


Why should you display this message?
When products run out of stock, it often leads to lost sales opportunities and frustrated customers.

By showing a “Remind me when it’s back in stock” message, you can:
- Keep customers engaged instead of letting them leave your store.
- Collect emails and grow your subscriber list for future marketing campaigns.
- Capture purchase intent and bring shoppers back as soon as the product is available again.
This feature is especially useful for popular or limited-edition items where demand is high.
How to create one with GemPages?
Follow these steps to design and display the “Remind me when it’s back in stock” message block using GemPages v7.
Step 1: Configure the Out of Stock State
1. Open the target product page in GemPages Editor. Click the X Product Assigned button on the top bar.
2. Check the current assigned product to ensure the stock is set to 0.
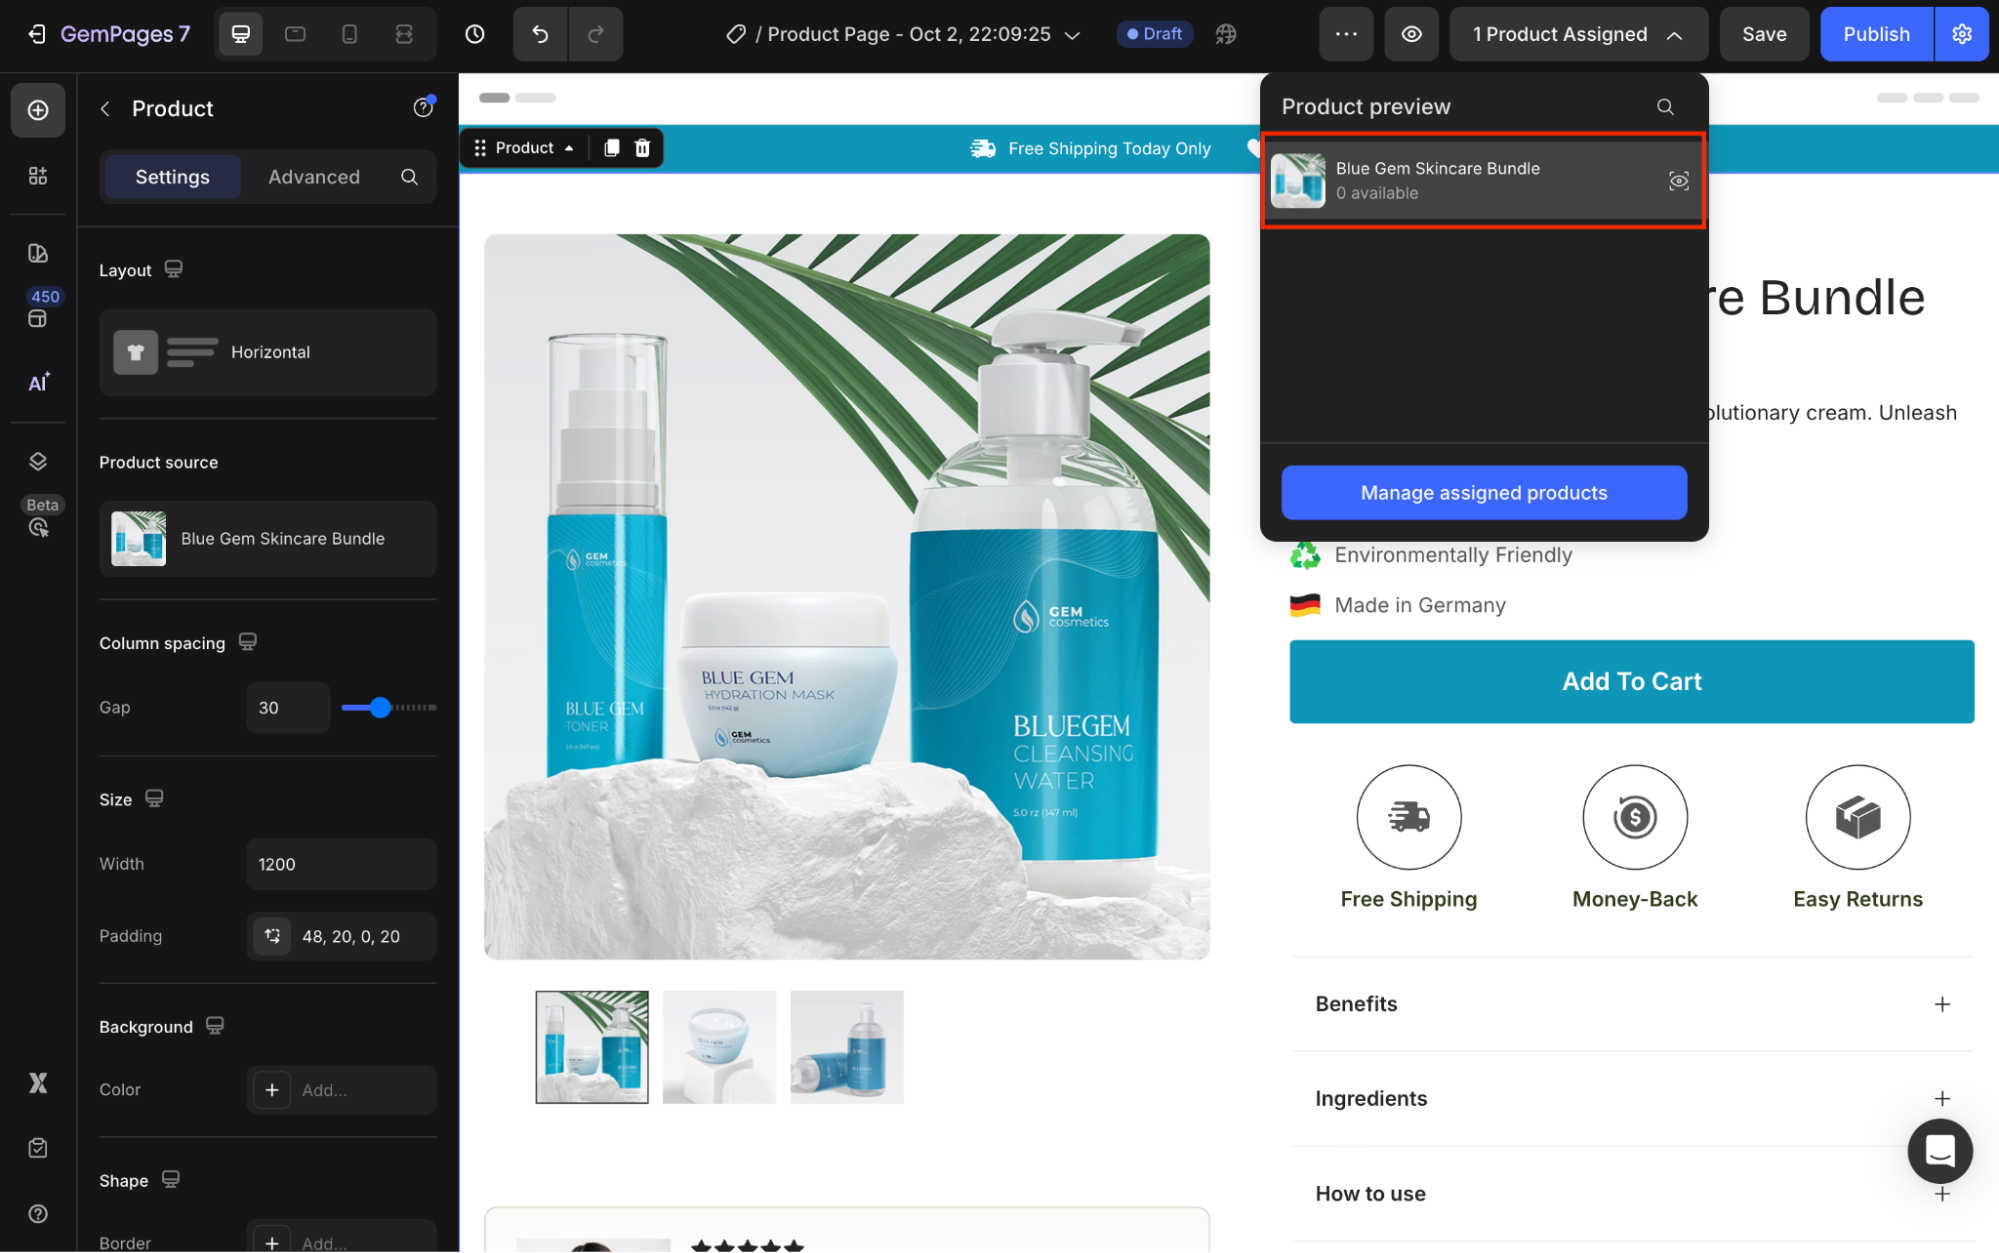
3. Double-check that the Product Module is synced with the assigned product on this page.
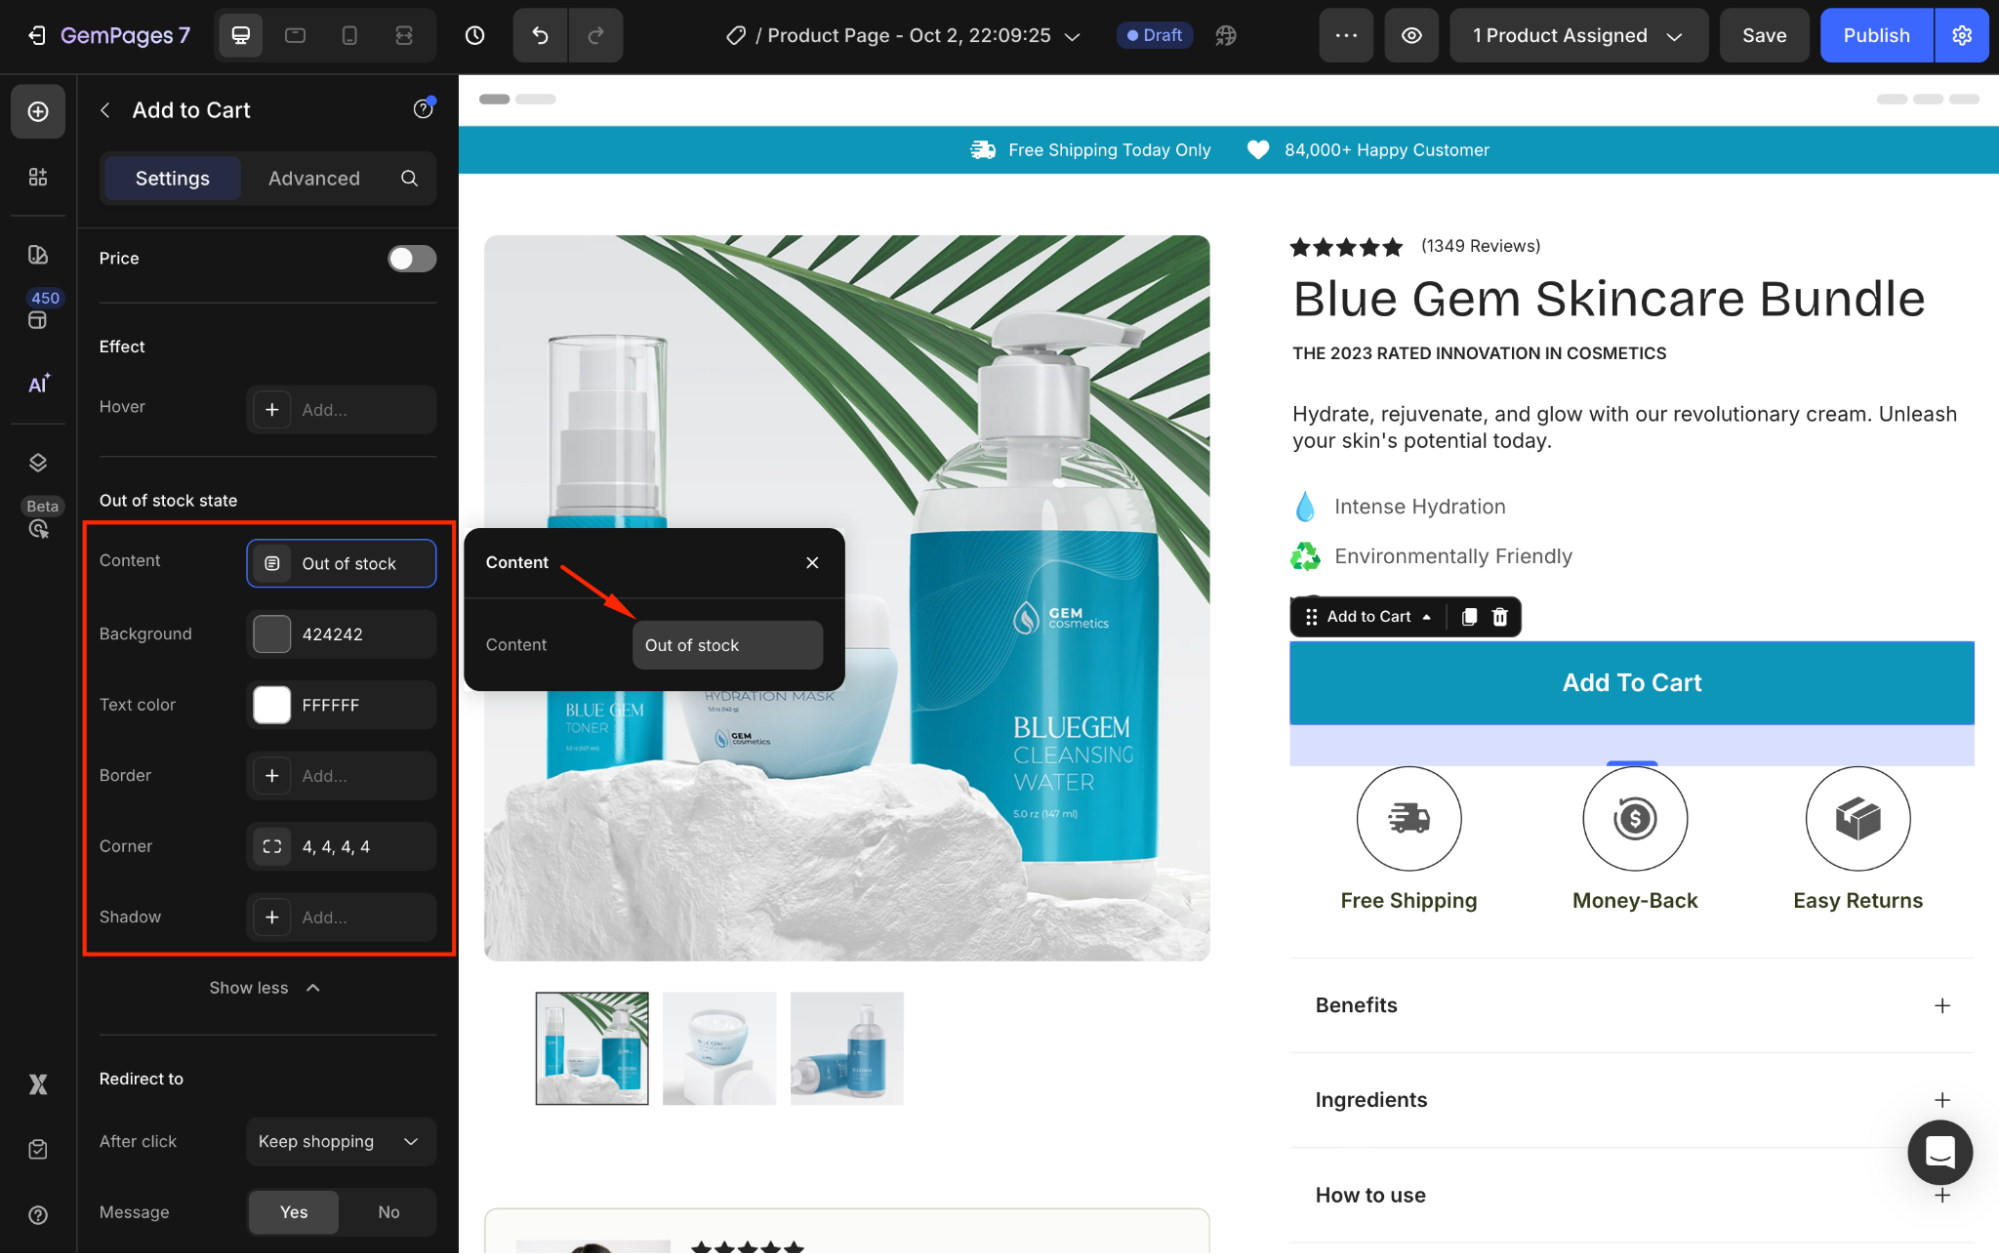
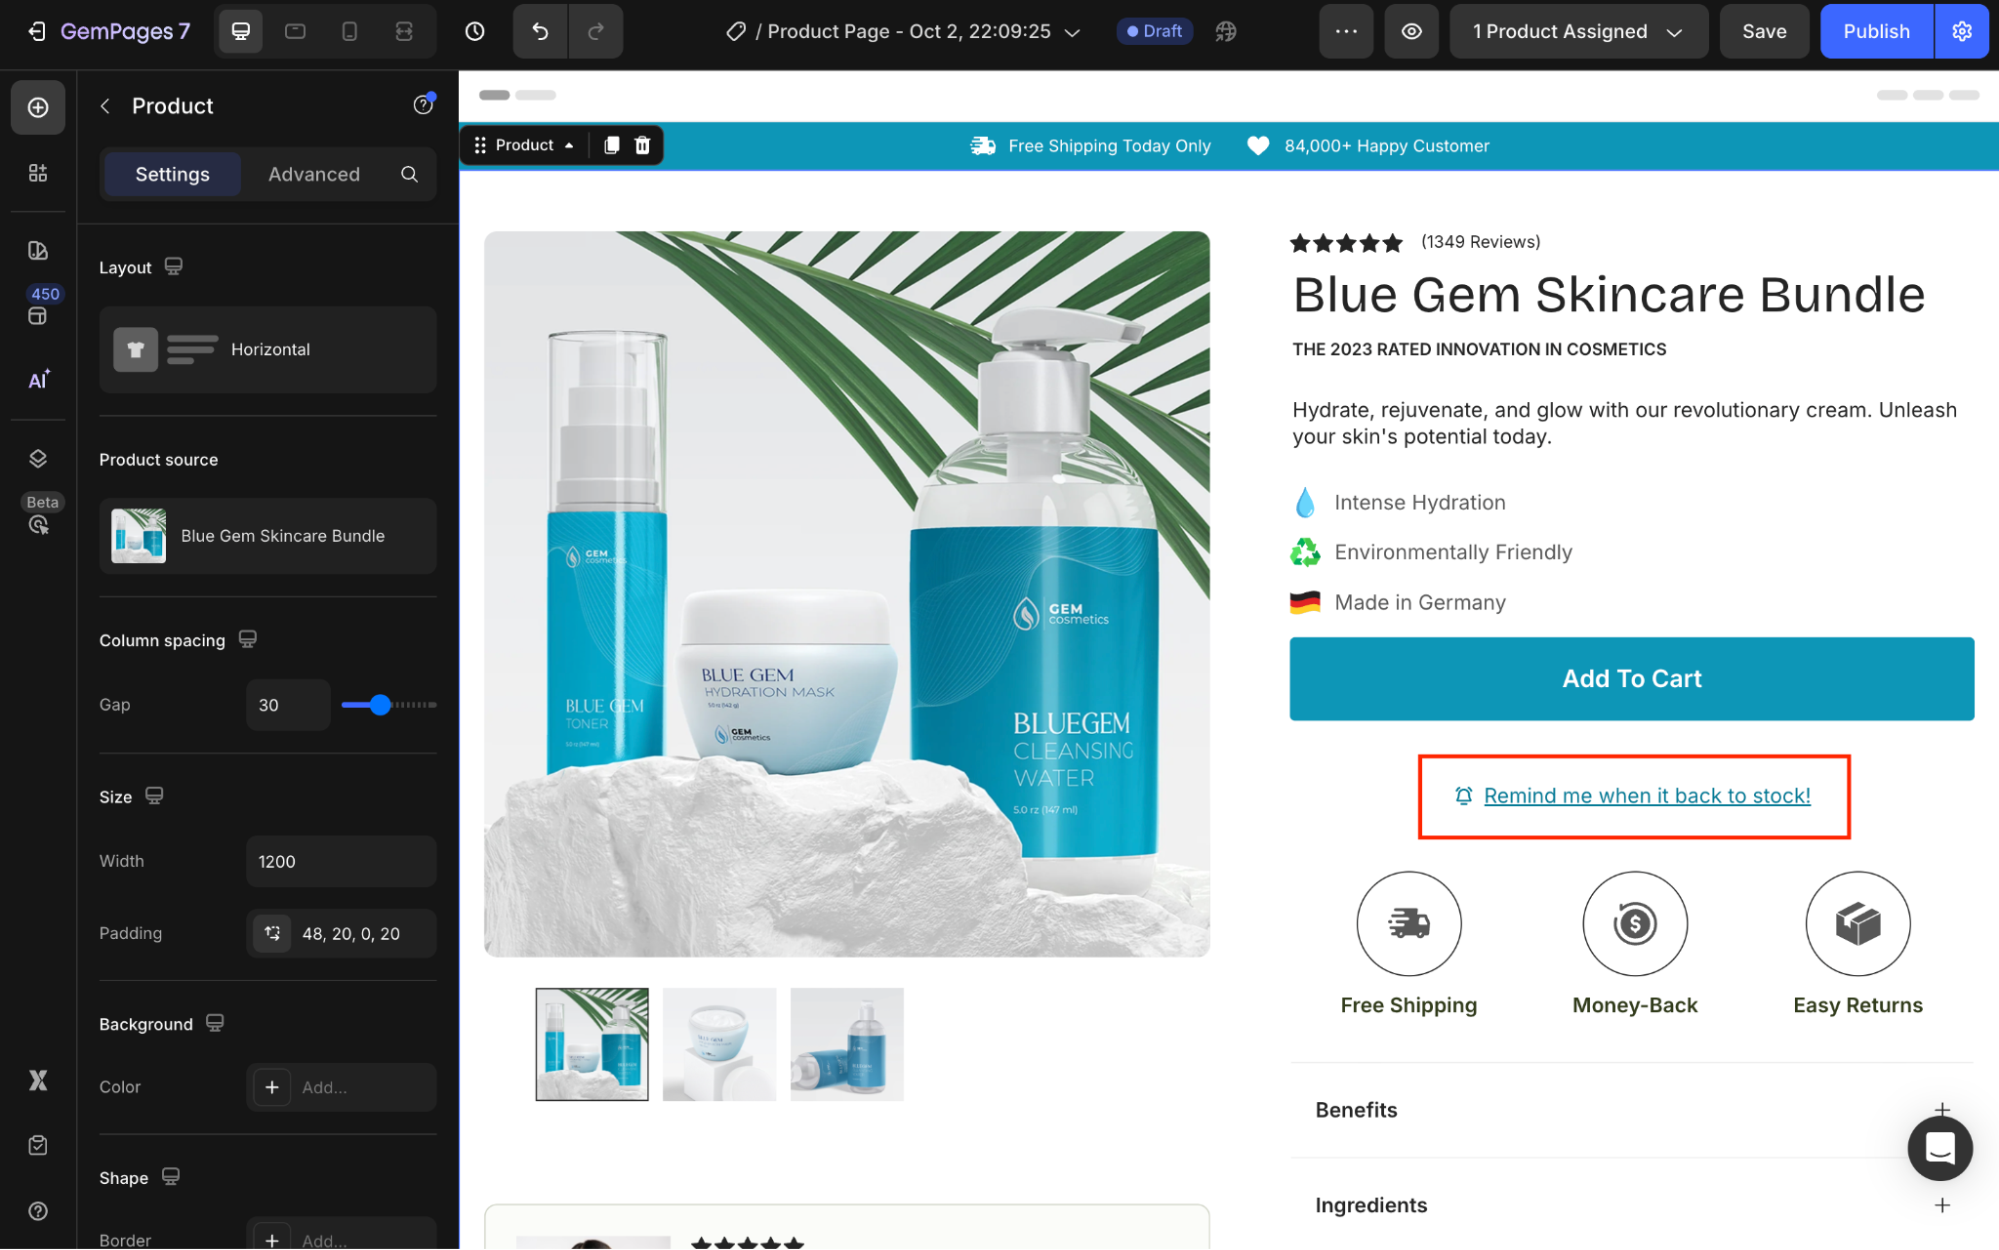
4. Click on the Add to Cart button element to open its settings and scroll down to the Out of stock state section.
From here, you can customize the out-of-stock state for this product:
- Edit the text content and text color.
- Change the background color.
- Add a shadow effect for better visibility.
Step 2: Add the Reminder Message
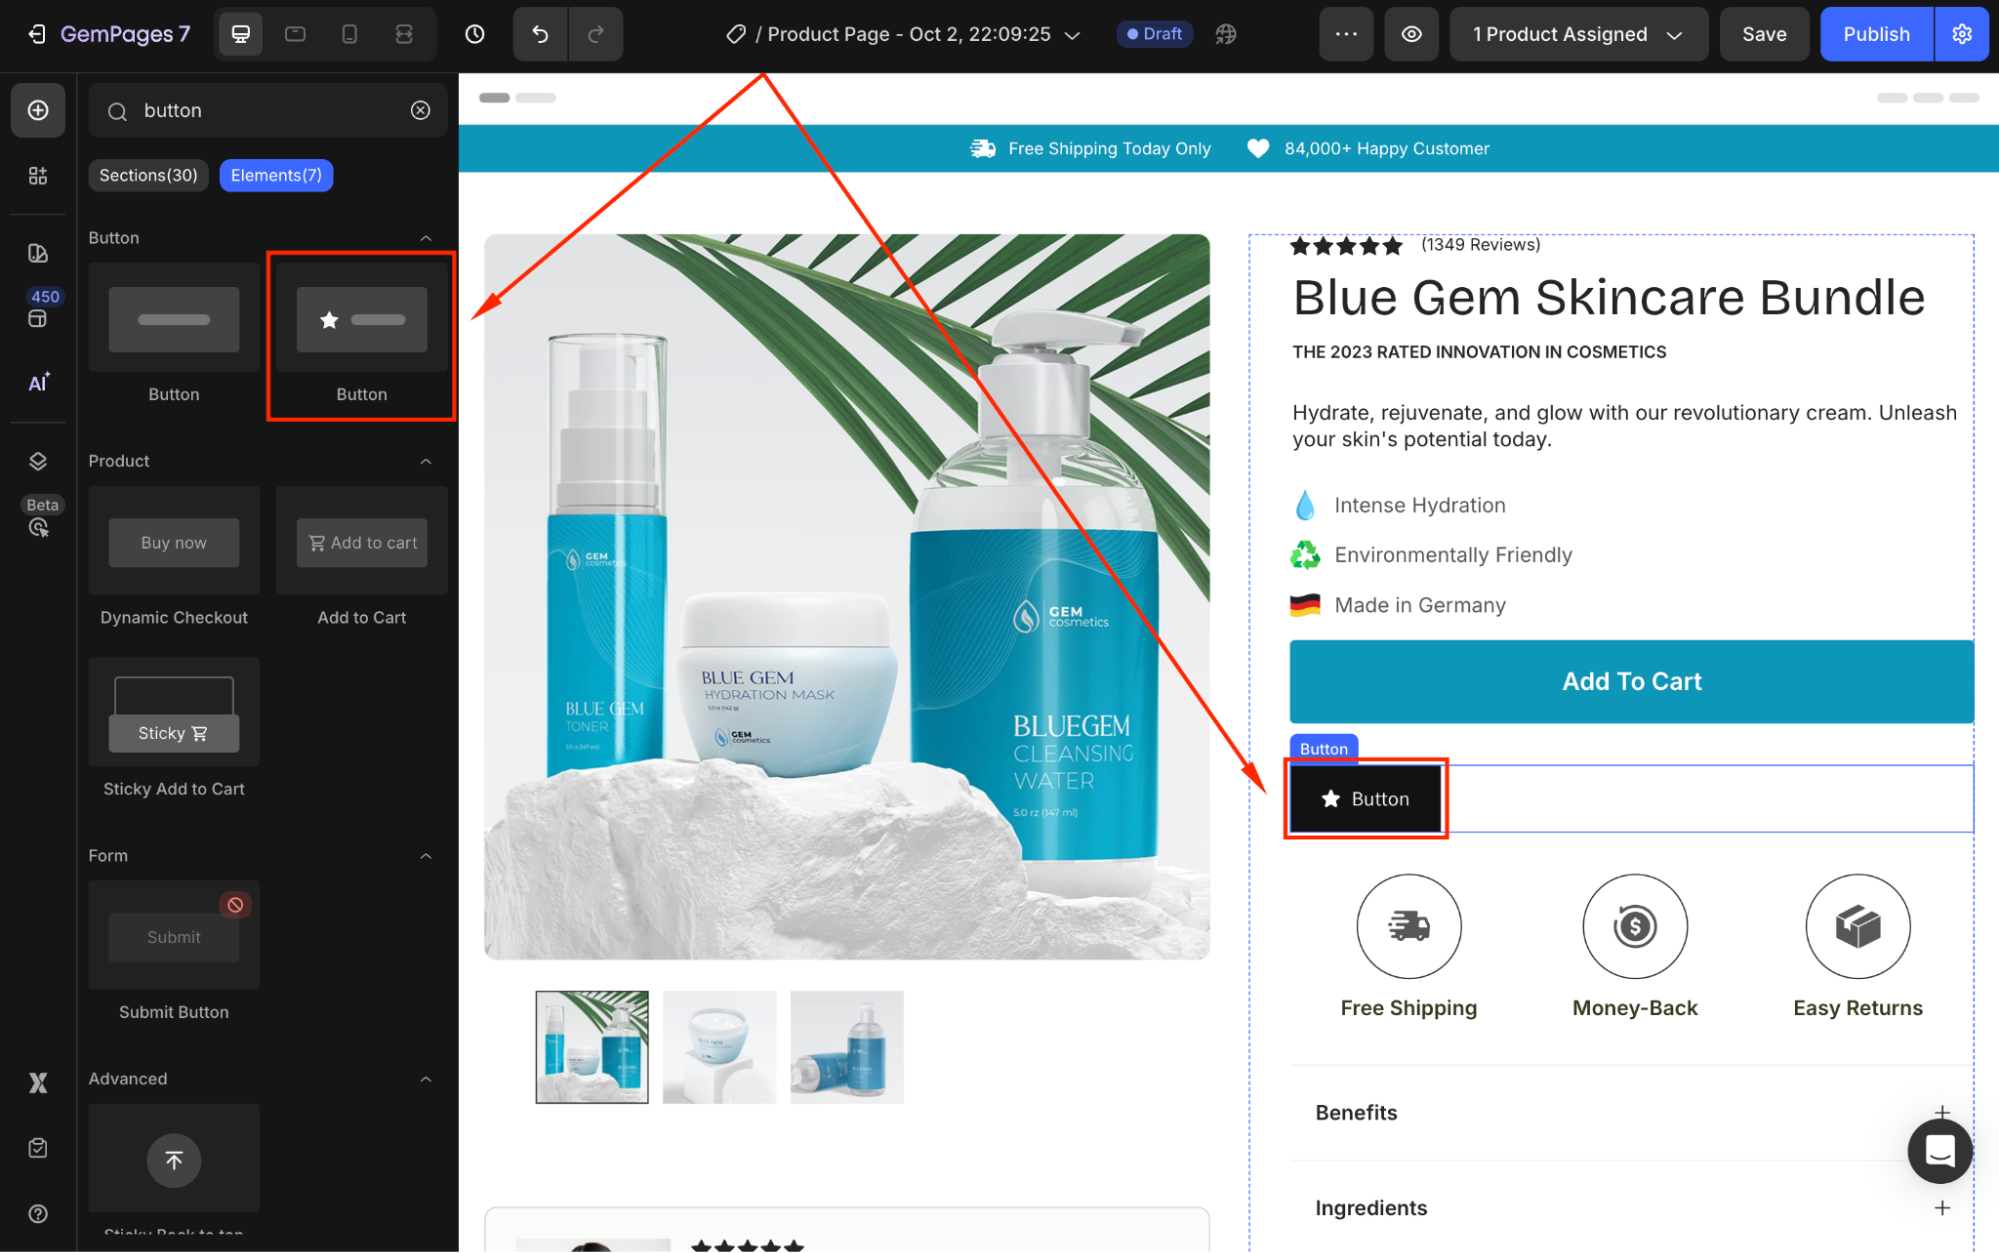
1. From the left sidebar, use the search bar to find the Button Element.
2. Drag and drop it into your desired position within the Product Module.
This button will trigger an email subscription form where your customers can enter their email addresses.
3. Under the Settings tab, go to Size to adjust the width, height, and padding of the button.

4. Double-click the default text “Button” to replace it with: “Remind me when it’s back in stock!”
5. Scroll down to the Icon section and choose one, such as a “bell” icon.
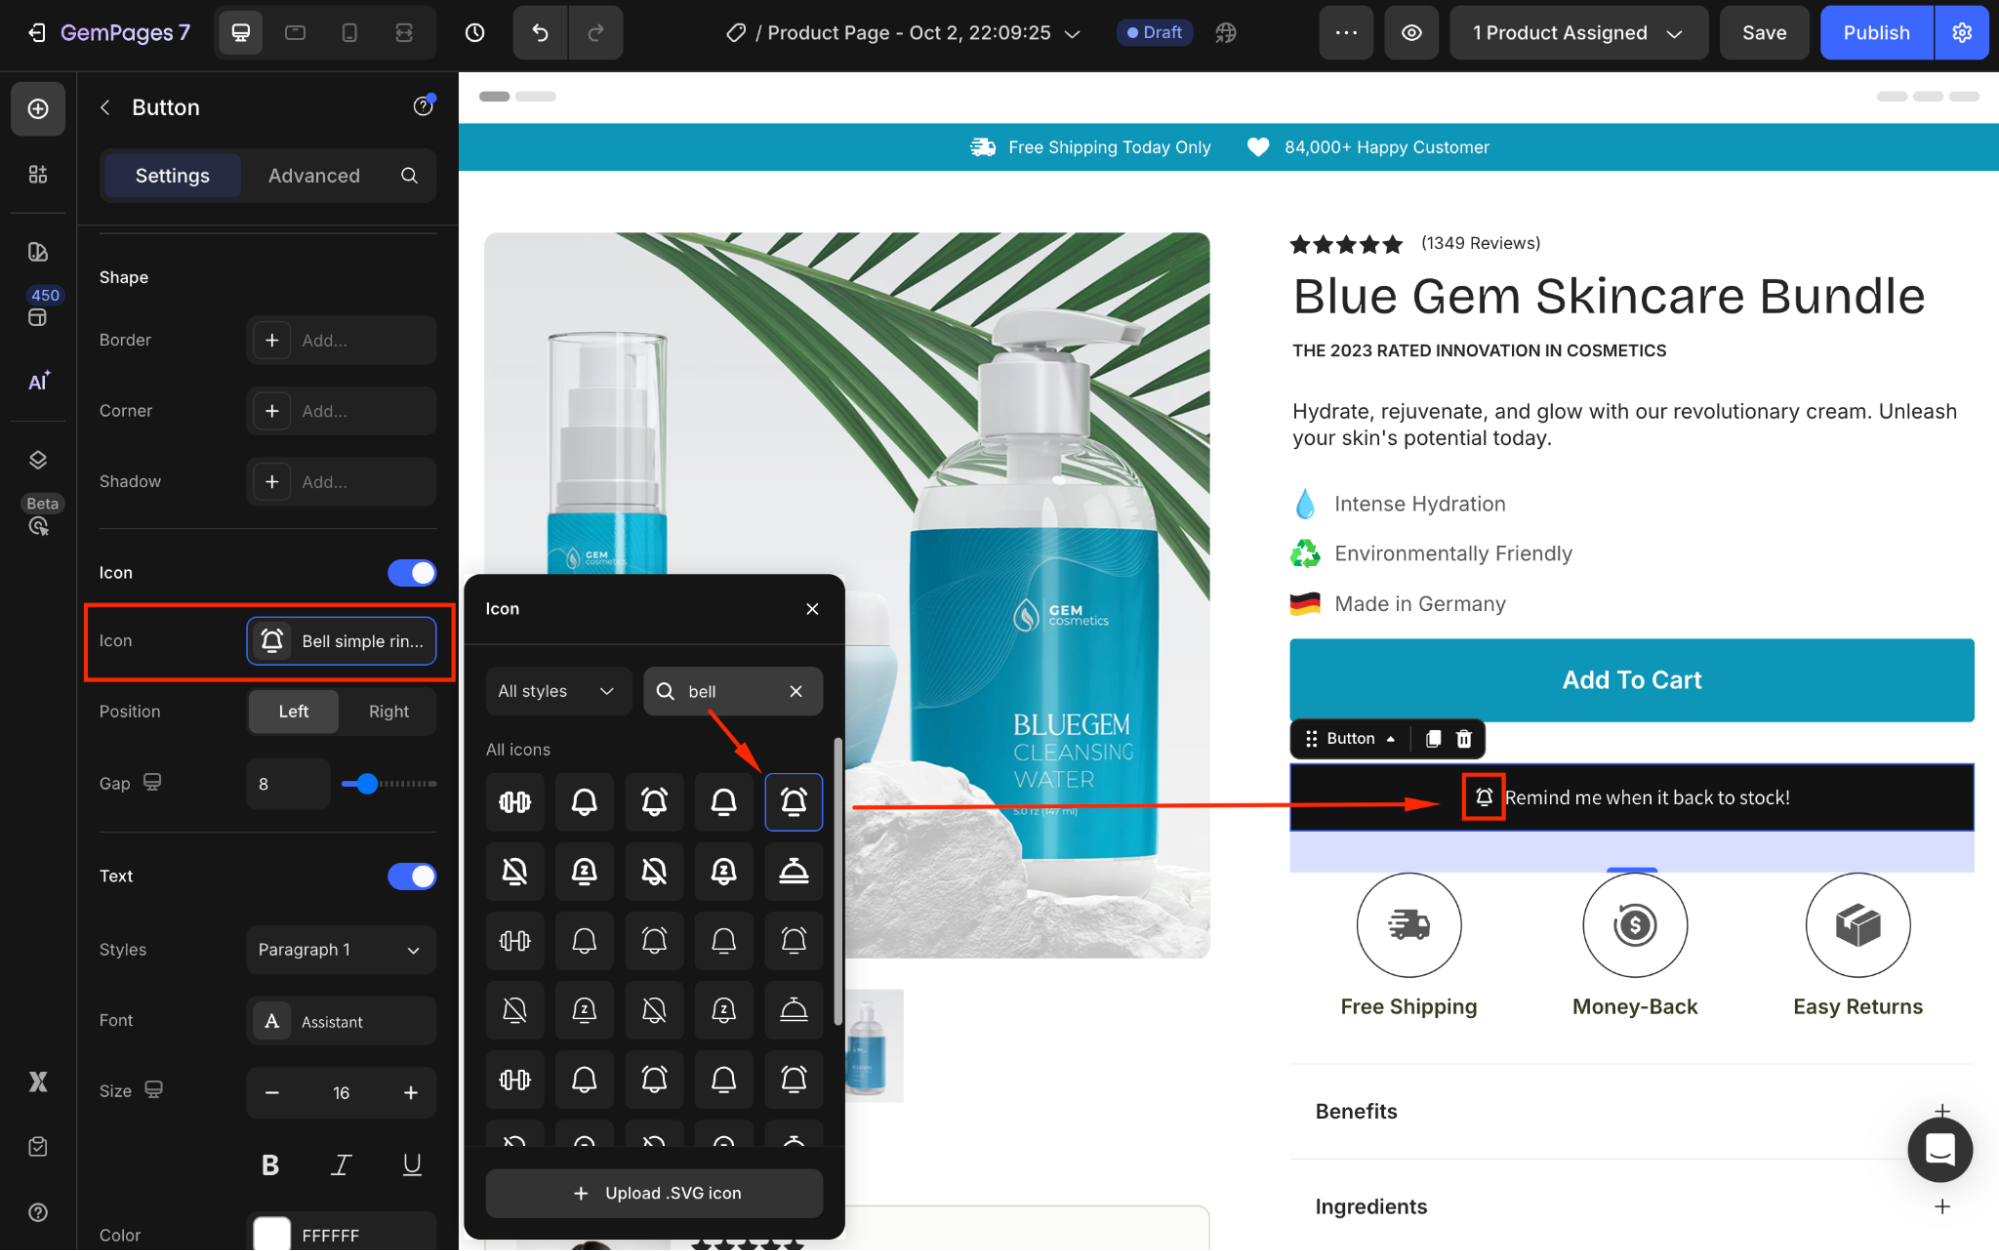
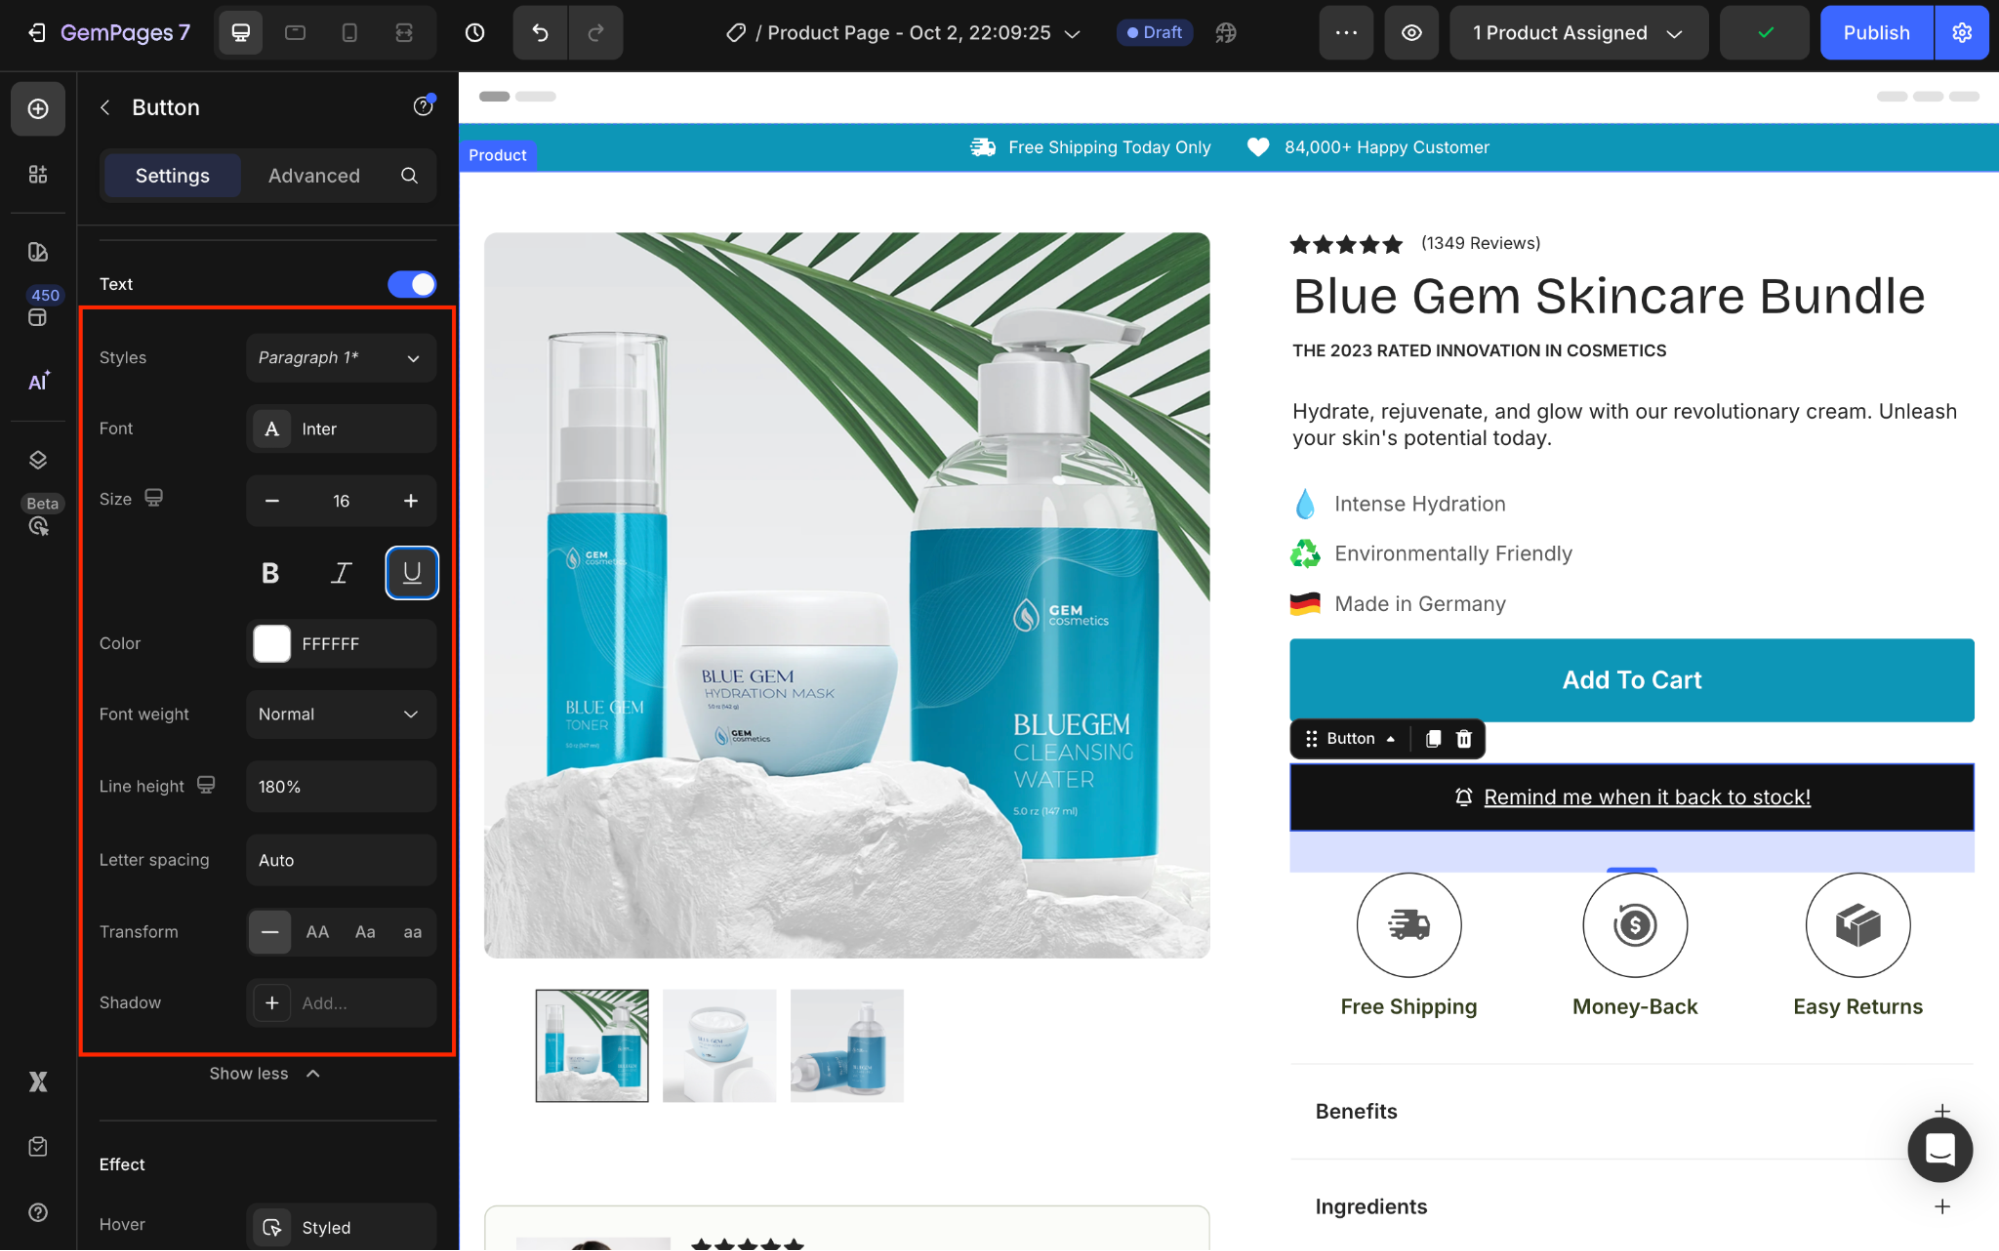
6. In the Text section, you can further customize the style, font, size, and color.
Here’s the result:
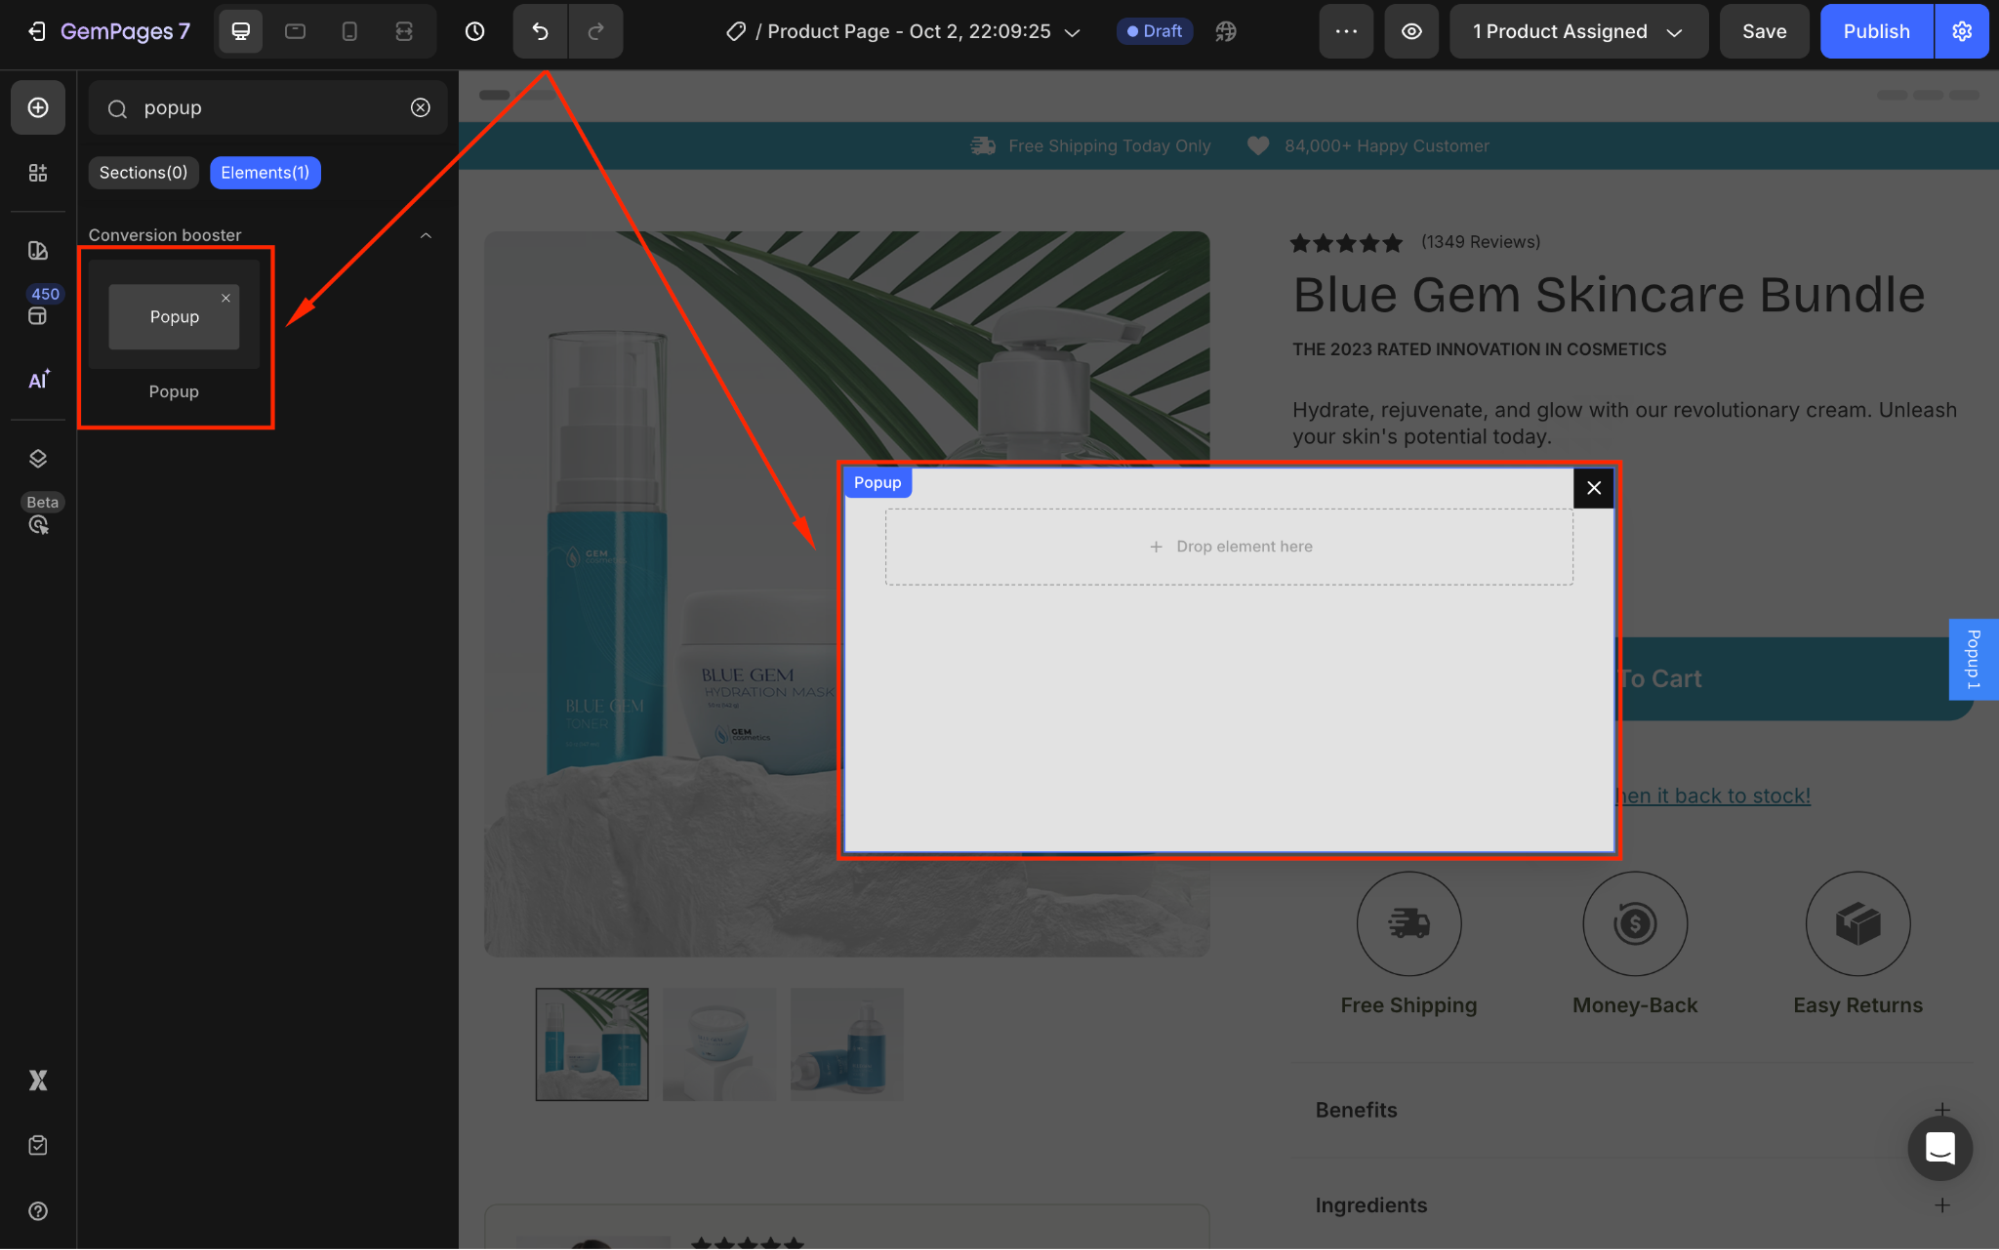
Step 3: Create the Pop-up Form
1. Drag and drop a Popup Element into the design area.
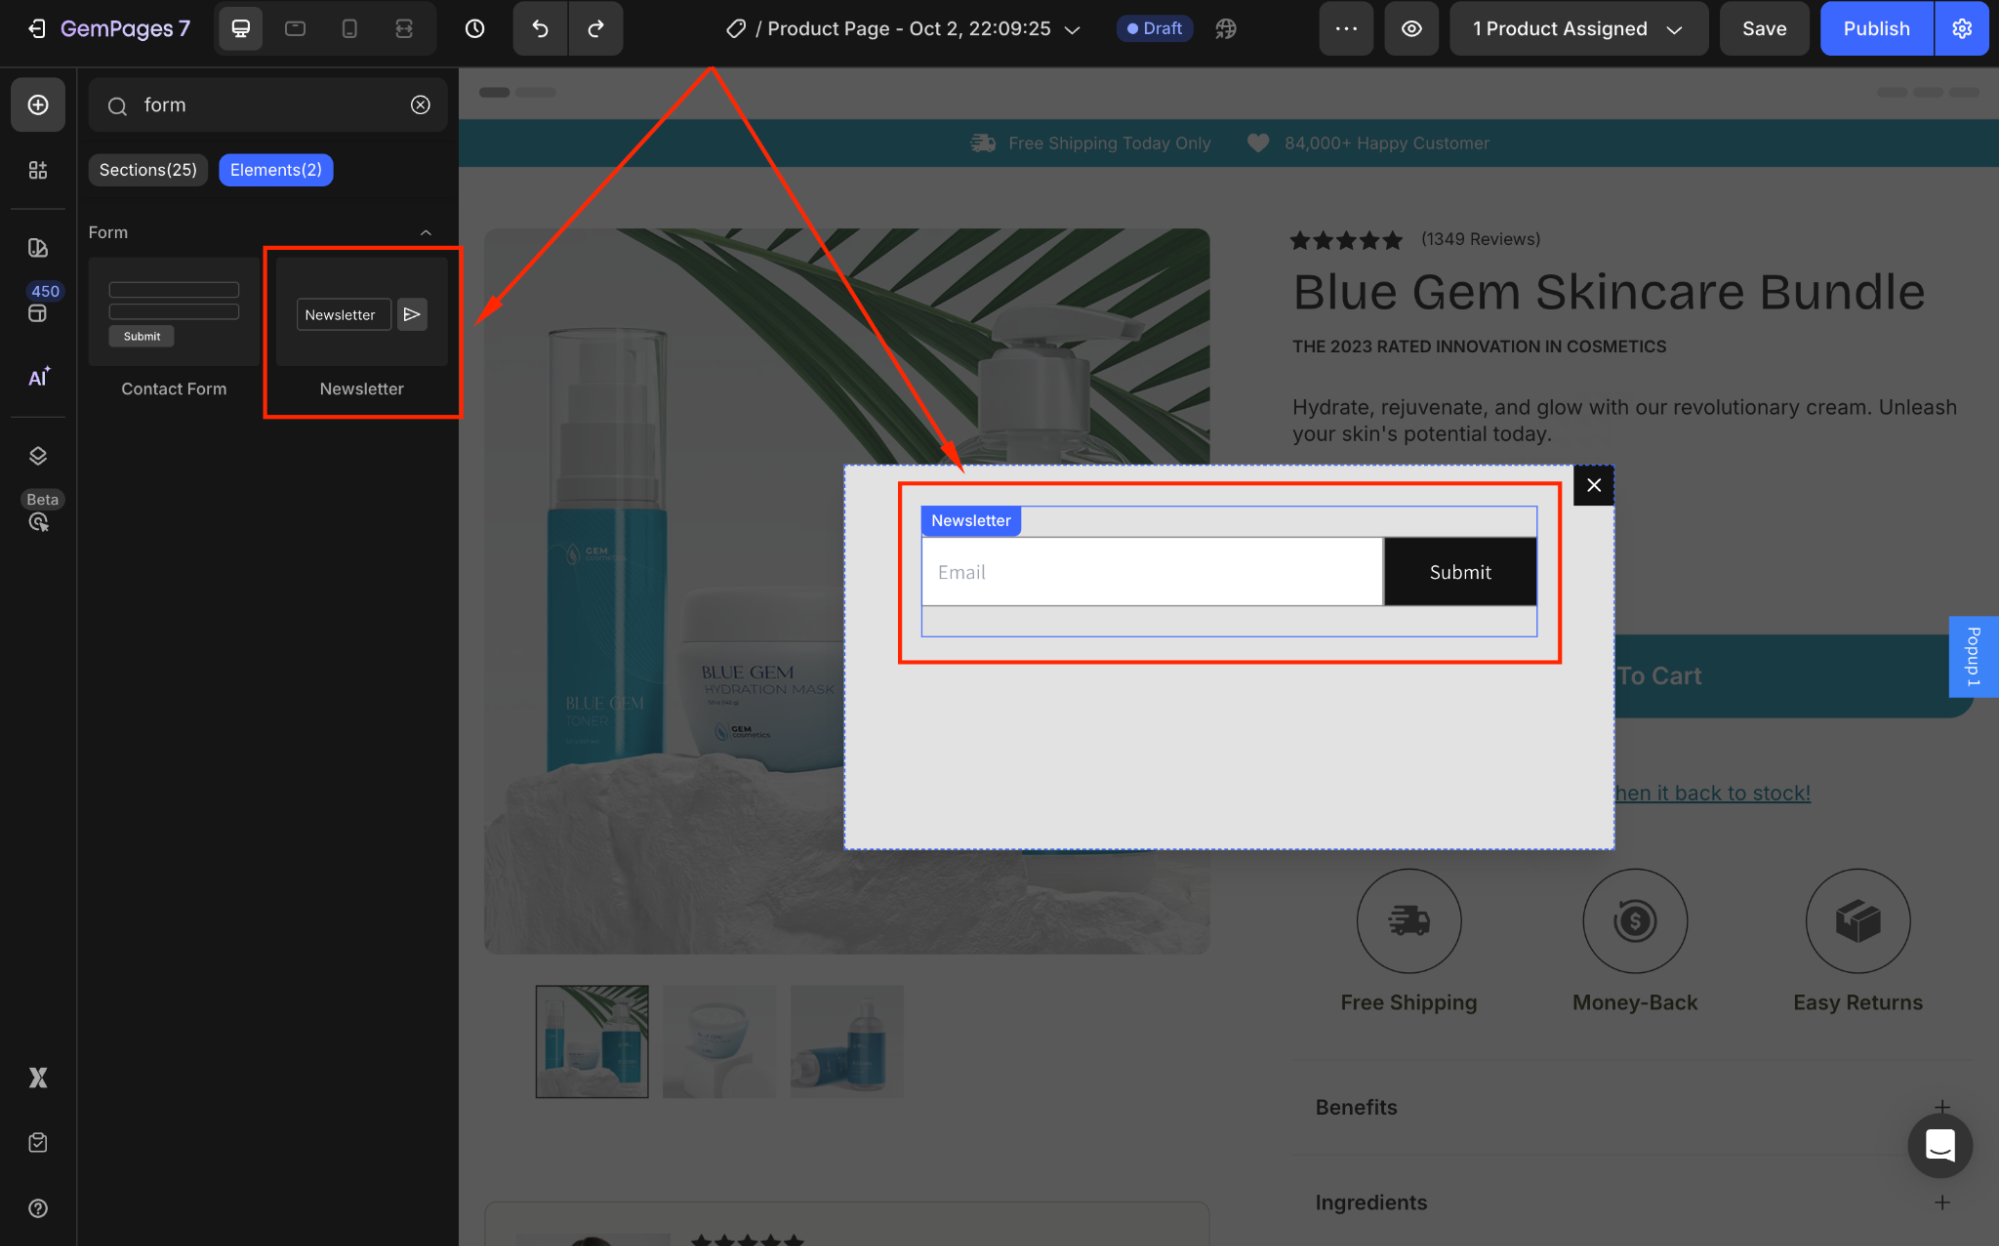
2. Nest a Newsletter Element (email sign-up box) inside this pop-up.
3. Customize the subscription form under the Settings and Advanced tabs.
Step 4: Link the Pop-up Form to Your Message
1. Select the Button Element created in Step 2.
2. In the settings panel, scroll to the Link section and toggle it ON.
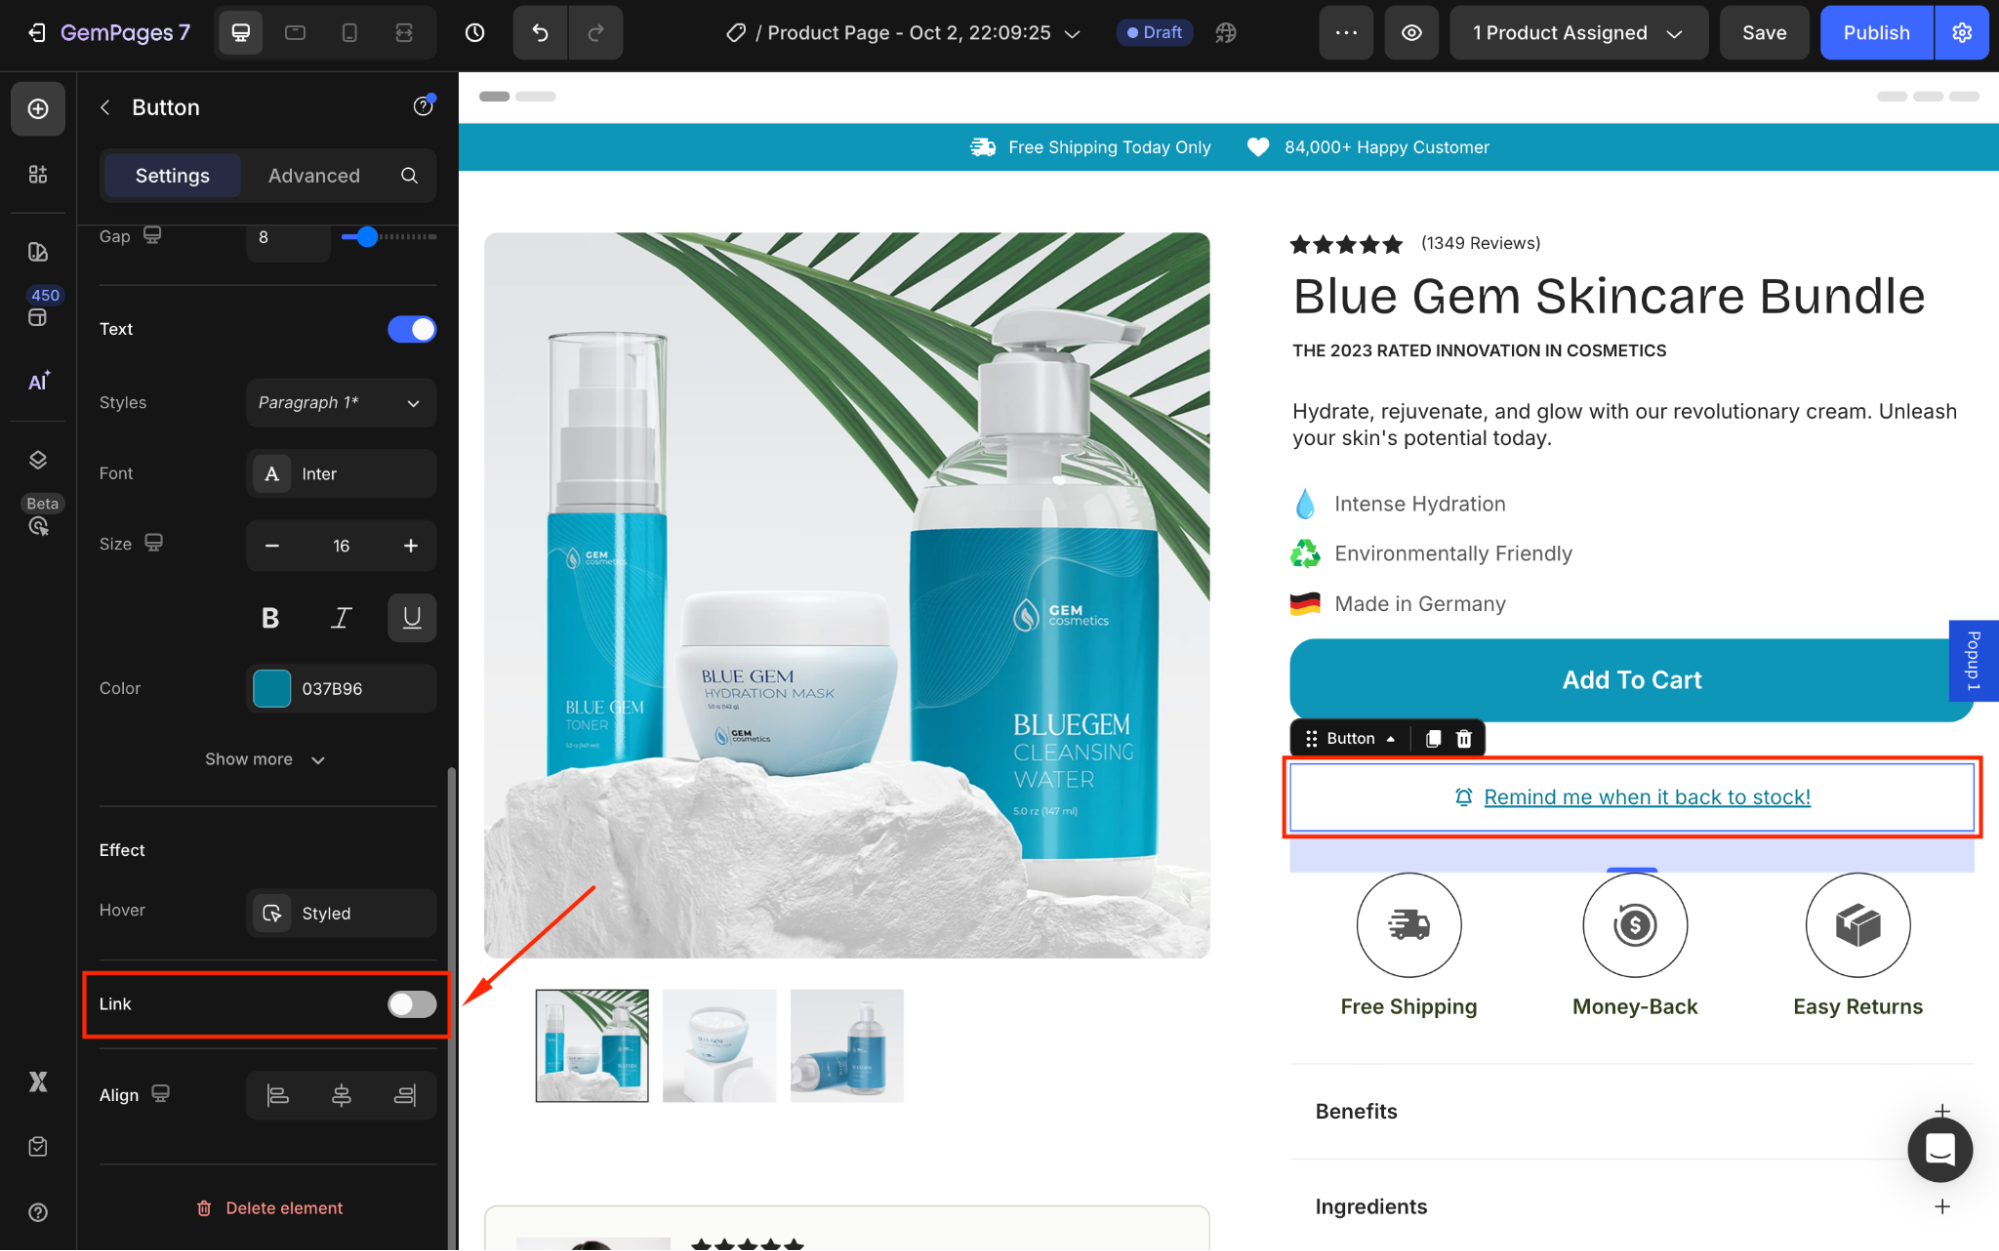
3. Under After click, choose Open popup from the dropdown.
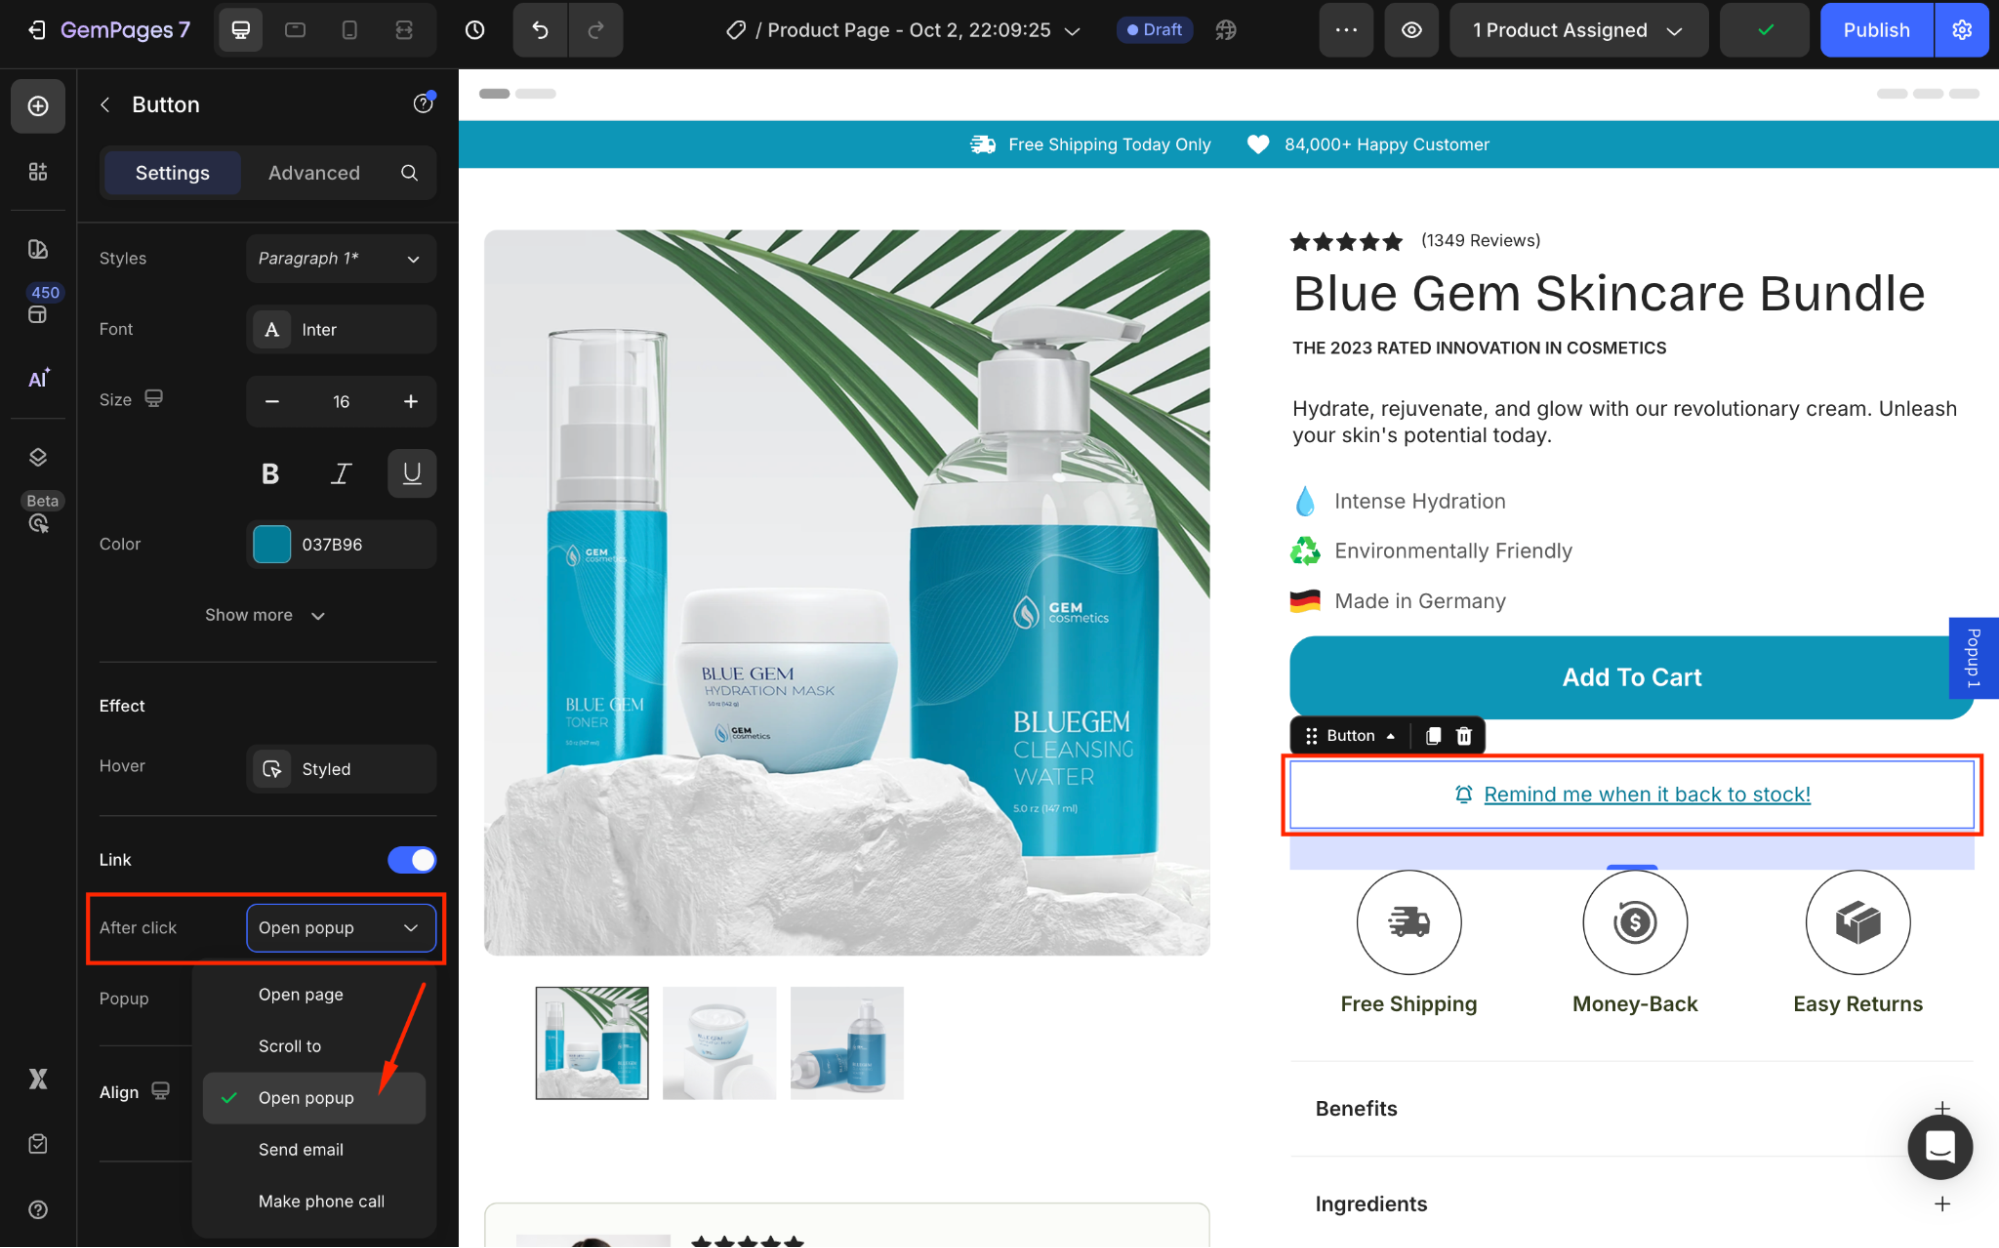
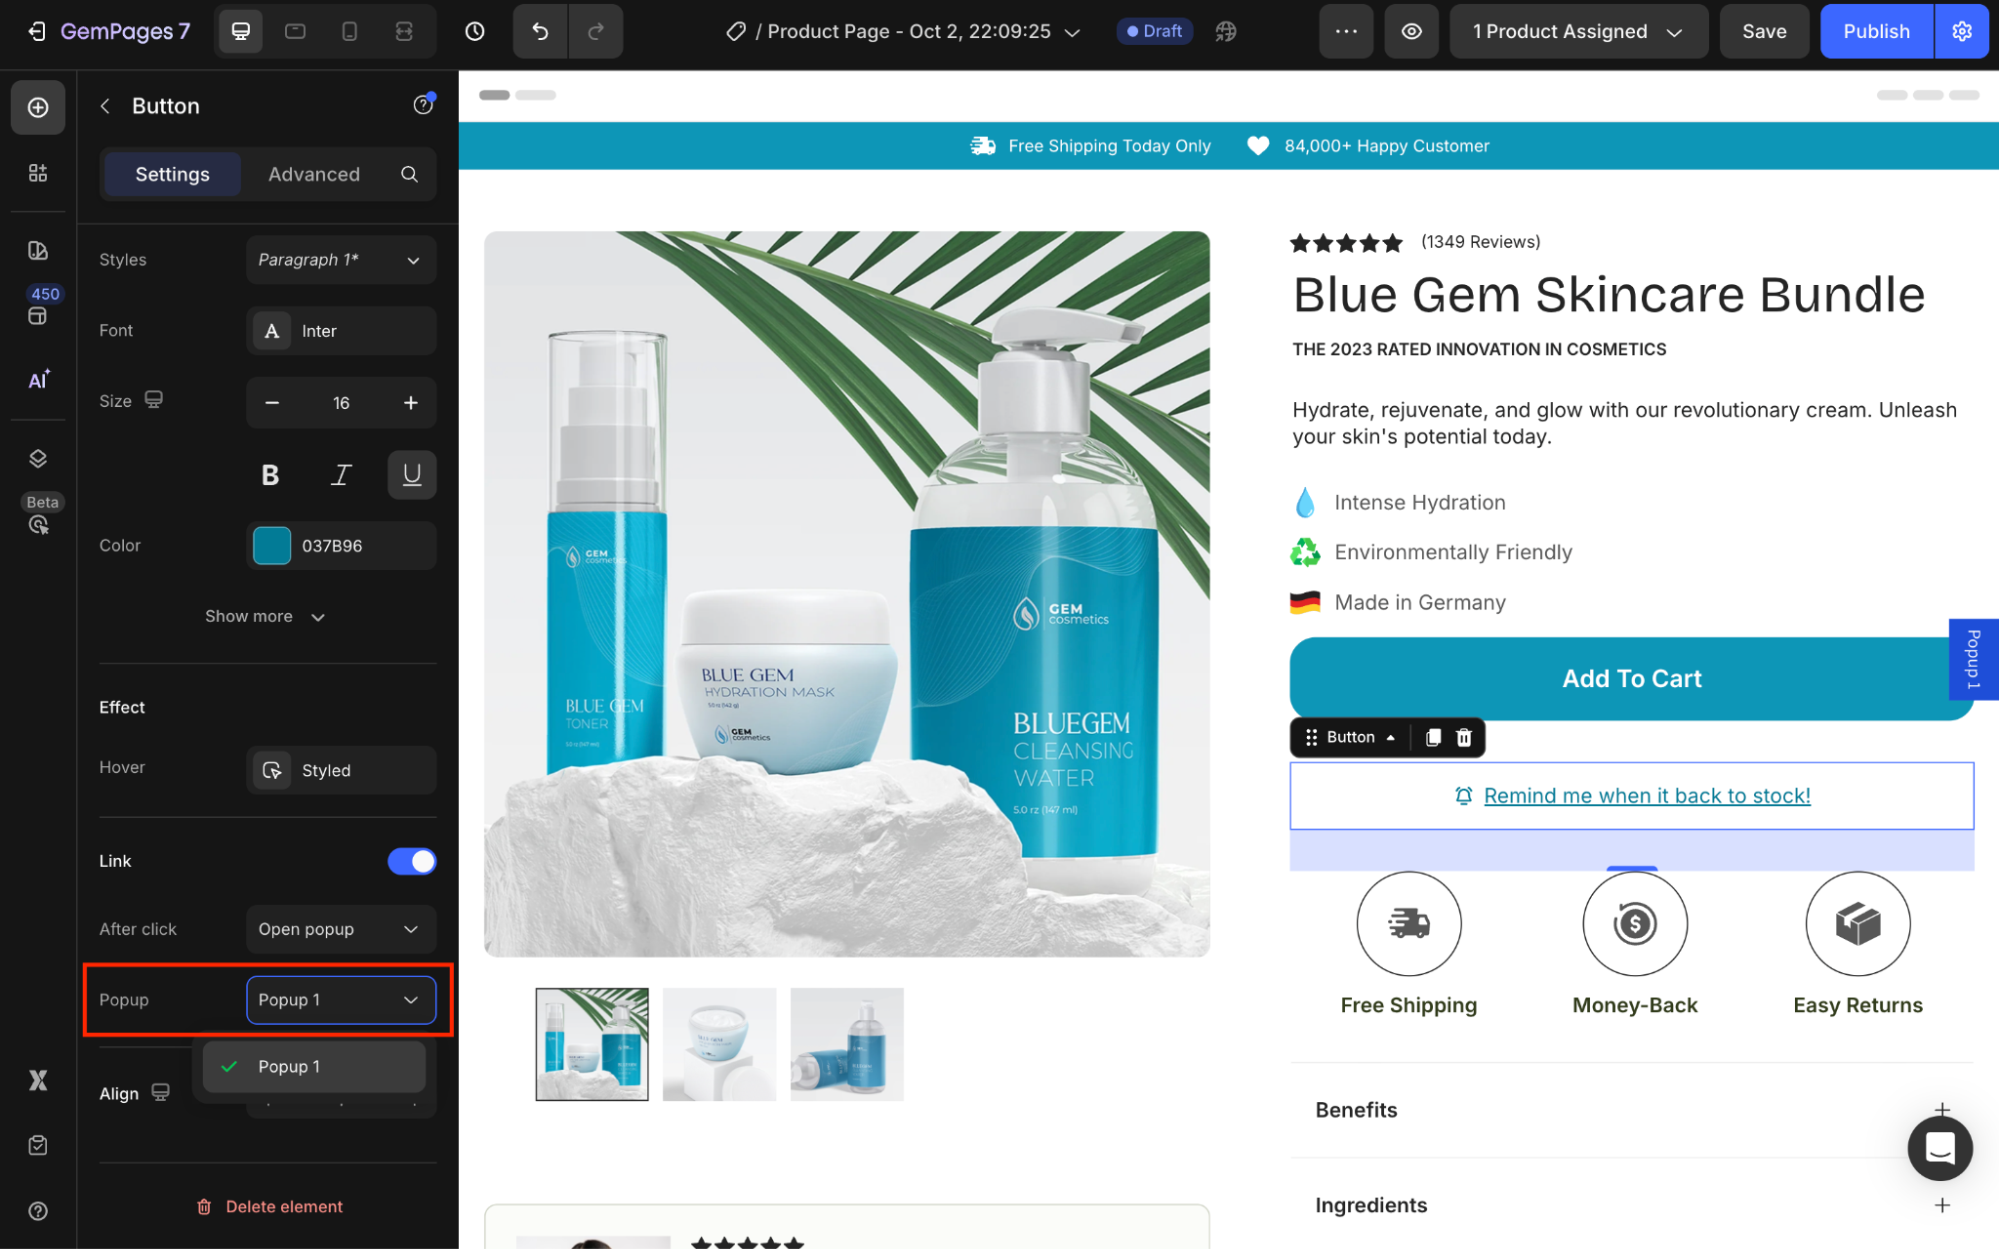
4. Select the pop-up you created in Step 3 in the Popup field.
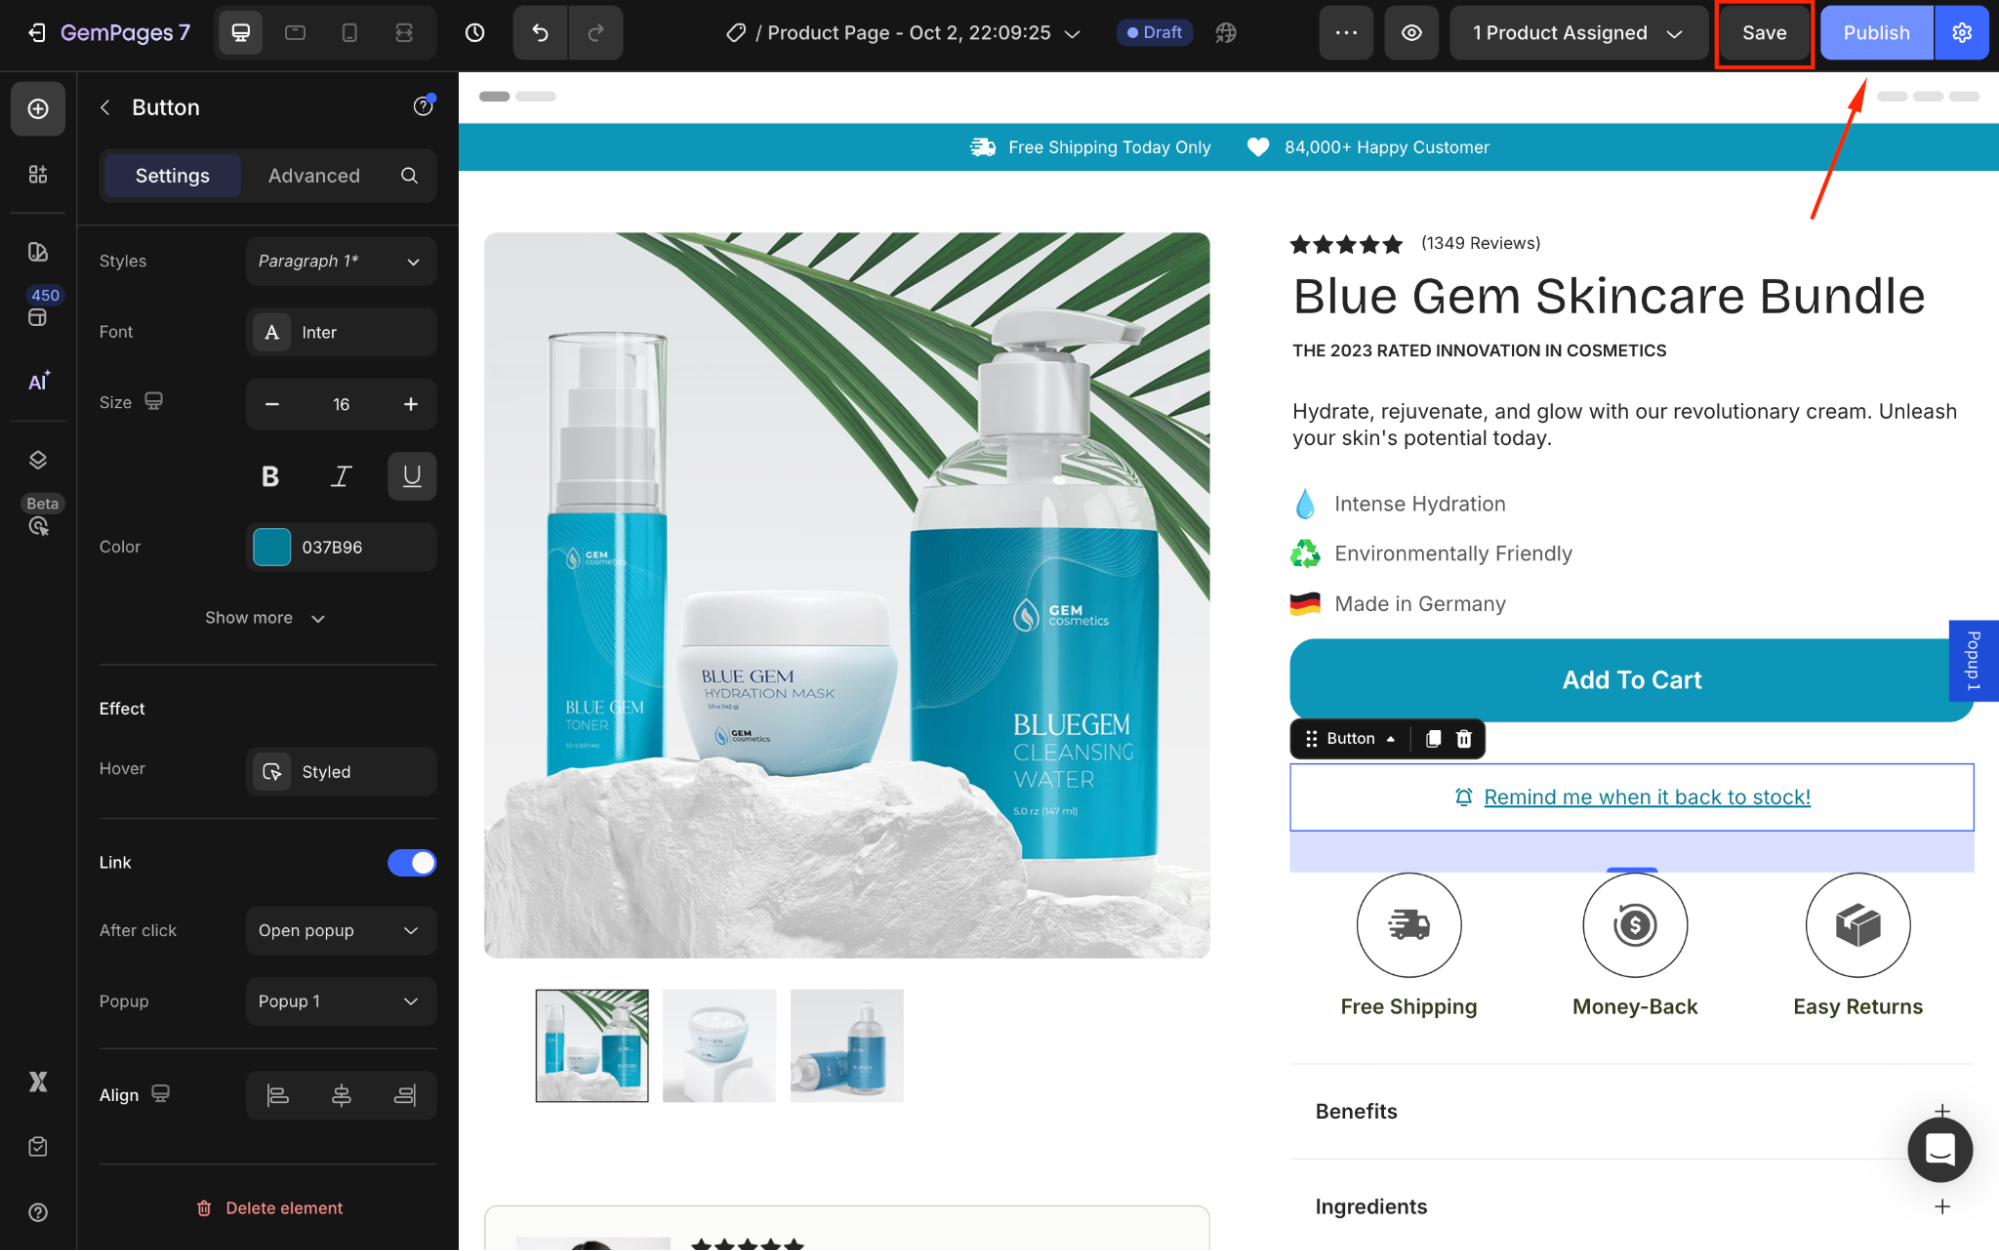
Step 5: Save and Publish
- Click Save to apply your changes.
- Hit Publish to republish your page.
You can now check the final result in your live store:
Your customers can now subscribe to be notified when the product is restocked, helping you capture purchase intent and recover missed sales.
Best Practices for Back in Stock Notifications
| Keep it short and clear | Use simple phrases like “Notify me when available” so customers instantly understand the action. |
| Add a visual cue | Pair the message with a familiar icon (e.g., a bell) to draw attention. |
| Segment your list | Store these sign-ups in a separate list so you can send targeted restock alerts or special offers. |
| Test your message | A/B test different button texts such as “Notify Me” vs. “Back in Stock Alert” to see which drives more clicks |
| Follow up fast | As the delays can reduce purchase intent, send restock notifications promptly. |
Applying these tips ensures your Back in Stock message not only captures emails but also drives more conversions when products return.


Thank you for your comments