


About Kiwi Size Chart & Recommender
The Kiwi app helps you deliver the same sleek sizing experience customers expect from top fashion brands. It provides easy-to-use size charts, guides, and AI-powered fit recommendations that:
- Make shopping easier and faster
- Reduce return rates caused by sizing issues.
- Allow flexible layouts that adapt to your brand.
Key Features of Kiwi Size Chart & Recommender
Here are some key features of this app:
- Import size charts from images, webpages, or CSV files, or build your own.
- AI-powered size recommender for products where body measurements can’t be predicted.
- Add multiple elements to your size charts: tables, images, videos, tabs, and more.
- Create product- or collection-based size guides that auto-apply to new products.
- Input sizing in any unit and let the app auto-convert.
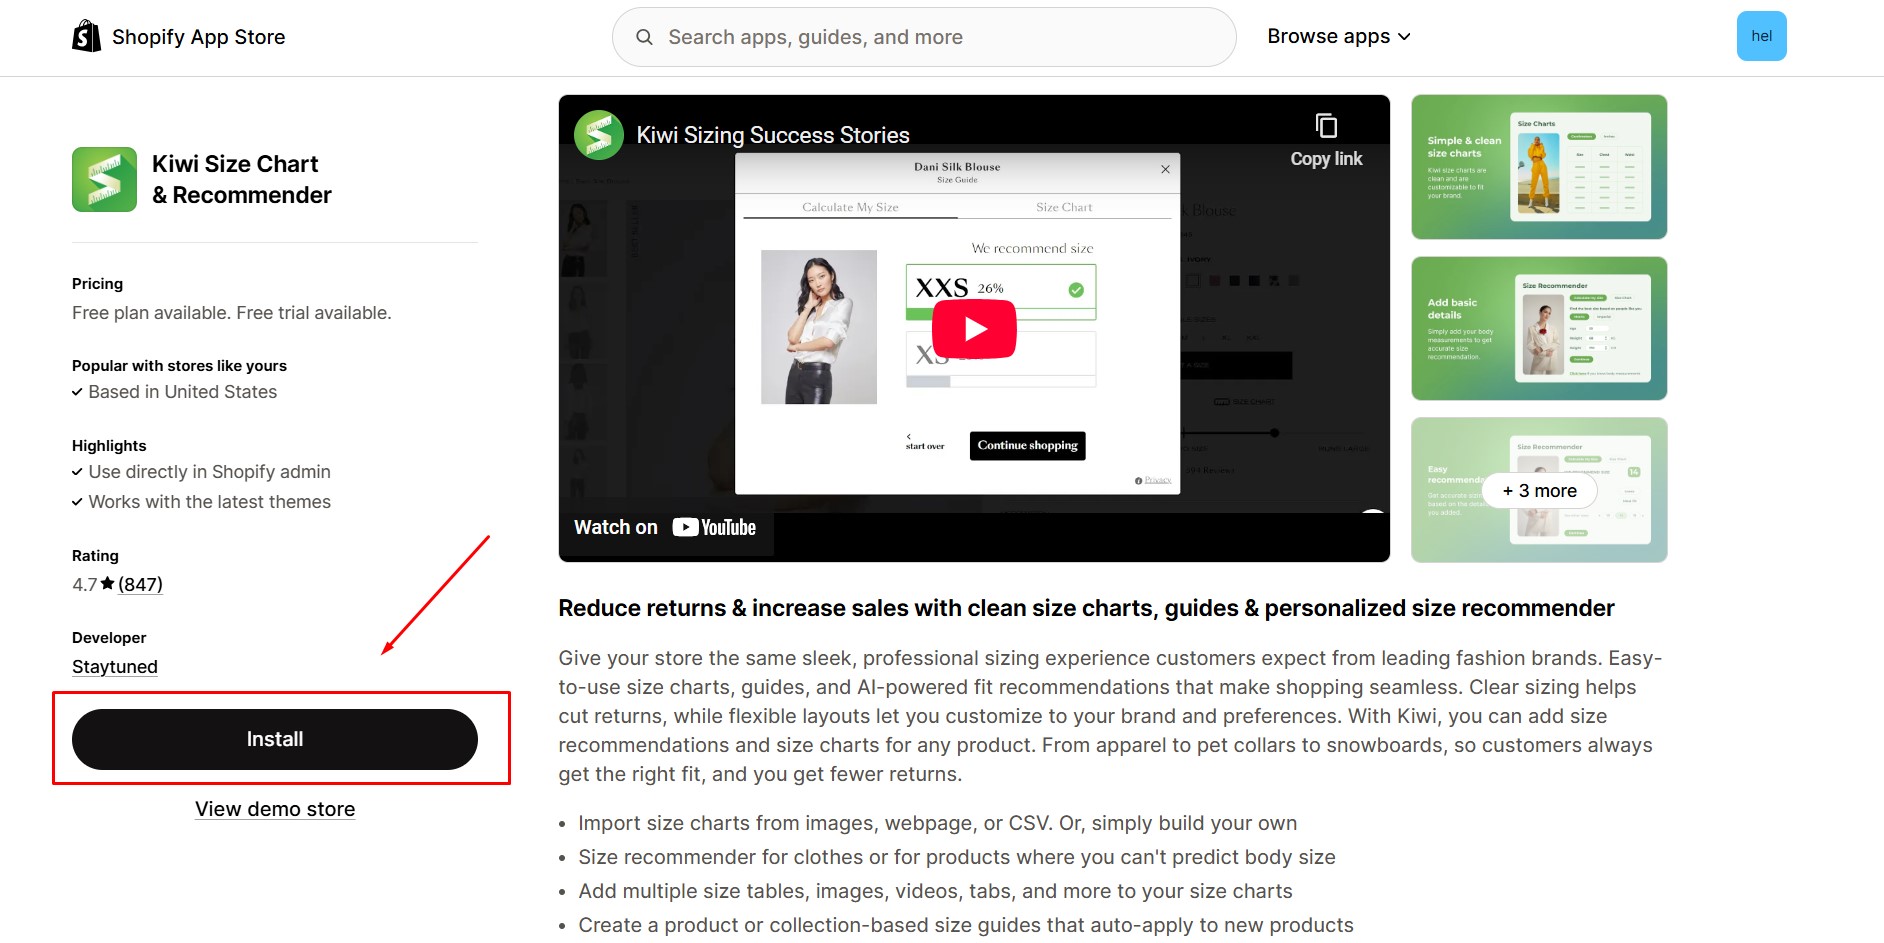
How to Install & Set Up Kiwi Size Chart & Recommender
Step 1: Install Kiwi Size Chart & Recommender in the Shopify App Store.
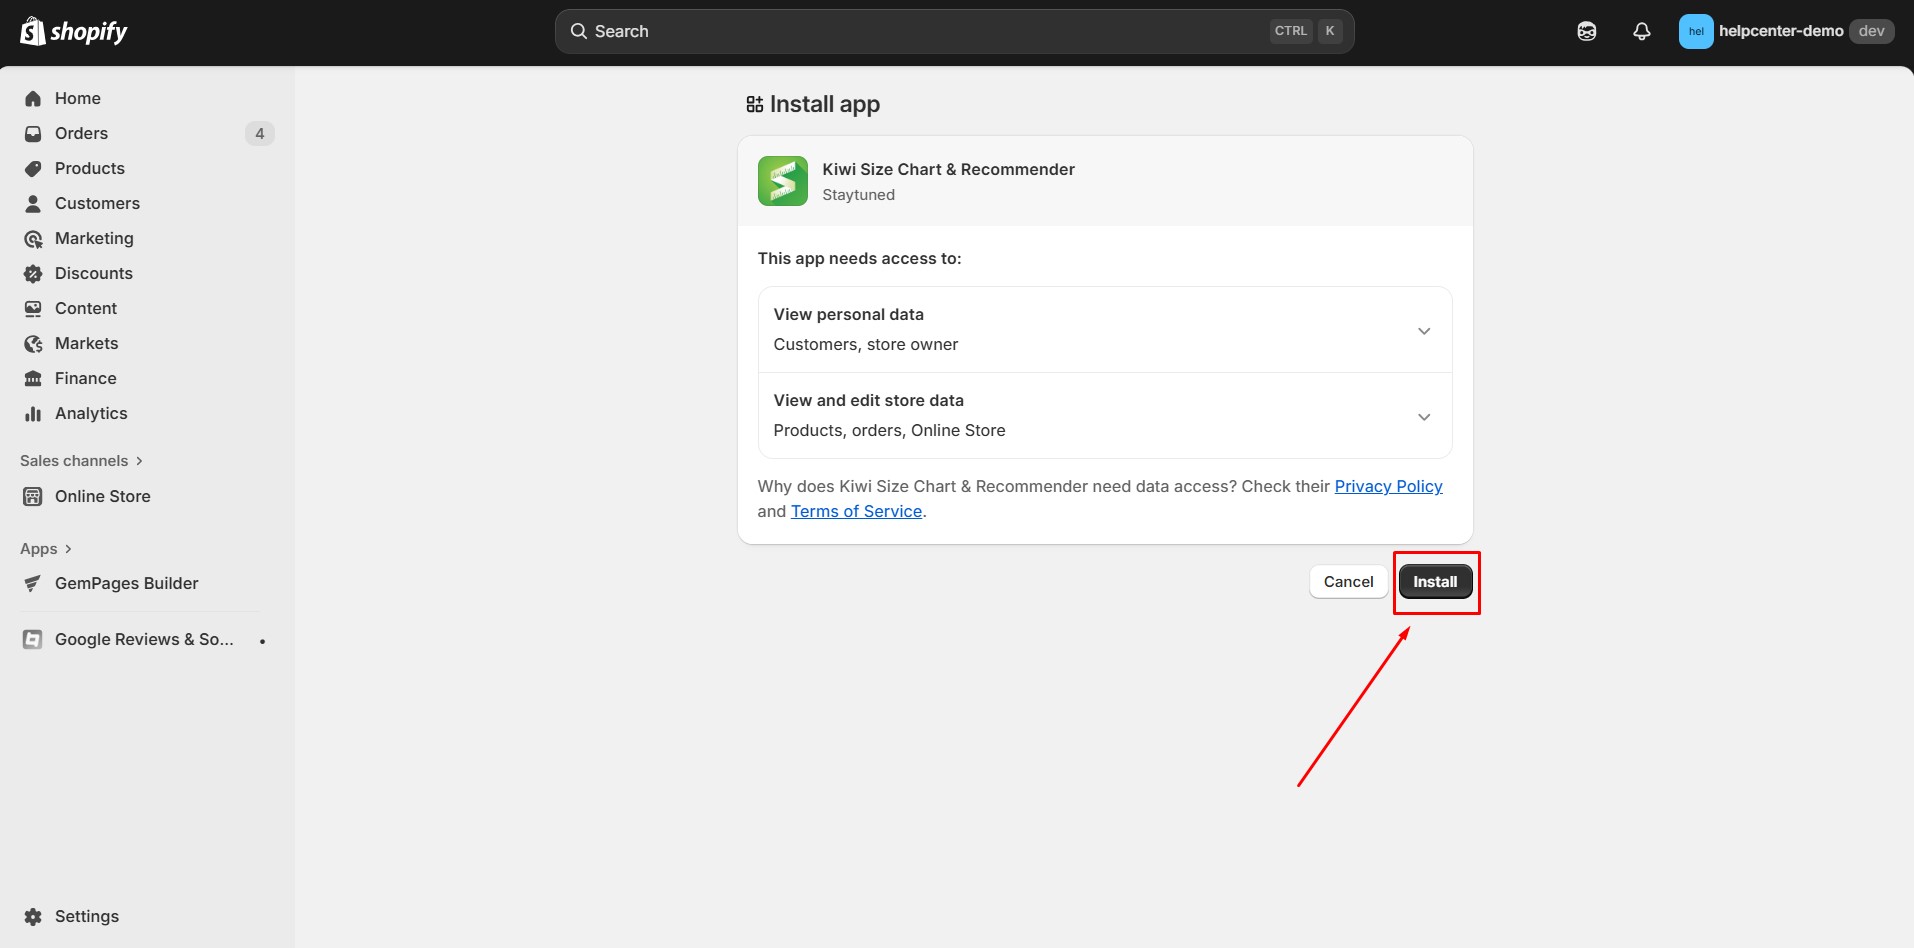
Step 2: Provide the app with access to the required data.
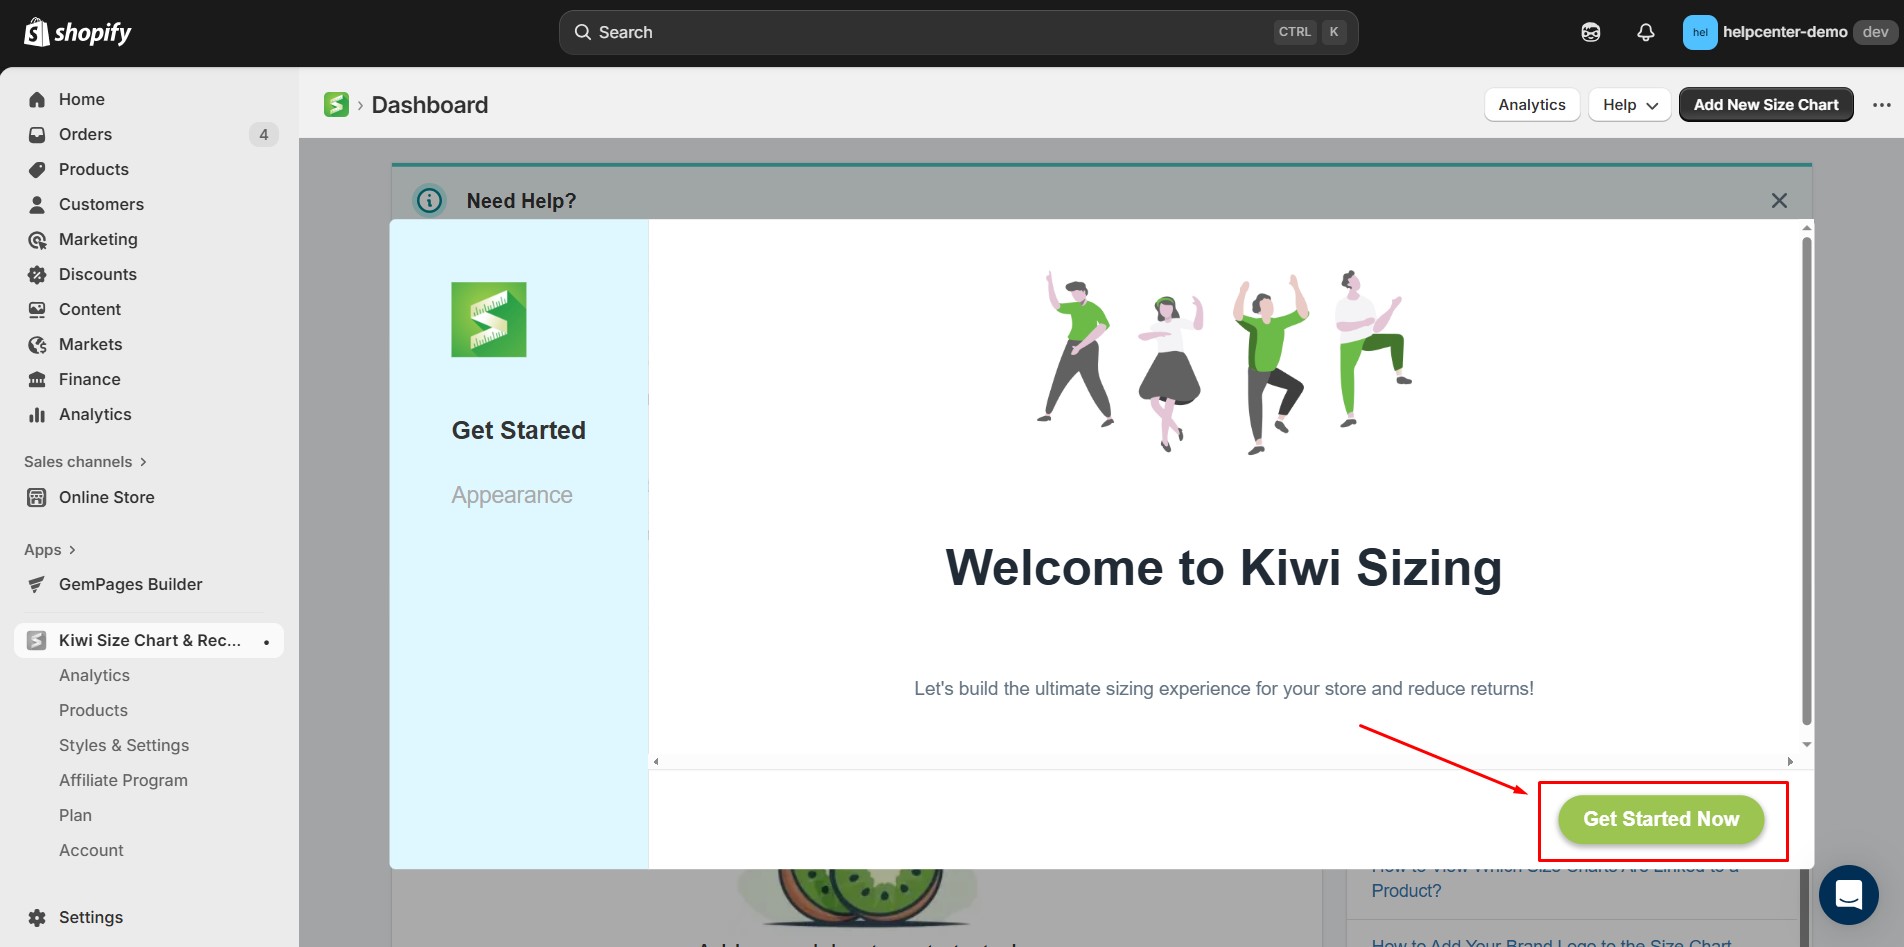
Step 3: Open the app and proceed with the setup.
Step 4: Configure table unit settings

- Primary brand color: Match your brand styling.
- Upload shop logo: Add your store logo for brand recognition.
- Display both Imperial (US) & Metric measurements: Toggle this on if you want both systems shown.
- Unit conversion display mode: Choose how conversions appear:
- Conversion button
- Inline text
- Inline cell
- Default unit system: Pick between Imperial (inches, pounds) or Metric (cm, kg).
- Link text and Chart icon: Customize how the chart is labeled in your store.
- When done, click Finish.
Step 5: Enable the extension in your theme settings and Save changes.
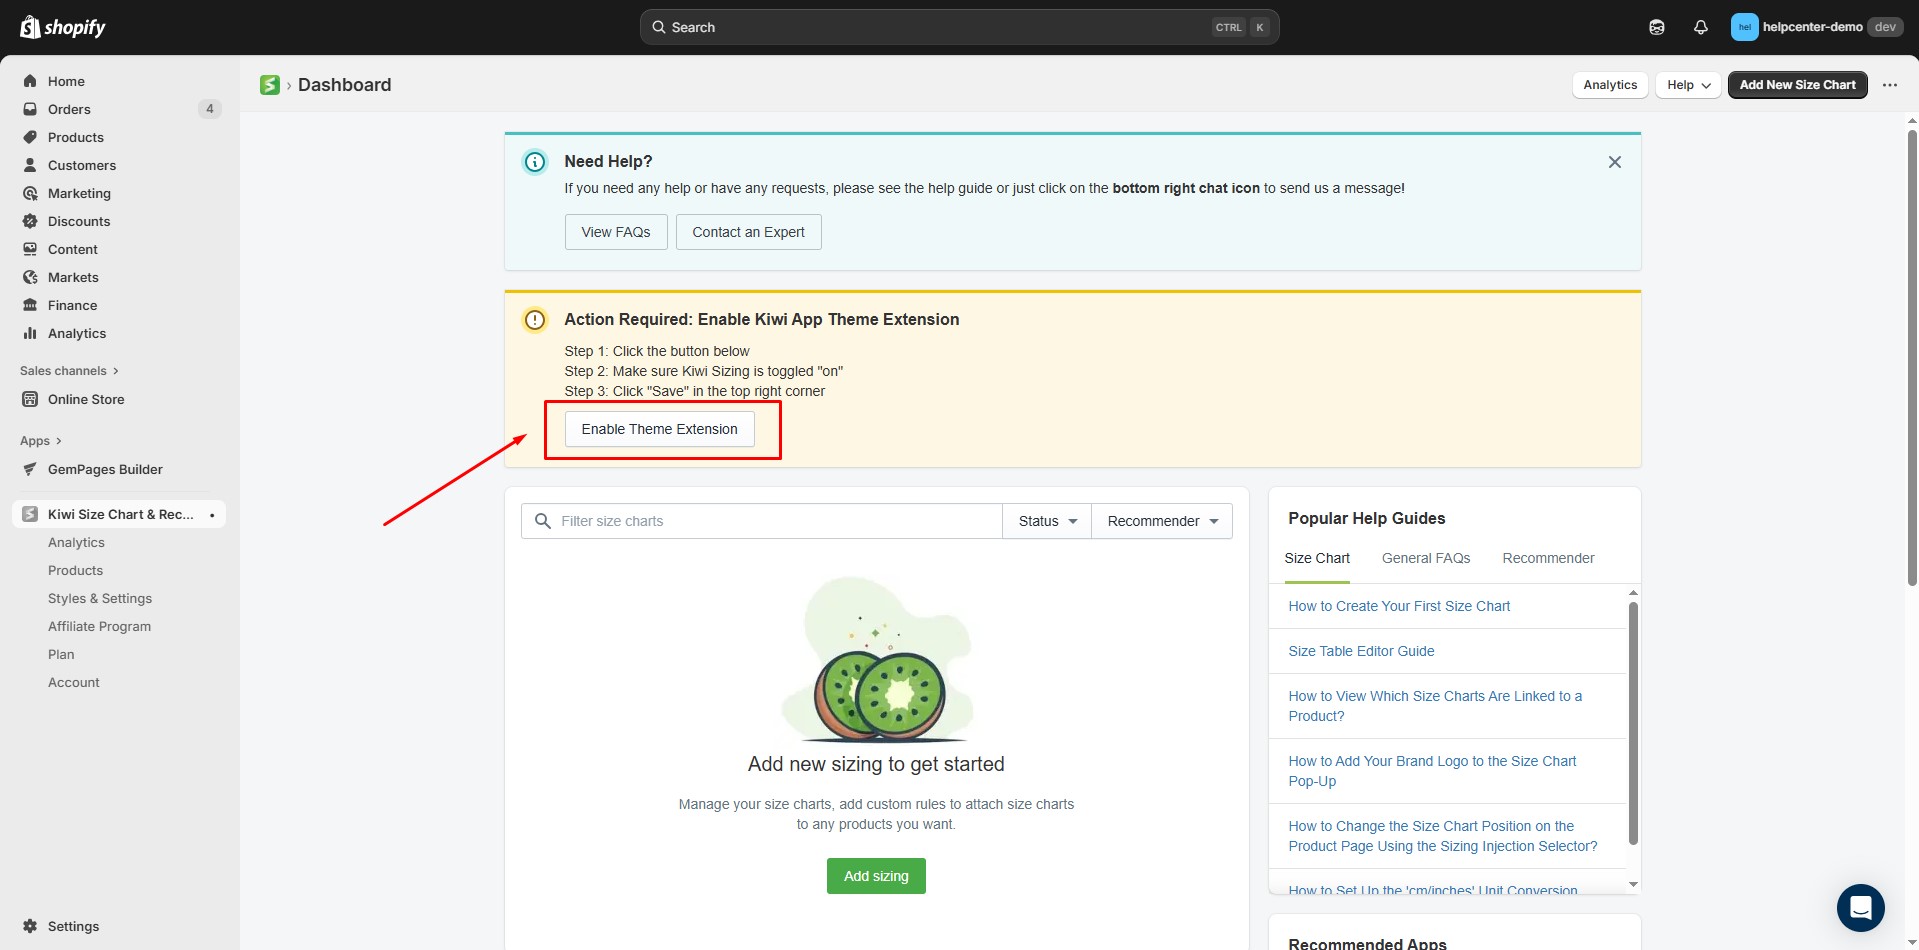
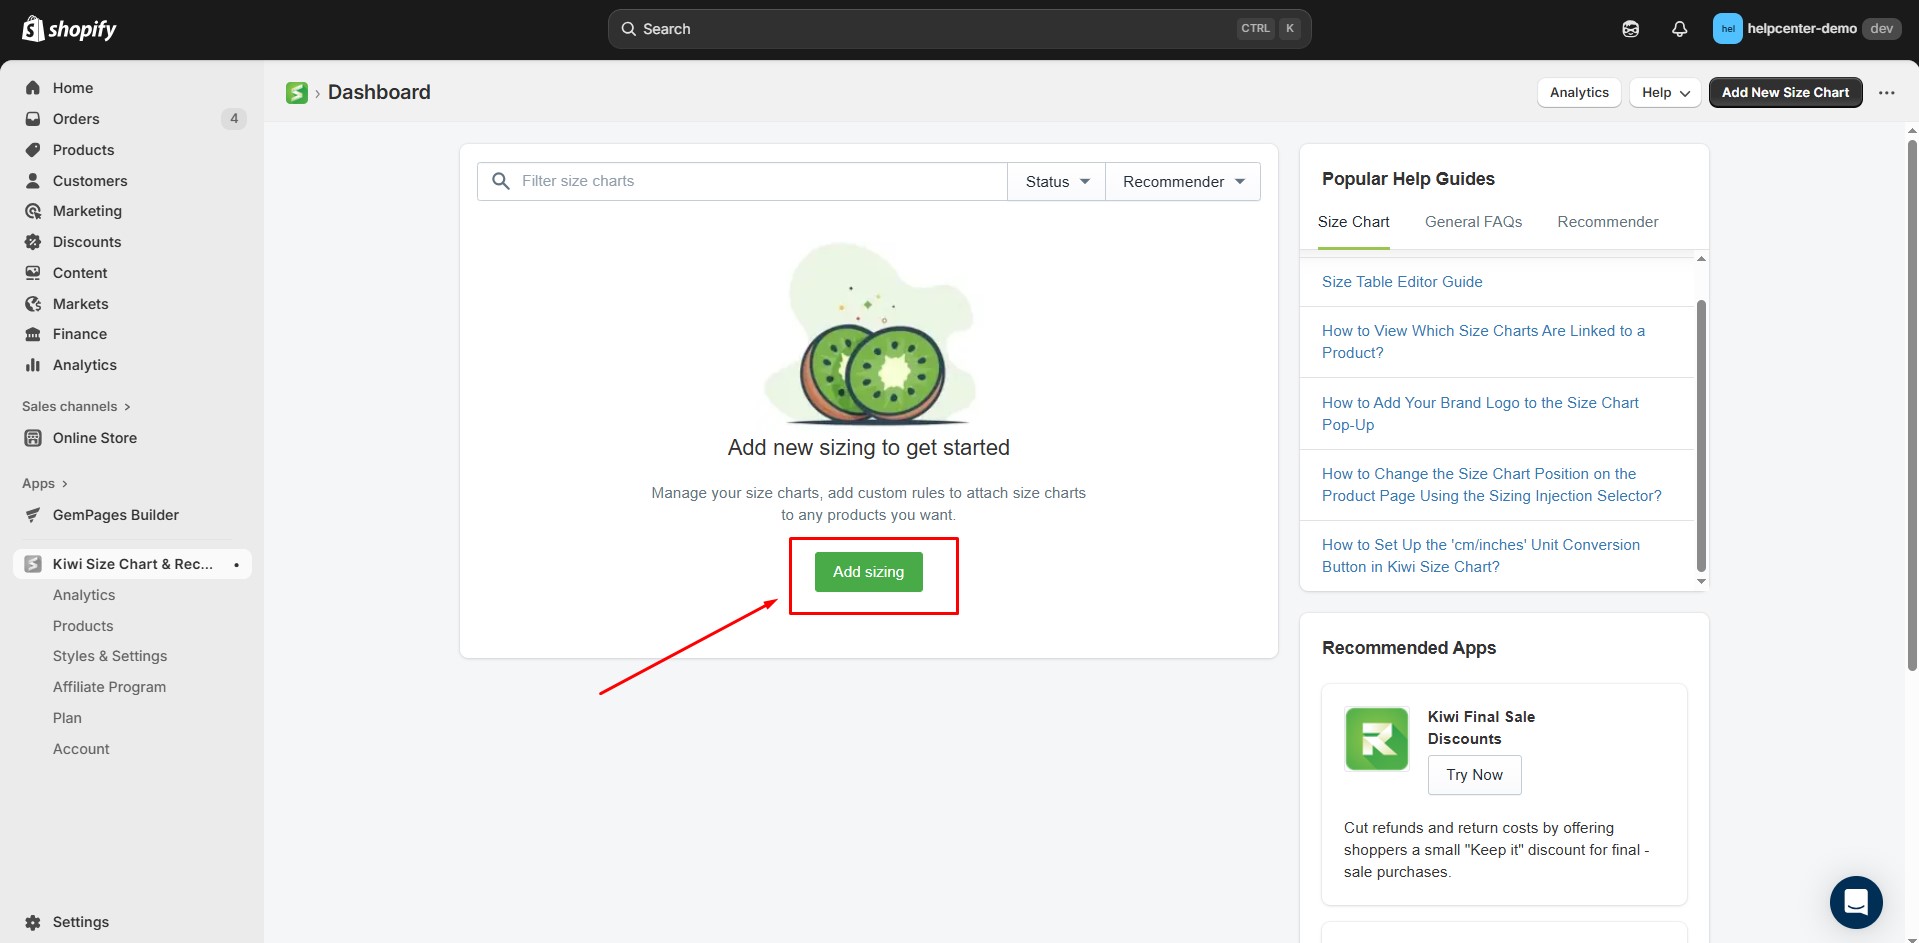
Step 6: In the Kiwi app, click Add sizing.
Step 7: Select a ready-made template or import your chart. For this guide, we will choose a template.

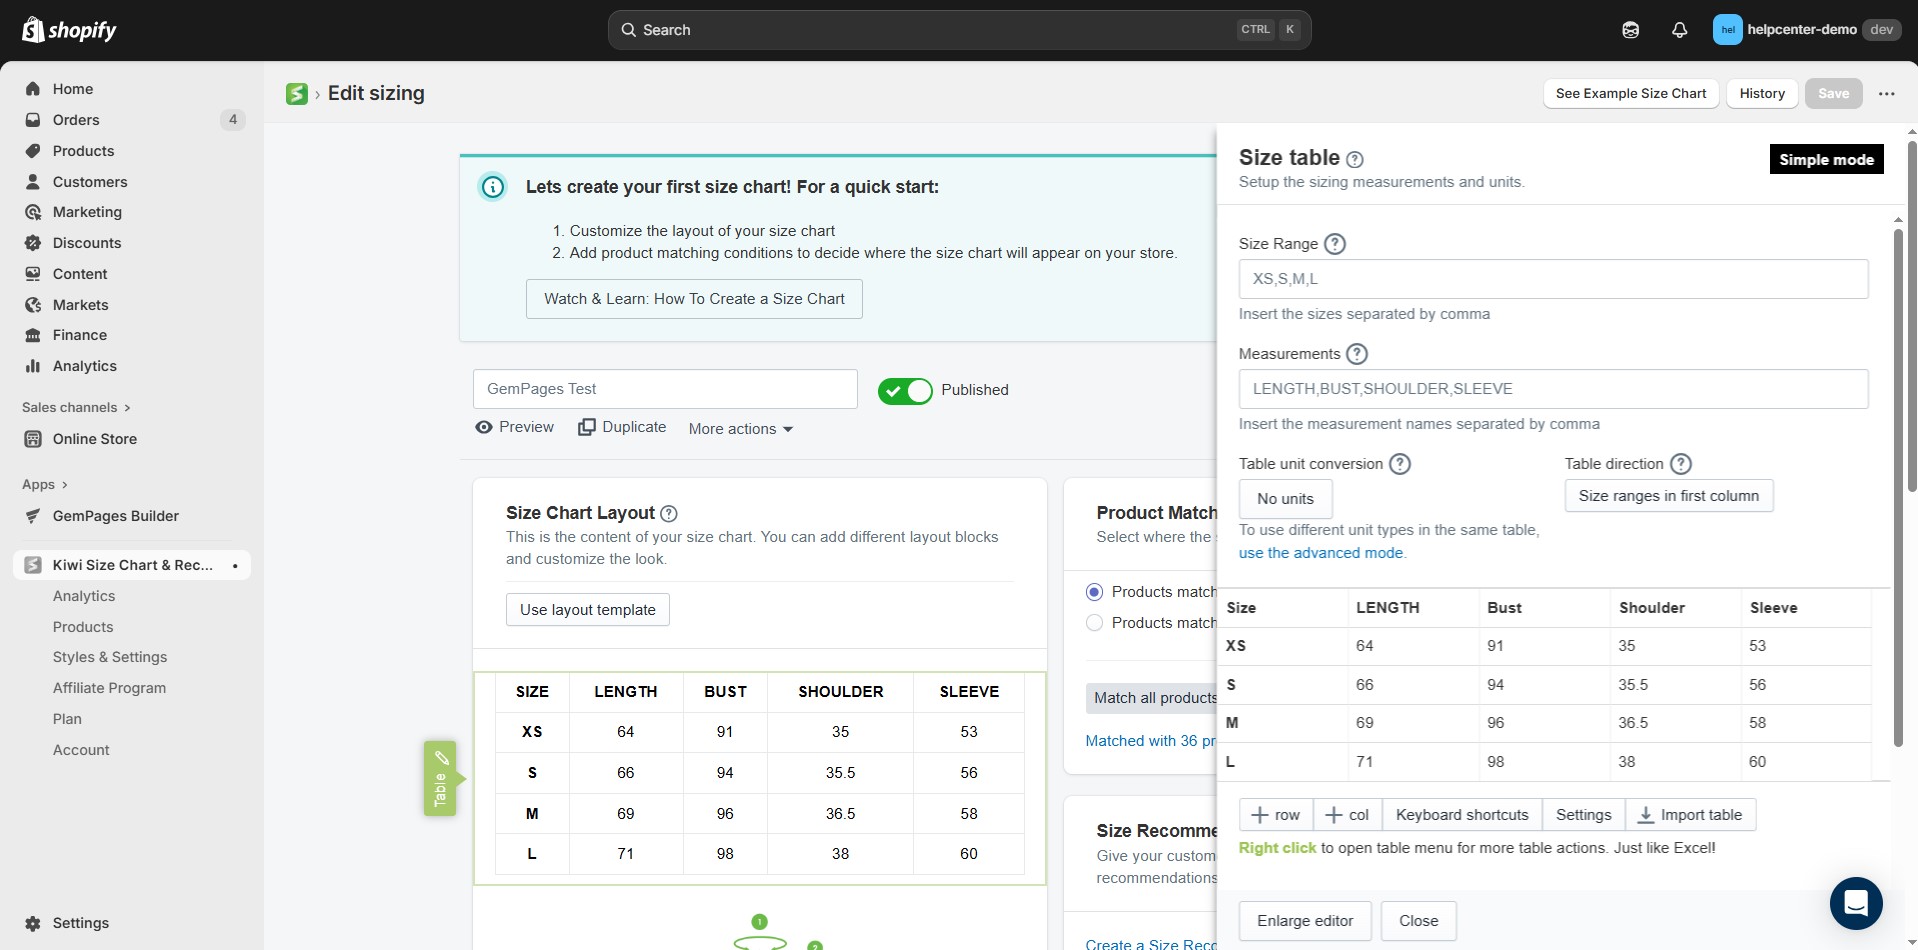
Step 8: Configure your size chart
Depending on the template, you may see the following options:
- Size range: Automatically generates the size table.
- Measurements: Define the measurements used in the chart.
- Table unit conversion: Select the units applied in the table.
- Table direction: Choose whether size ranges appear in the first column or row.
- Table header text and Table footer text: Customize labels.
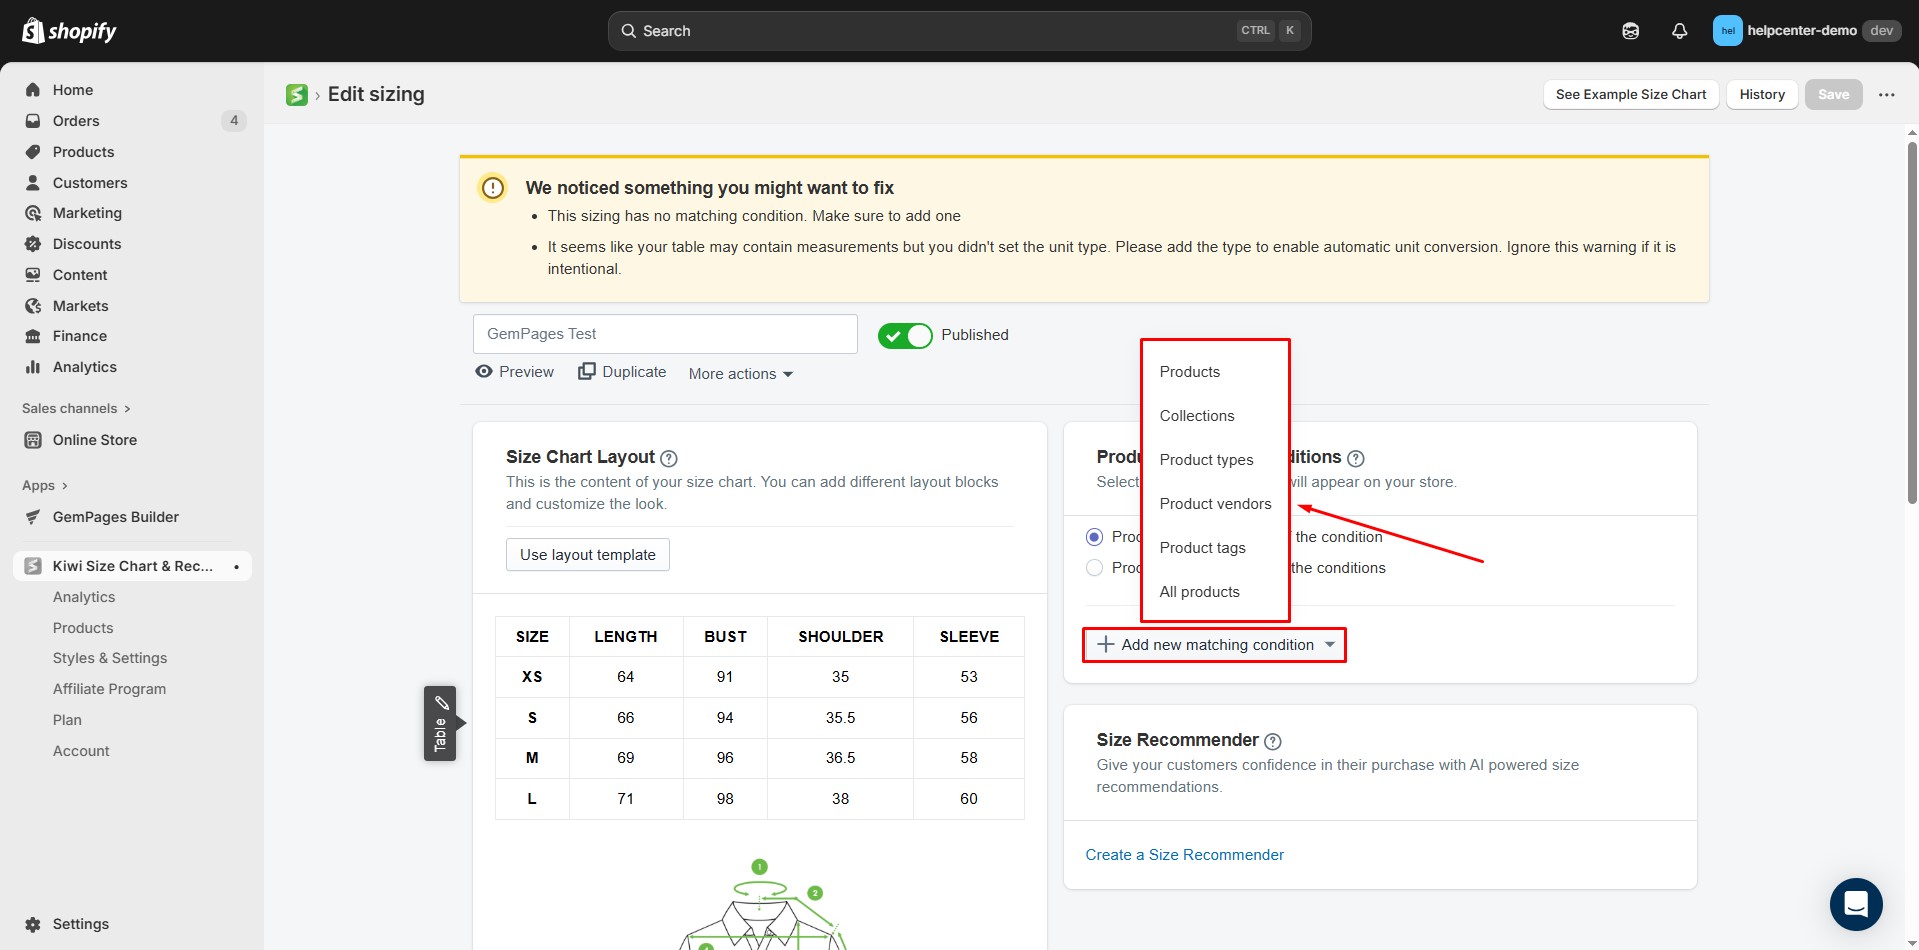
Step 9: Set product matching conditions
- Product Matching Conditions link size charts to specific products.
- Define rules so the correct chart shows up automatically on relevant products.
Step 10: Click Save, and your new size chart will appear in the list.

How to Add Kiwi Size Chart to a GemPages v7?
Step 1: Go to the GemPages app and open the page where you want to display the size chart.
Step 2: Add the Shopify App element
- Drag and drop the Shopify App element into the section where you want the size chart to appear.
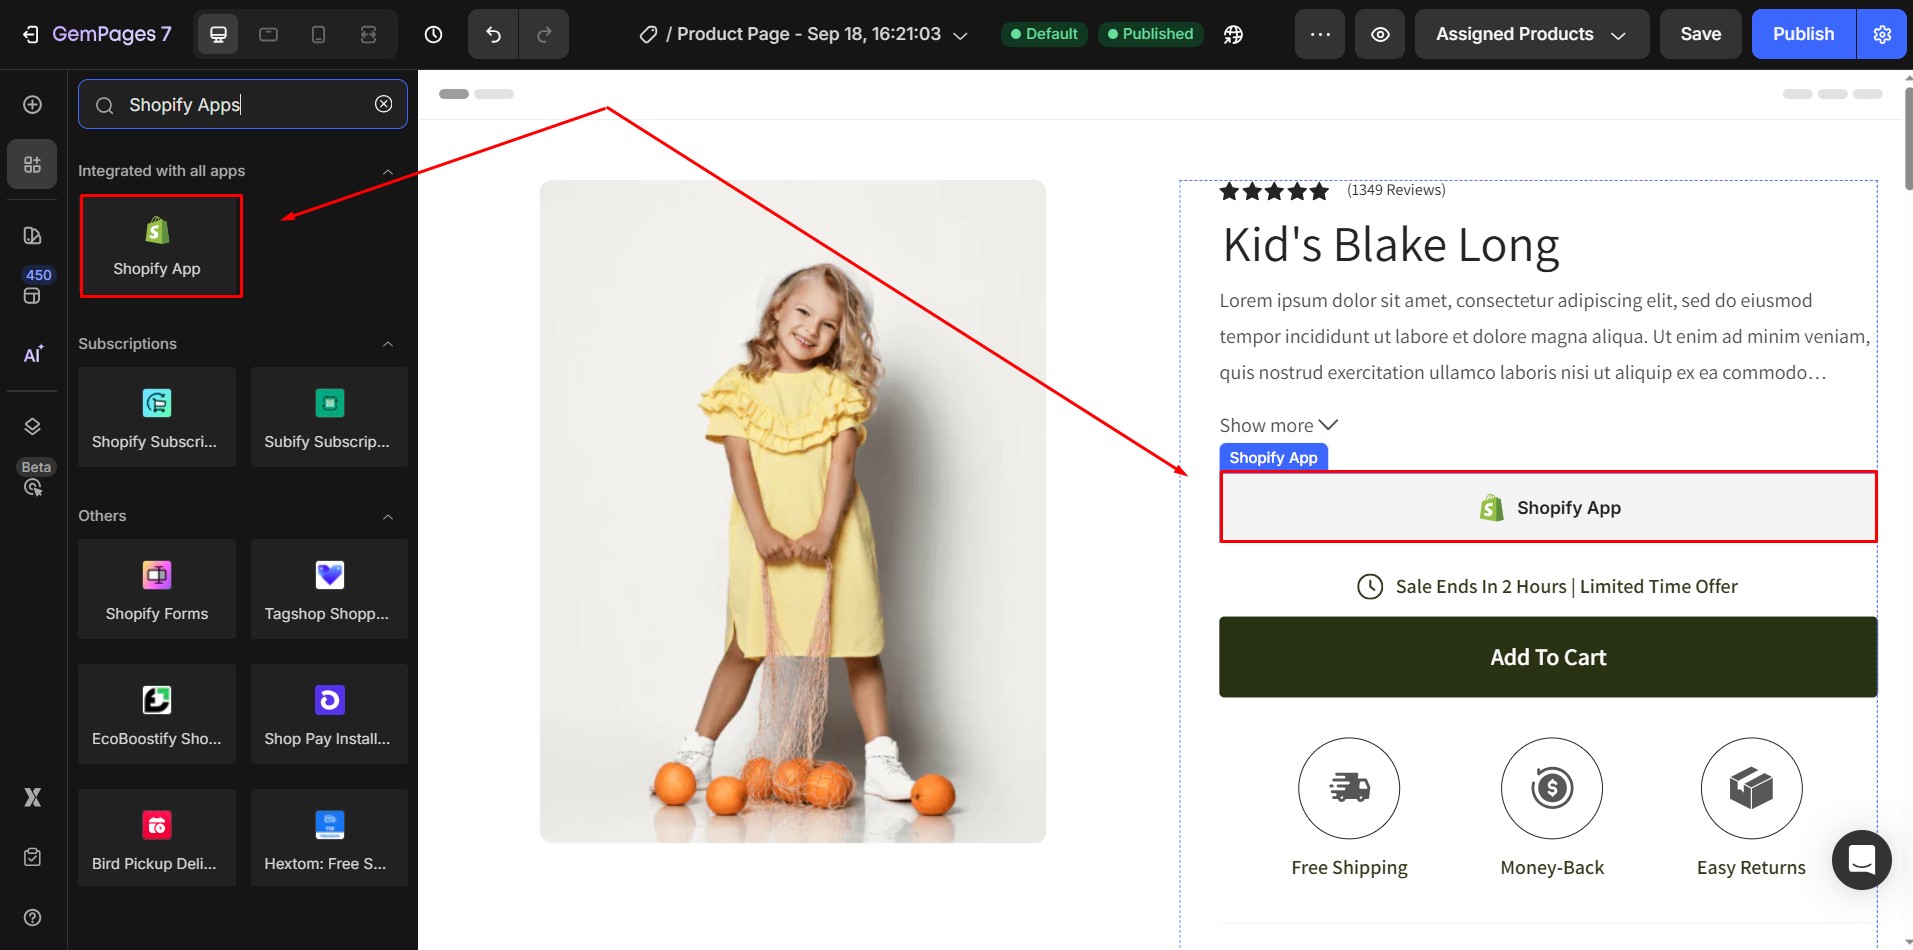
- Click Save and Publish.
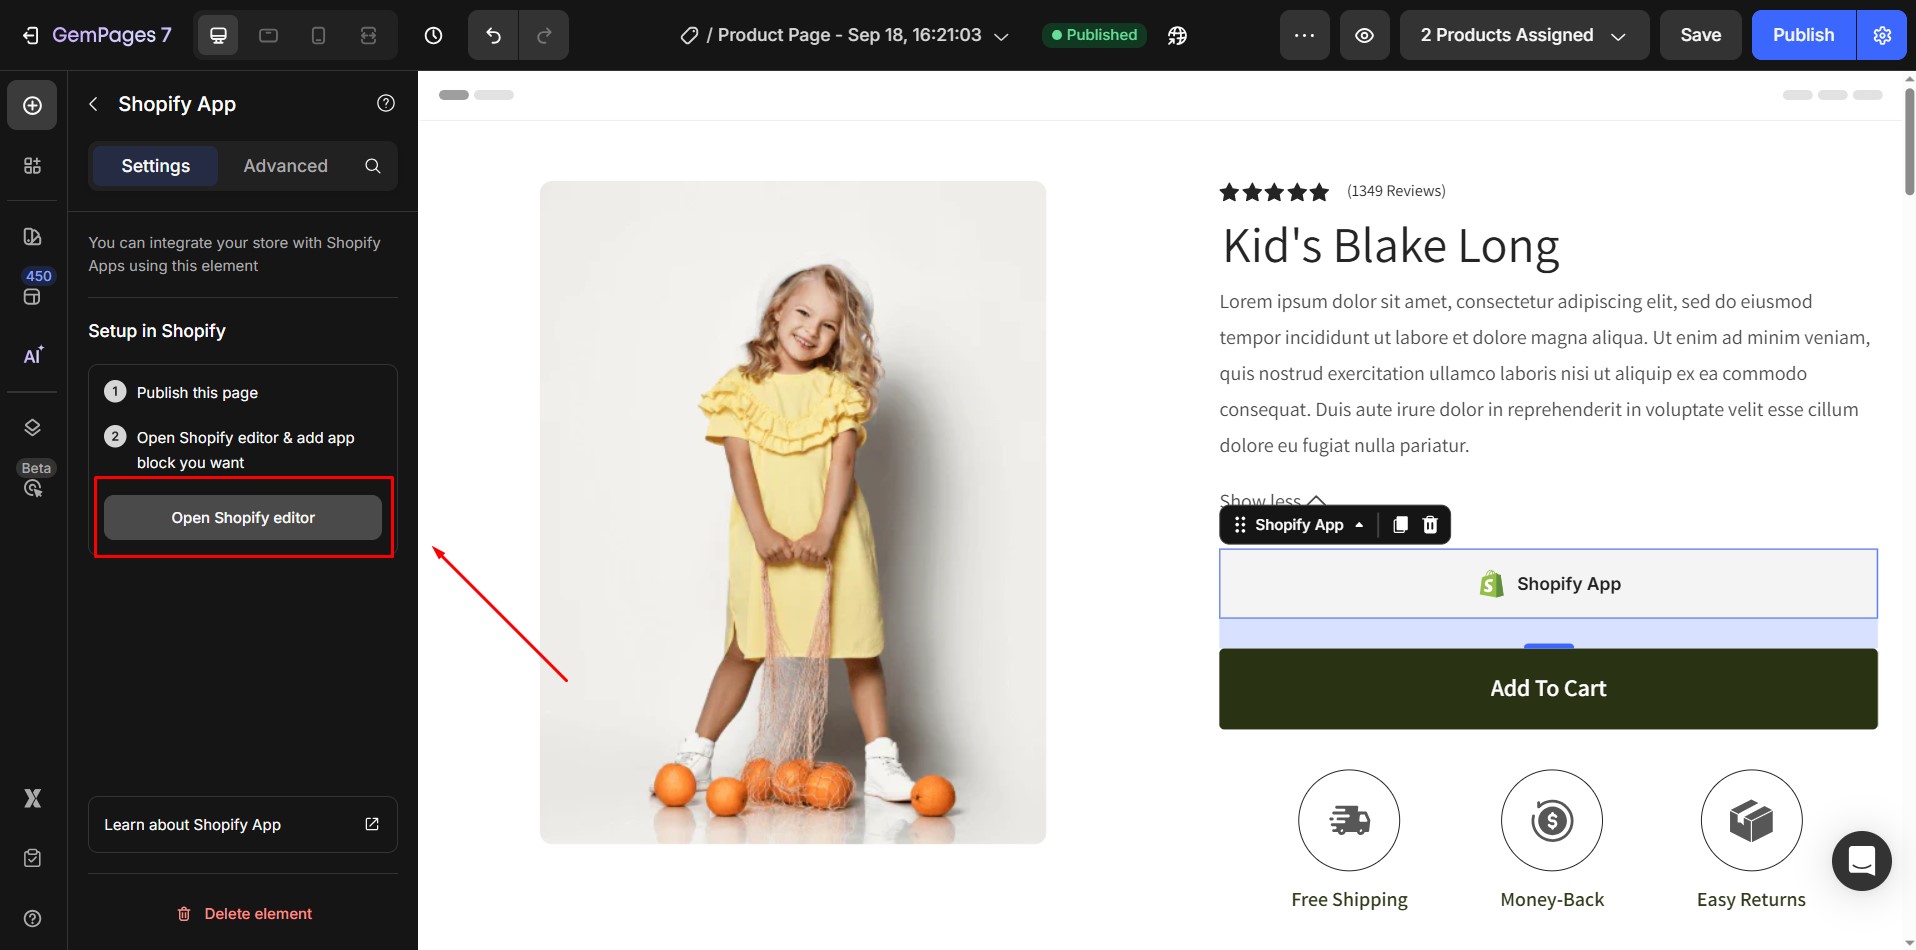
- Select the element, then click Open Shopify Editor. You’ll be redirected to the Theme Editor.
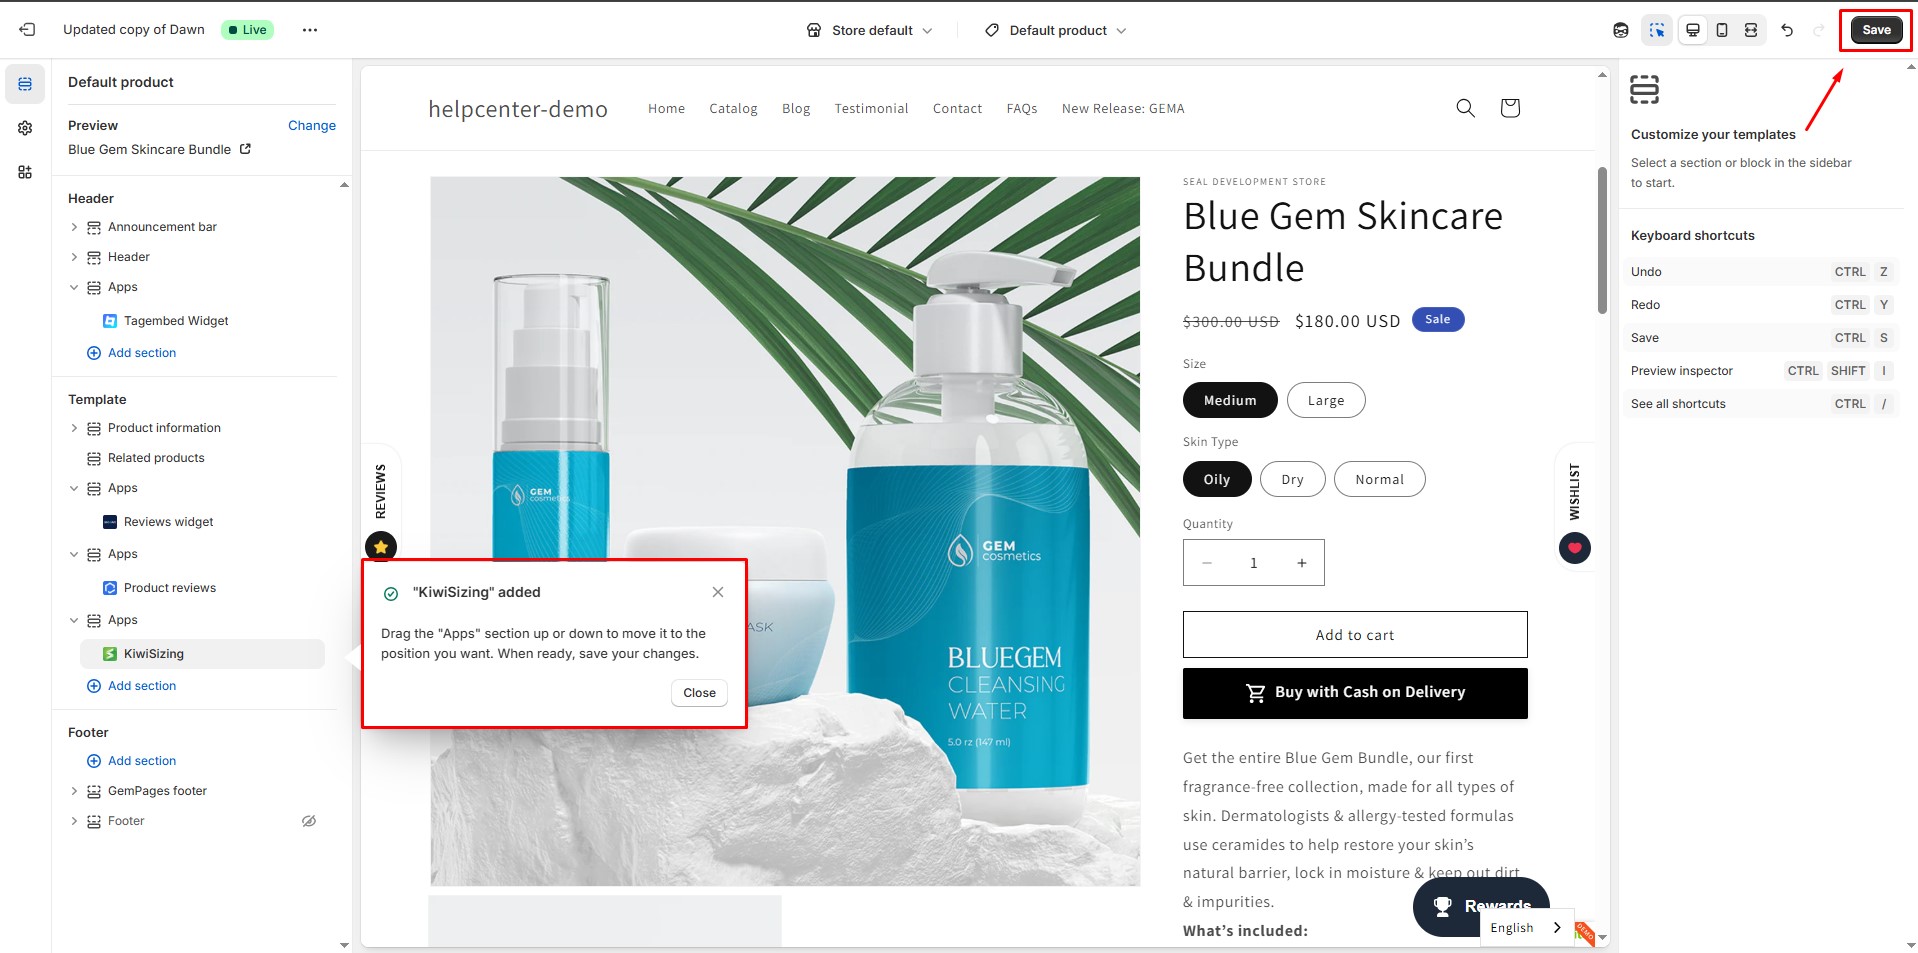
Step 3: Under the Template section, click Add block → choose App. Select Kiwi Size Chart & Recommender.
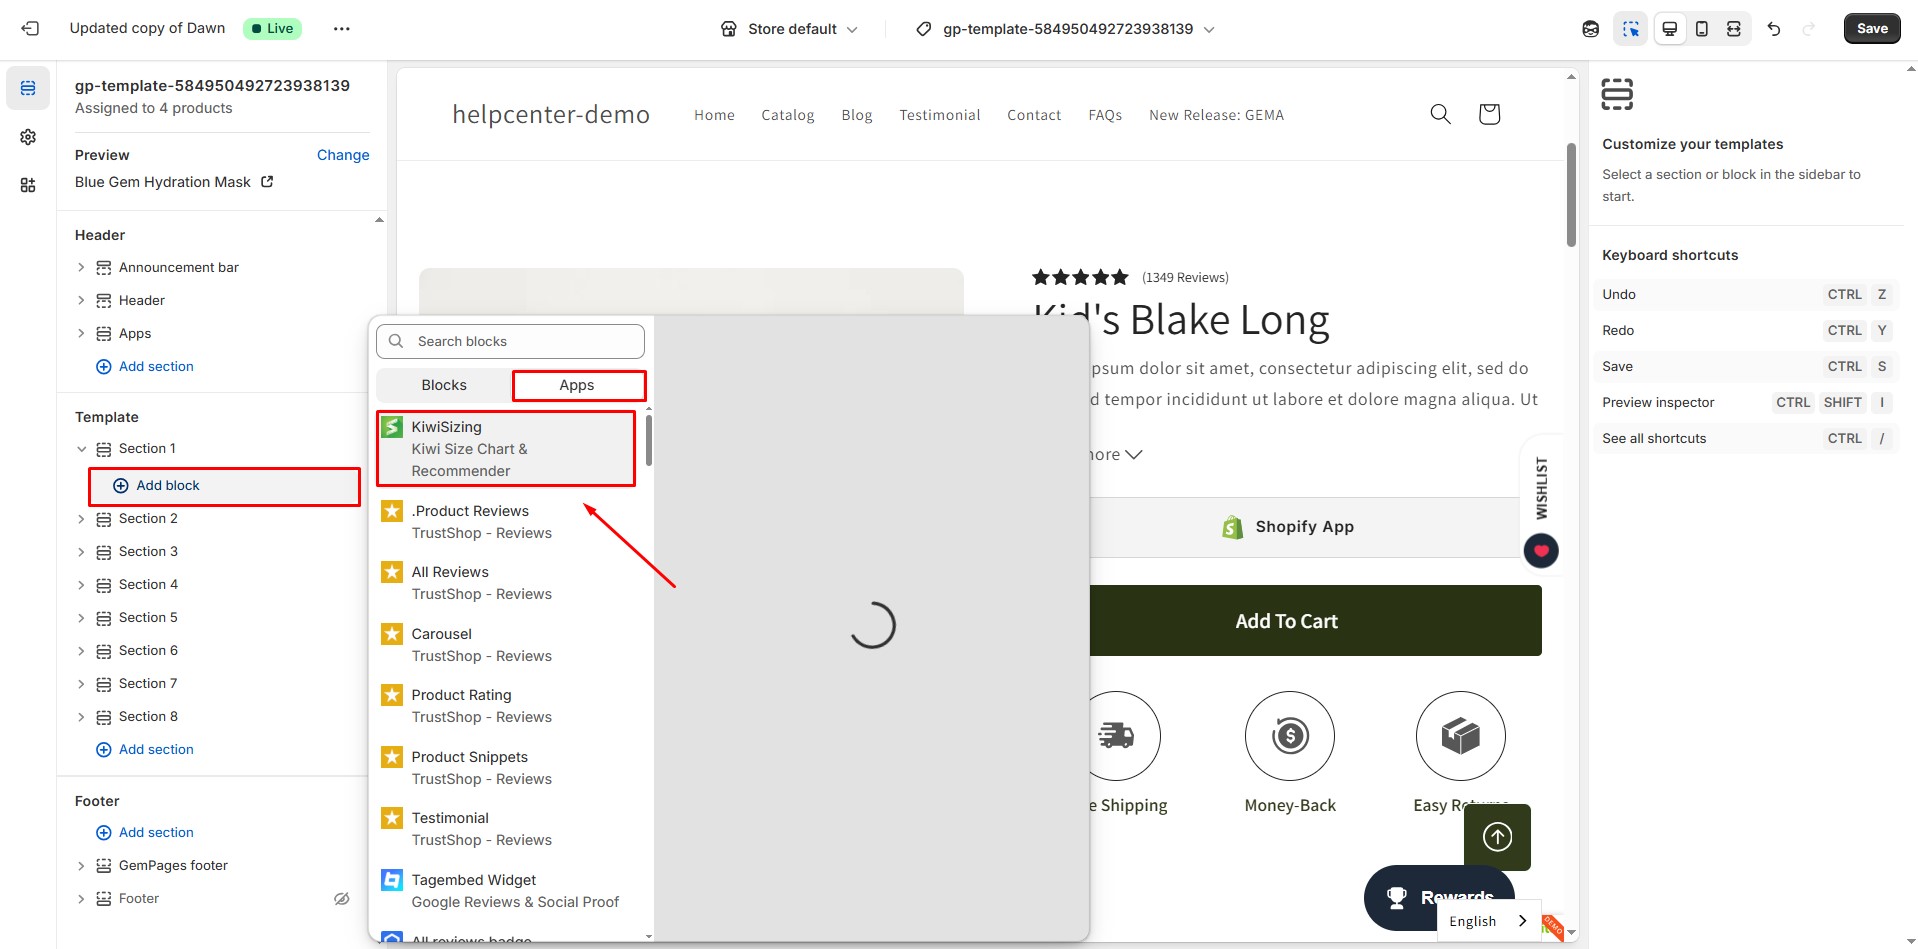
Example: If you’re working with Section 1, scroll to find Section 1 in your theme editor before adding the new block.
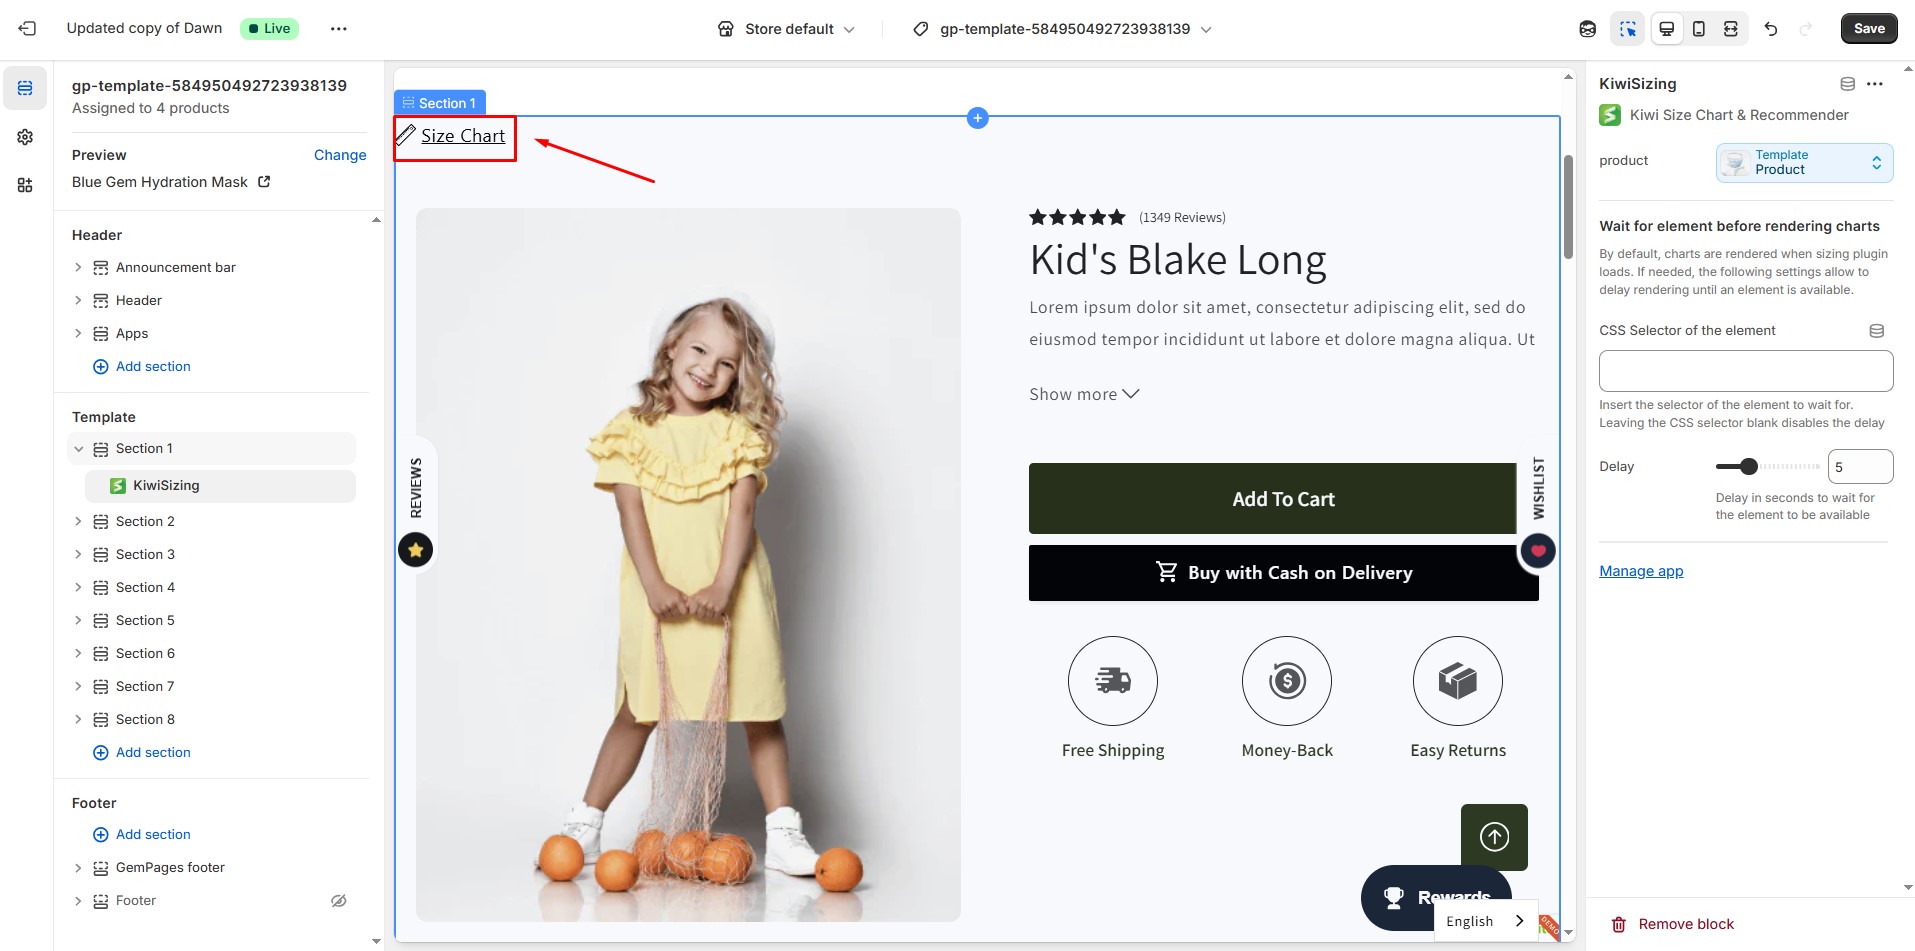
Step 4: Hit Save in the top-right corner. Preview your live store to confirm the size chart displays correctly.
Tips for Ensuring Kiwi Size Chart Appears in the Correct Location on GemPages v7
1. Go to Styles & Settings → Display Settings → Sizing Injection Selector and set the proper CSS selector (for example, option-selector) and injection point (Inject after / Class). This tells Kiwi exactly where to inject the chart.
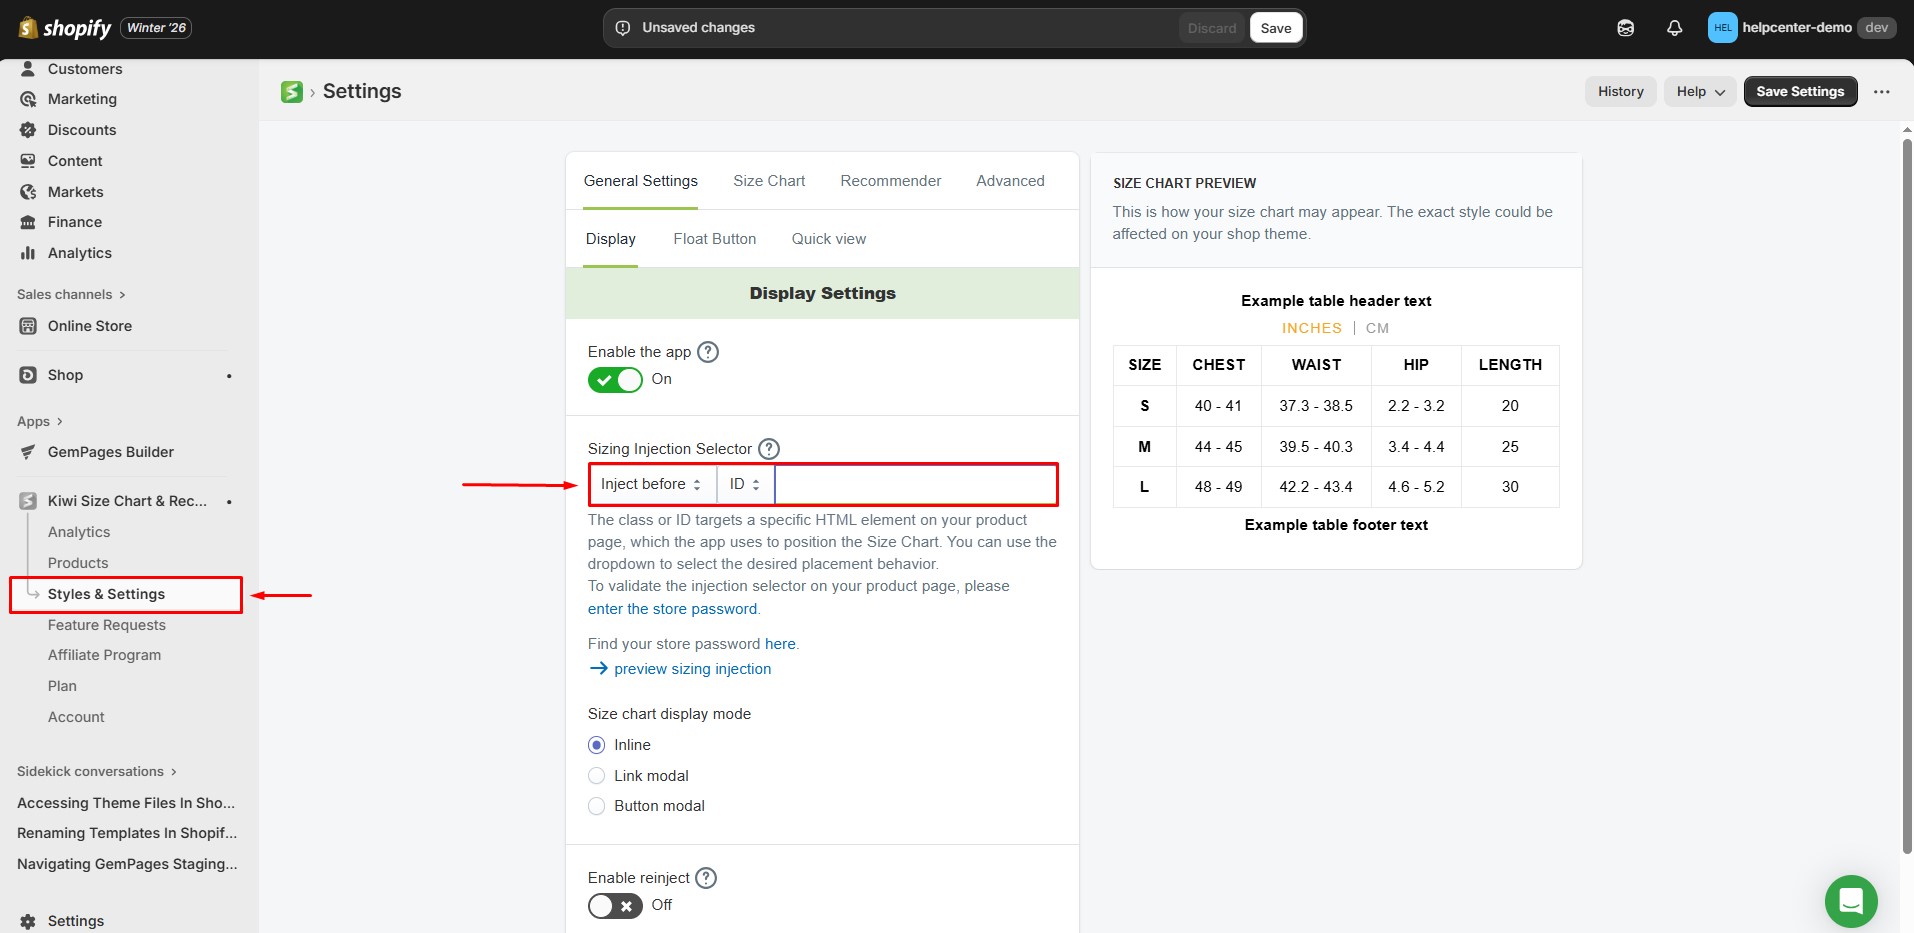
2. Add a Custom Code element in GemPages. Place this where you want the chart to appear.
3. Insert a small HTML snippet in your page to create a target for Kiwi to inject the chart: <div class="option-selector"></div>
4. Combine the steps above with the Shopify App element in GemPages to ensure the chart renders correctly in your live store.


Thank you for your comments