


When you share a Shopify store link on Facebook, Twitter, LinkedIn, or messaging apps, a social preview image (also called an Open Graph (OG) image) will appear. Setting the right Shopify social preview image helps your store look professional, improve SEO, and increase click-through rates from social platforms.
In this guide, we’ll explain what a Shopify social preview image is, why it matters for SEO, and how to set it for different page types in both Shopify and GemPages.
What Is a Shopify Social Preview Image?
A Shopify social preview image is the thumbnail displayed alongside your page title and description when someone shares your link. It provides the first visual impression of your brand on social media.
For example:
- A product page usually shows its featured product image.
- A collection page usually shows its featured collection image.
- A custom landing page built with GemPages can display its own preview image.
Correctly setting your OG image not only improves your store’s look but also helps generate rich social snippets that drive more clicks.
How to Set Social Preview Images by Page Type
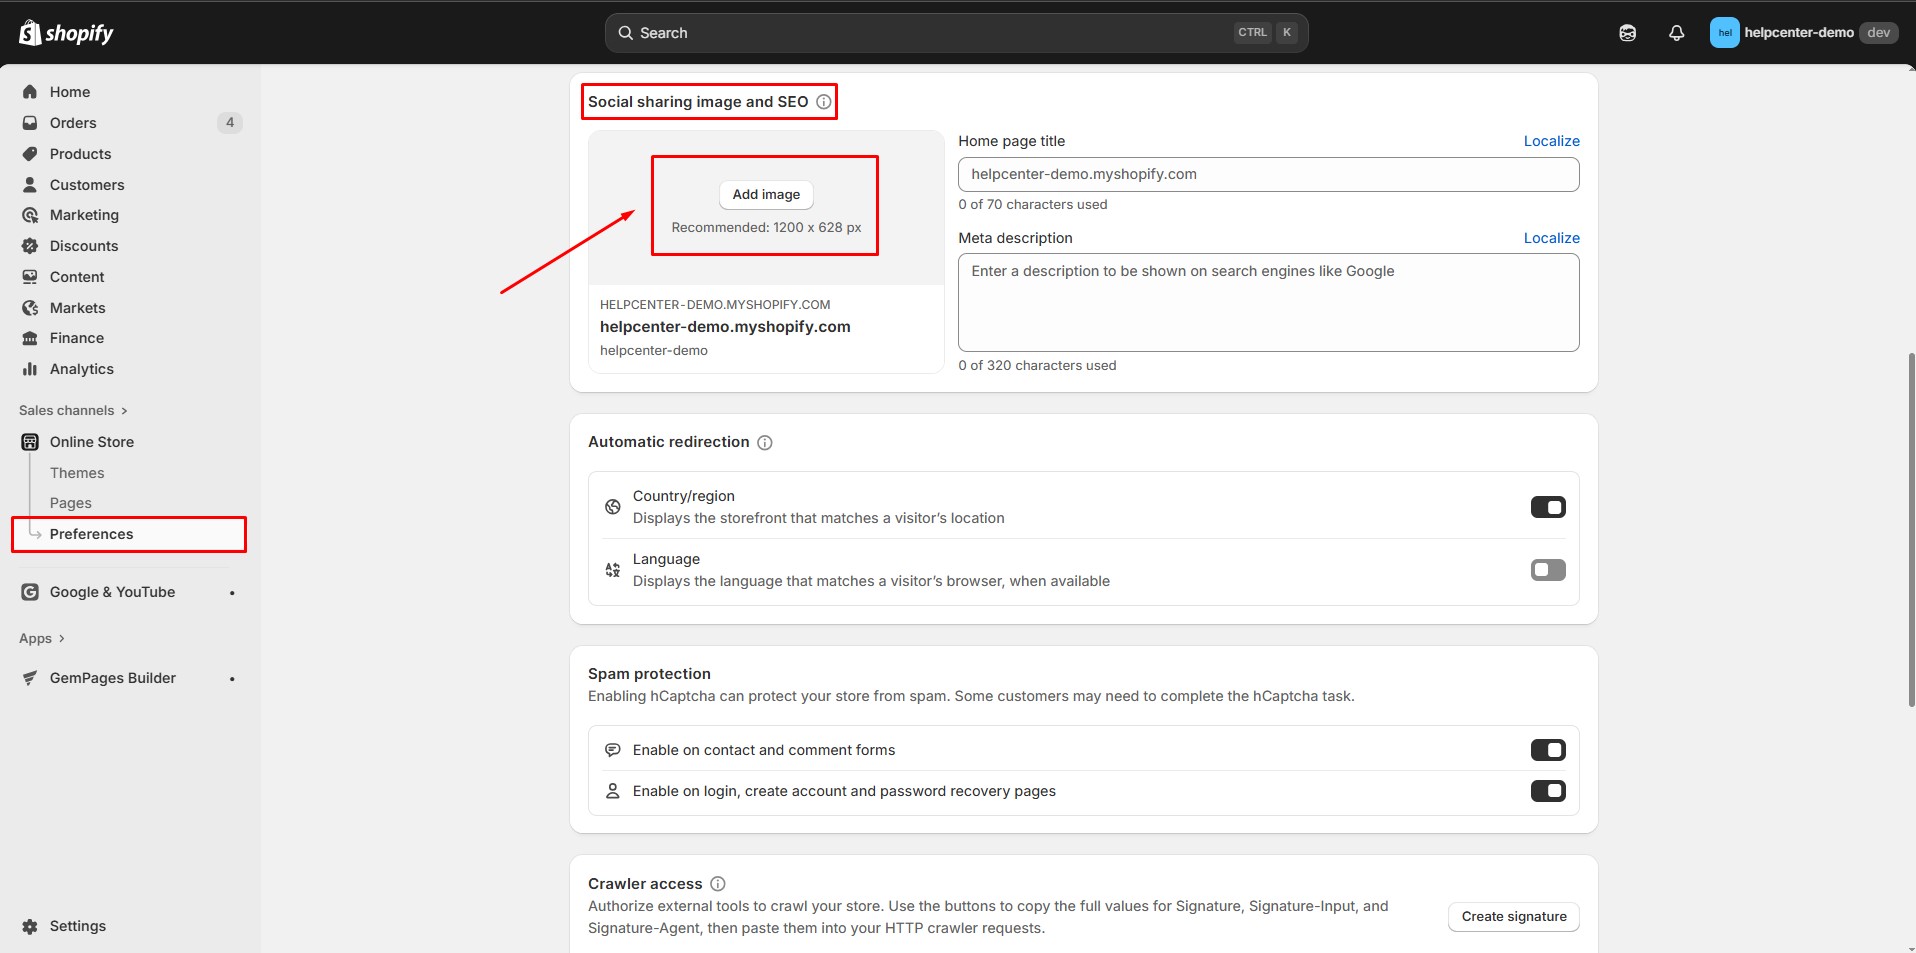
1. Homepage Social Preview Image
The Homepage social preview image can only be set in Shopify Admin.
Steps:
- From your Shopify Admin, go to Online Store > Preferences.
- Scroll to the Social sharing image section.
- Click Add image (or Change if updating).
- Upload the image you want to use.
- Click Save.
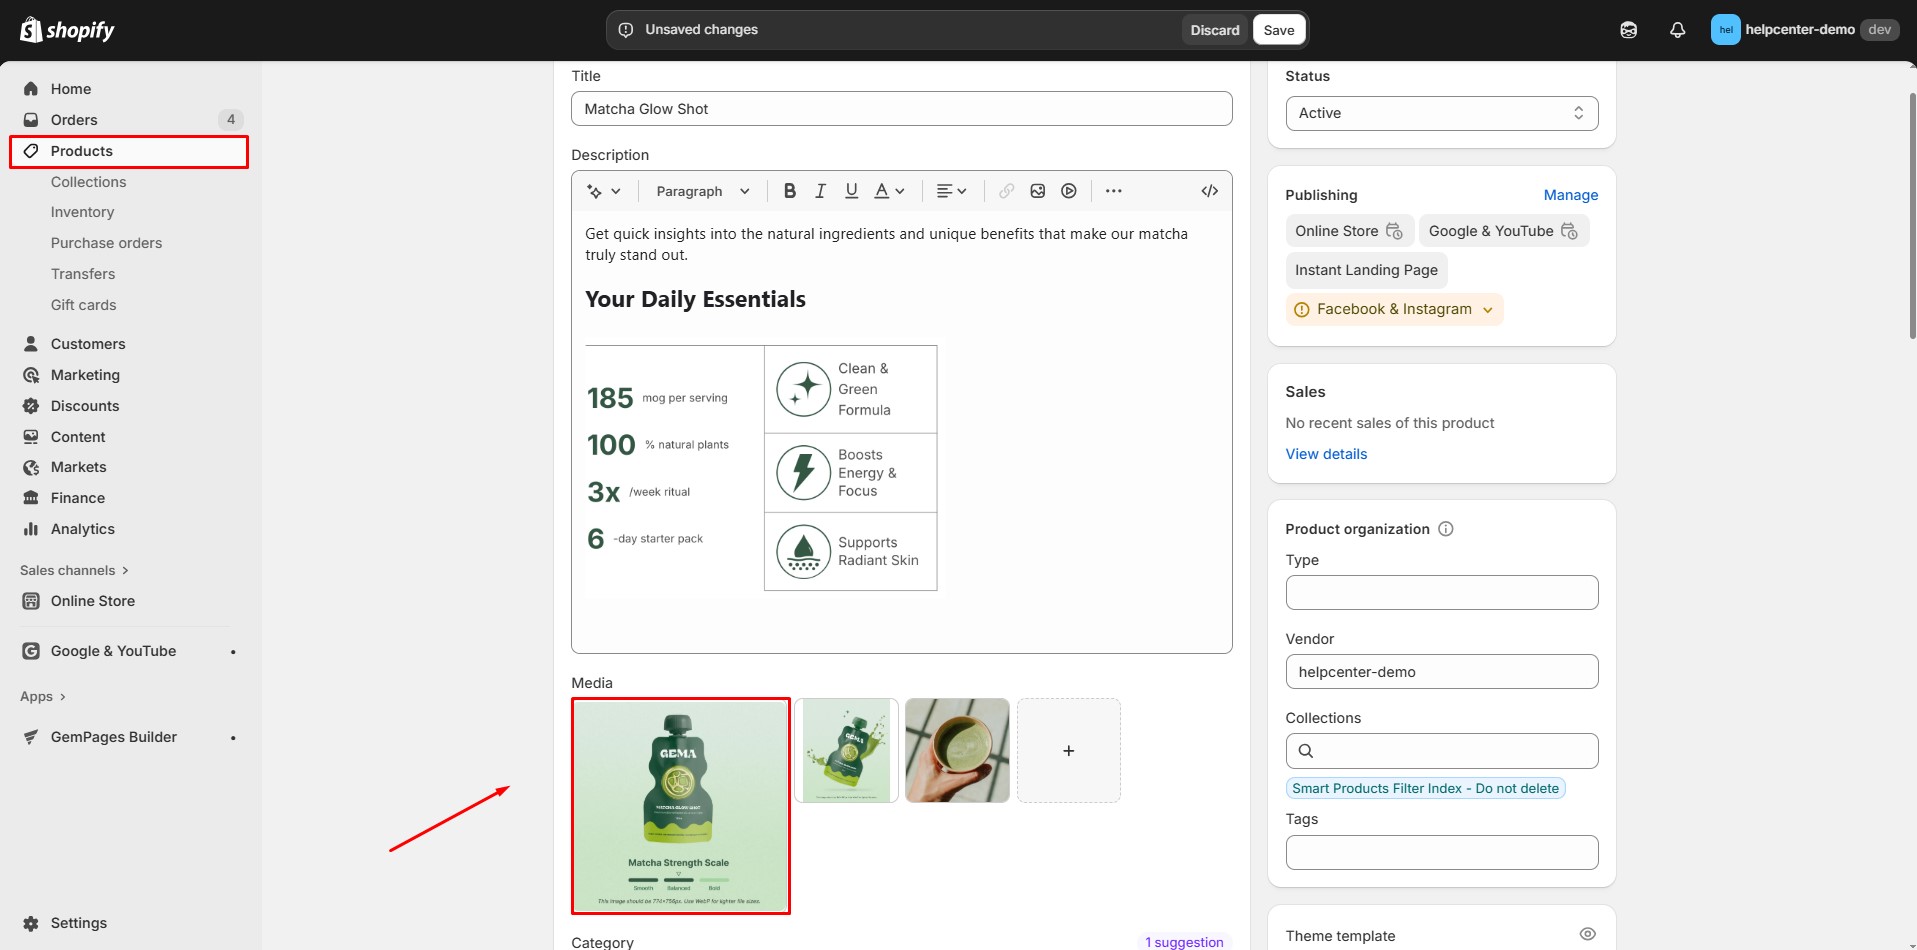
2. Product Page Social Preview Image
When a product page is shared on social media, Shopify automatically displays the featured product image.
Steps to update:
- Go to Products in your Shopify Admin.
- Select the product you want to edit.
- In the Media section, upload or update the featured image.
- Click Save.
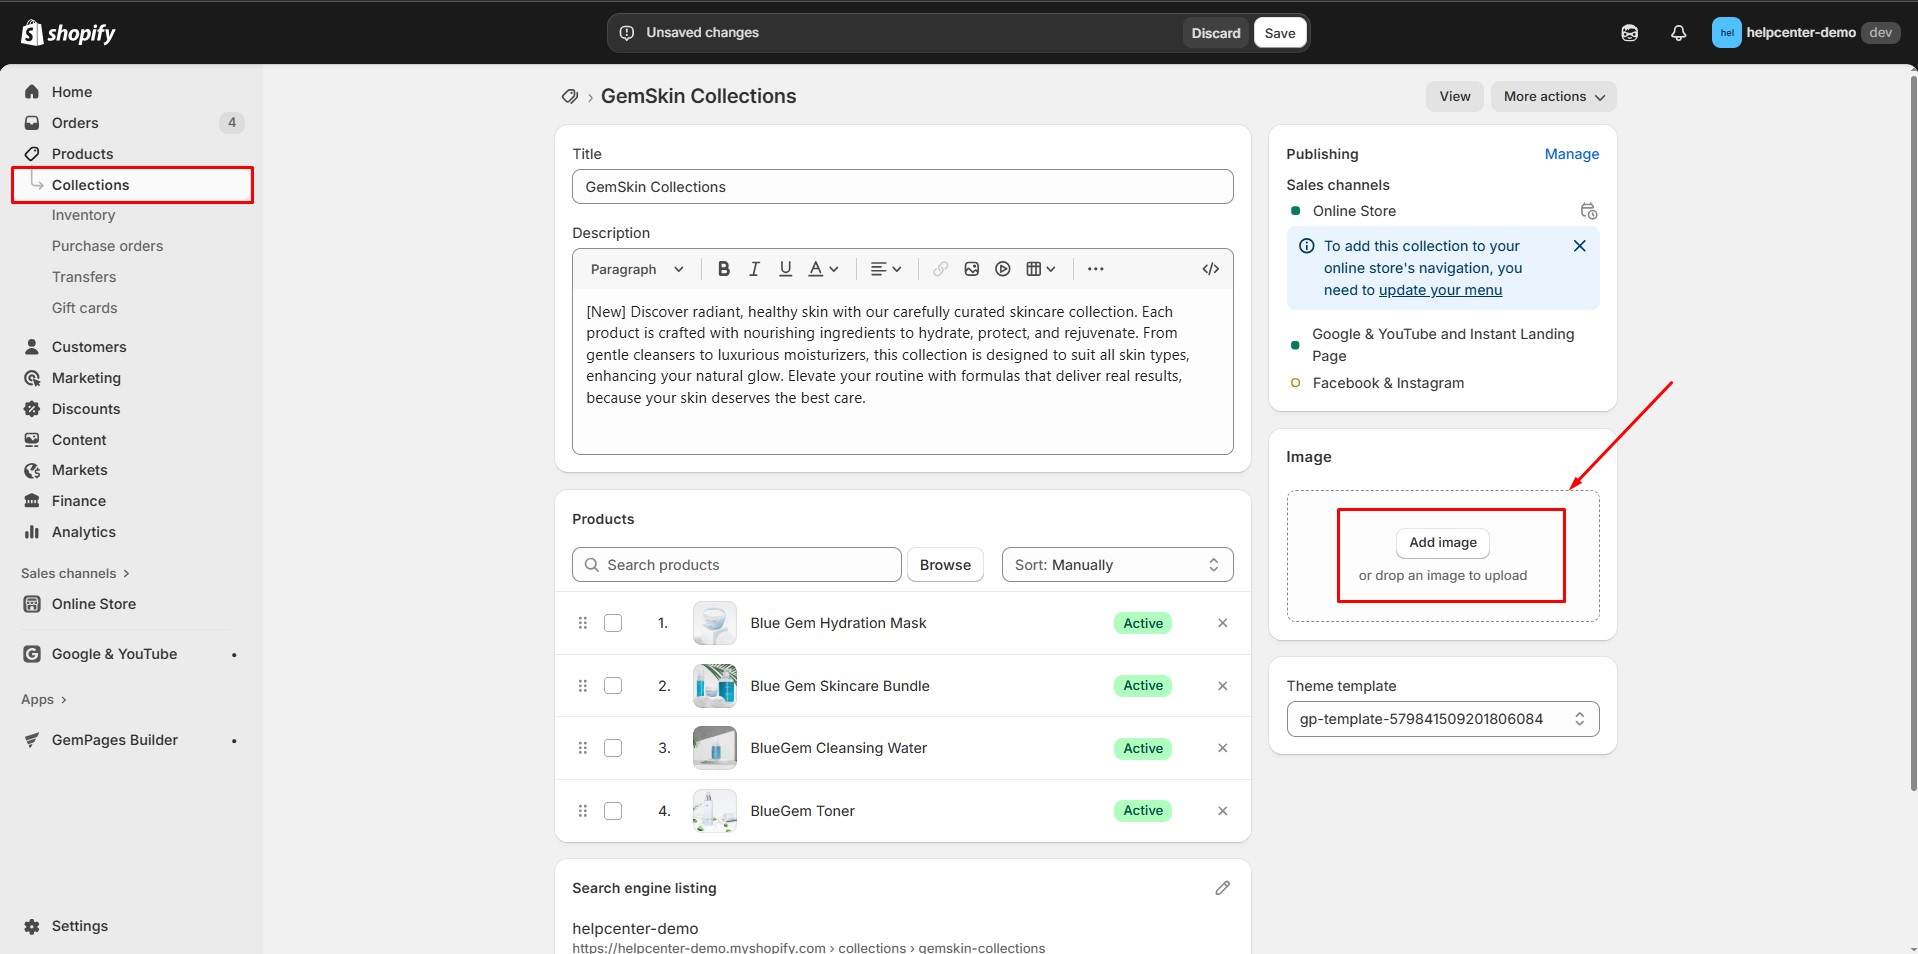
3. Collection Page Social Preview Image
Collection pages use the collection’s featured image as the social preview image.
Steps to update:
- In your Shopify Admin, go to Products > Collections.
- Open the collection you want to edit.
- In the Collection image field, upload or change the featured image.
- Click Save.
4. Blog Post Social Preview Image
When you share a blog post, Shopify uses its featured image as the preview image.
Steps to update:
- From your Shopify Admin, go to Content > Blog posts.
- Choose the blog post you want to edit.
- In the Featured image section, upload or update the image.
- Click Save.

5. GemPages Landing Page Social Preview Image
For custom landing pages built with GemPages, you can assign a specific preview image directly in the editor.
Steps:
- Open your page in the GemPages Editor.
- Go to Publish Settings > Social Sharing.
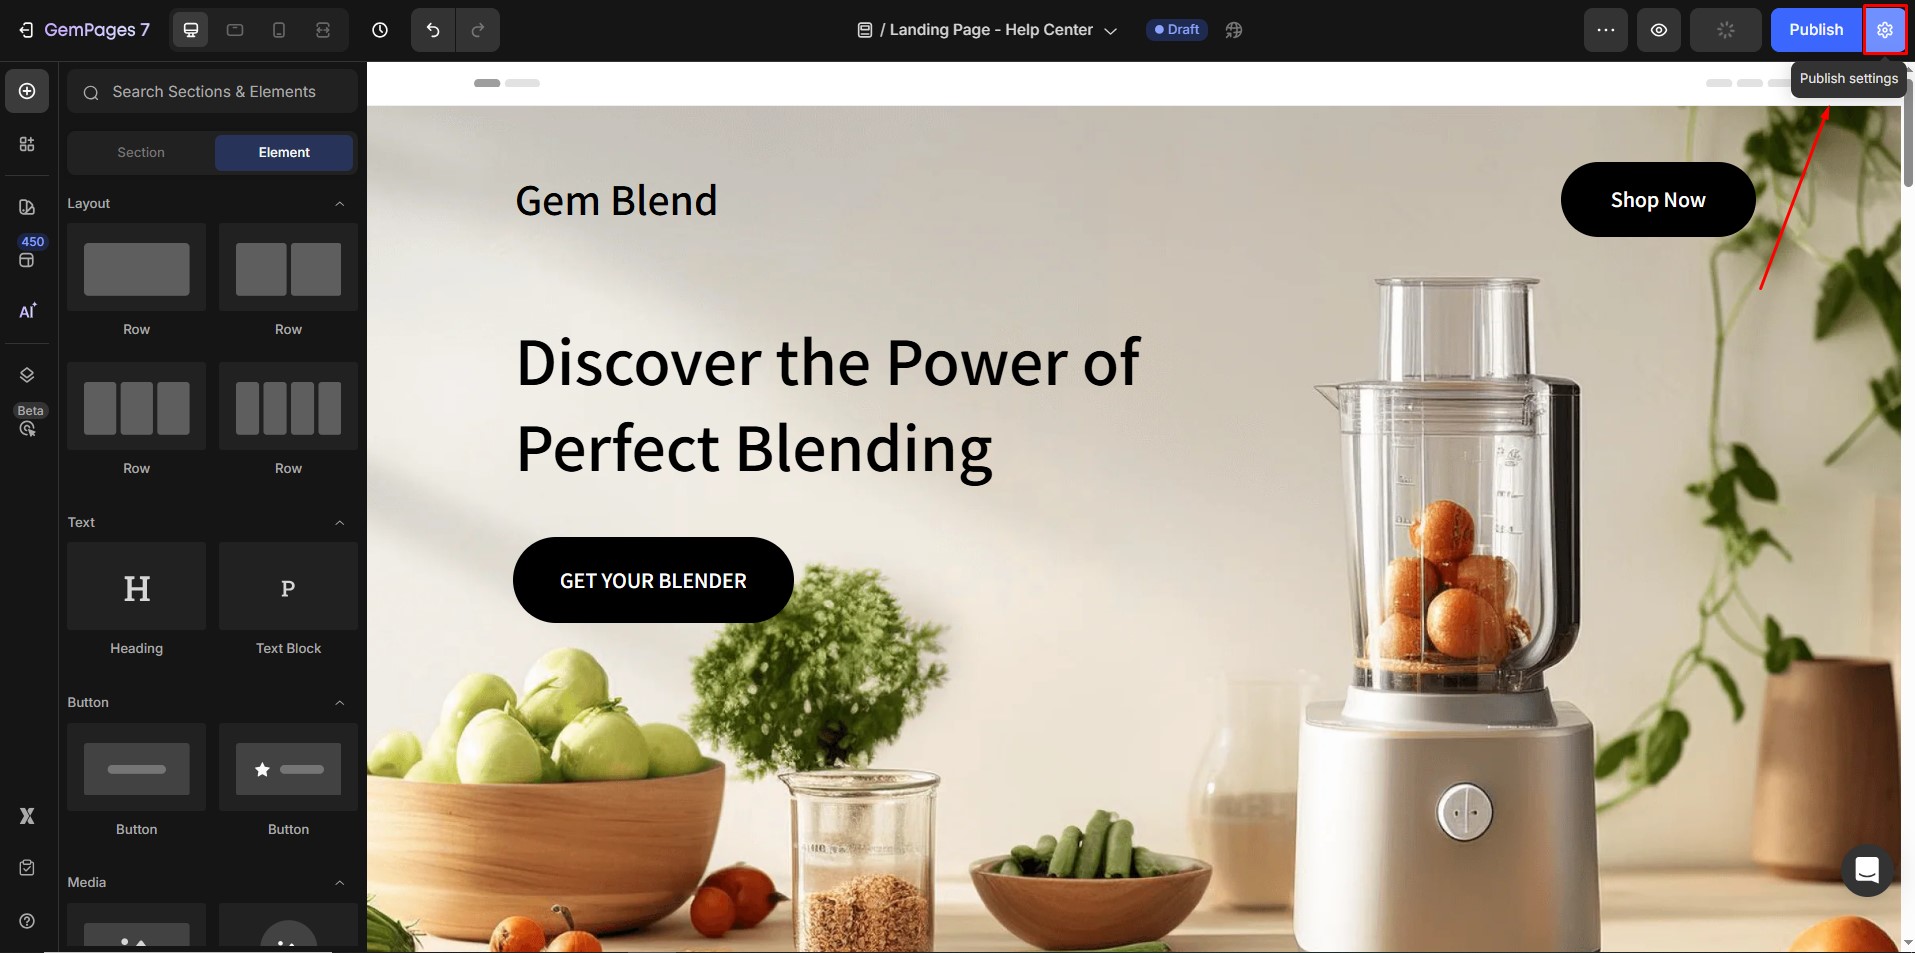
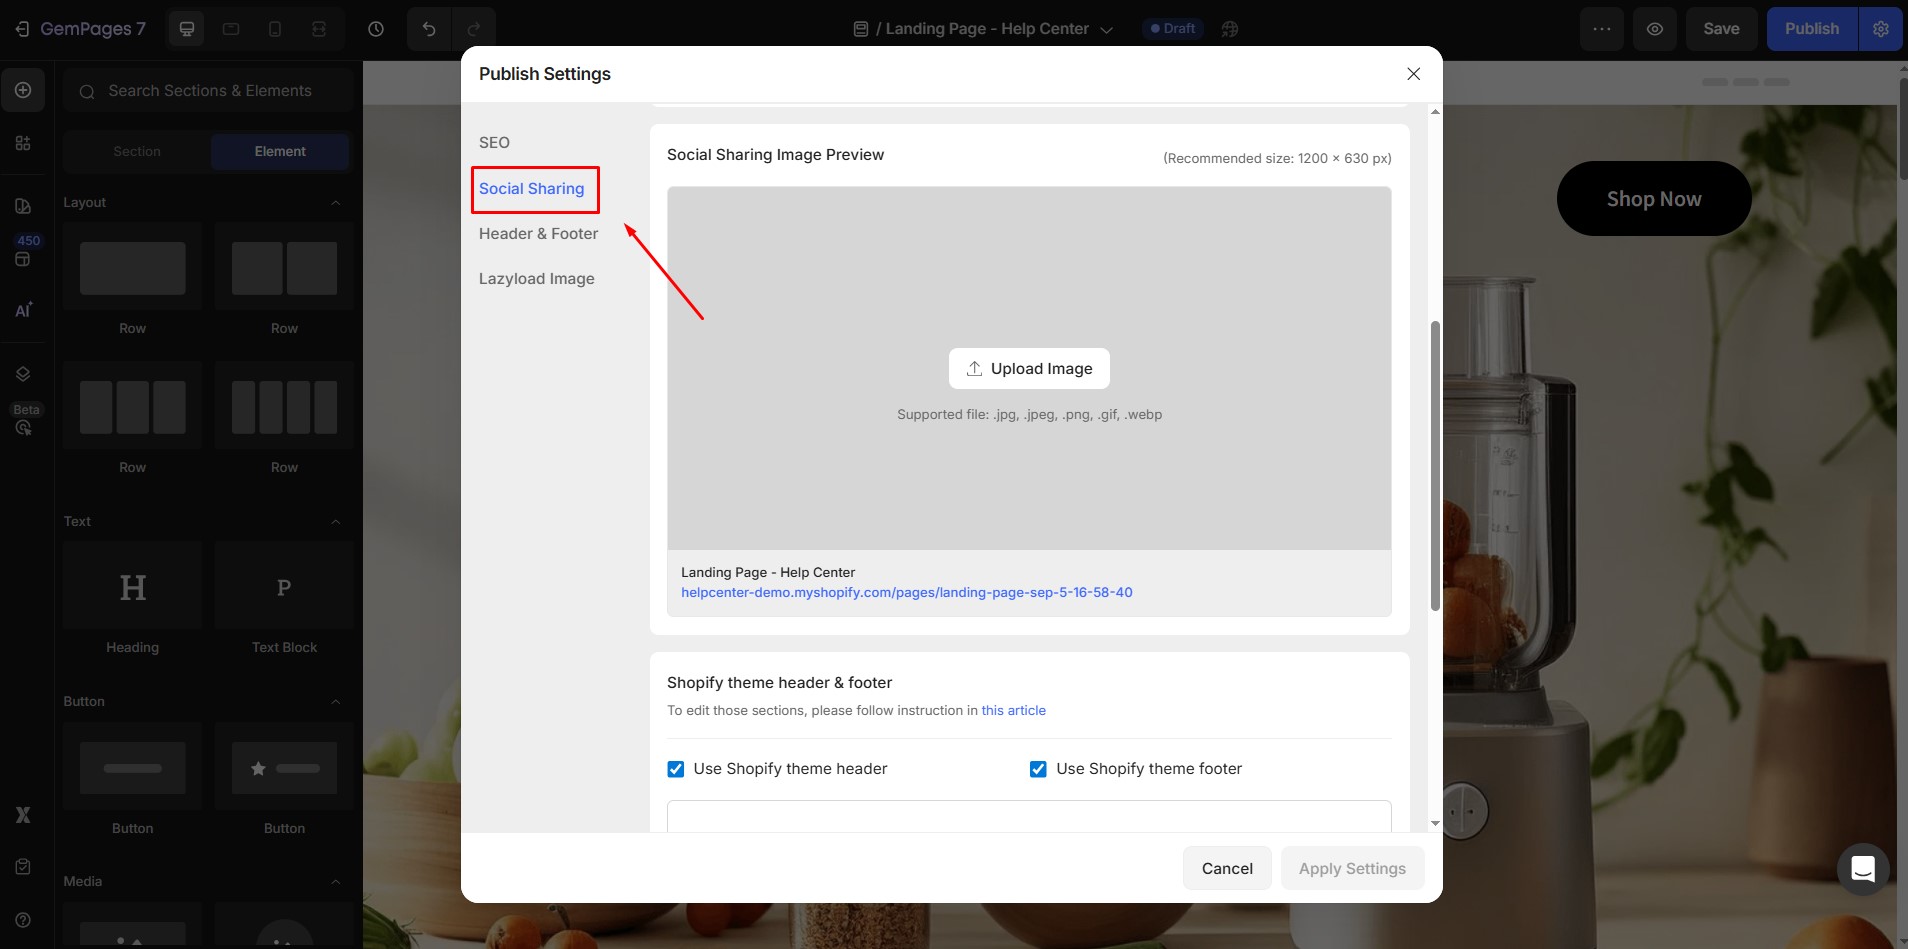
- Upload the image you want to use as the preview.
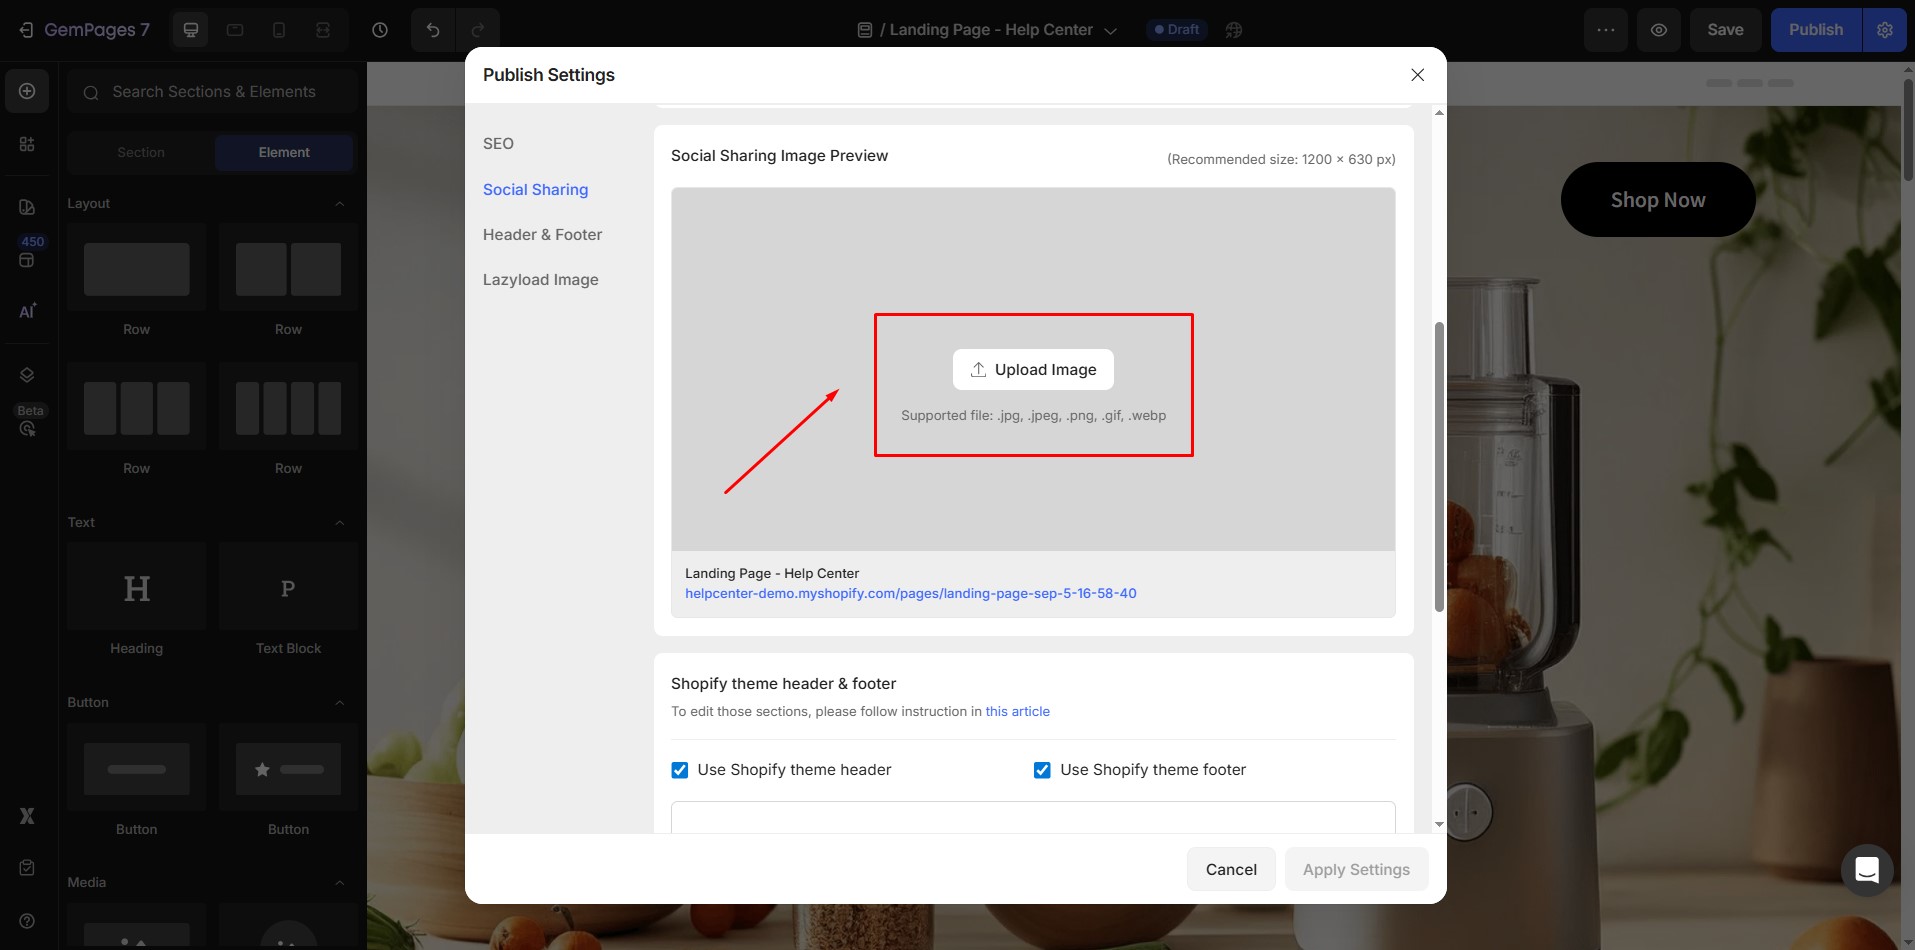
- Save and republish the page.
Troubleshooting: Why Is My Social Preview Image Incorrect?
If the social preview image appears incorrect when sharing your link, it is usually caused by caching from social platforms.
Here are some common solutions:
1. Clear Facebook Cache
Facebook often stores a cached version of your page preview. To refresh it, use the Facebook Sharing Debugger and click Scrape Again to force Facebook to update the preview.
2. Clear Twitter/X Cache
If the issue occurs on X (formerly Twitter), use the Twitter Card Validator to refresh the preview data.
3. Republish Your Page
If you recently updated the image in Shopify or GemPages, make sure the page is saved and republished so the new preview image can be detected.
4. Check Image Size and Format
For best results, use a 1200 × 630 px image in JPG or PNG format. Incorrect sizes may cause cropping or fallback images.
5. Wait for Cache to Update
In some cases, social platforms may take a few minutes to several hours to update the preview after changes are made.


Thank you for your comments