


This article walks you through how to display a cart button above your product image using GemPages v7.
Why add a cart button above the image?
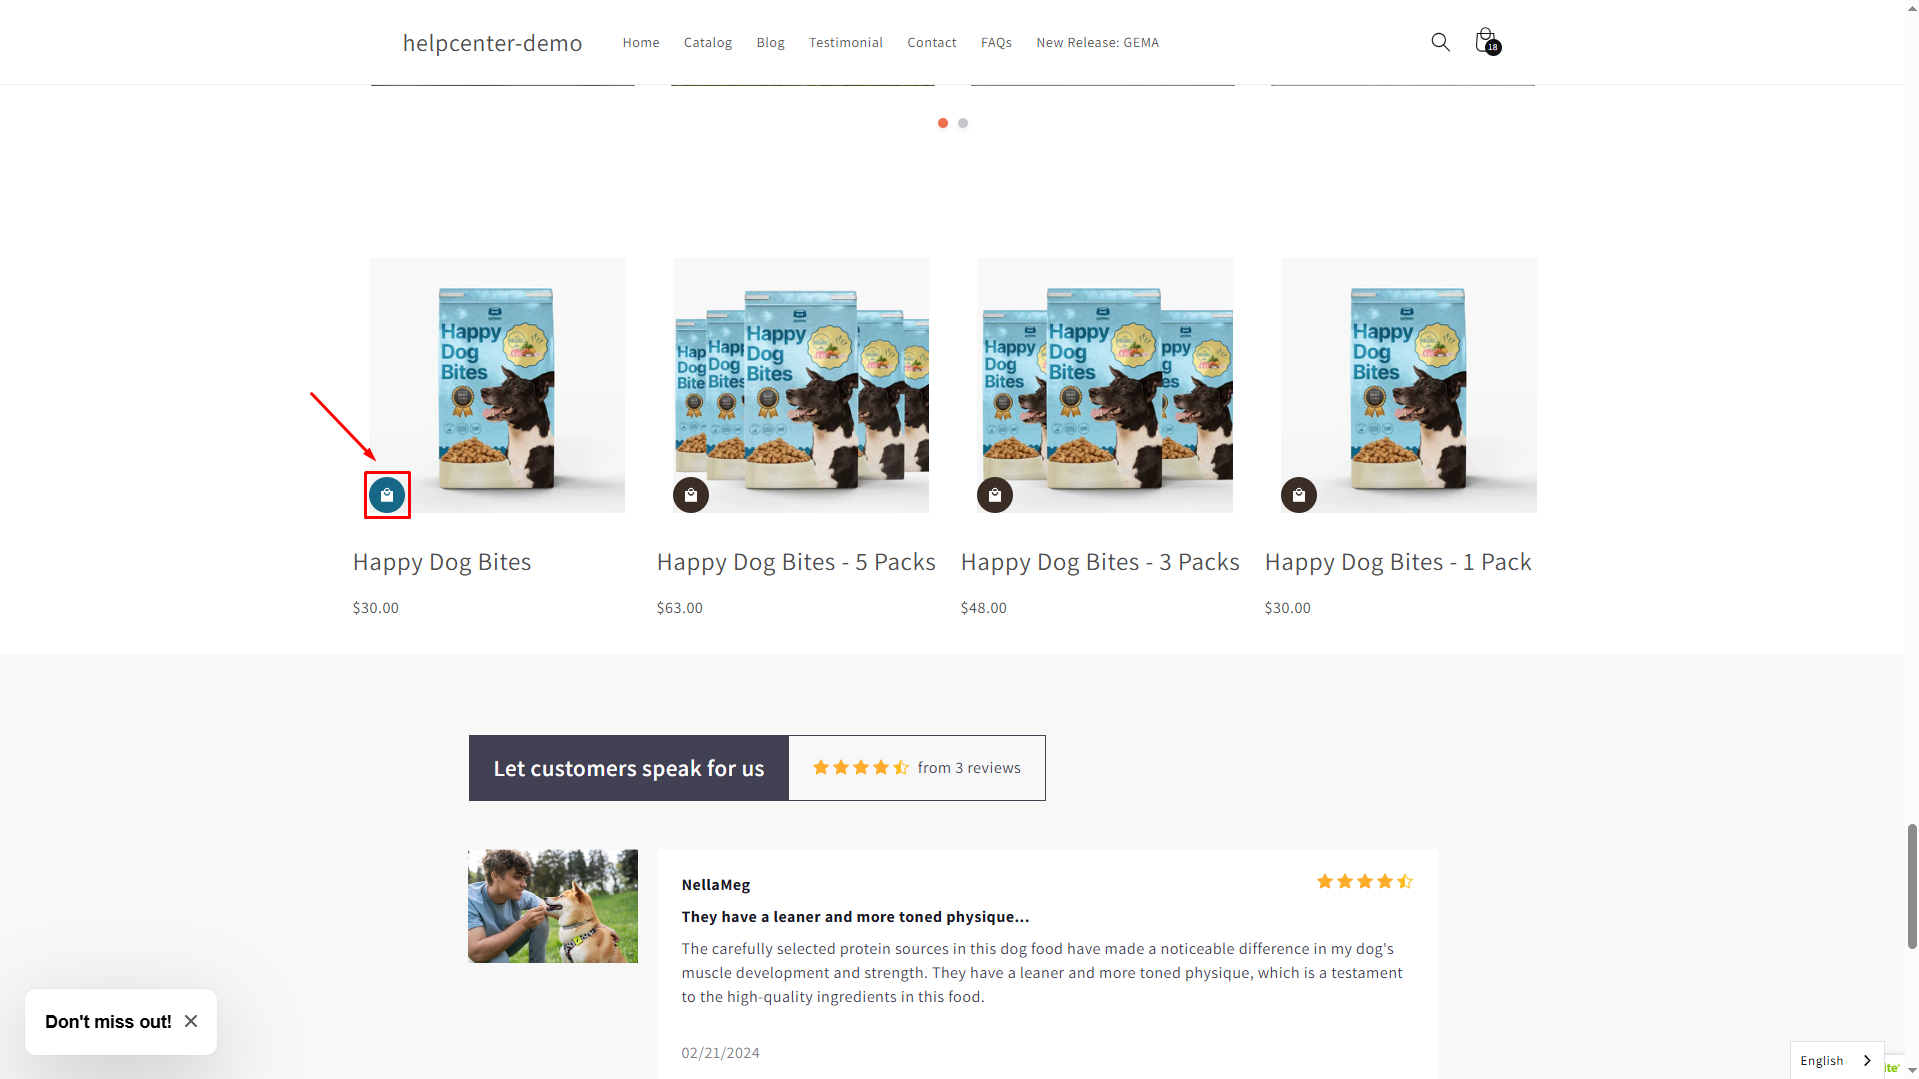
Placing the Add to Cart button directly on the product image helps customers shop faster and more conveniently.
Instead of scrolling down to find the button, they can add items to the cart immediately with one click.
Benefits:
- Reduce friction: Customers don’t have to search for the cart button under the product details.
- Encourage impulse buys: A quick-add option makes it easier for customers to add multiple products in one go.
- Improve mobile experience: On small screens, a button overlay saves space and keeps the layout clean.
- Highlight promotions: You can style the button to match seasonal campaigns or discounts, making it stand out on the image.
How to Display the Cart Button Above the Product Image?
Within GemPages v7, you can design your own product list section with an “Add to Cart” button above the image.
First, from your Shopify admin, navigate to the GemPages Dashboard > Pages. Click on the target page to open the editor.
Then, follow these steps:
Step 1: Add a Product List element to your page
- From the left sidebar, search for the Product List Element, then drag and drop the element to your page.
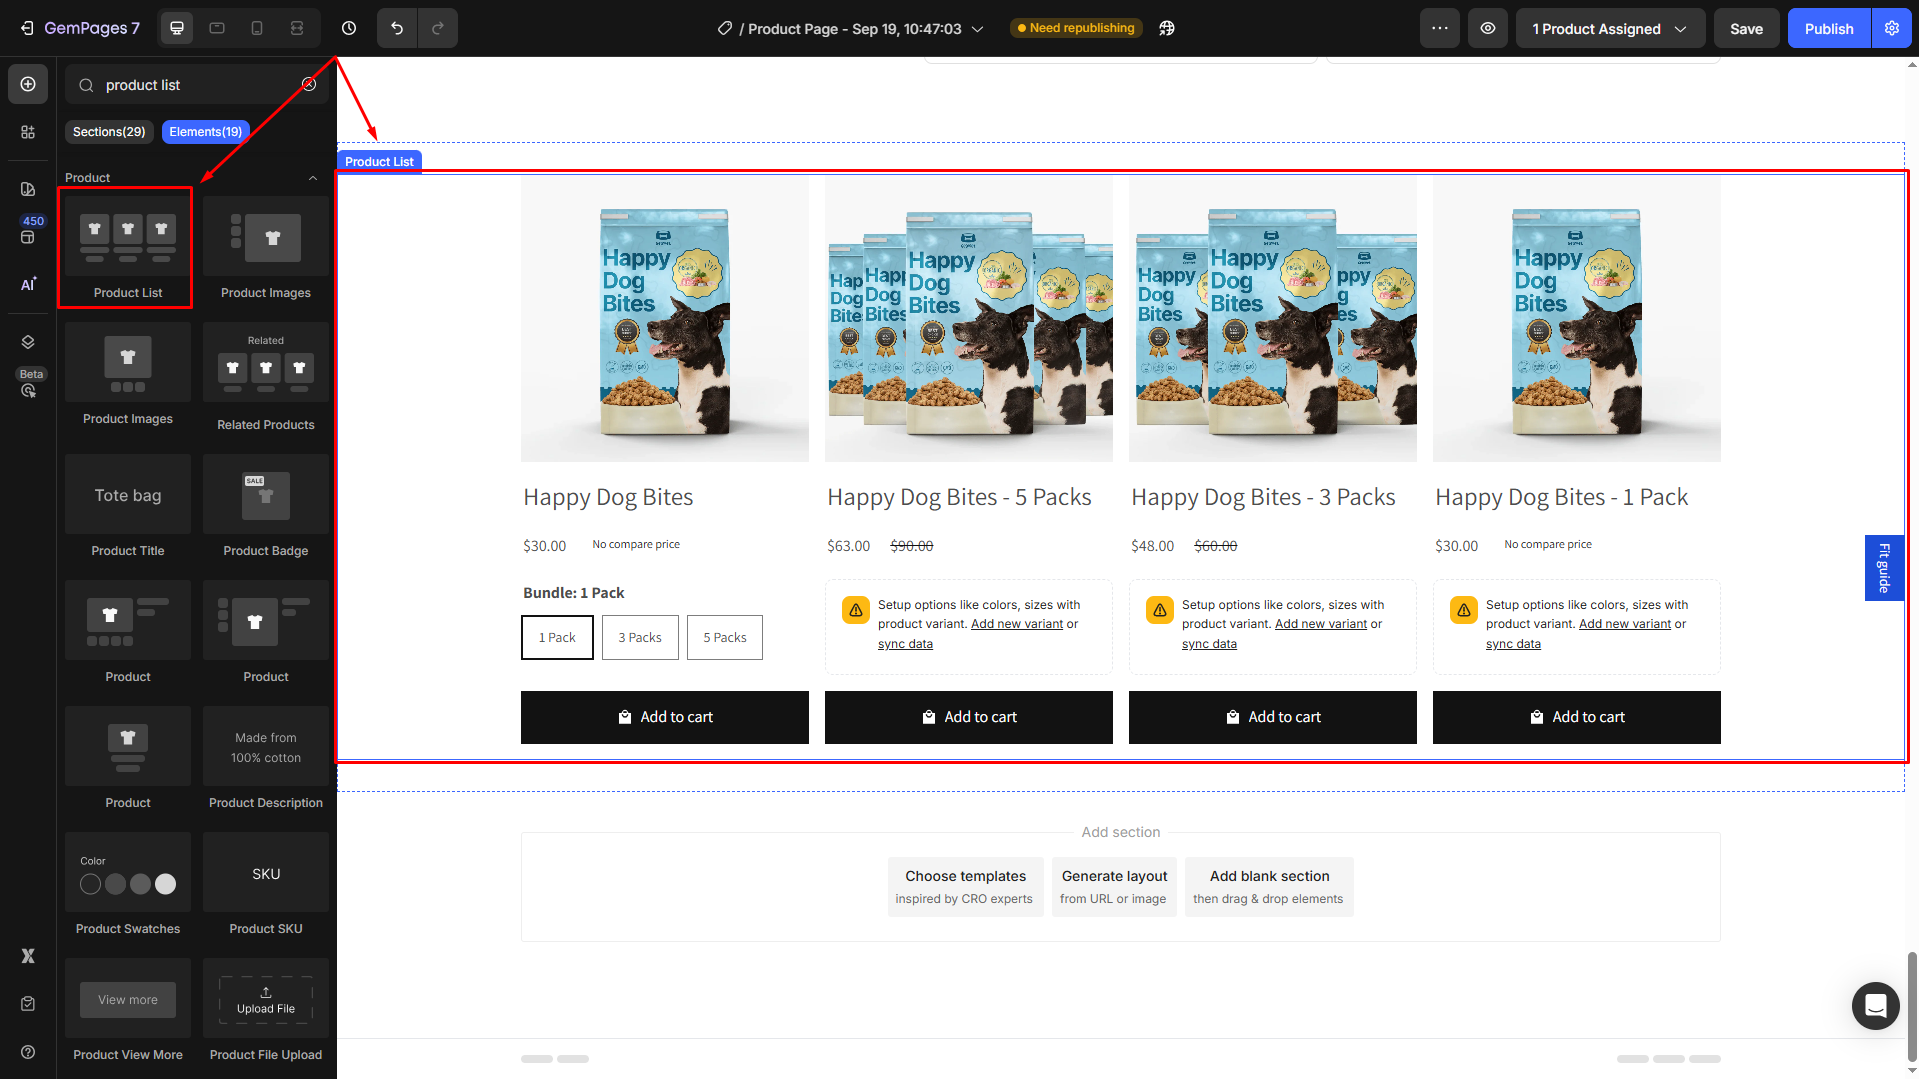
- To ensure a clean design, you can delete several child elements nested in the Product List element.
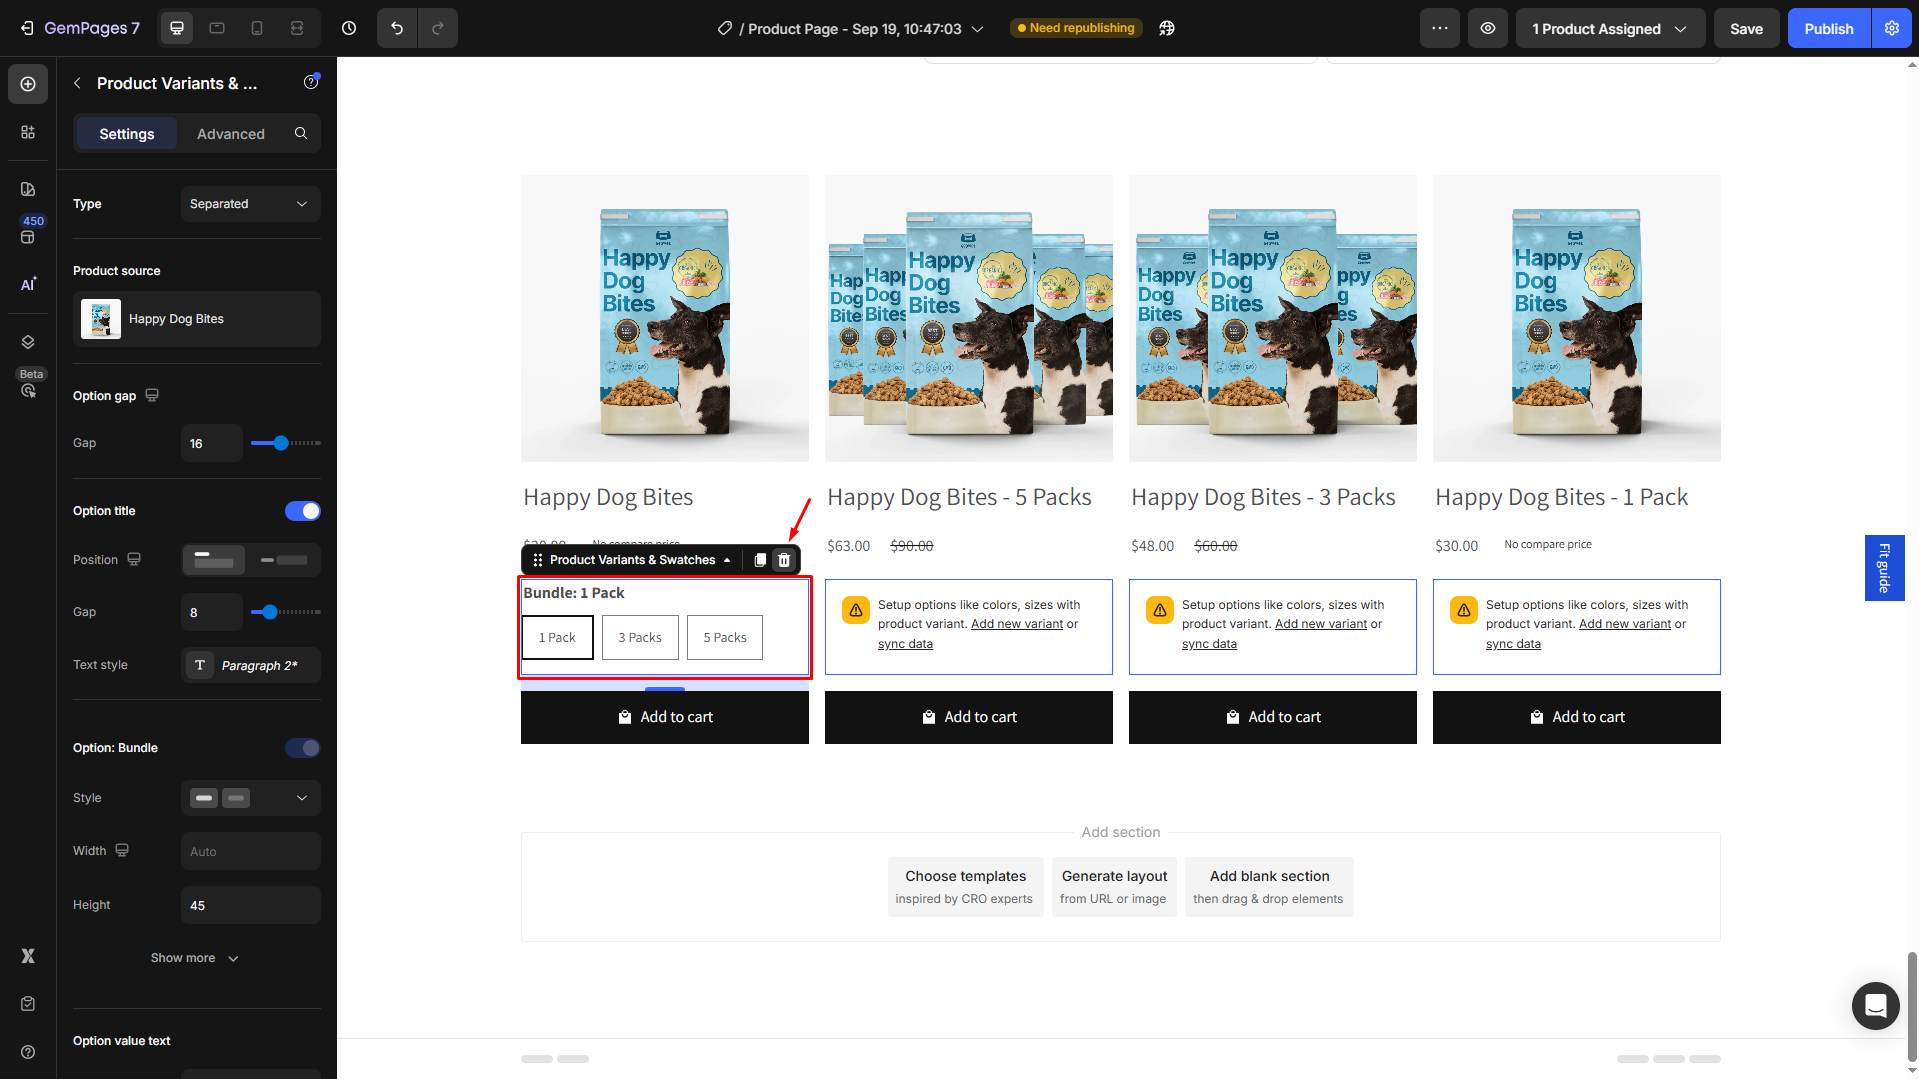
For example, remove the Product Variants & Swatches by clicking on the element and hitting the bin icon.
Step 2: Add a Row element to the Product List element
- From the left sidebar, add a Row Element to the product list you have created in Step 1.
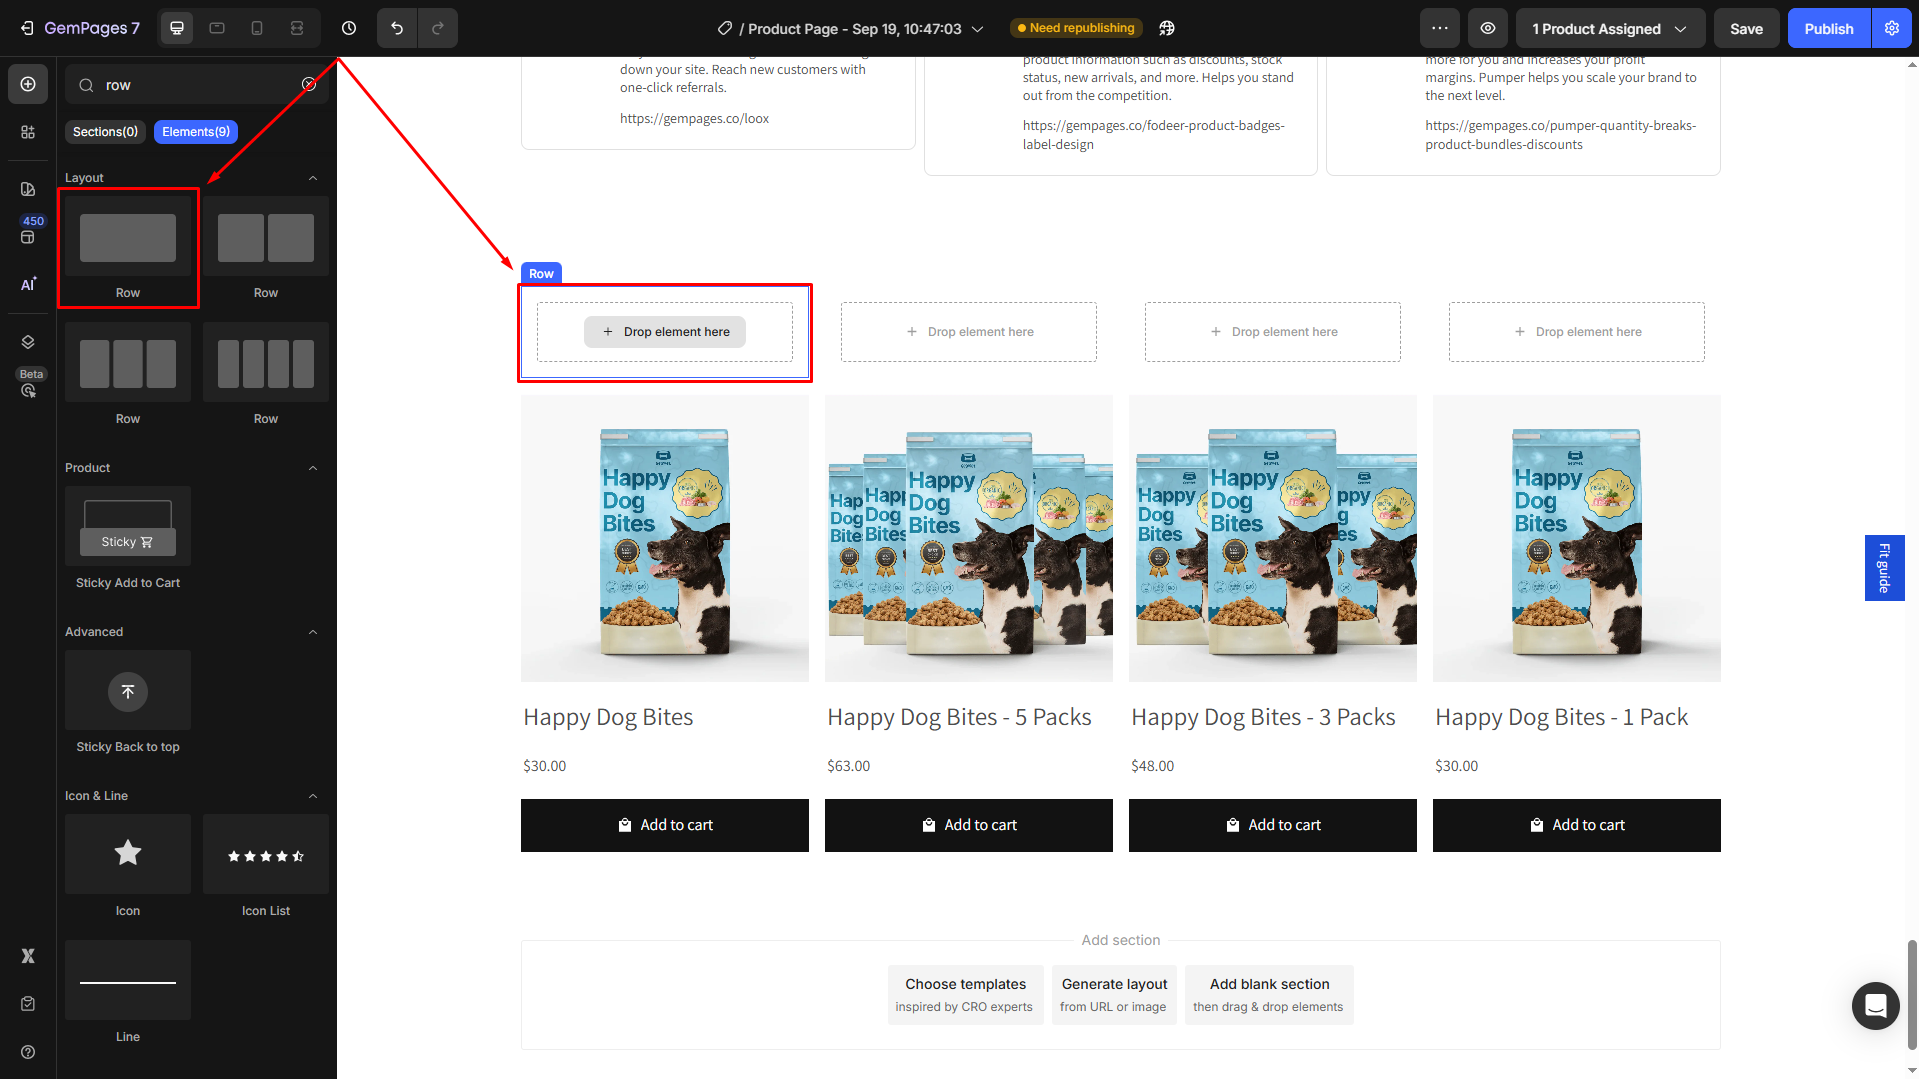
- Drag and drop the Product Image and the Add to Cart Button elements into this row.
Step 3: Configure the Cart Button’s position
- Click on the Add to Cart button element to open its settings panel.
- Go to the Advanced tab > Position.
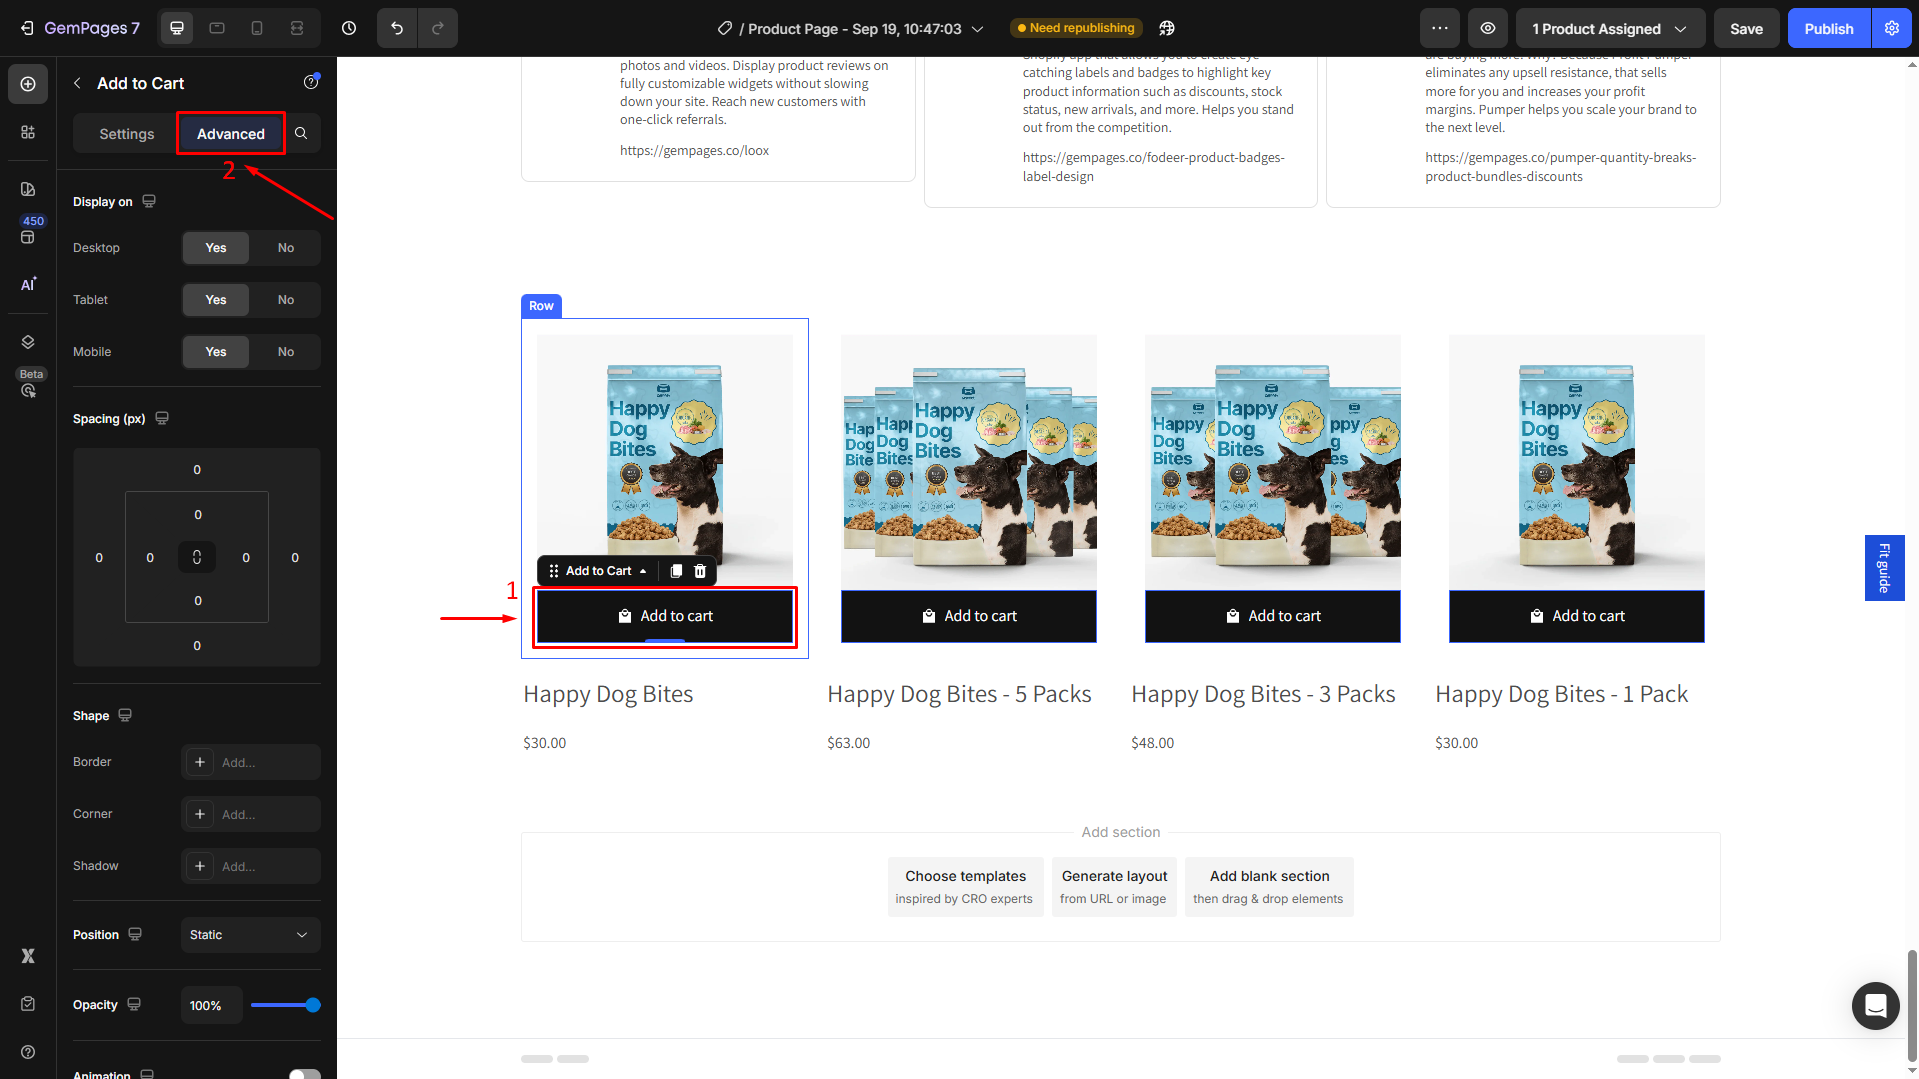
- From the dropdown, select Absolute position.
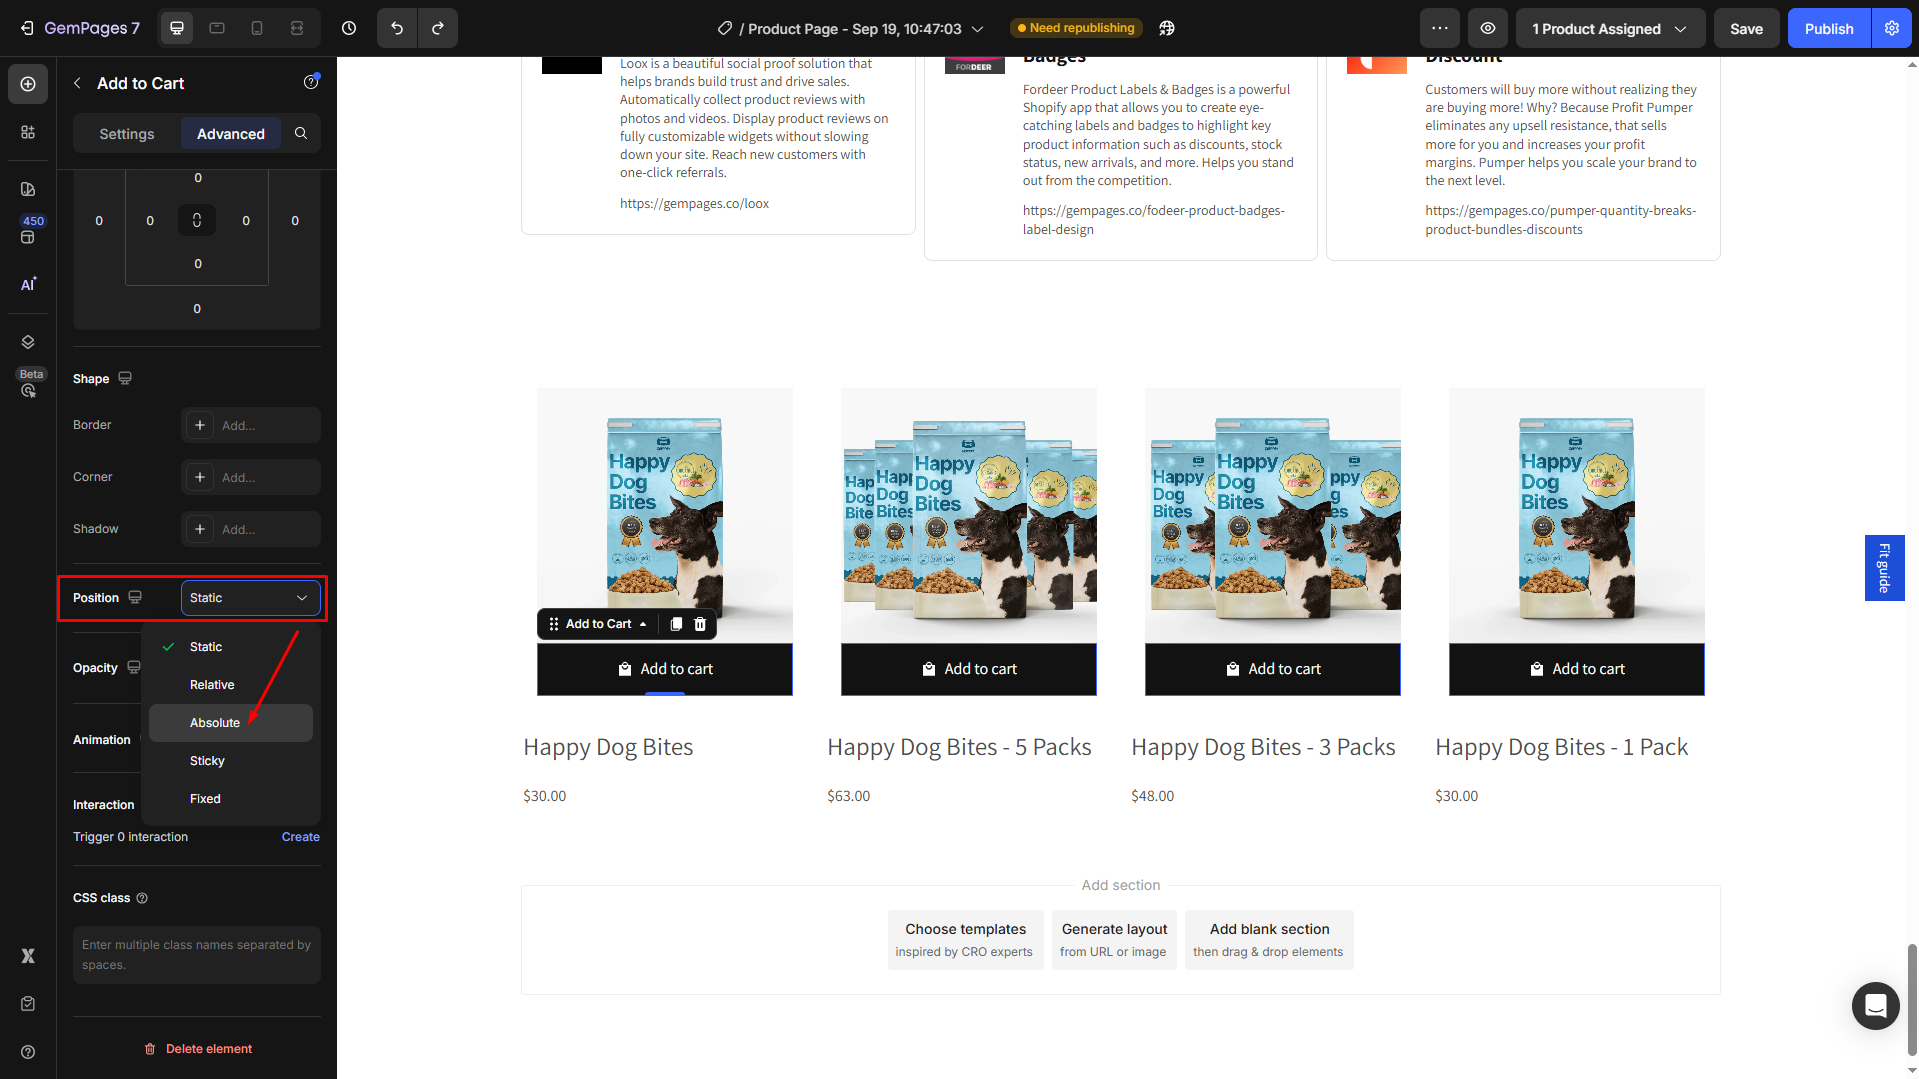
Then, the cart button will be above the product image.
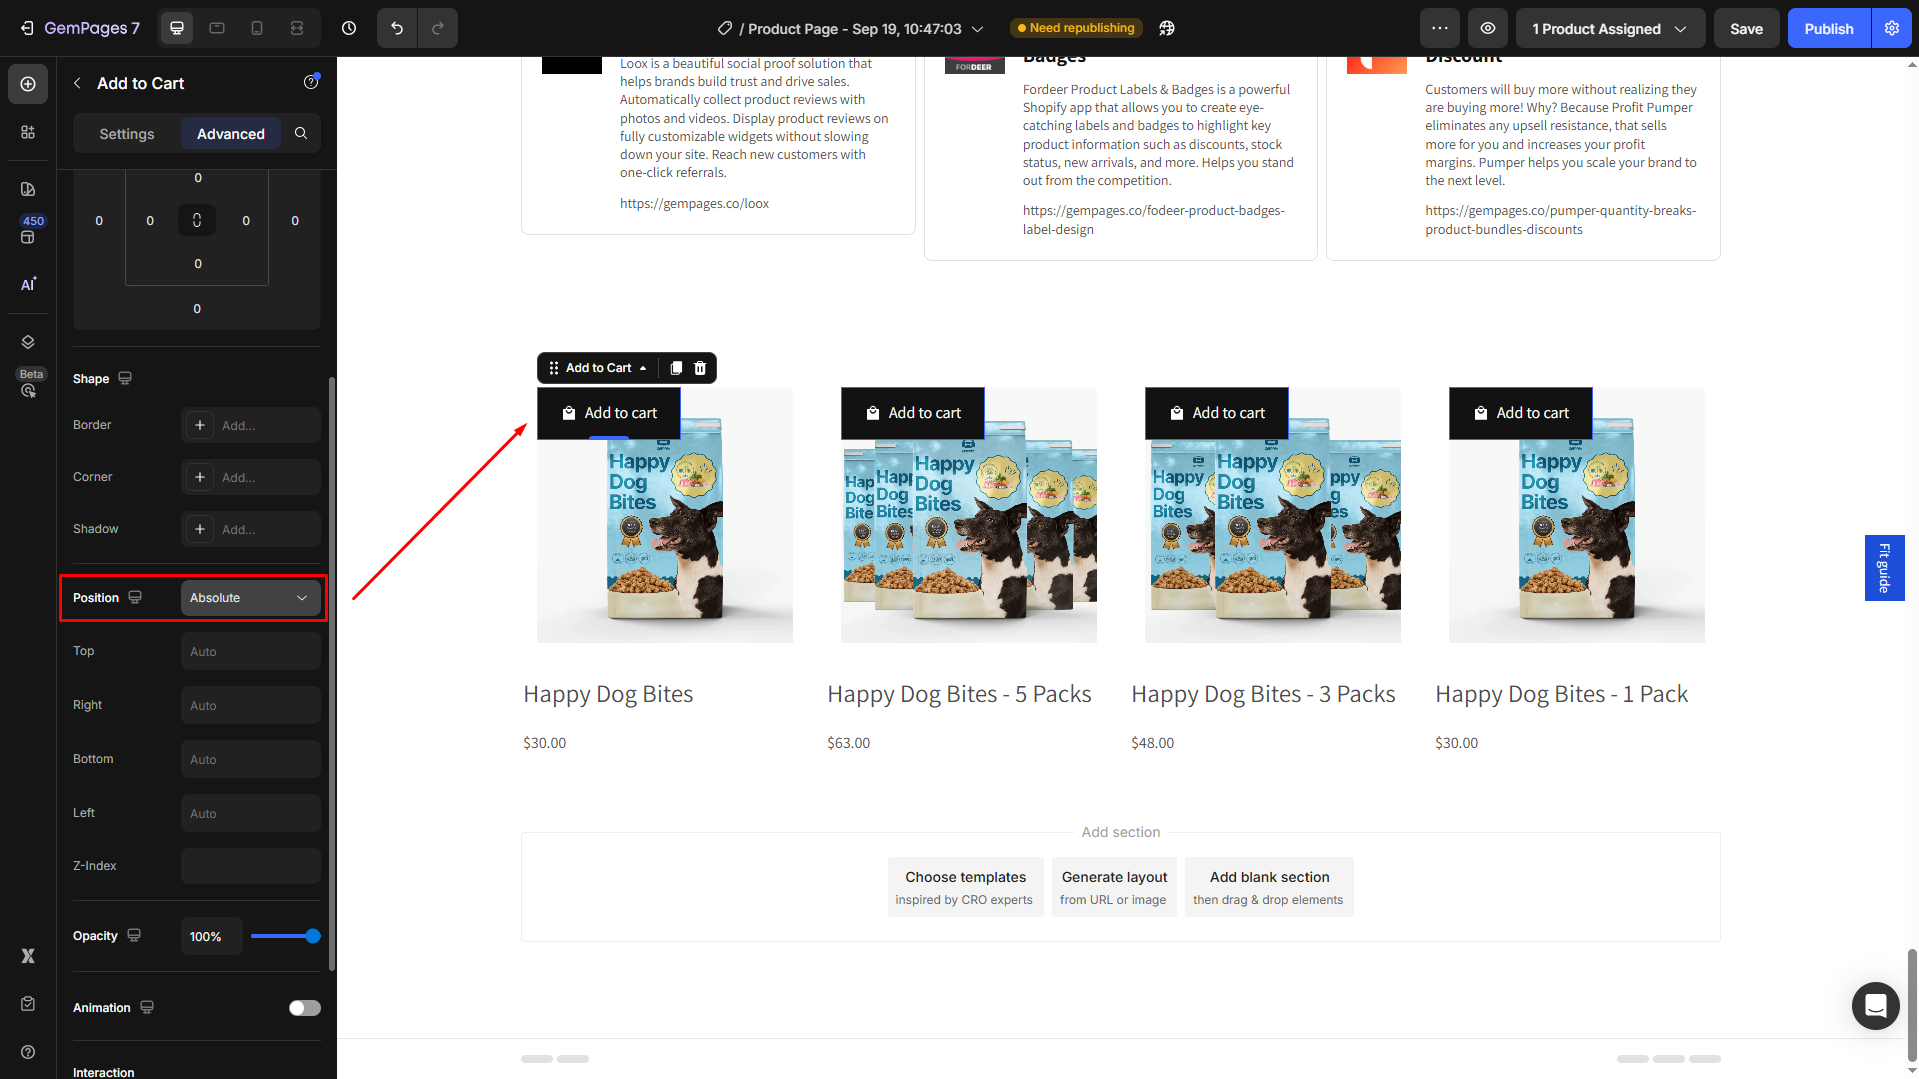
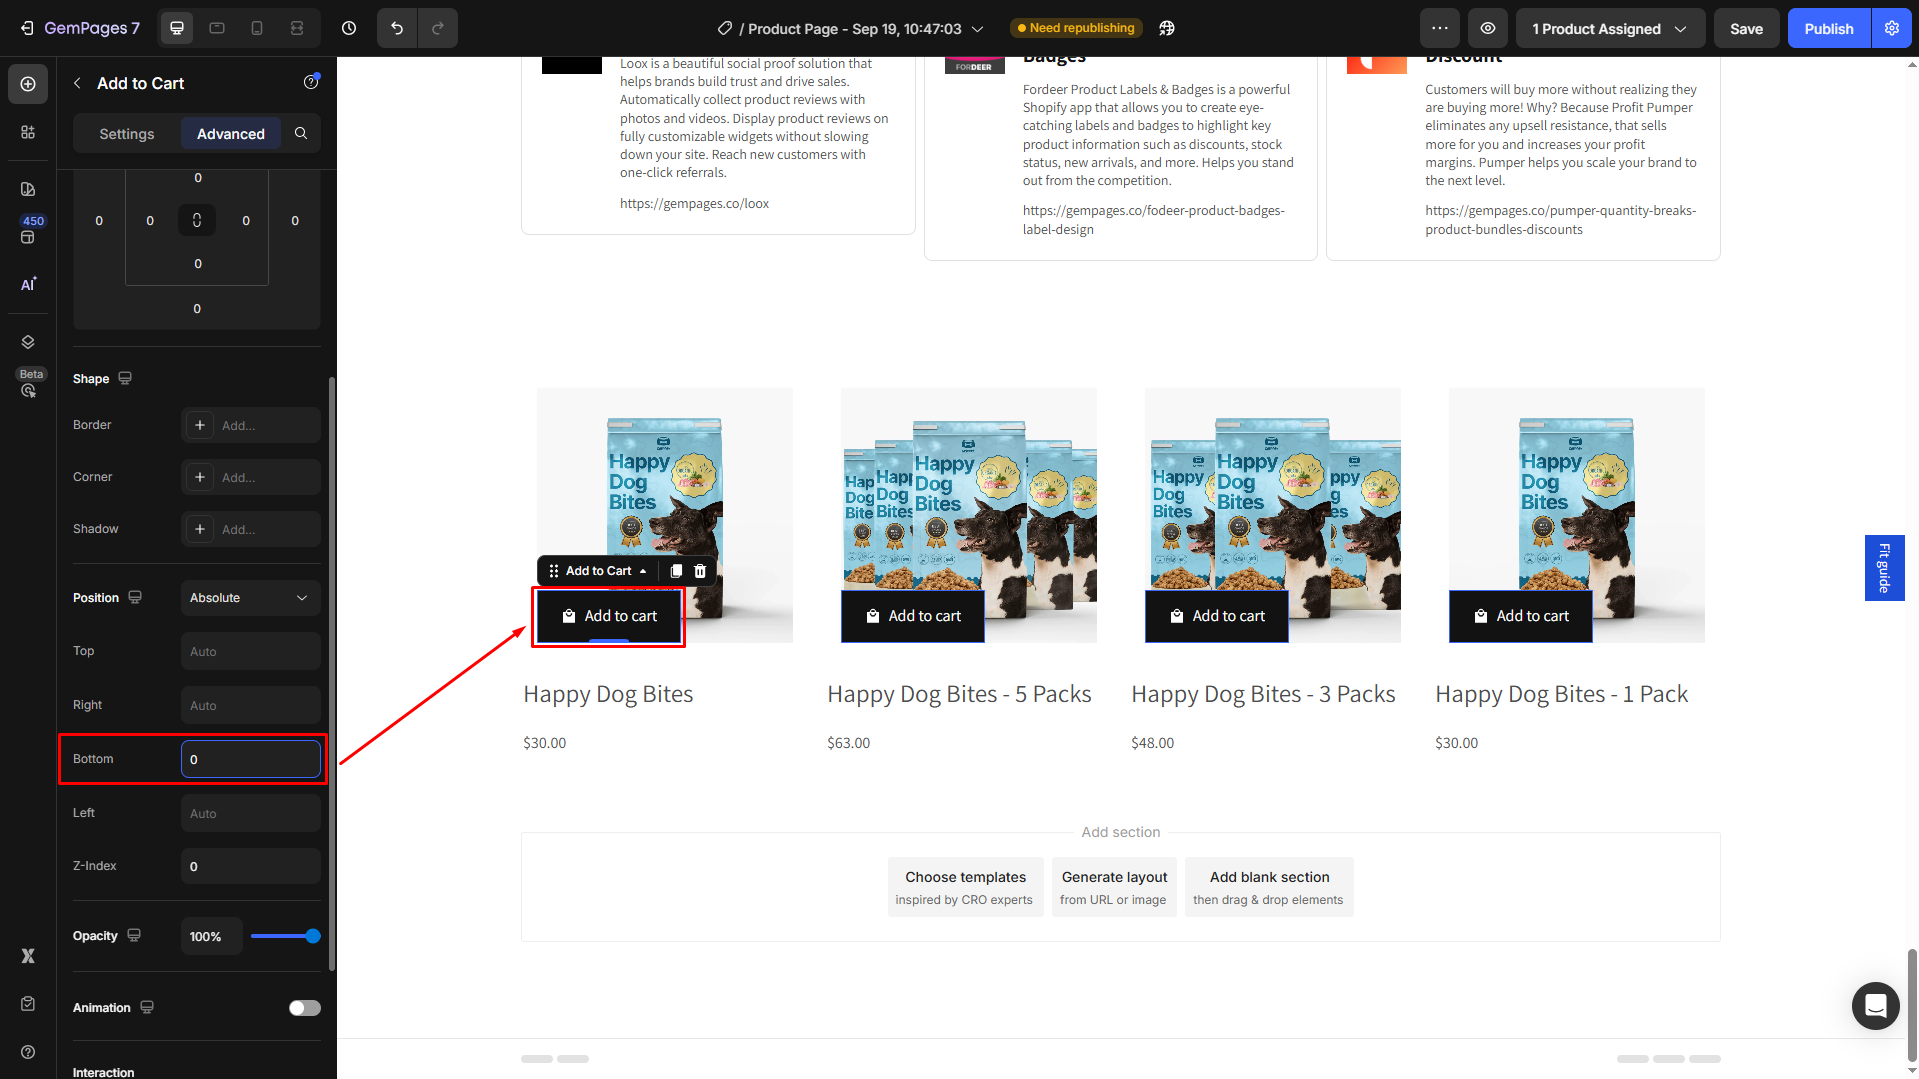
- Set the Bottom = 0 to display the button at the bottom of the image.
- Go back to the Settings tab to configure the button’s visibility as preferred. For example, you can remove the text, change the background color, or set up the hover state.

For further information about configuring the Add to Cart Button element, please refer to this article.
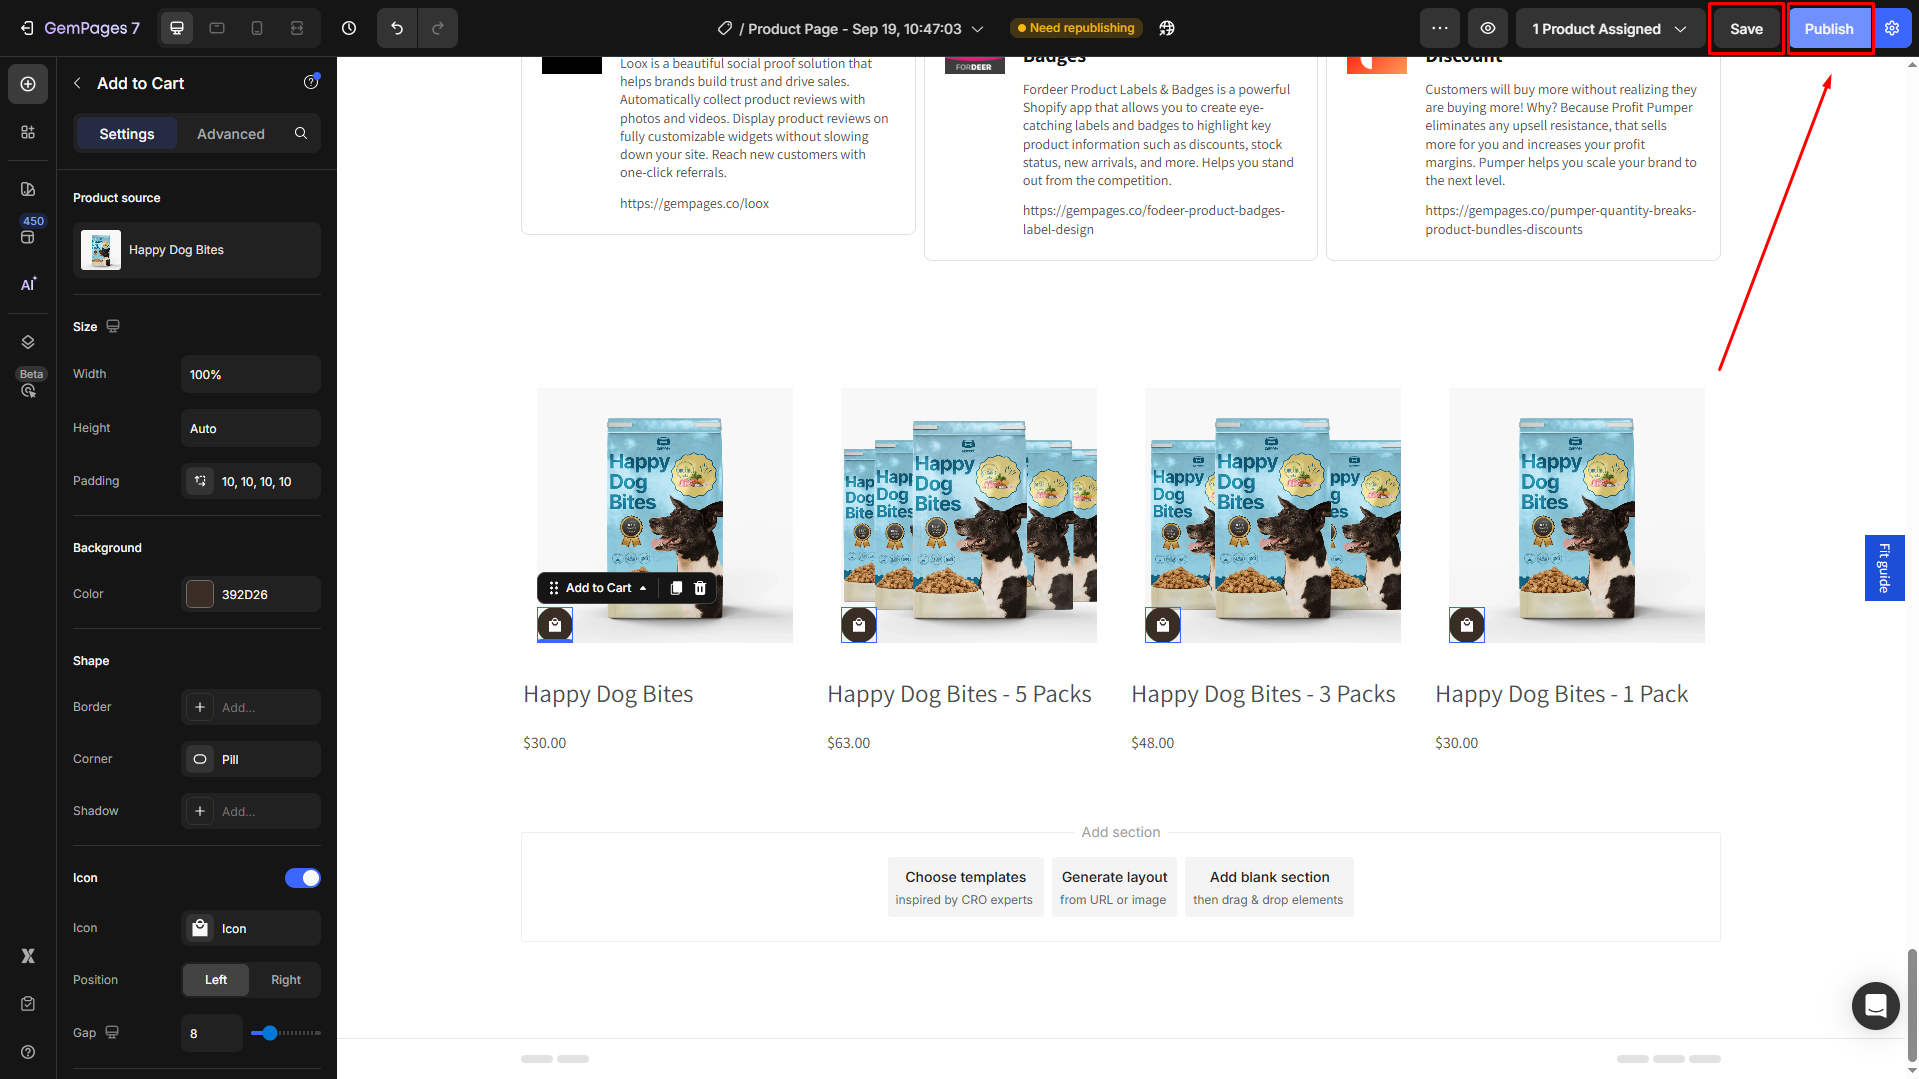
Step 4: Save and publish
- You can preview to check the results by hitting the eye icon on the top bar.
- If everything is fine, save the changes and hit the Publish button to republish your page.
Result:


Thank you for your comments