


Adding a map to your page helps customers easily locate your store, office, or any location relevant to your business. While GemPages Version 6 included a built-in Map element, Version 7 allows you to embed a map using the Custom Code element.
Follow this step-by-step guide to add a map to your GemPages page.
Step 1: Get the Map Embed Code
- Open Google Maps in your browser.
- Enter the address you want to display.
- Click Share > Embed a map.
- Copy the HTML code provided.
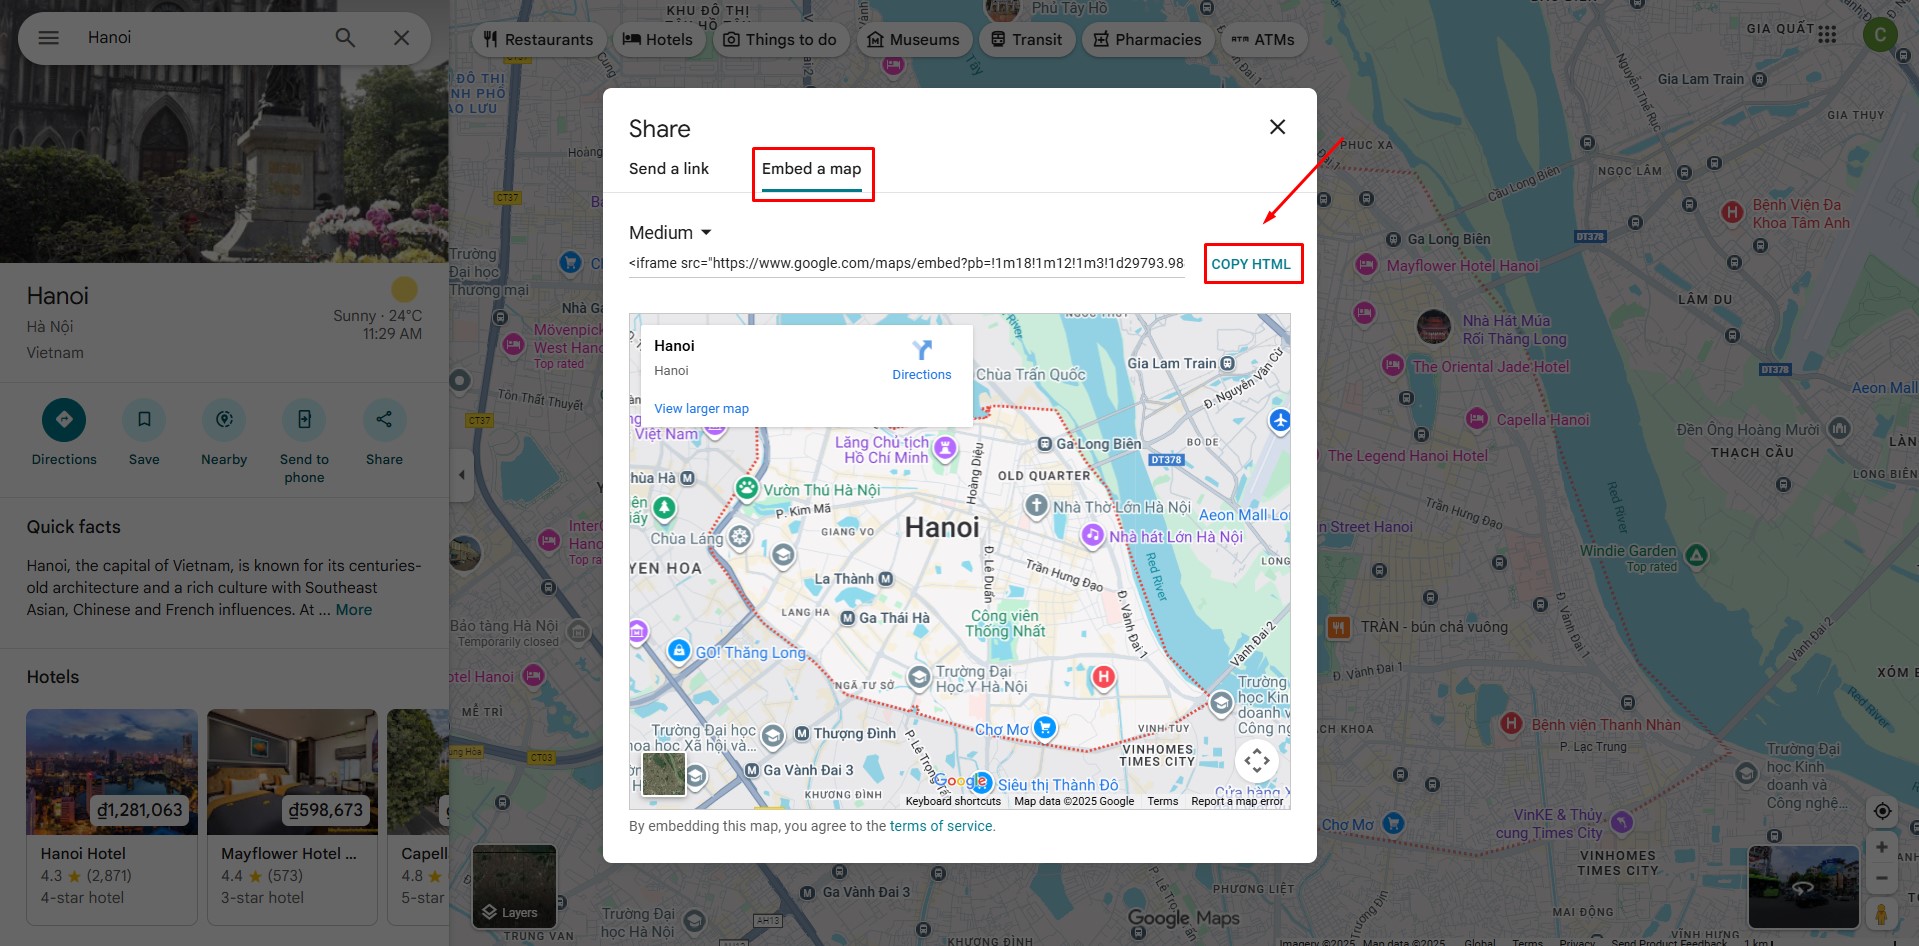 This code will display the map directly on your page.
Step 2: Open the Page in GemPages
- Go to your GemPages Dashboard.
- Open the page where you want to add the map.
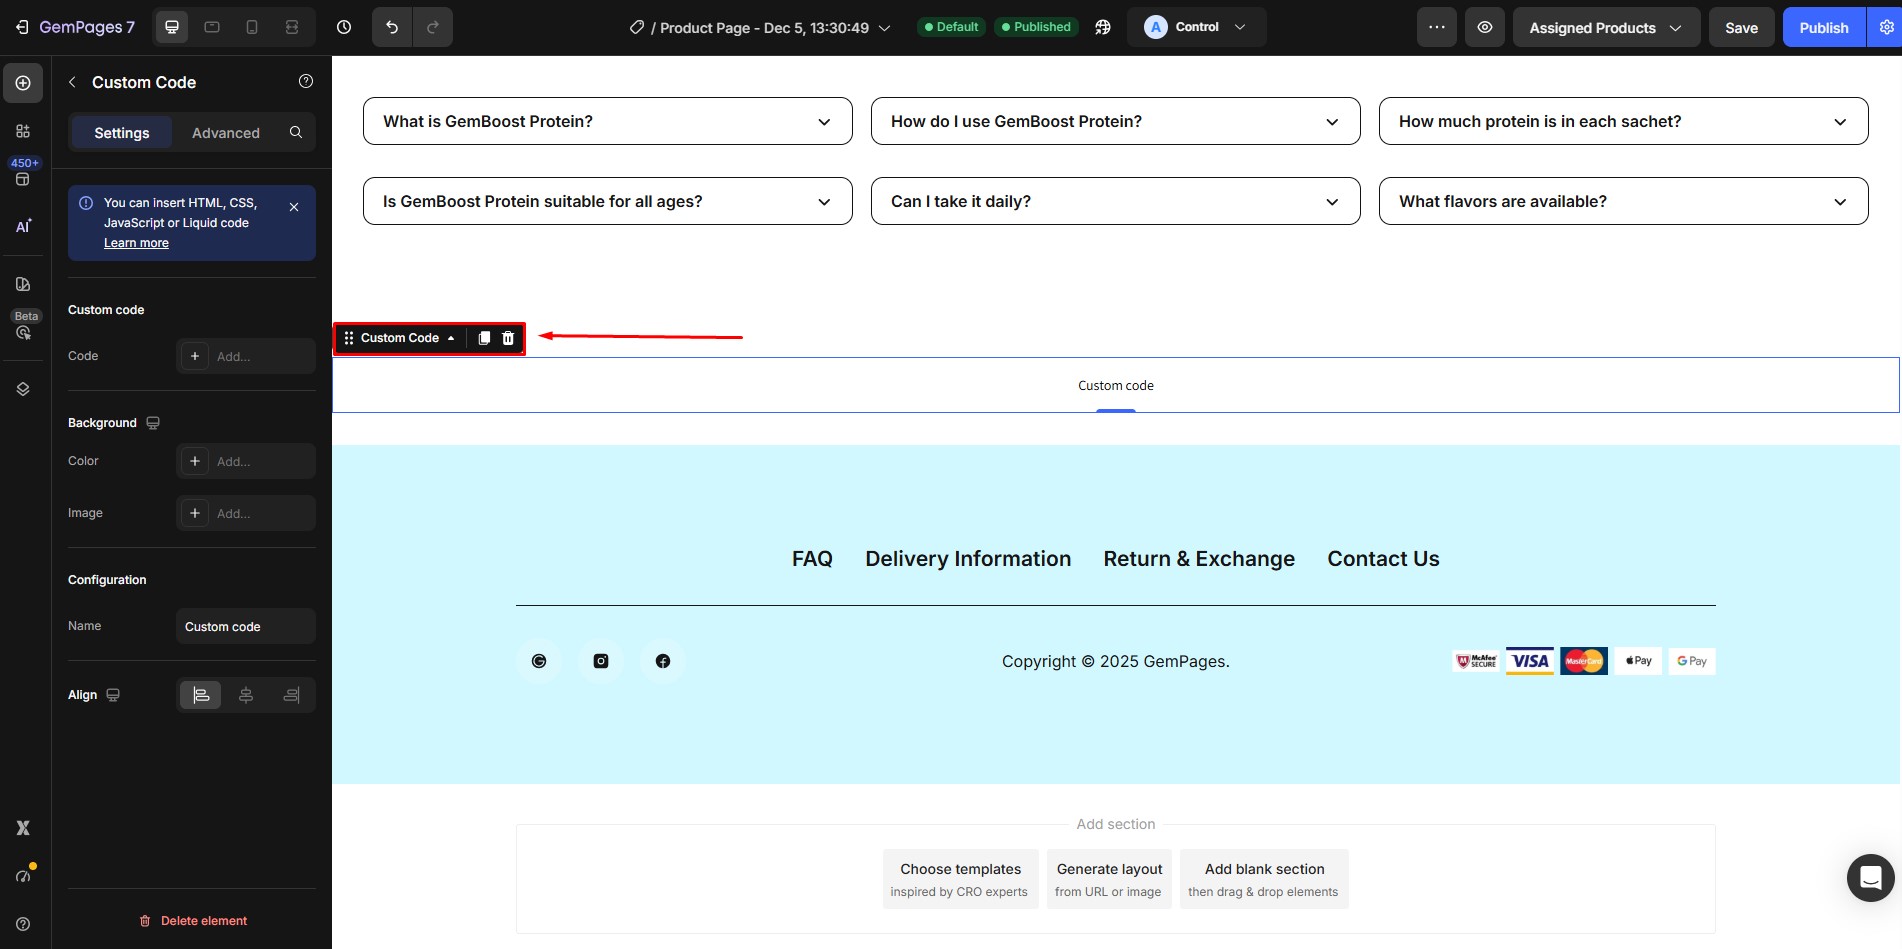
Step 3: Add the Custom Code Element
- In the editor, drag and drop the Custom Code element to the desired position on your page.
- Place it exactly where you want the map to appear.
Step 4: Insert the Map Code
- Double-click the Custom Code element you just added.
- Paste the HTML code you copied from Google Maps into the editor.
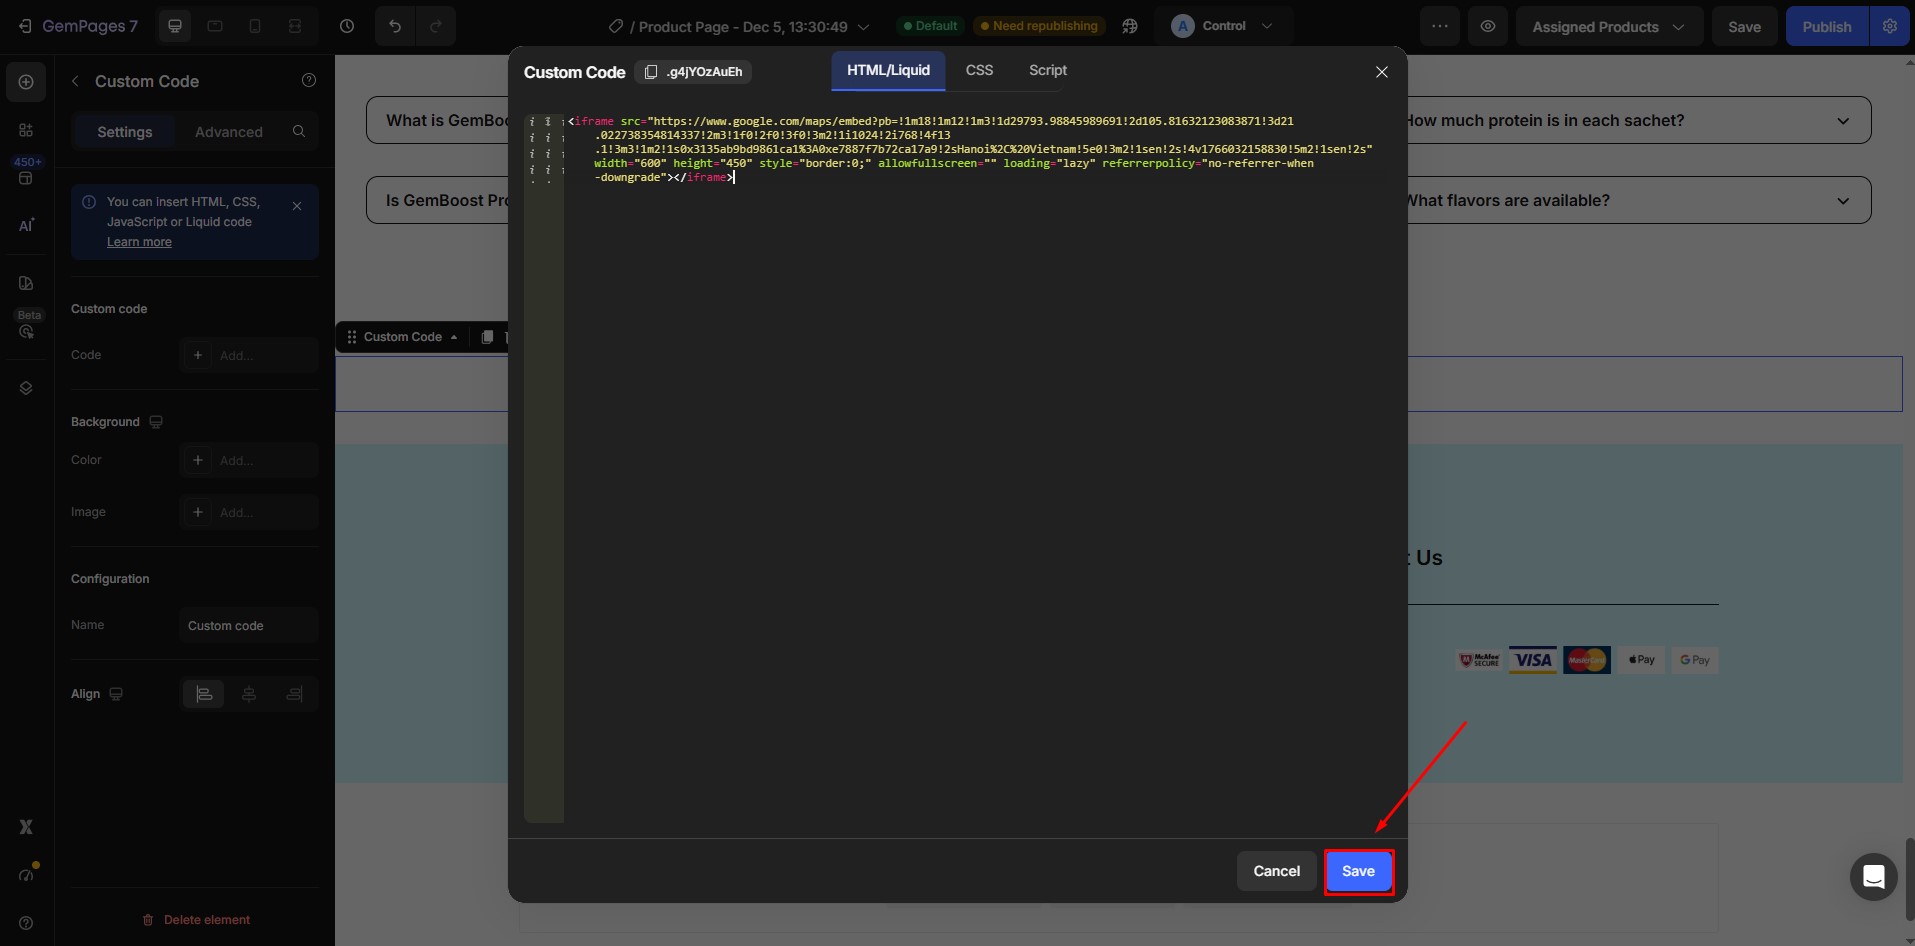
- Click Save when finished.
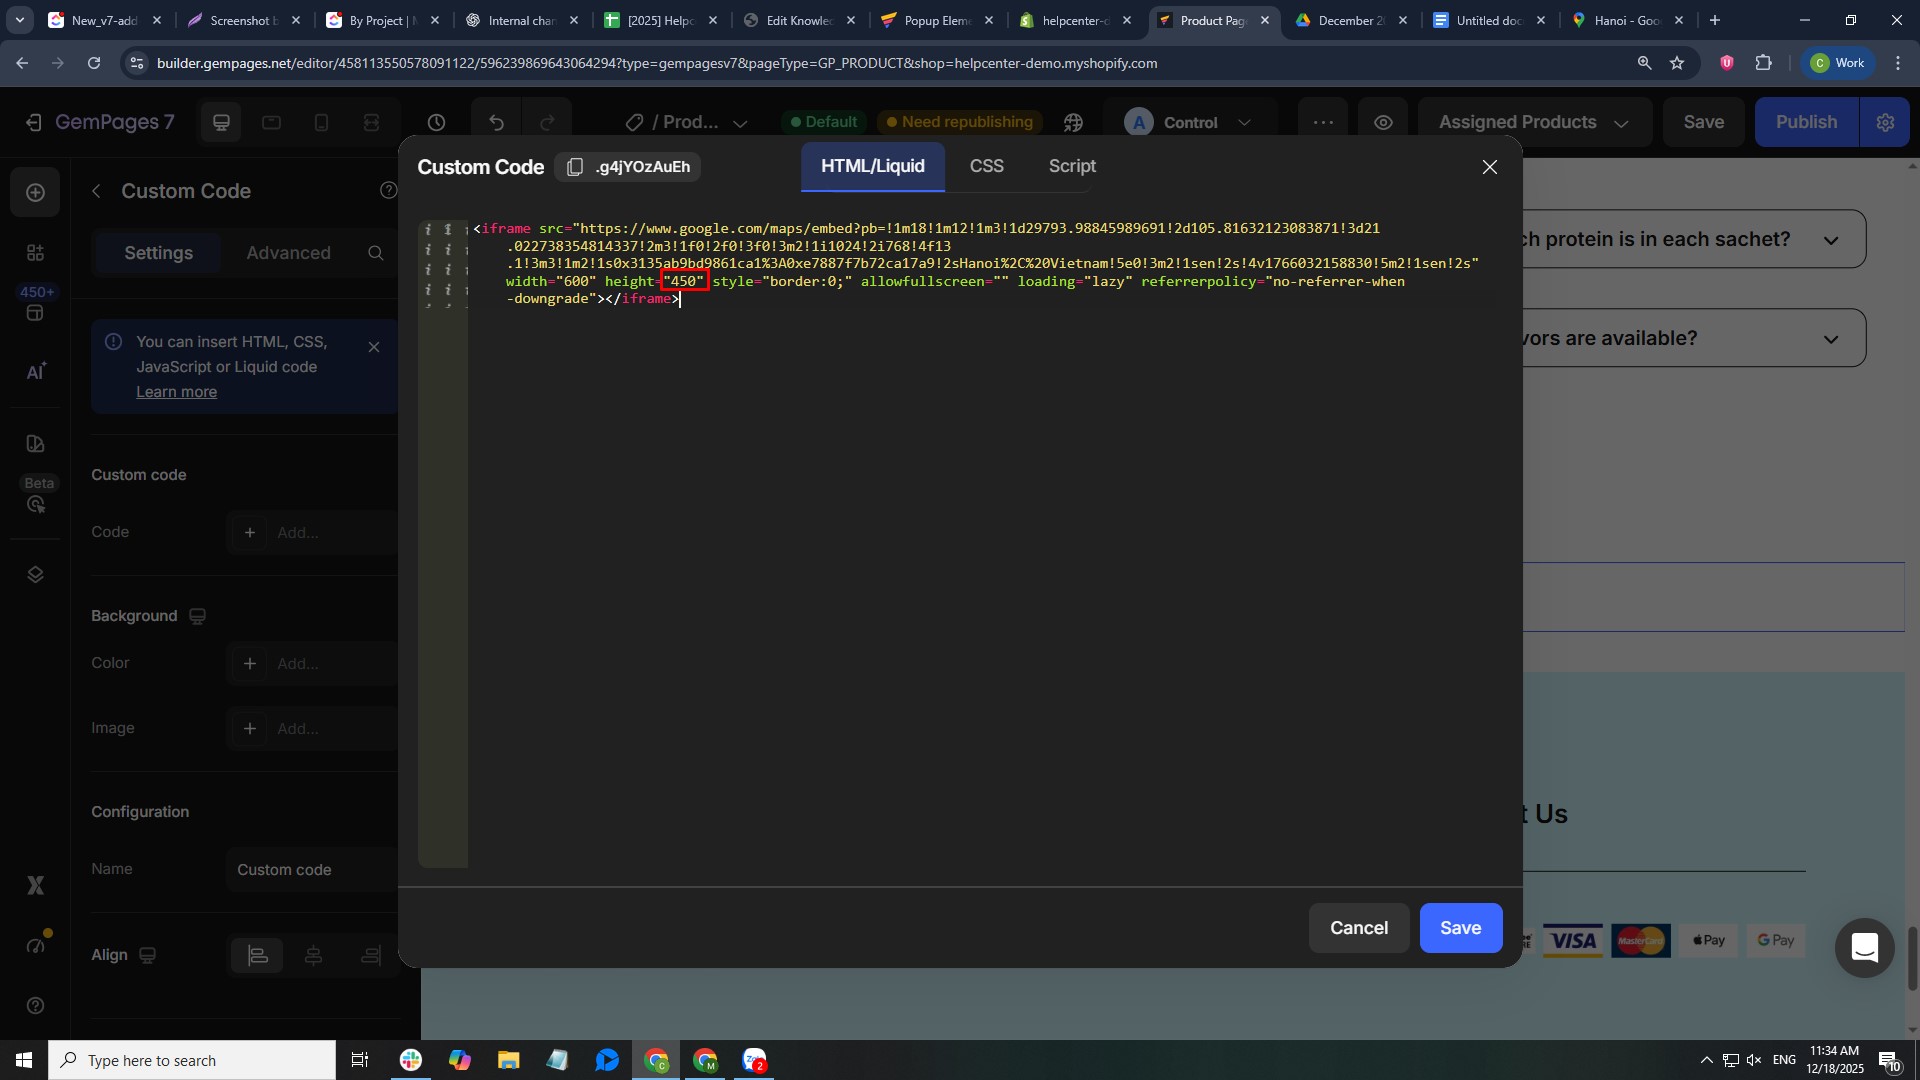
Note: You can adjust the height of the map directly in the HTML code to better fit your page layout.
Step 5: Save and Publish
- After inserting the map code, click Save in the GemPages editor.
- Click Publish to make the changes live on your store.


Thank you for your comments