


Why the Table of Contents Matters
Adding a Table of Contents (TOC) helps both your readers and search engines understand your content structure better.
- Improves readability: Readers can quickly scan your article and jump straight to the section they’re most interested in.
- Enhances user experience: Especially for long-form blogs, a TOC keeps your layout organized and easy to navigate.
- Boosts SEO performance: Search engines use anchor links in a TOC to understand your page hierarchy, which can improve your chances of appearing in rich snippets.
- Reduces bounce rate: Visitors are more likely to stay longer when they can easily find the information they need.
How to Create a Table of Contents in GemPages?
In this article, let’s walk through the steps to build a dropdown table of contents with H2 headings for your blog page.
Step 1: Access the GemPages Editor
- From your Shopify admin, go to the GemPages Builder > Pages > Blog post.
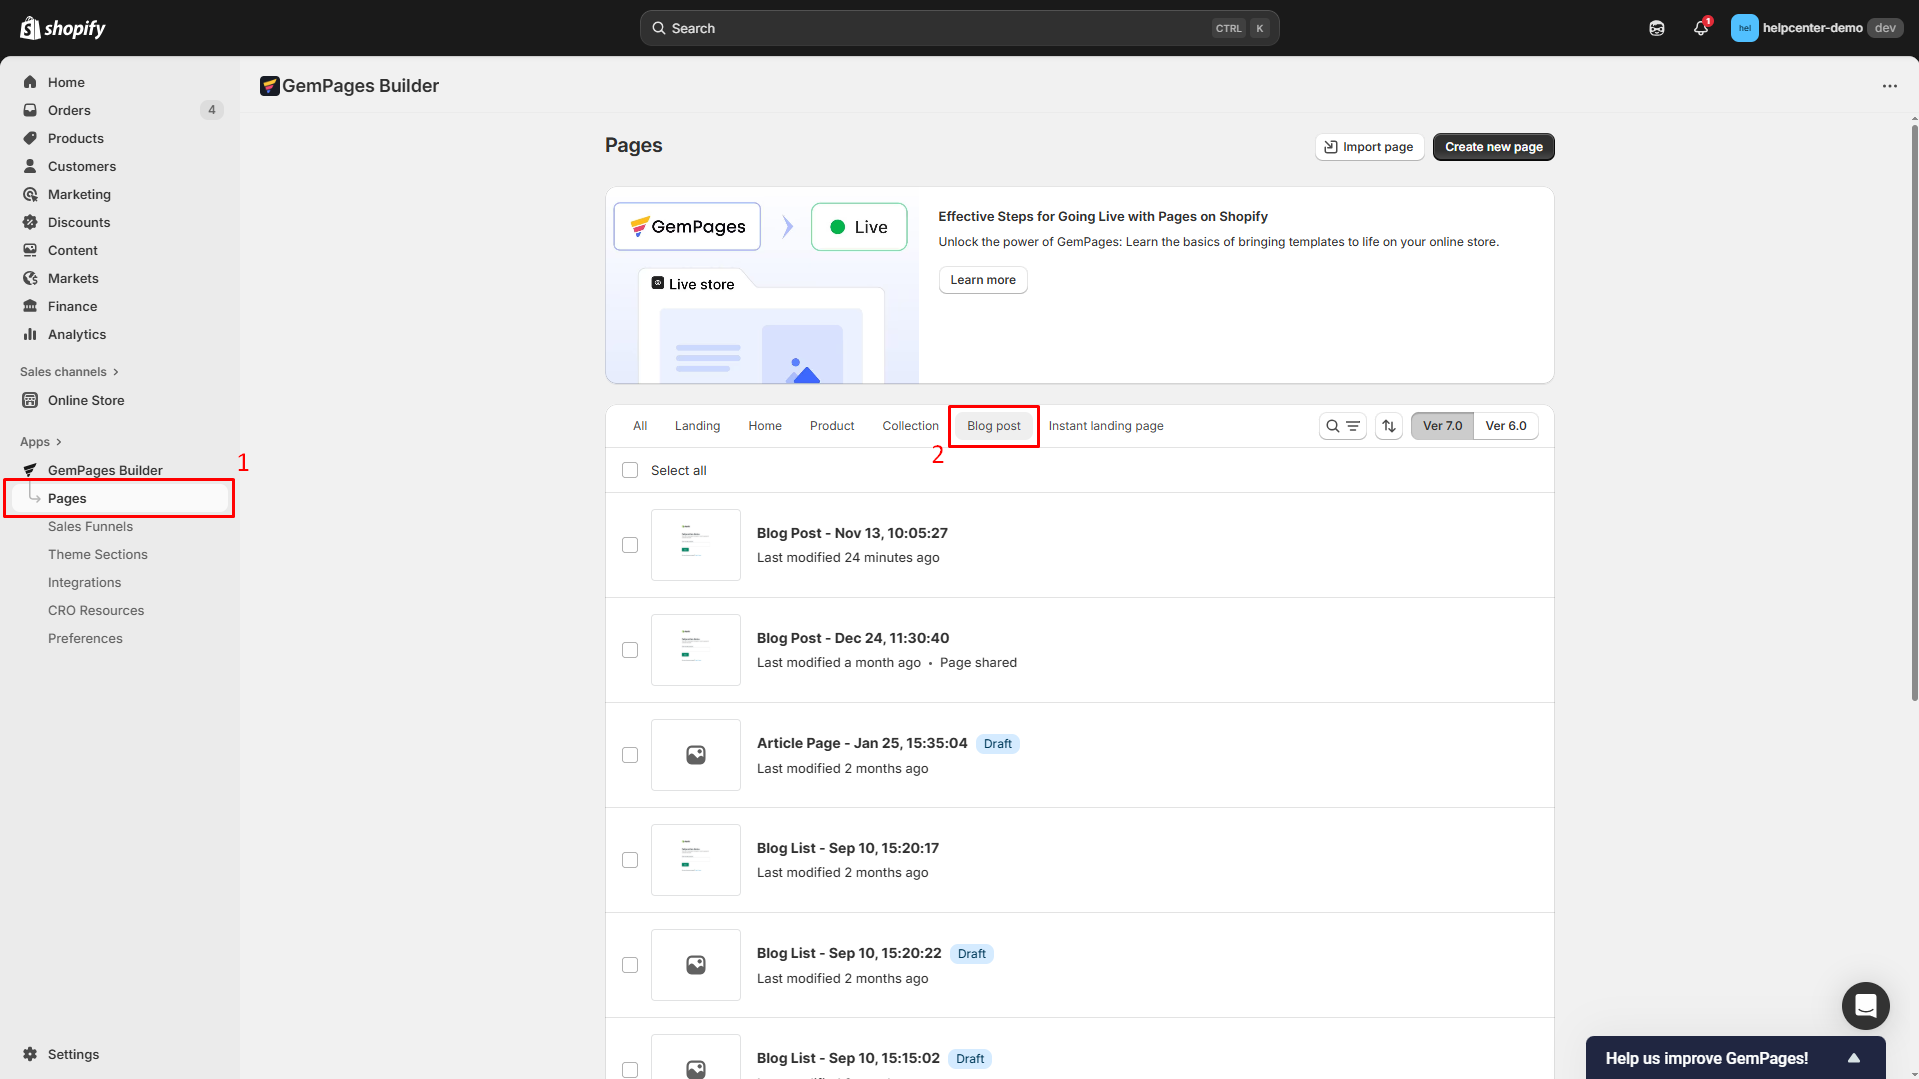
- Click on the target blog post that you want to add a table of contents to.
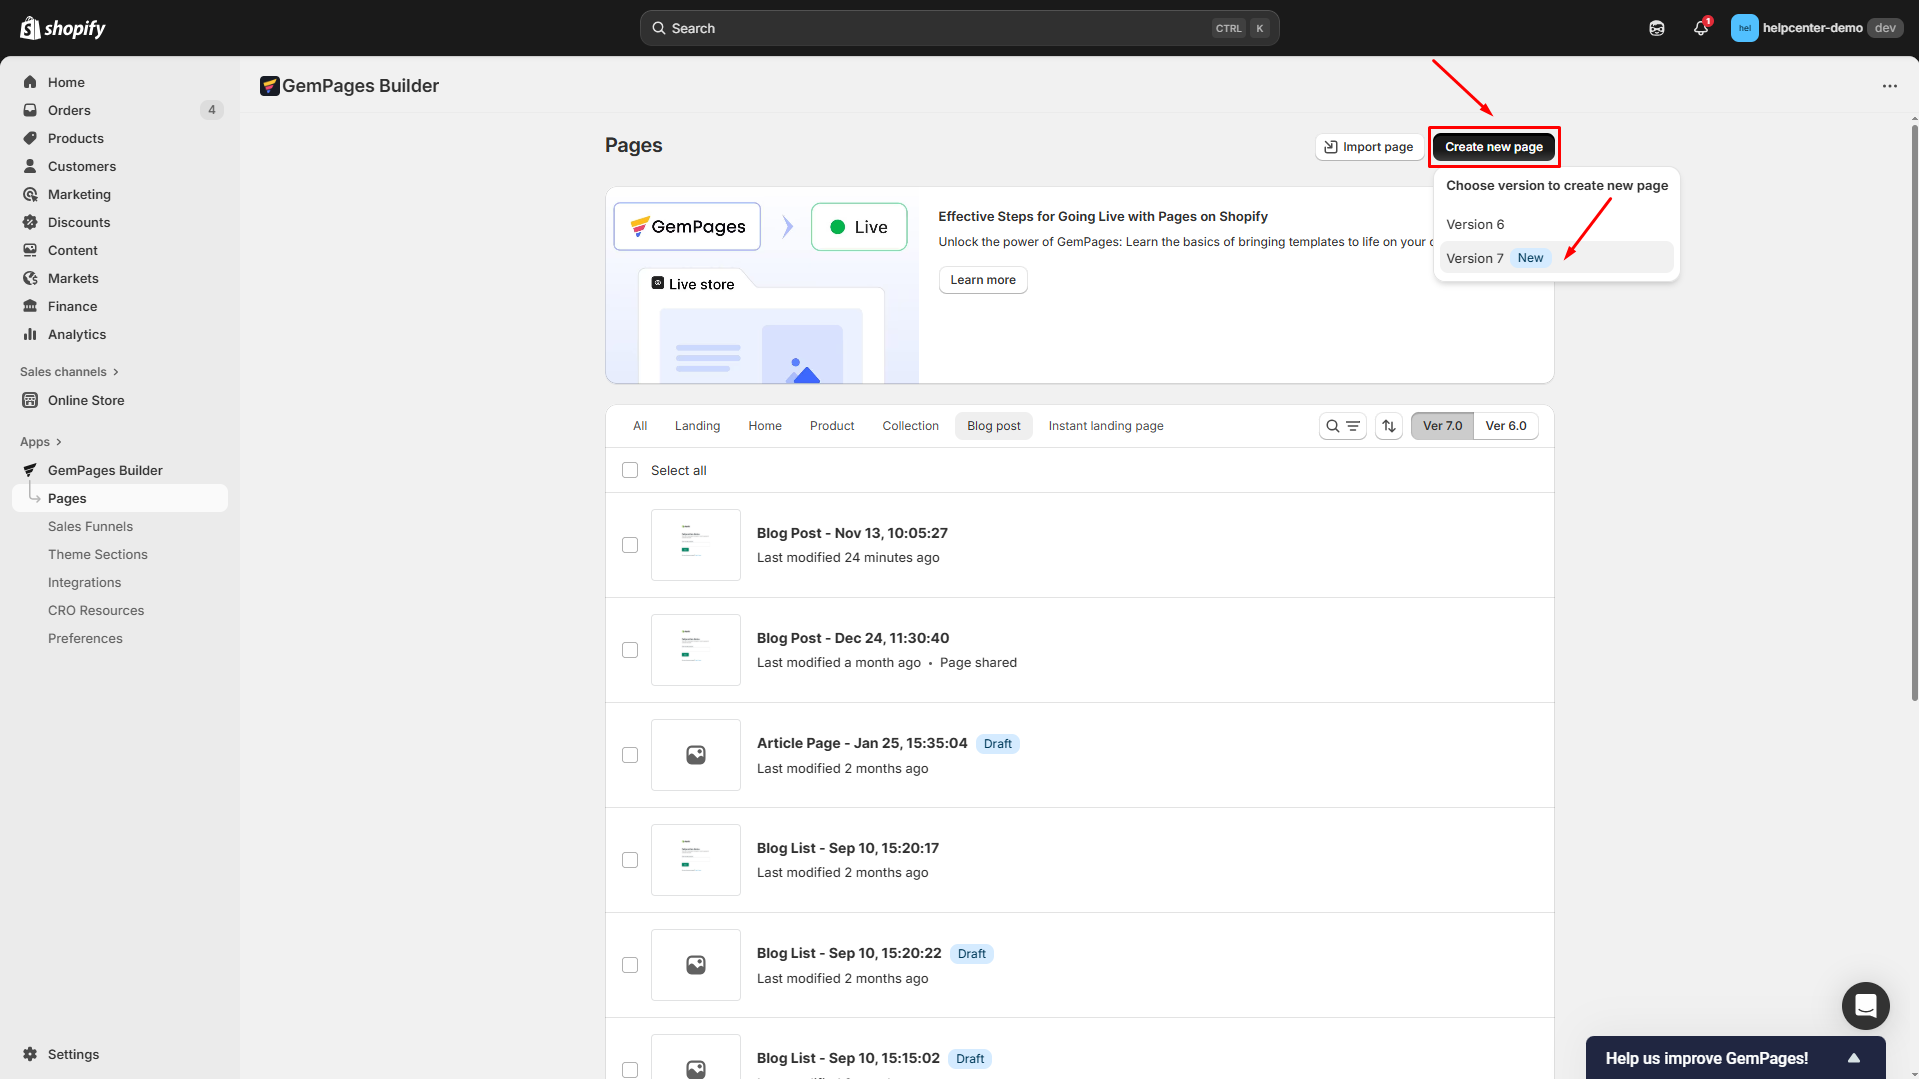
If you have not created any blog posts, click Create new page to build one.
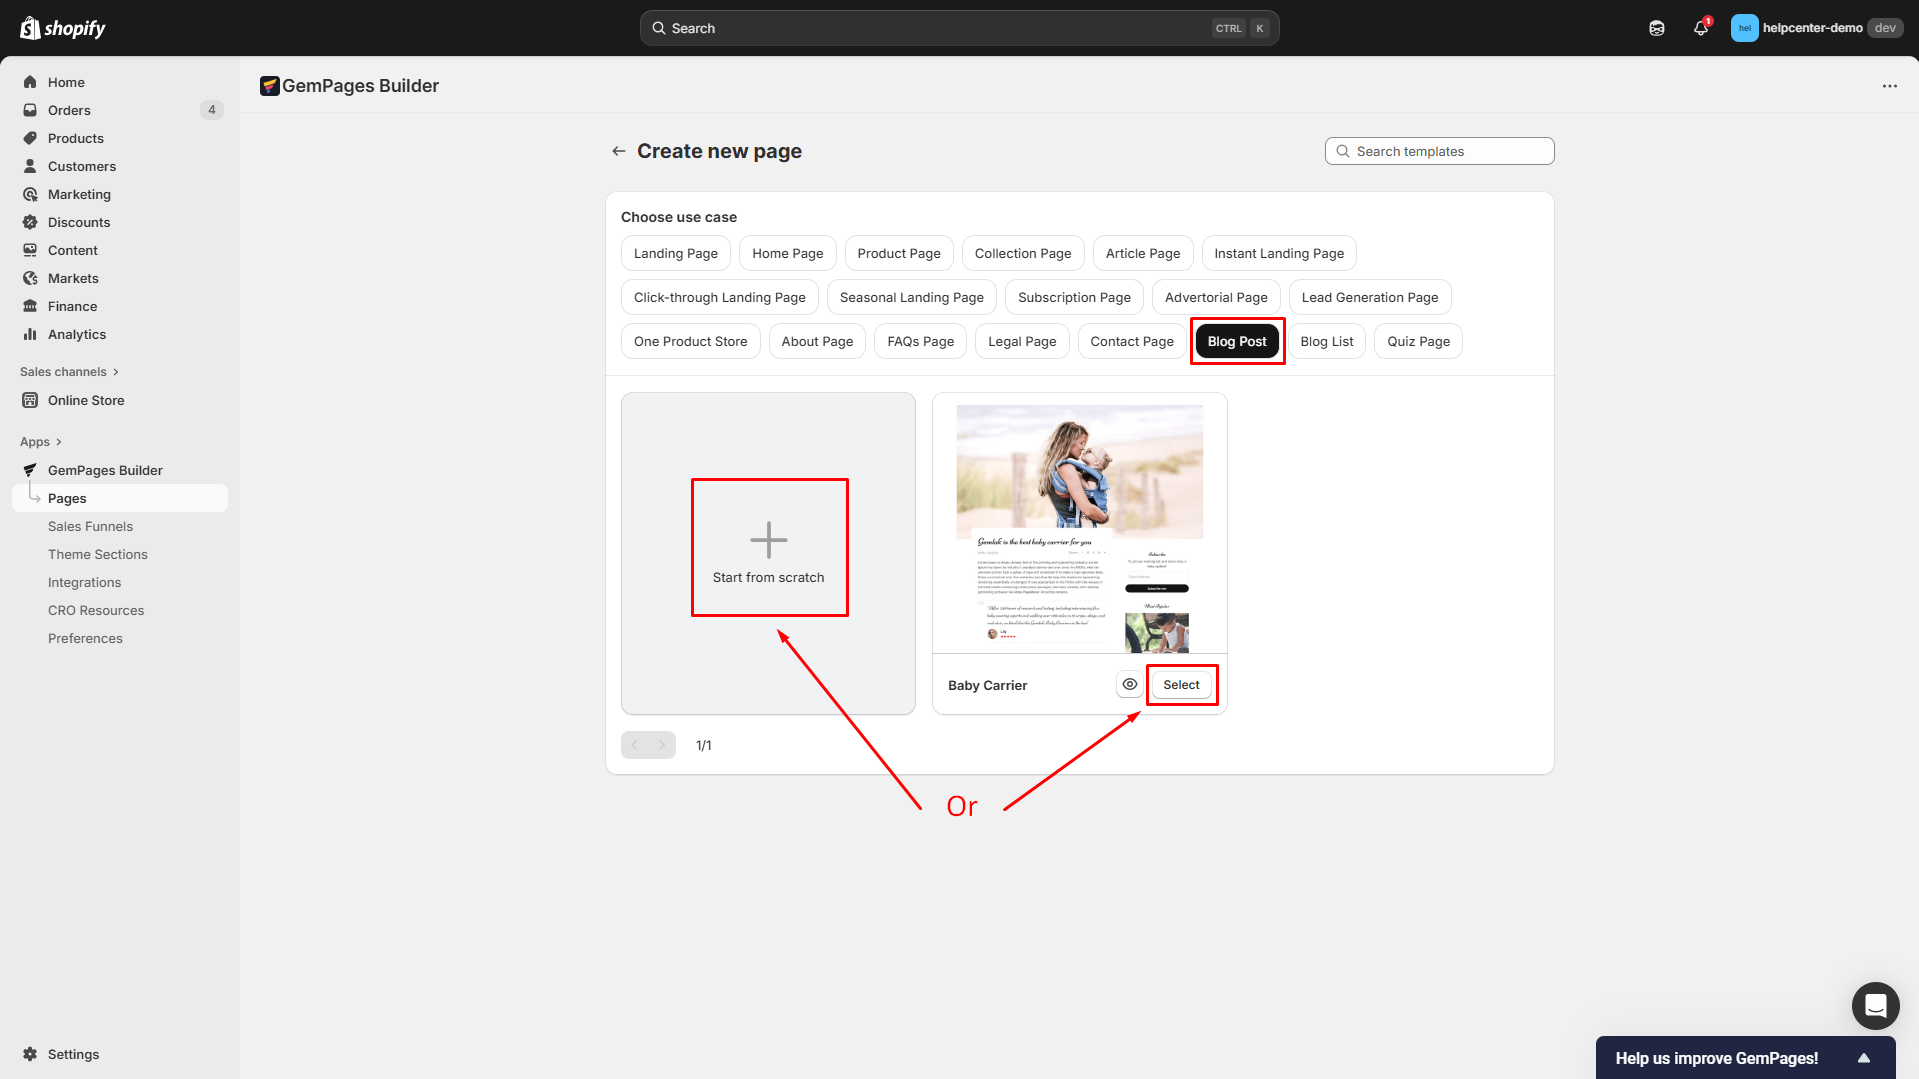
Choose the Use Case to Blog Post. Then, you can start from scratch (a blank blog post template) for full customization or go with the GemPages’ pre-designed template to save time.
You’ll be directed to the GemPages Editor.
Step 2: Add an Accordion Element to Your Blog Page
Once entered in the editor, use the search bar to locate the Accordion Element.
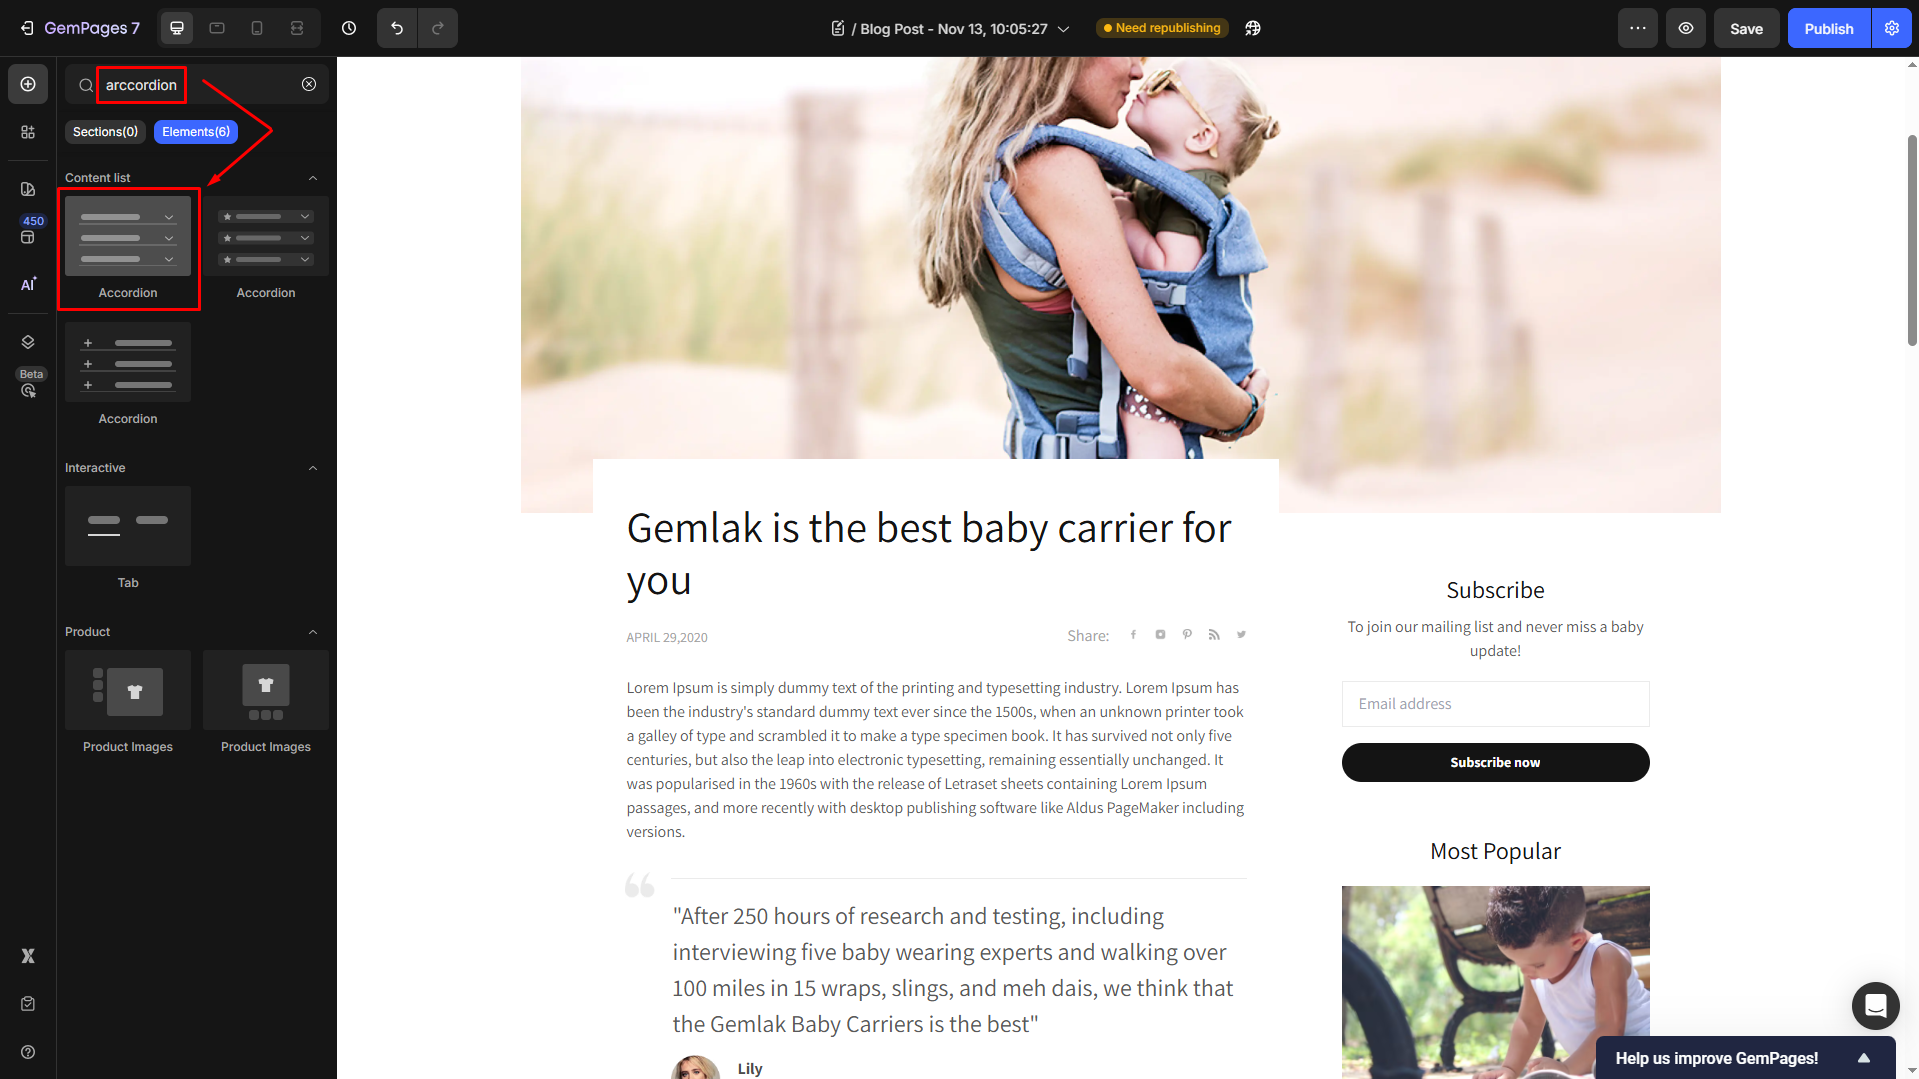
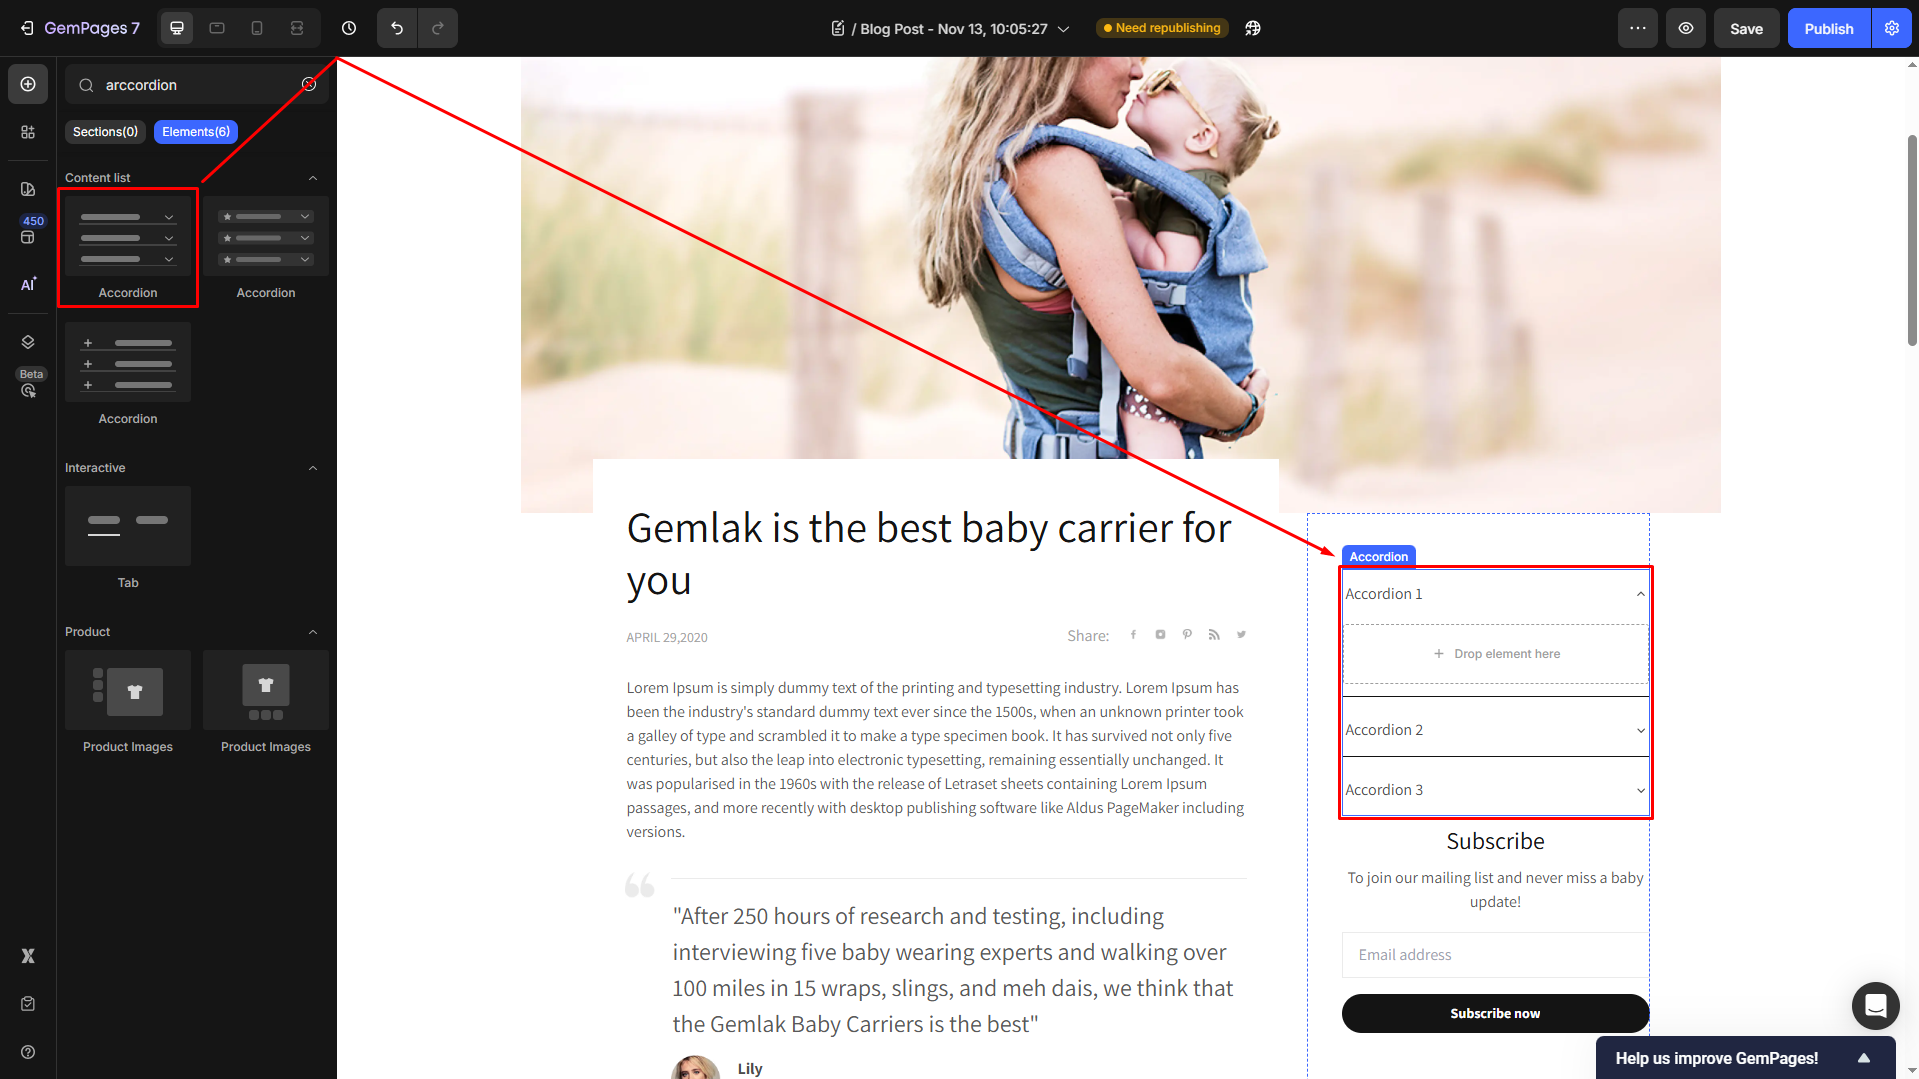
Drag and drop the element to the desired position on your blog post.
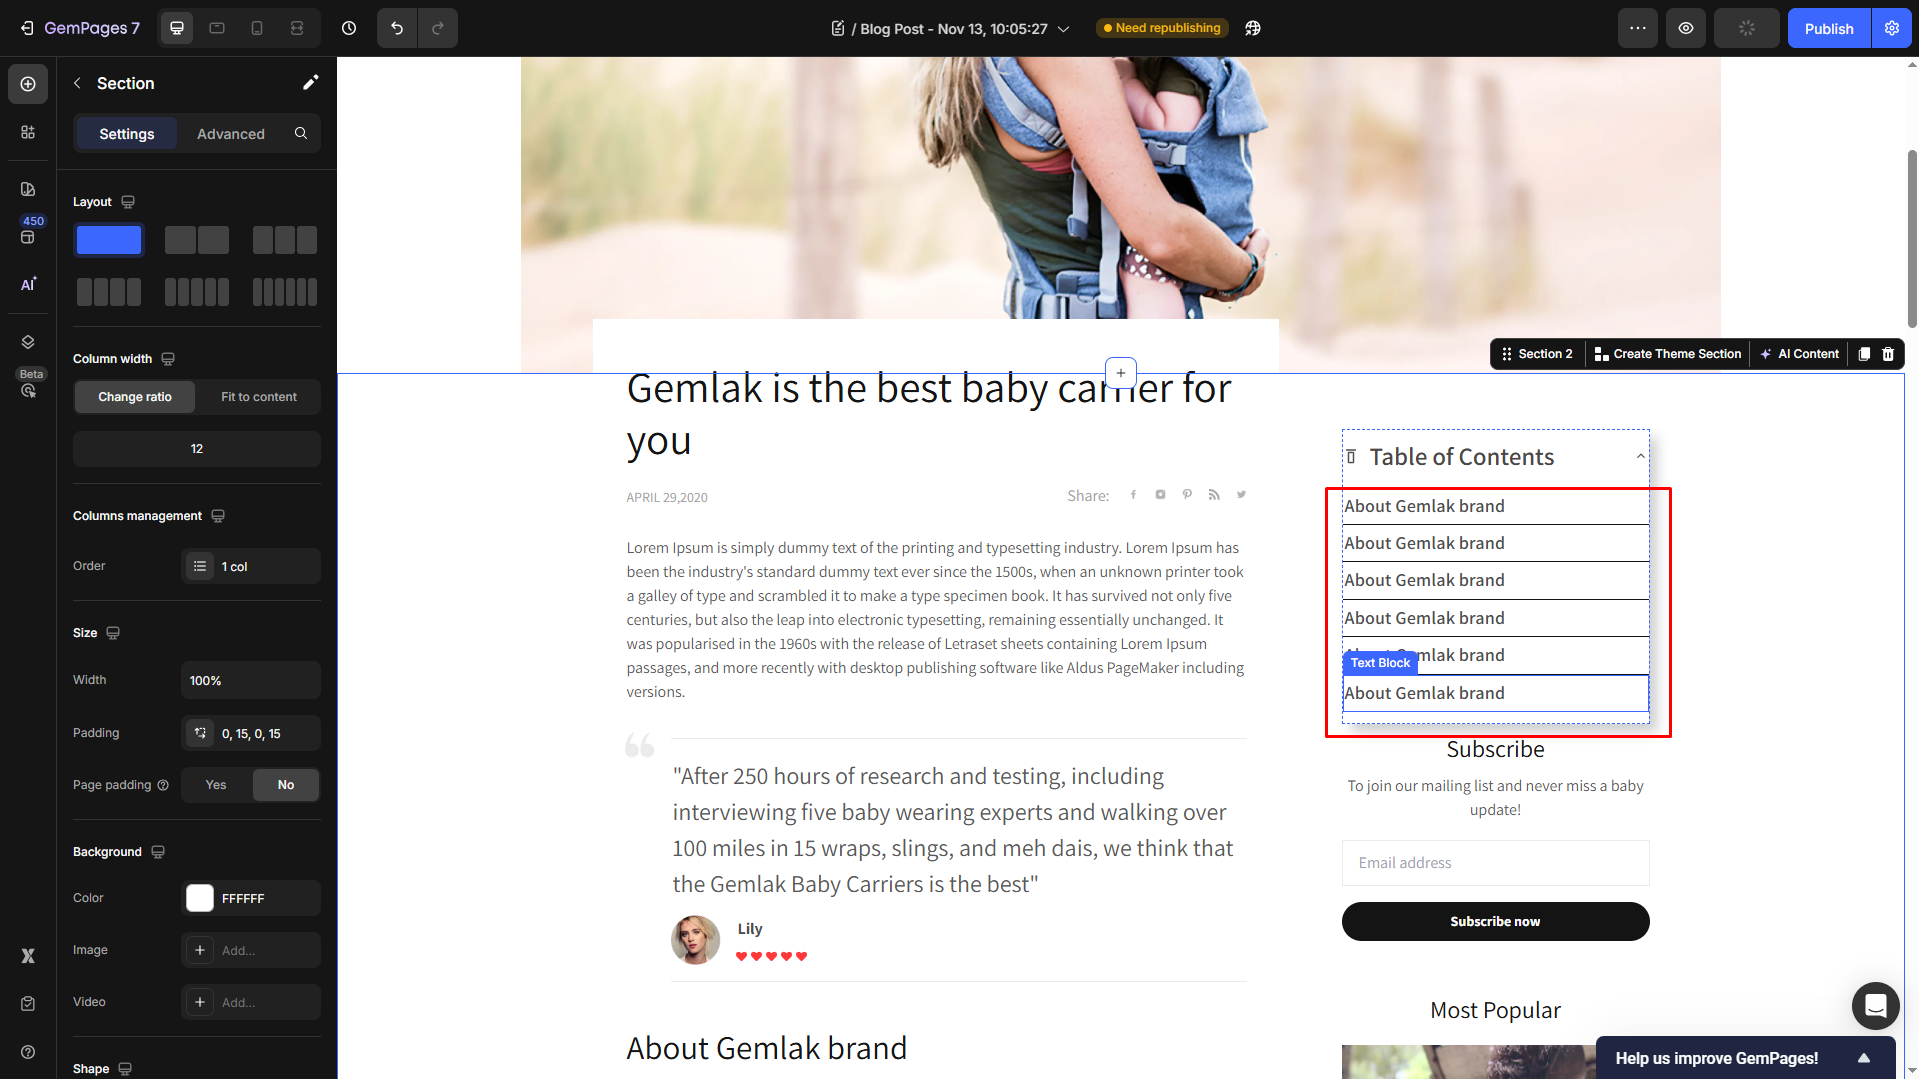
Click on the element to open its settings tab. Under the Item management section, hover over “Accordion 2” and “Accordion 3”, and click the bin icon to delete them.
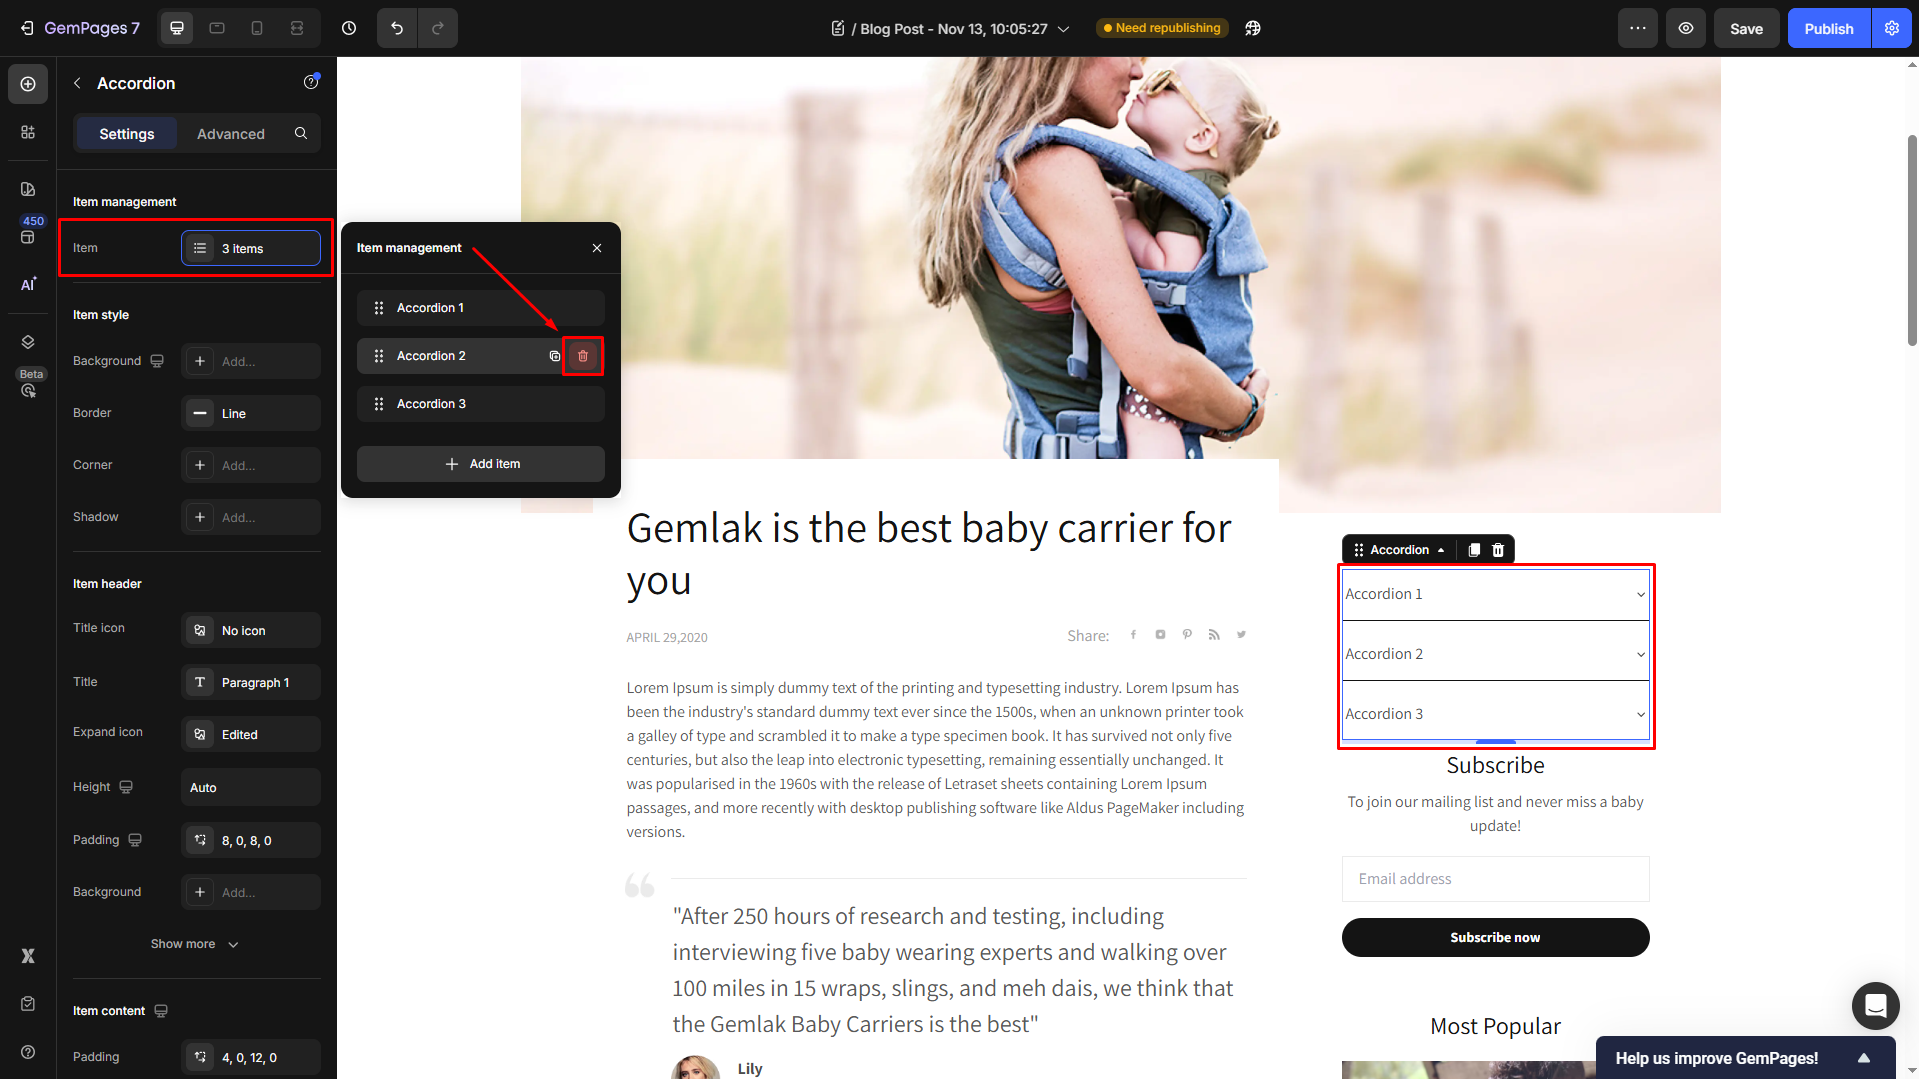
Locate the Arccodion 1 and change its name to “Table of Contents”.
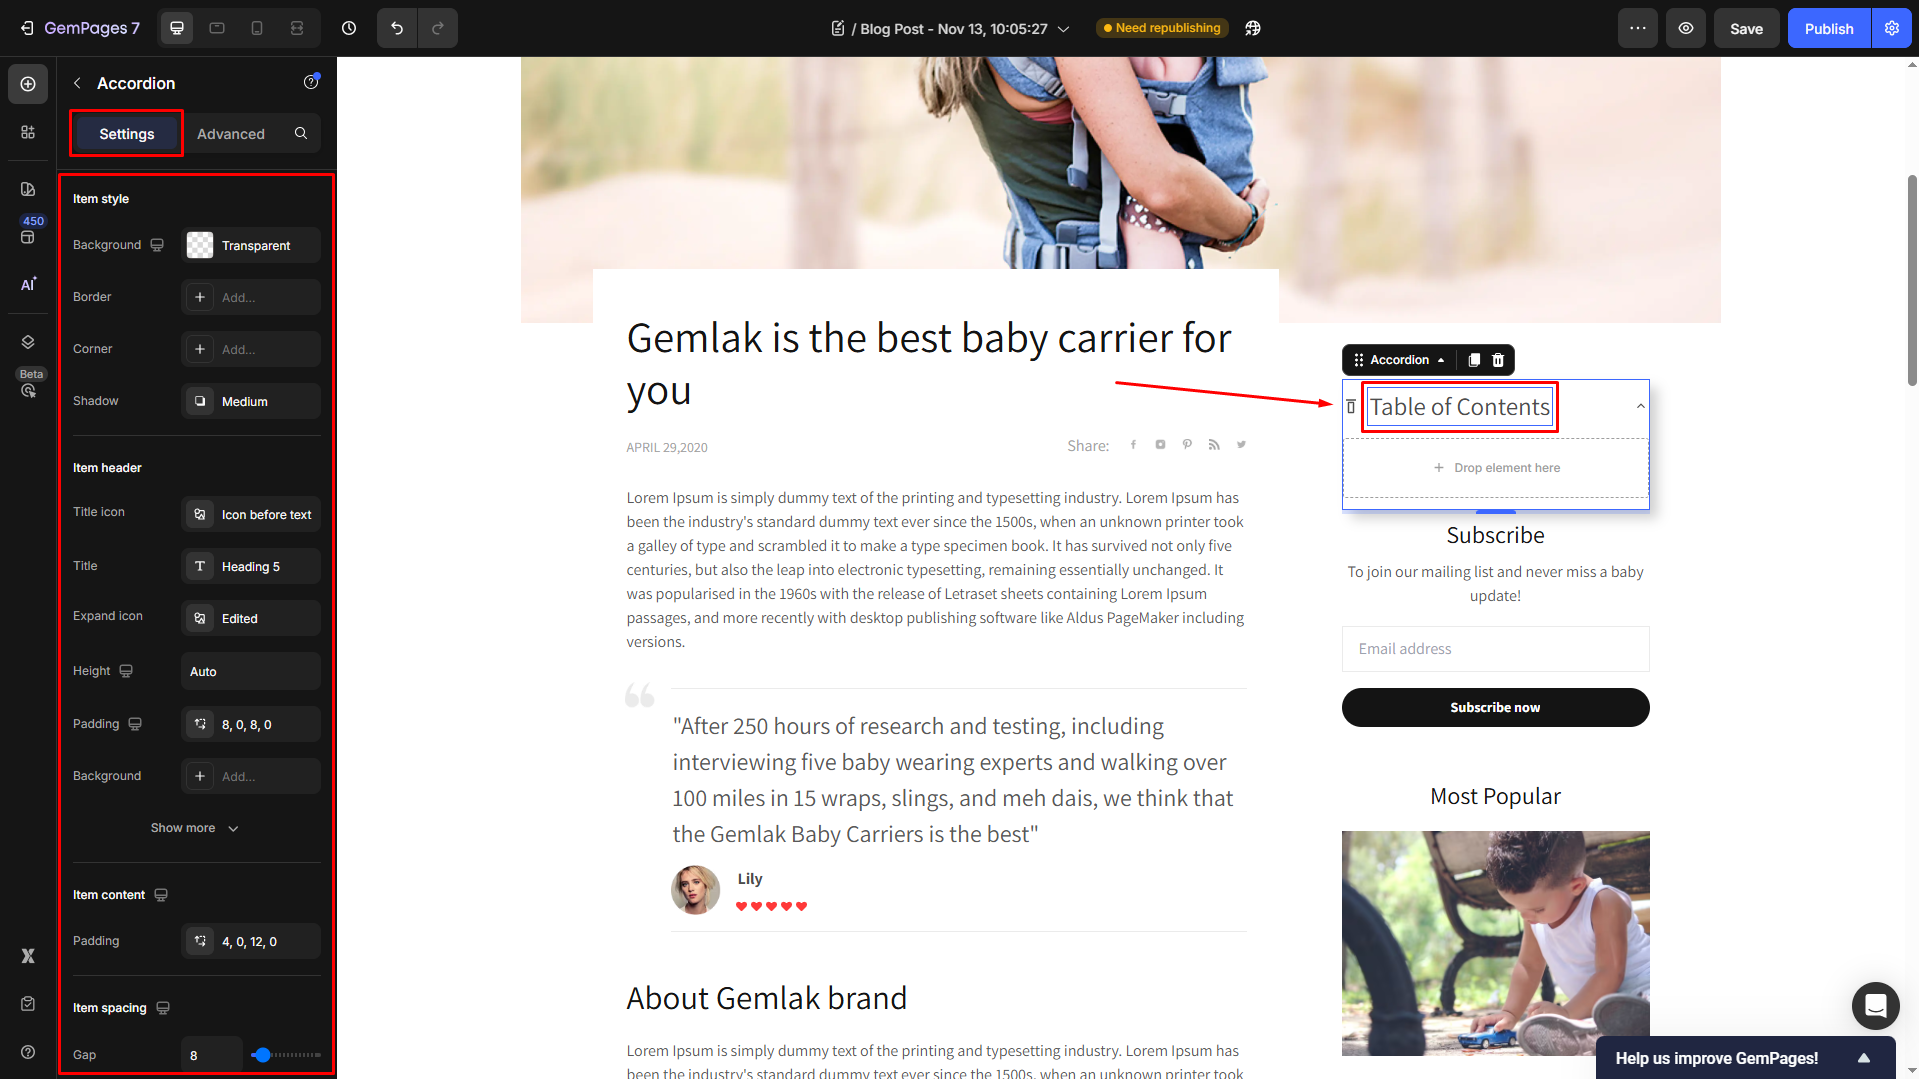
Under the Settings tab, customize the visibility of the “Table of Contents” to fit your branding.
Step 3: Add Text Block elements inside the Accordion
Drag and drop the Text Block Element under the accordion “Table of Contents”.
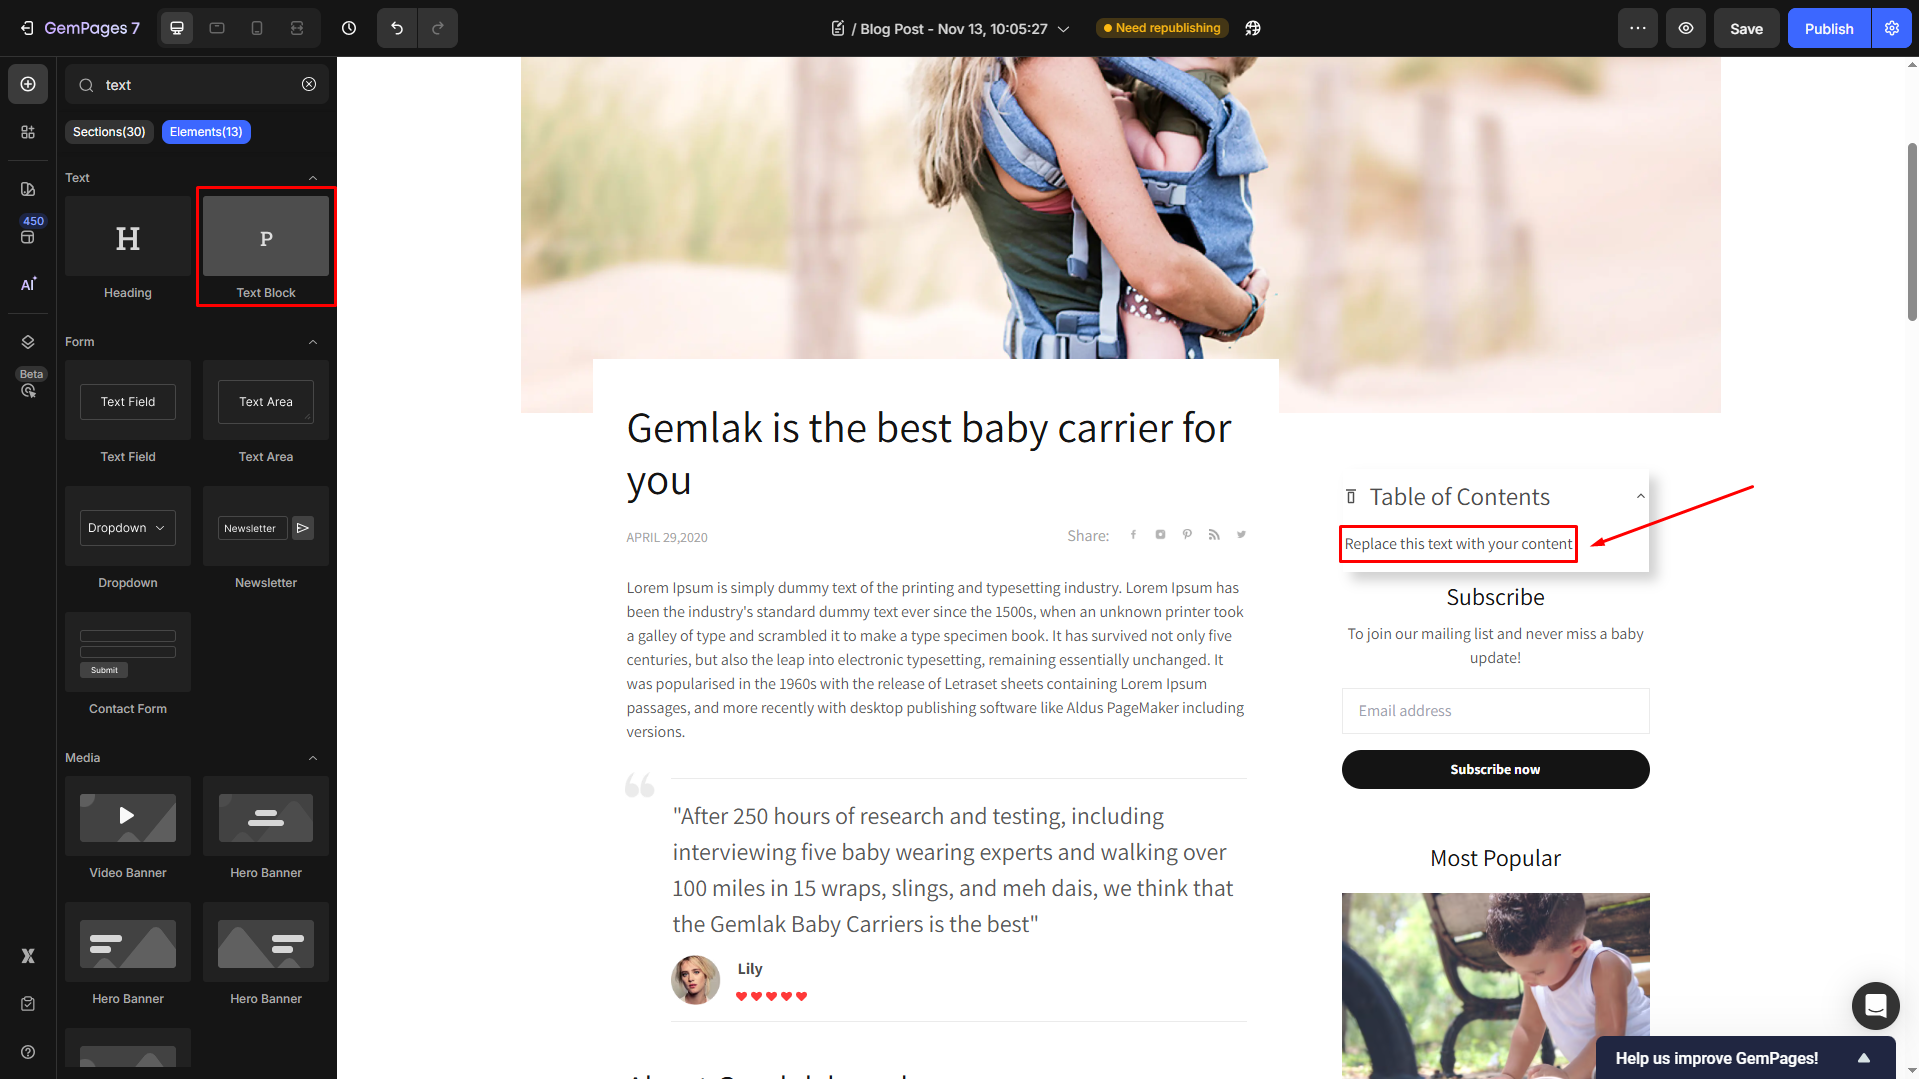
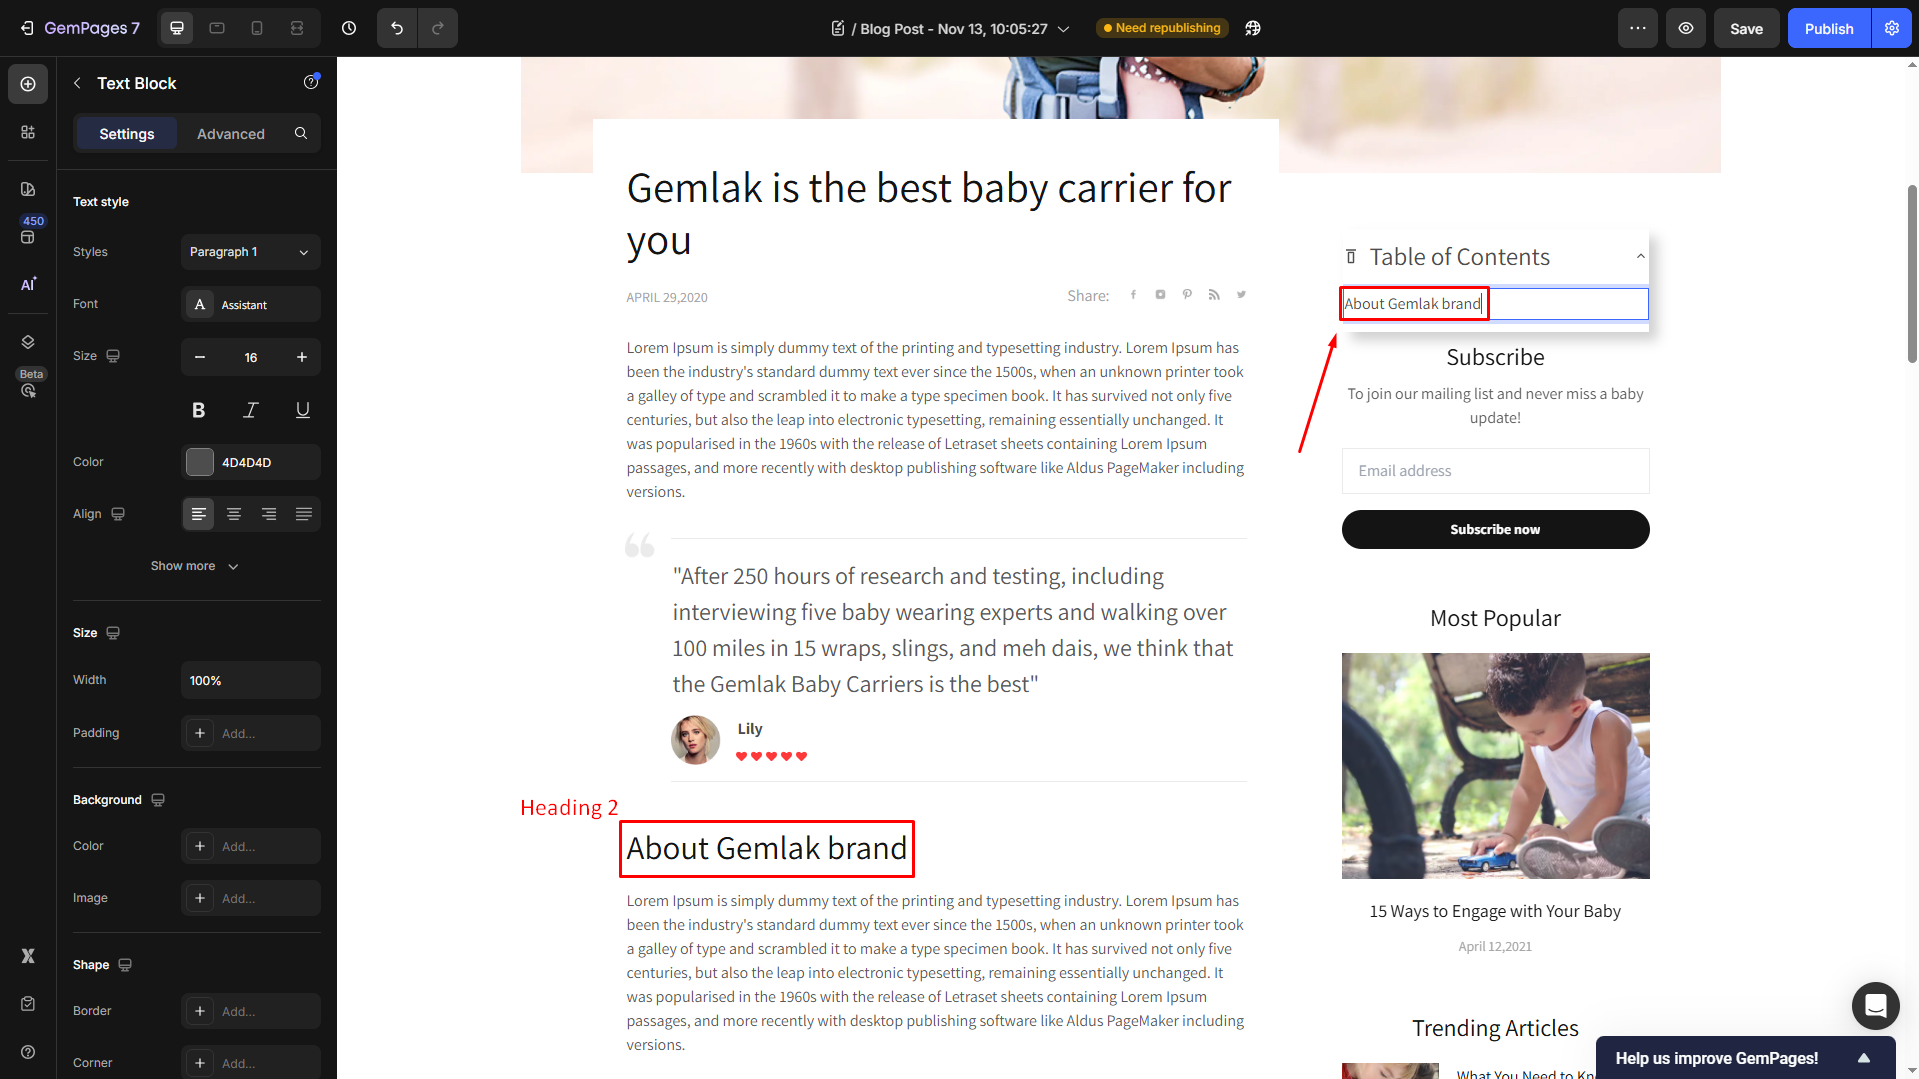
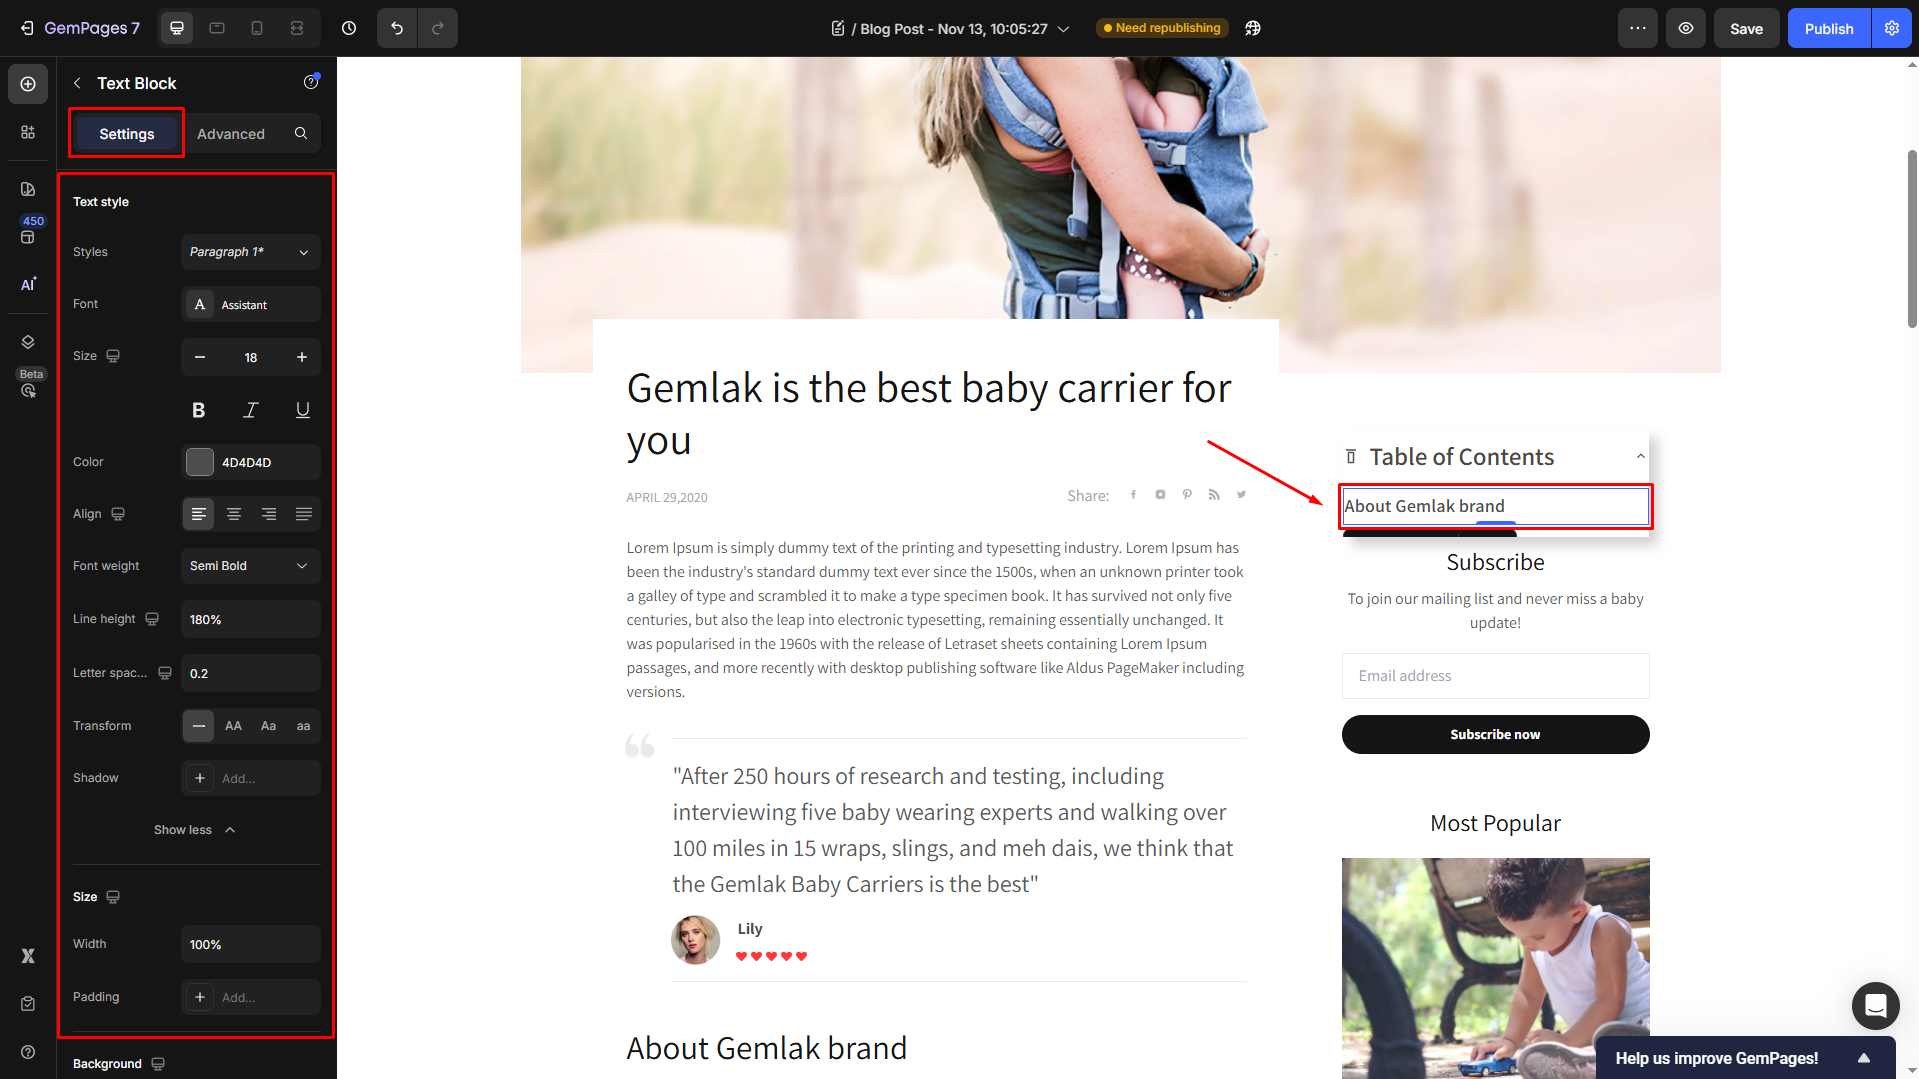
Then, change the text to match the heading.
Under the Settings tab, modify the text style, size, background, etc., as you prefer.
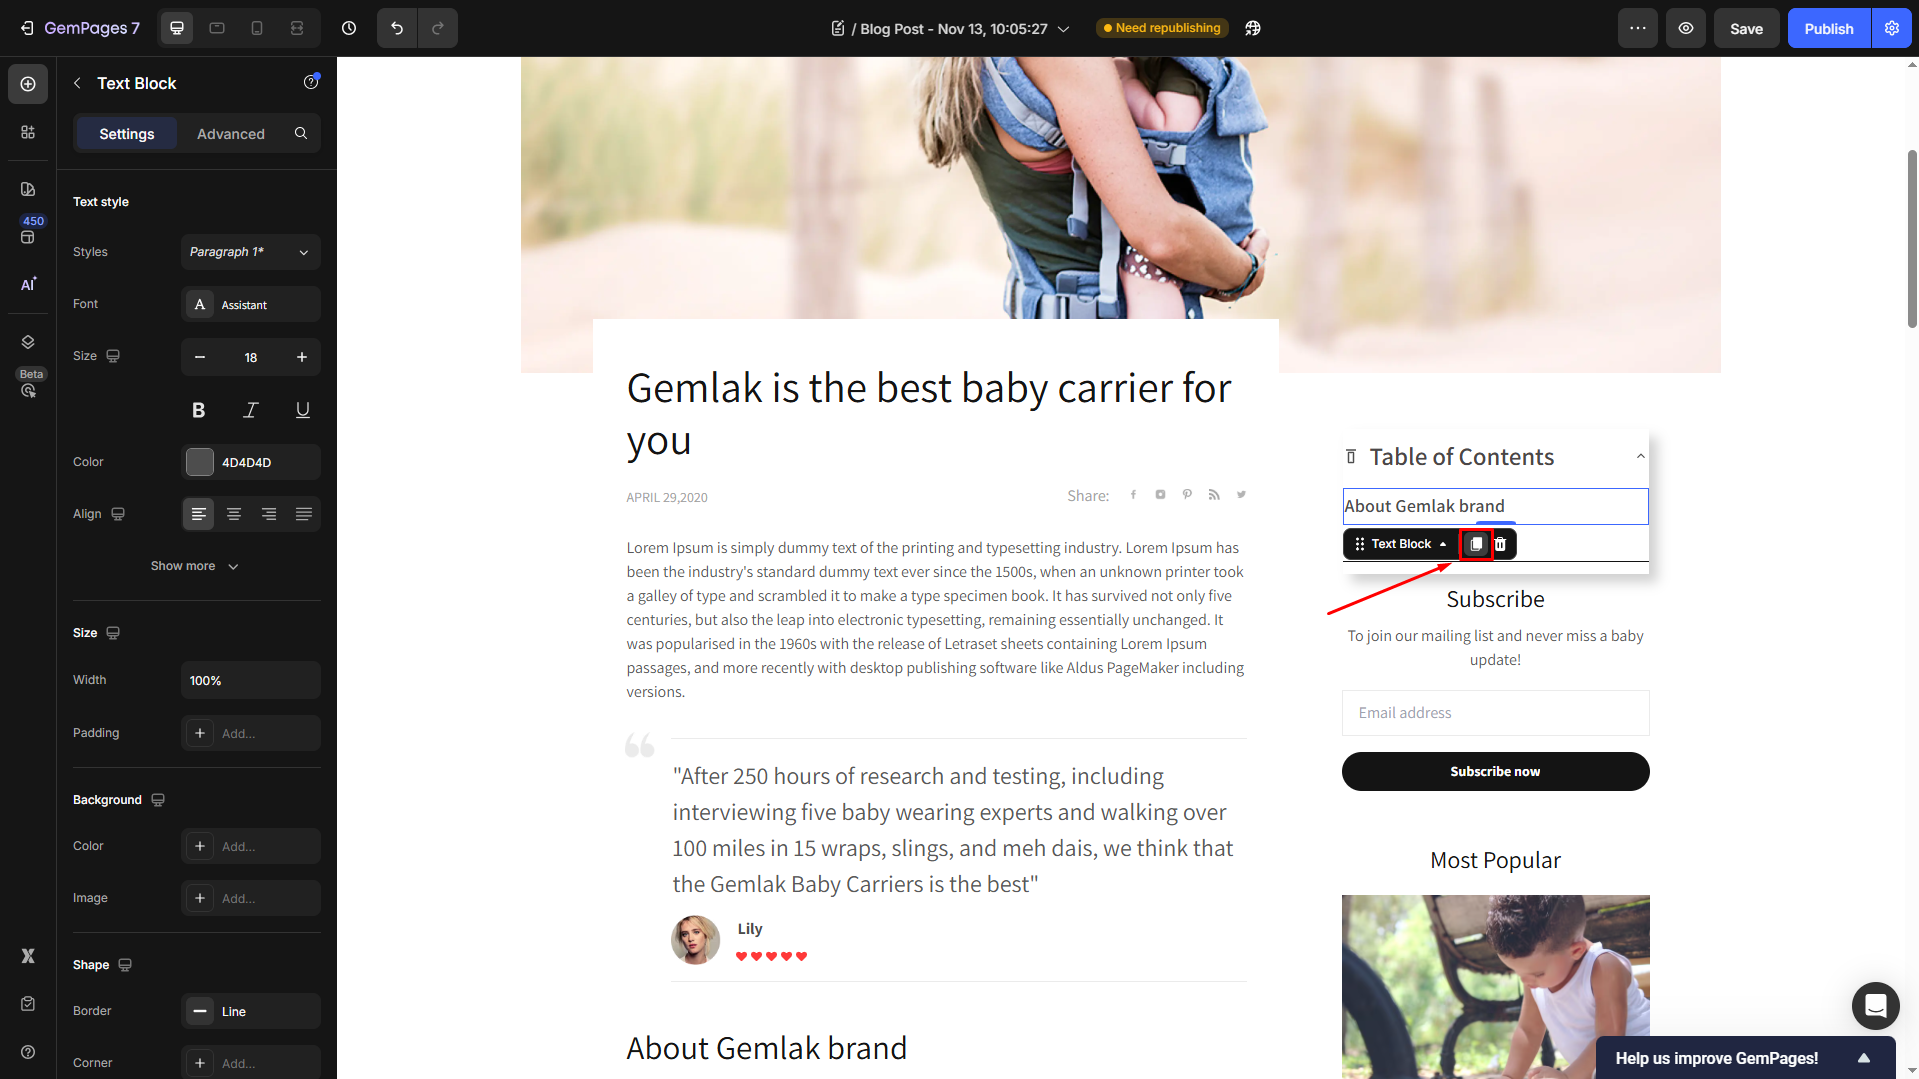
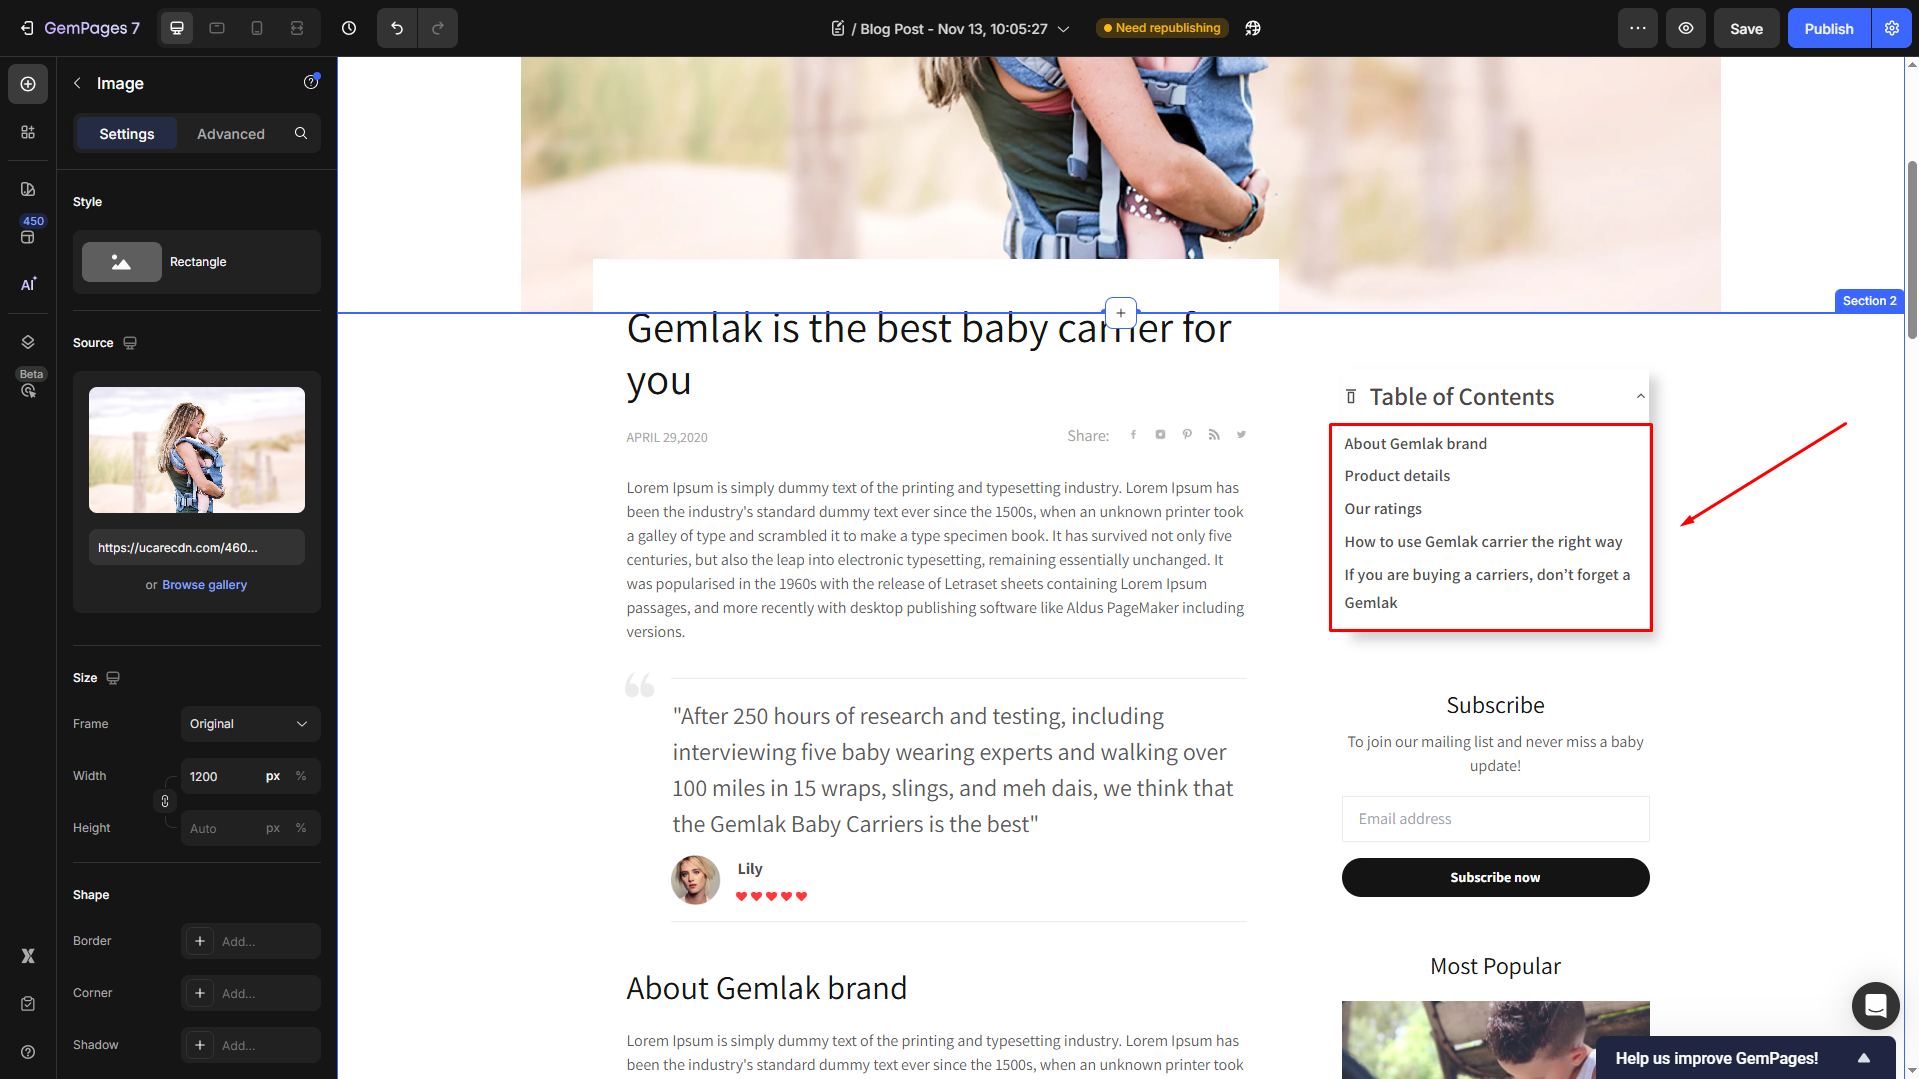
Once satisfied, click on the element and duplicate it to save your time and effort. Each text block element will be linked to one level-2 heading.
For example, we have 5 headings at level 2, then we’ll have 5 text blocks.
Now, change each text one by one to match each heading’s title.
Step 4: Create Interactions for each Heading 2
Click on each text block element, navigate to the Advanced tab, and scroll down to the Interaction section.
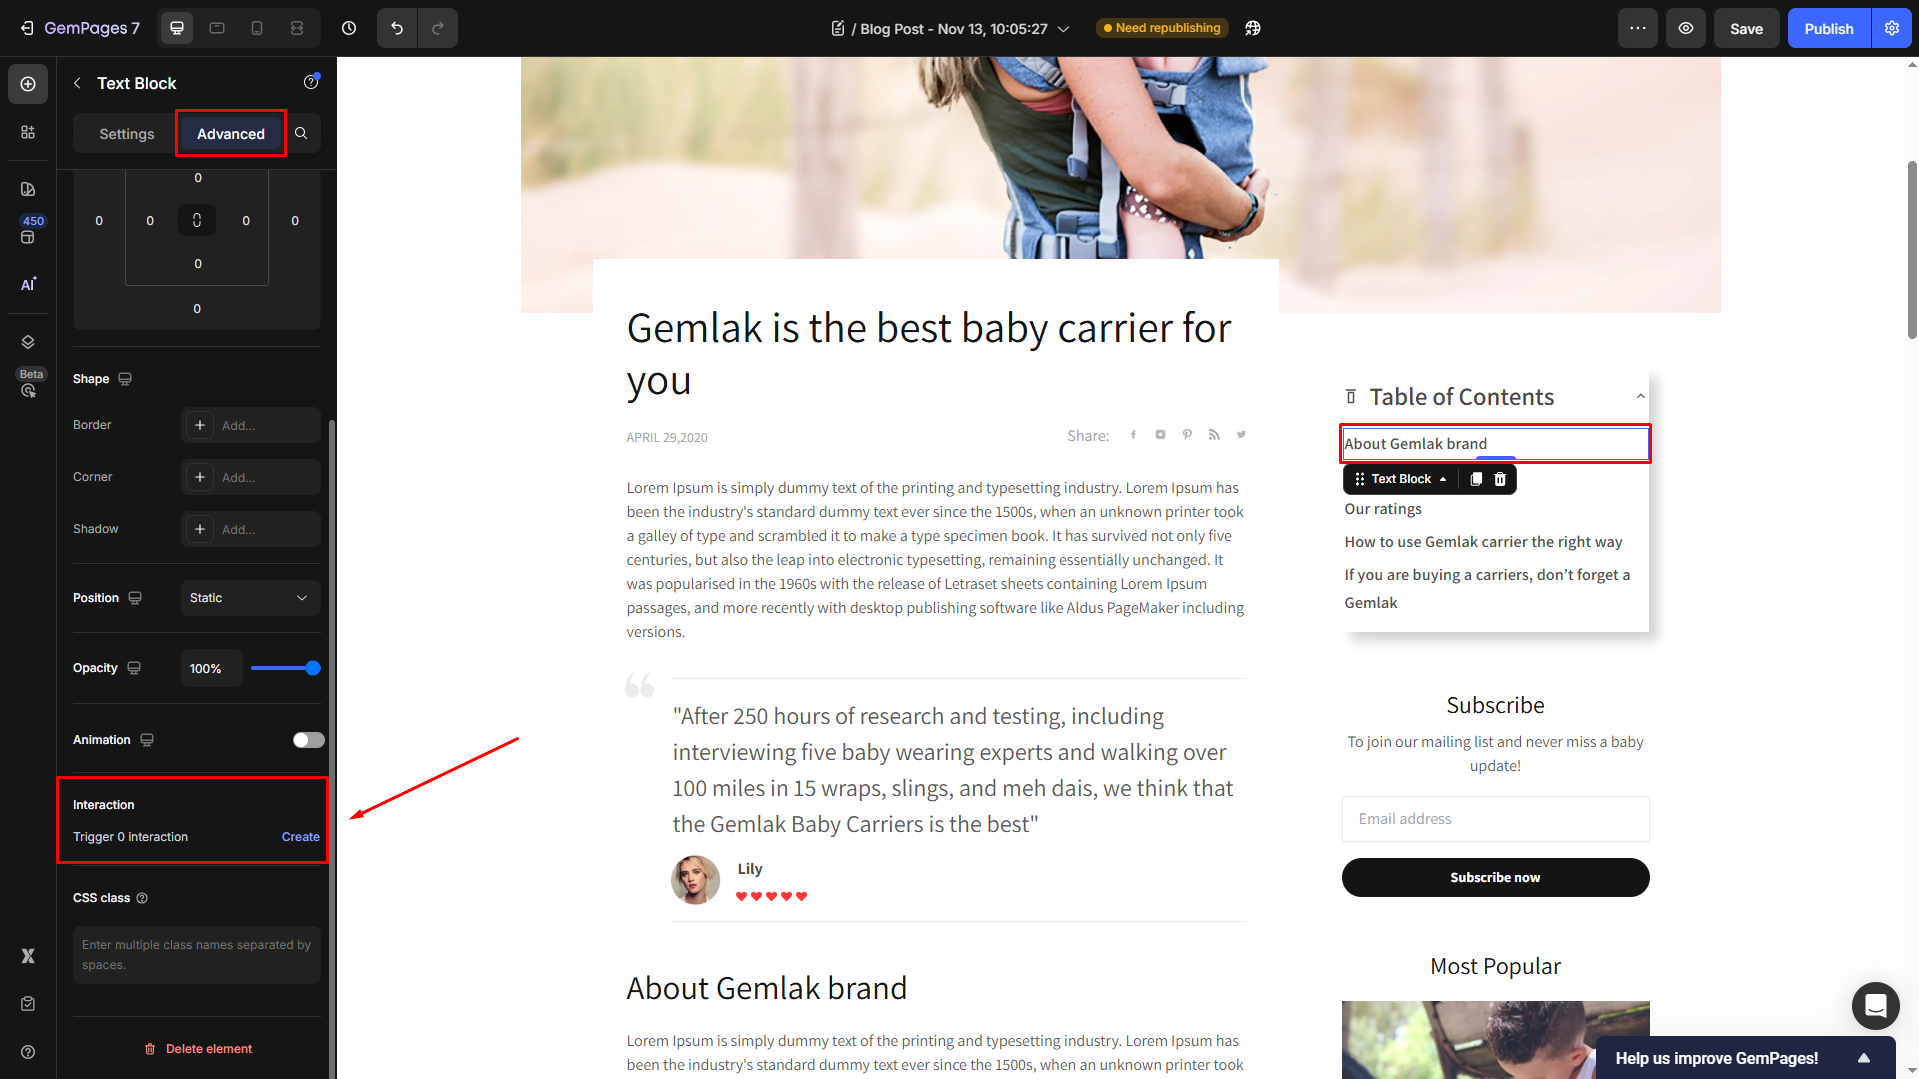
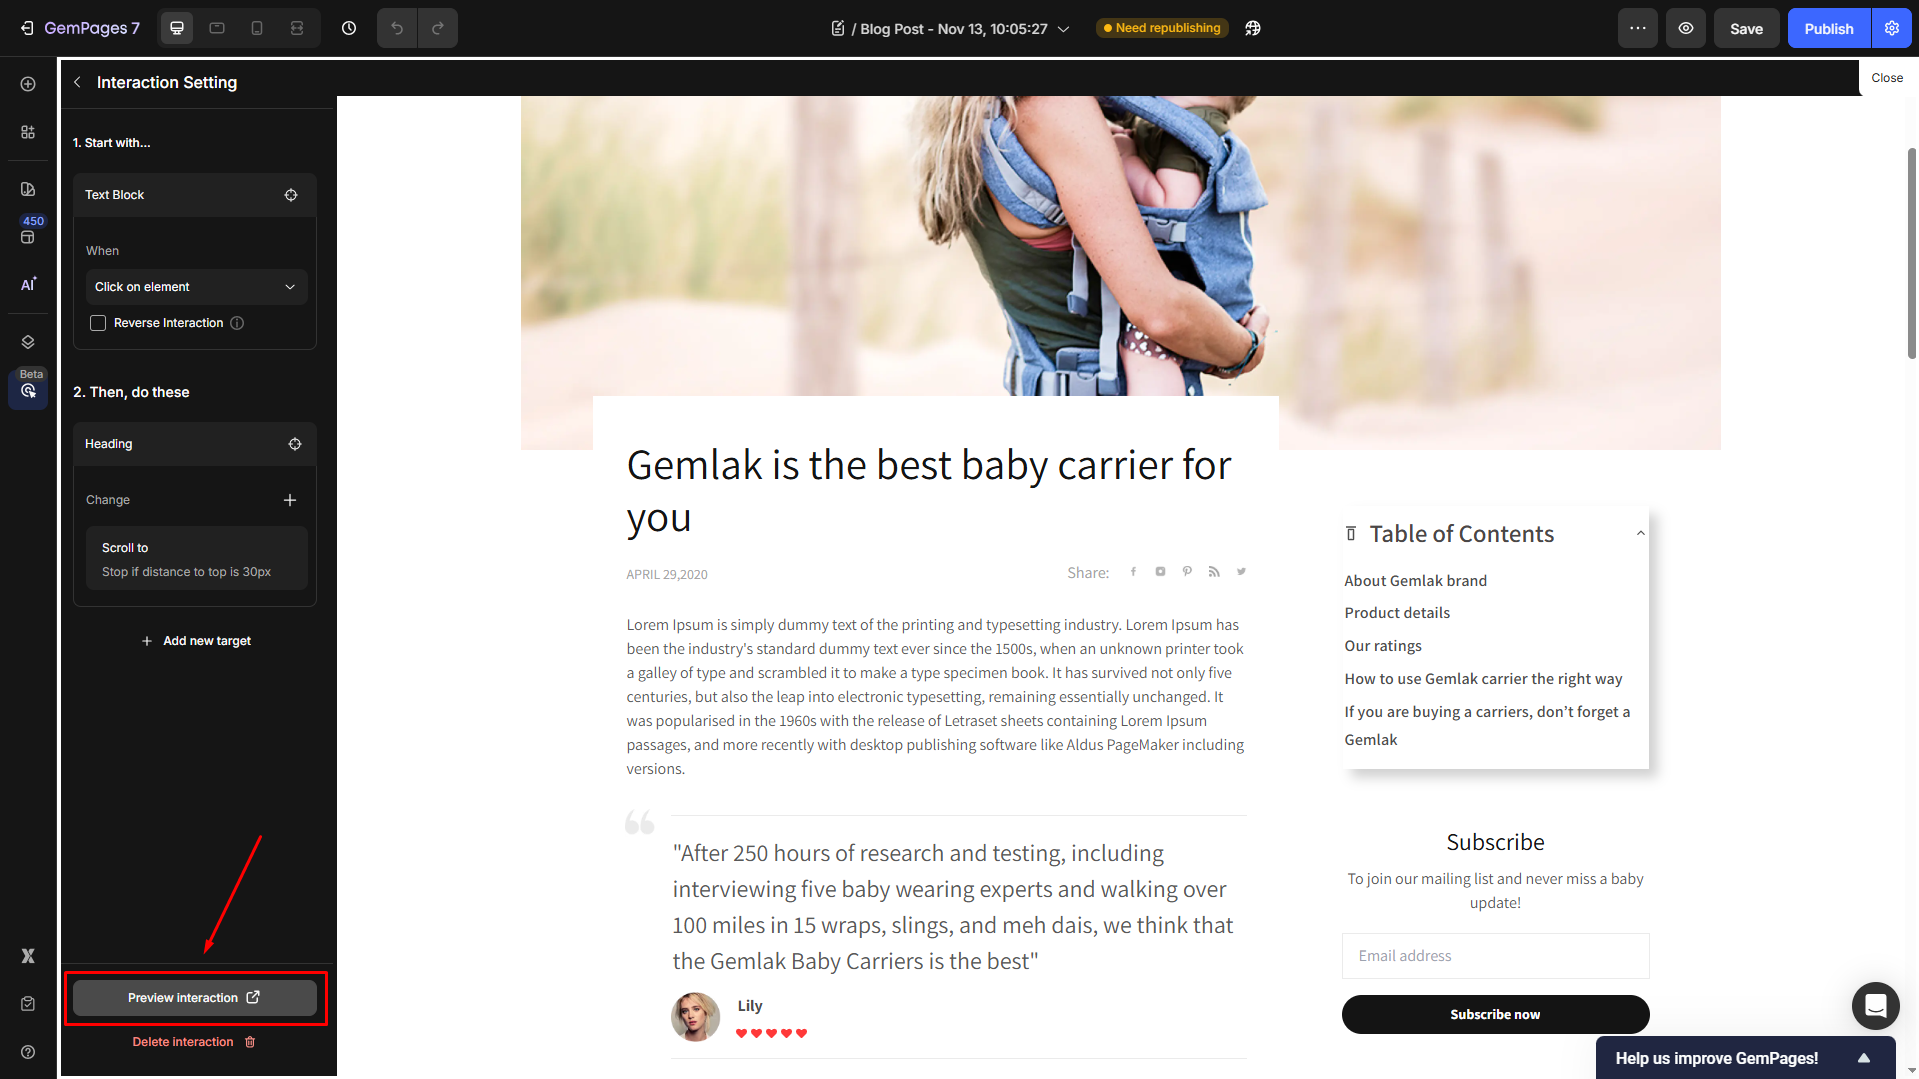
Click Create to open the Interaction Setting panel in the left sidebar. Under the “1. Start with…” section, set When to Click on element.
Under the “2. Then, do these”, click Select target on page. Then, select the target heading in the design area and choose the Change to Scroll to.
Repeat the same steps for the remaining text blocks so that each text block is linked to its corresponding heading.
Step 5: Preview, Save, and Publish Your Blog Page
Click Preview interaction to preview your Table of Contents.
Once satisfied, you can save the updates and hit Publish to republish your blog post with a Table of Contents.
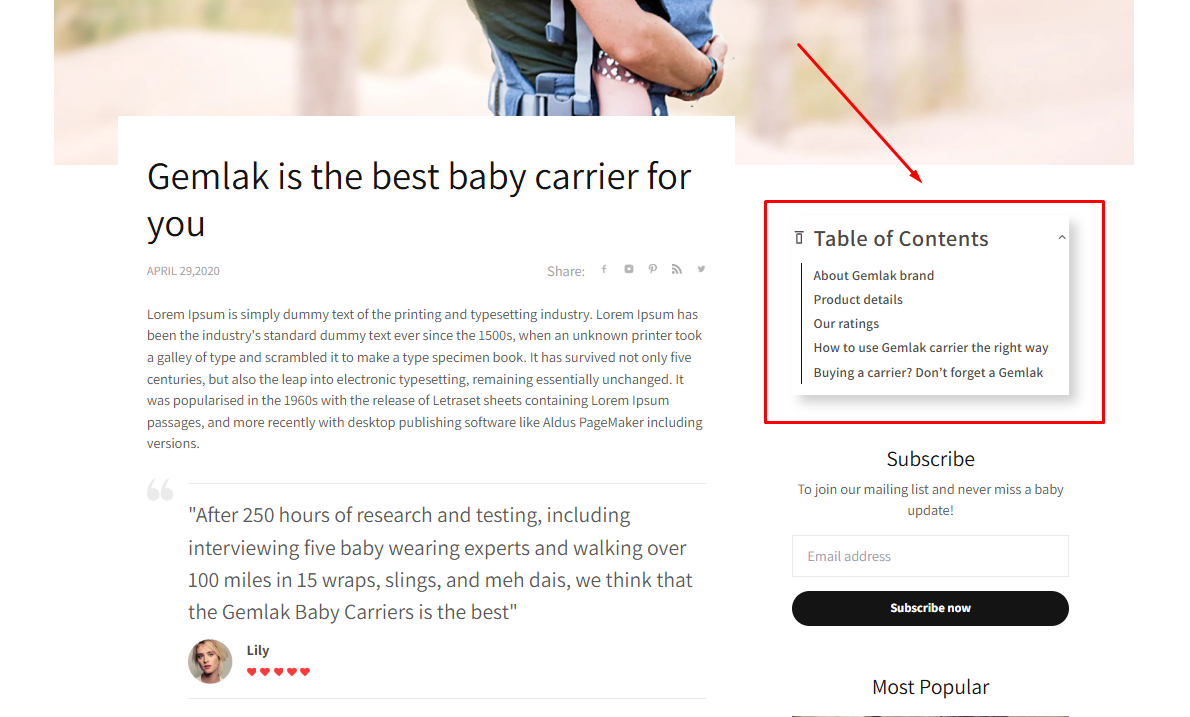
Results:


Thank you for your comments