


Shopify International Markets (commonly called Shopify Markets) is Shopify’s built-in system for selling internationally from a single store. It lets you control currency, language, pricing, taxes, duties, shipping, and domains based on a customer’s location, without the complexity of running multiple Shopify stores.
This guide explains how to set up Shopify International Markets correctly, what each setting does, when to use it, and the most common mistakes to avoid. The goal is to help you launch international selling in a way that’s scalable, compliant, and optimized for conversions.
What Is Shopify International Markets?
Shopify Markets is Shopify’s built-in feature for managing international selling.
It allows you to:
- Group countries or regions into markets
- Automatically detect a visitor’s location
- Show local currency and language
- Apply market-specific pricing
- Configure taxes and import duties
- Localize checkout and domains
All of this is managed directly in Shopify Admin, without creating multiple stores.
Before You Start
Before setting up Shopify International Markets, make sure that:
- Your Shopify store is already set up and accessible
- You have admin access to Shopify Settings
- Shopify Payments is enabled (required for multi-currency selling)
- You know which countries or regions you want to sell to
- You understand basic tax responsibilities in those regions
How to Set Up Shopify International Markets
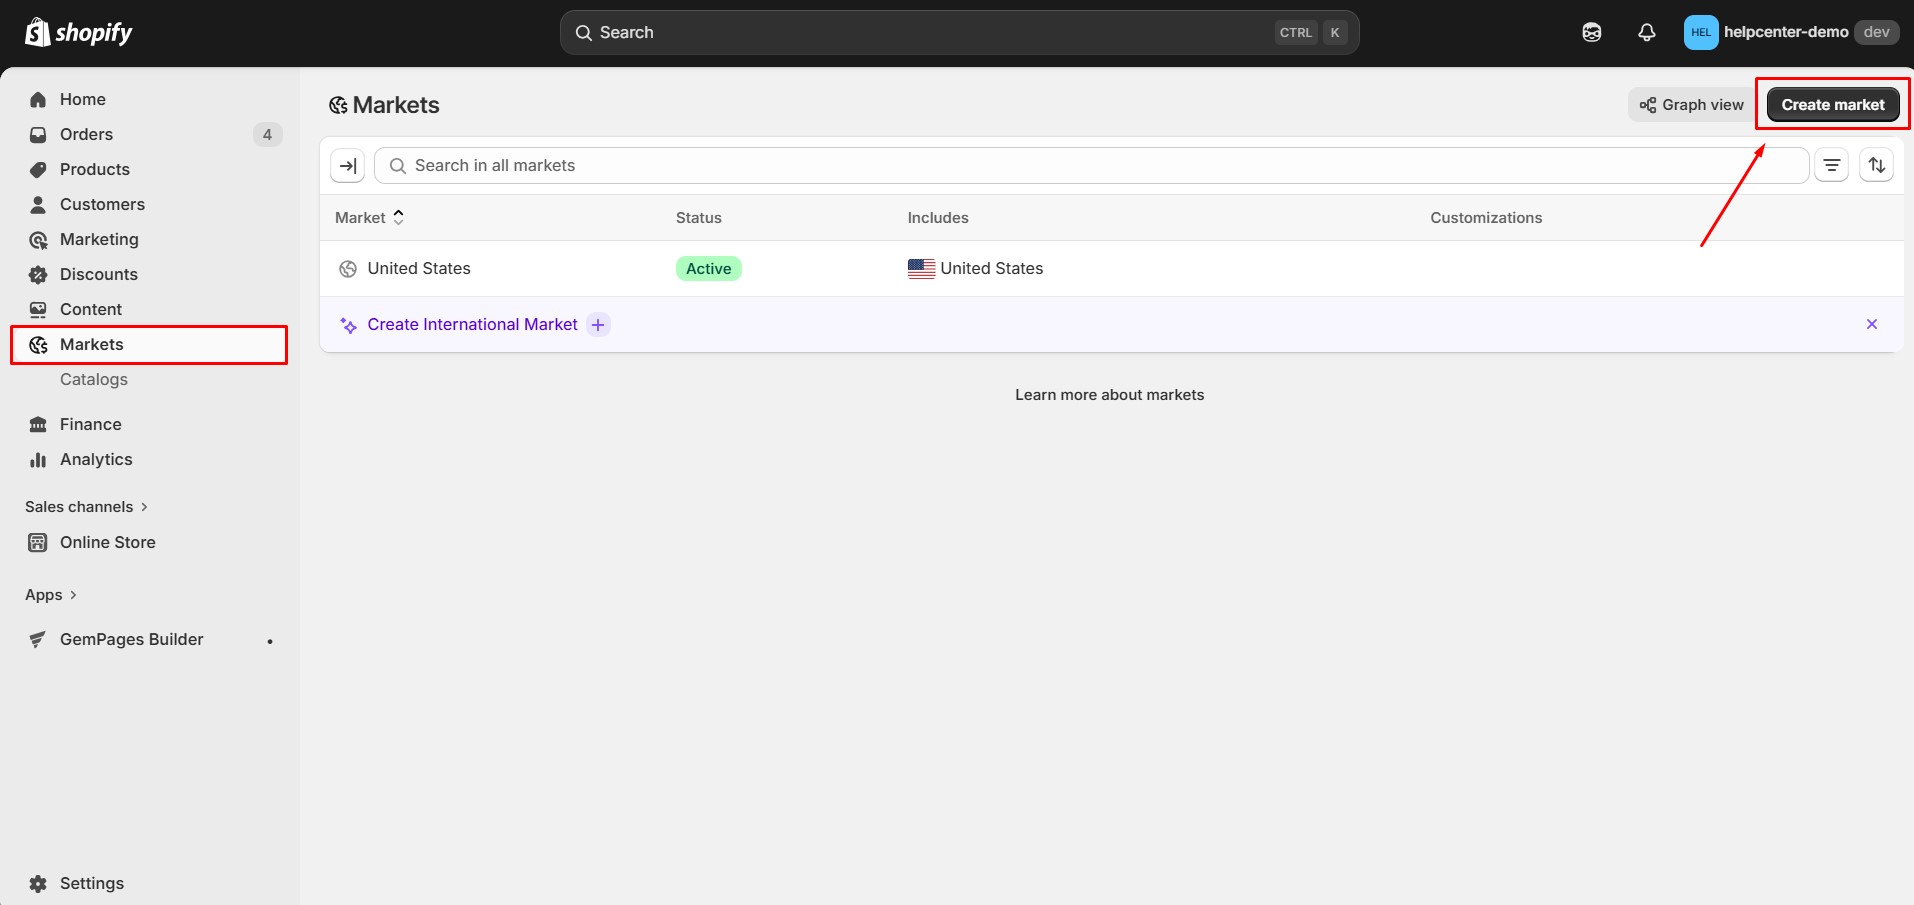
Step 1: Open Shopify Markets
- Go to Shopify Admin
- Click Settings
- Select Markets
Here, you’ll see:
- Your Primary market (usually your home country)
- Existing or automatically suggested markets
- Options to add, edit, or remove markets
Shopify may create a default International market automatically. You can customize it or replace it with more specific markets for better control.
Shopify may automatically create a general “International” market. You can edit or replace it.
Step 2: Create and Organize Markets
Create a New Market
- In Markets, click Create market
- Enter a market name (for example, Europe or Asia-Pacific)
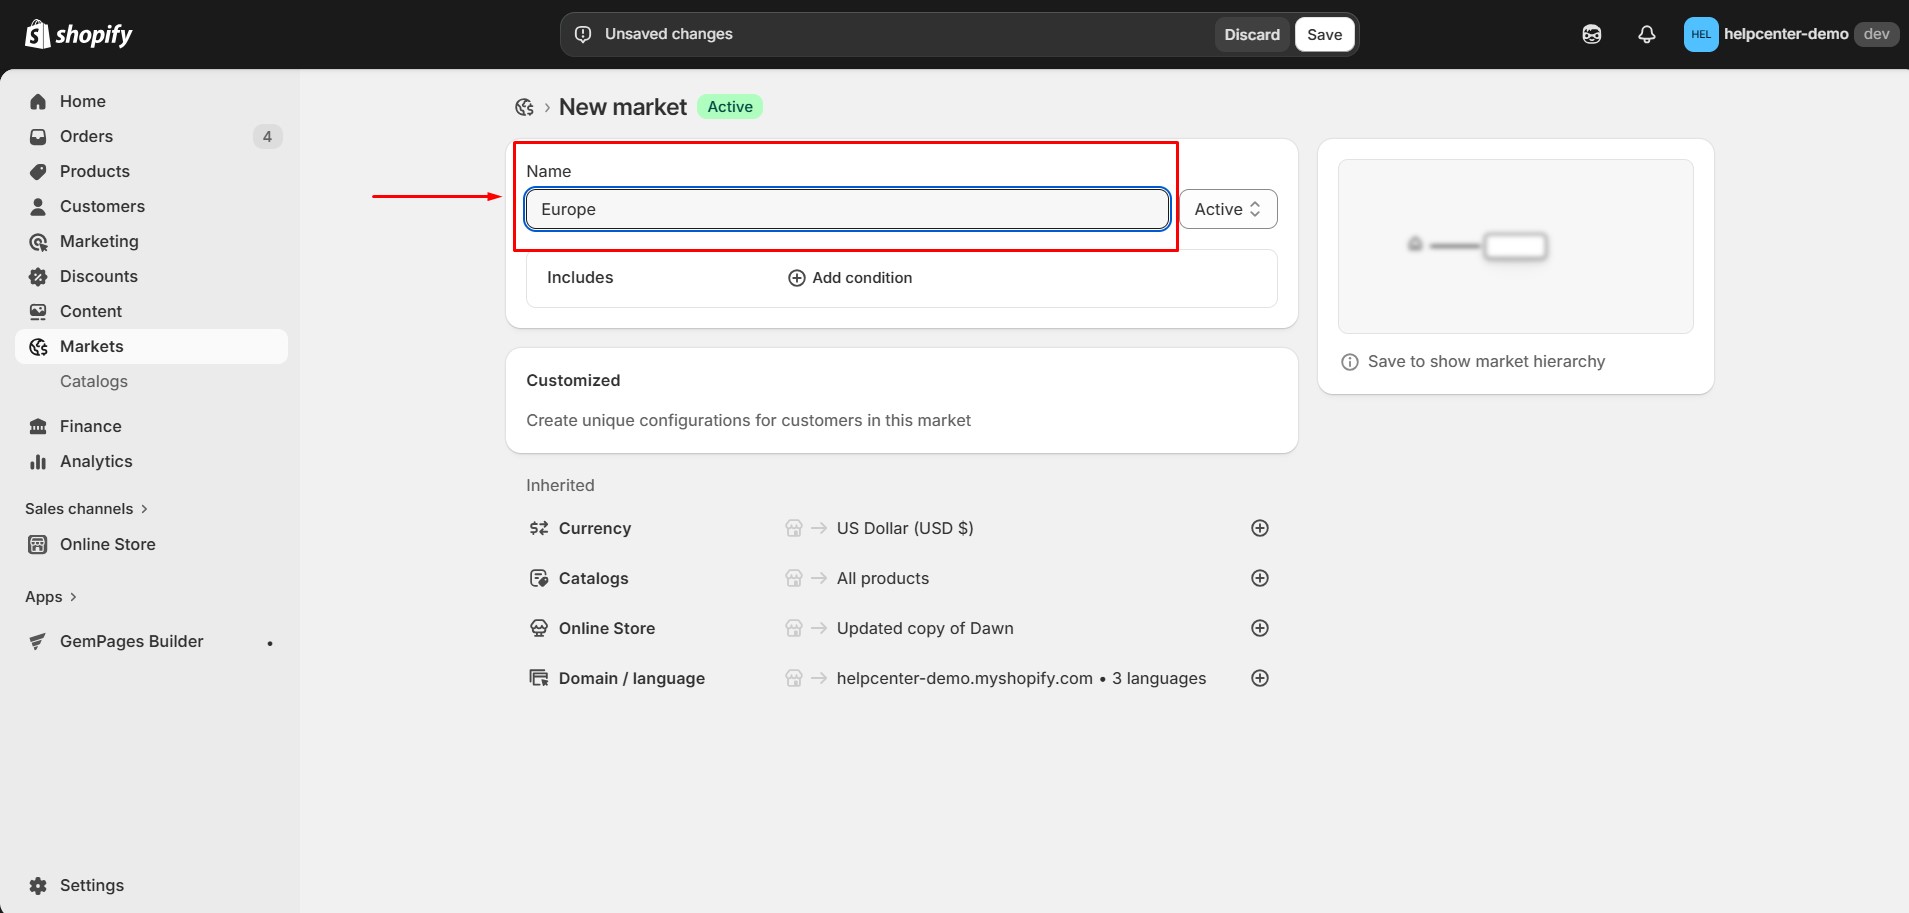
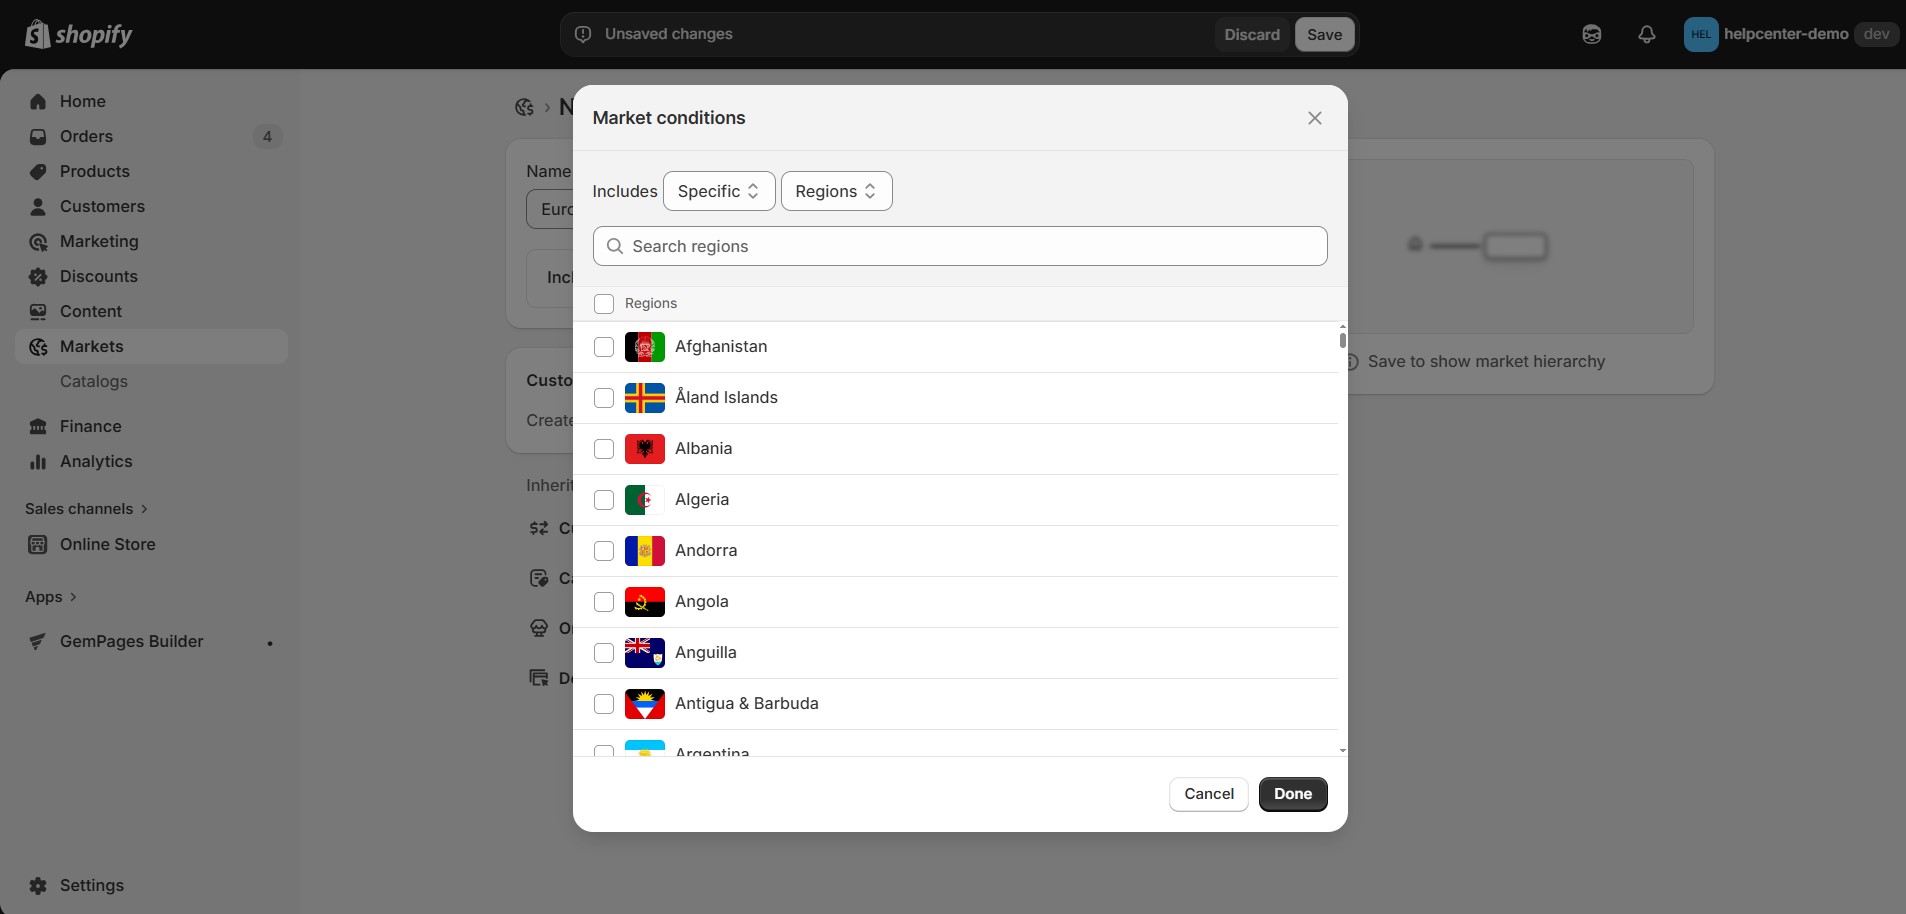
- Select one or more countries
- Click Done > Save.
How to Group Countries Correctly
You should group countries that share similar characteristics, such as:
- Currency
- Language
- Tax regulations
- Shipping costs and delivery expectations
Example strategies:
- One market for EU countries with similar VAT rules
- One market for English-speaking regions
- One market for high-cost or remote shipping destinations
A well-structured market setup makes pricing, tax configuration, and shipping rules far easier to manage later.
Step 3: Enable Local Currencies
Turn On Multi-Currency Selling
- Go to Settings > Payments
- Open Shopify Payments
- Enable Sell in multiple currencies
Once enabled, Shopify will automatically:
- Detect a customer’s market
- Display prices in the local currency
- Convert prices at checkout
Currency conversion is handled entirely by Shopify. Your theme or page builder does not control this logic.
Step 4: Configure Market-Specific Pricing
By default, Shopify converts prices using live exchange rates. However, relying solely on automatic conversion can hurt margins.
Apply Price Adjustments Per Market
- Go to Markets
- Select a market
- Open Pricing
- Enable Price adjustments
- Set a percentage increase or decrease
Price adjustments are commonly used to:
- Offset international shipping costs
- Protect margins from currency fluctuations
- Match local pricing expectations
Enable Price Rounding
Price rounding makes prices look natural and familiar to local shoppers.
Examples:
- €19.99 instead of €19.47
- ¥2,000 instead of ¥1,983
You can enable rounding in the same Pricing section for each market.
Step 5: Add Languages
Customers are significantly more likely to convert when they can browse and check out in their native language.
Enable Additional Languages
- Go to Settings > Languages
- Click Add language
- Select a language
- Publish it
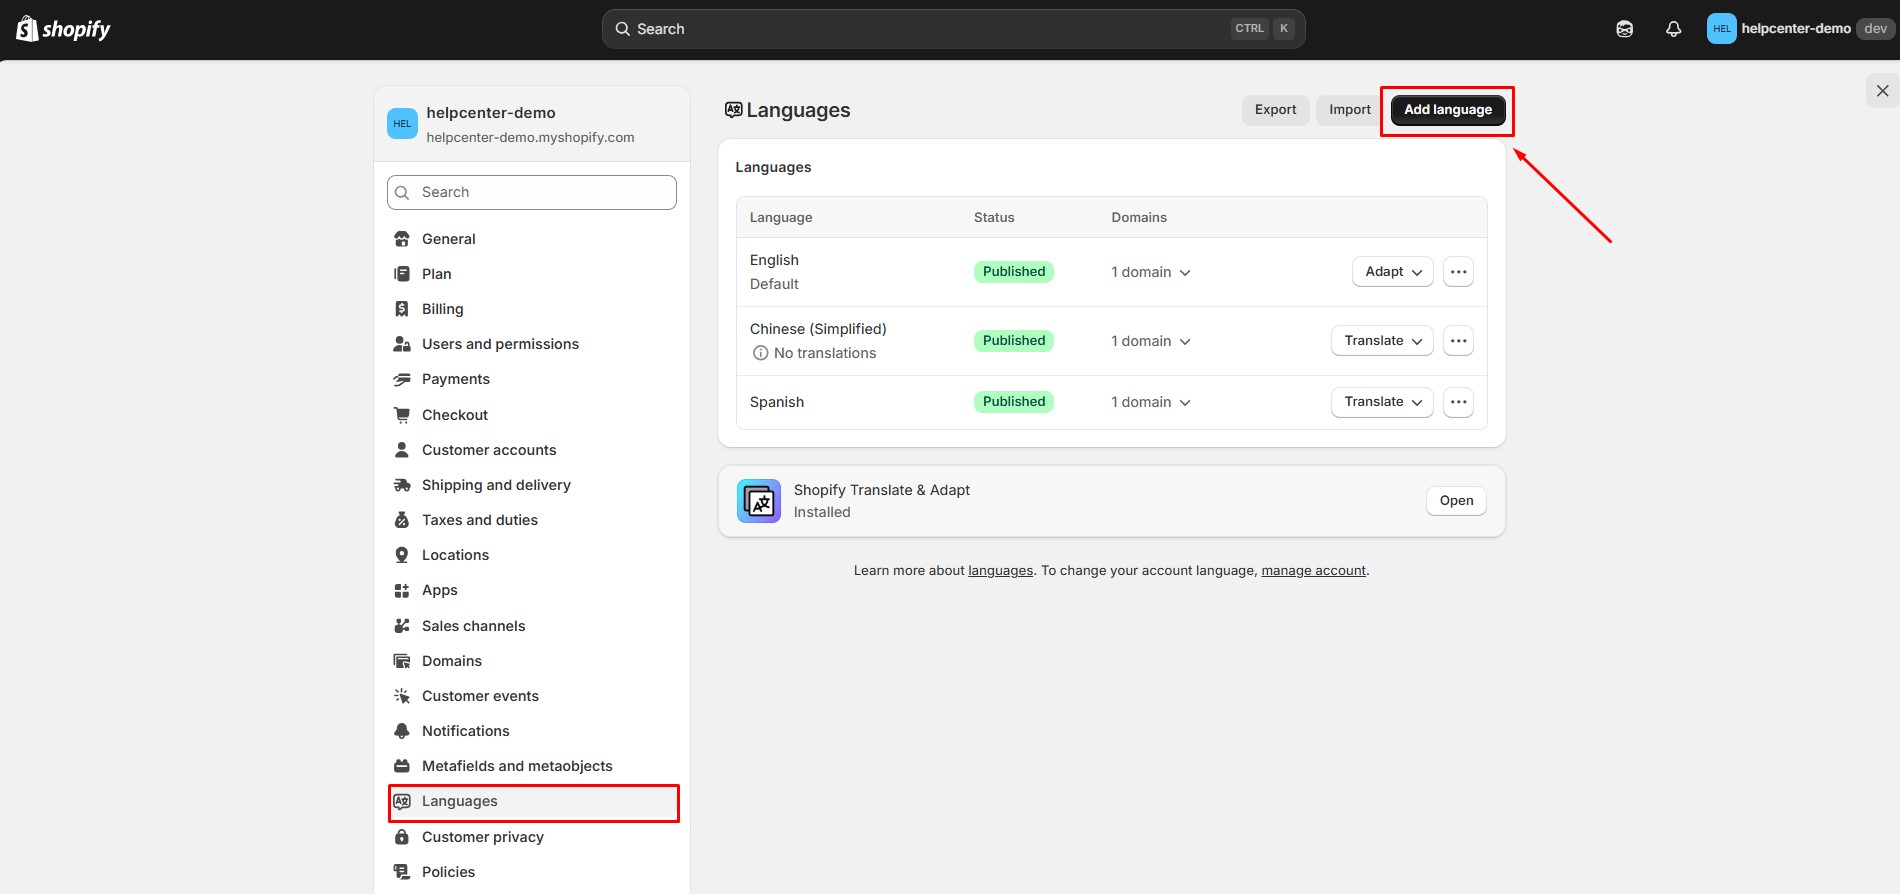
Shopify automatically:
- Creates language-specific URLs
- Routes visitors to the correct language version
- Translates checkout text where supported
Important Translation Notes
If content is not translated, Shopify displays the default language. This applies to:
- Products
- Collections
- Pages
- Navigation
- Checkout text
Shopify controls language routing. Page builders such as GemPages allow you to design and edit page content visually, but they do not affect:
- Market detection
- Currency logic
- Language routing
They are optional and do not change how Markets works. For more detailed guide, please refer to: How to Translate GemPages Pages in Shopify
Step 6: Set Up International Domains
International domains help both customers and search engines access the correct localized version of your store.
Shopify supports:
- Subfolders (example.com/fr)
- Subdomains (fr.example.com)
- Country-specific domains (example.fr)
Assign Domains to Markets
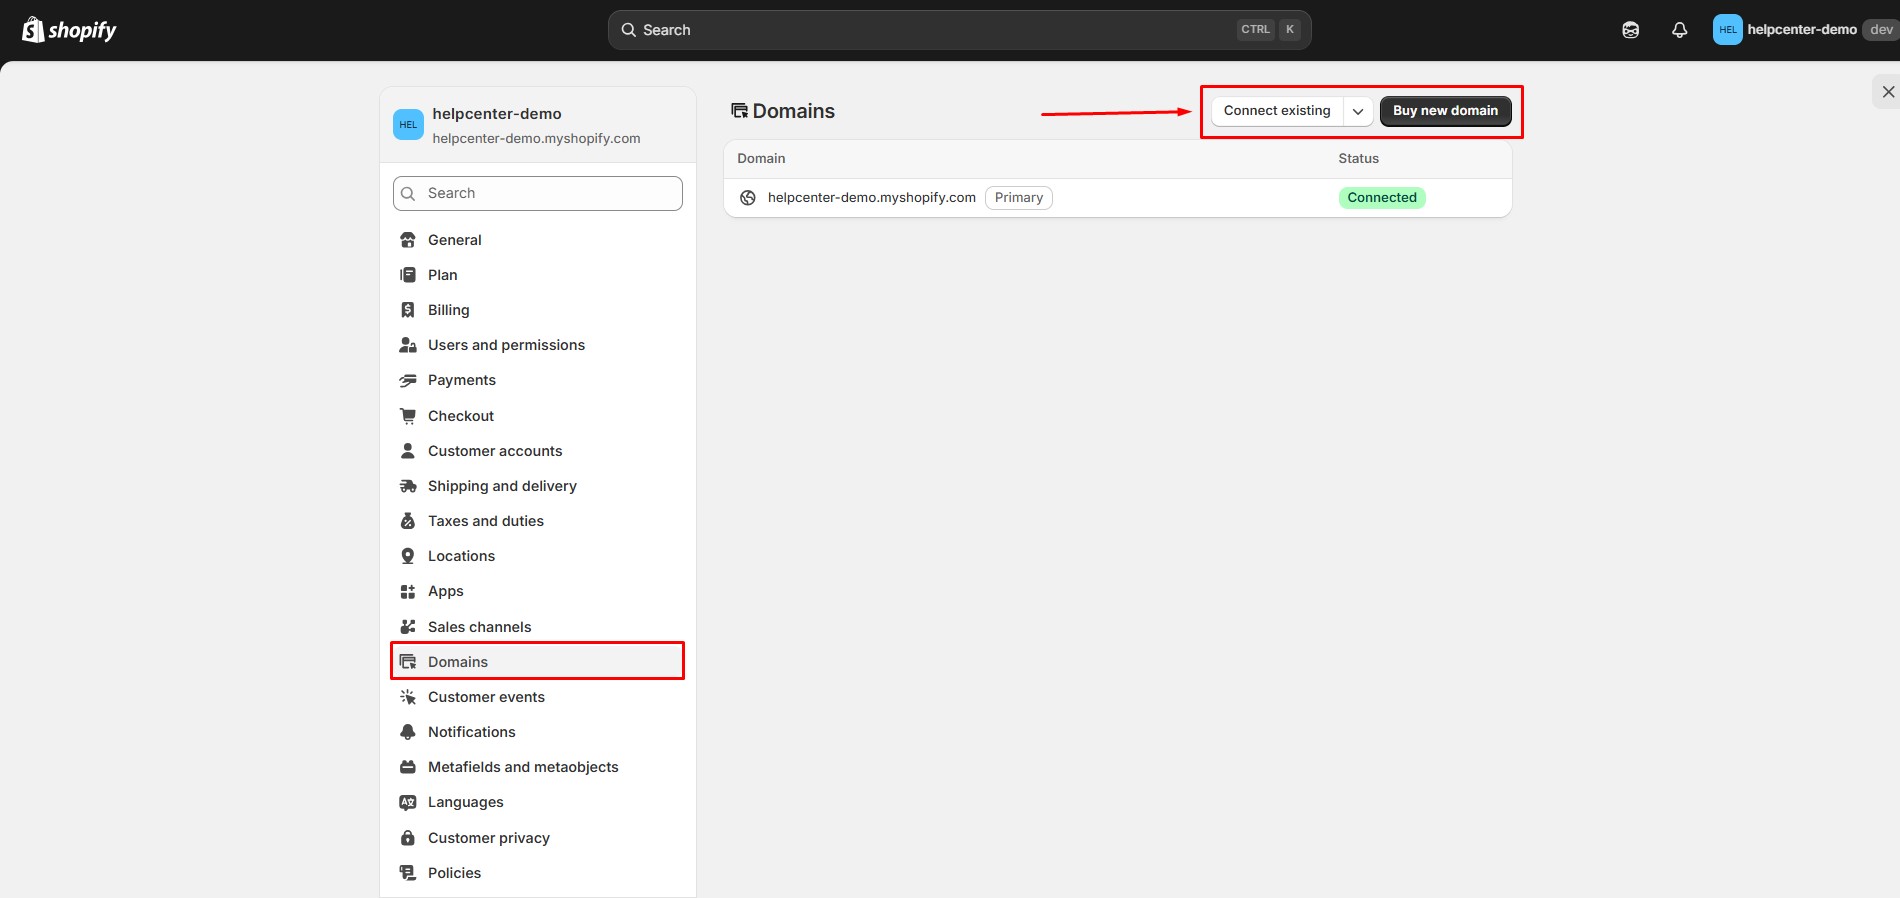
- Go to Settings > Domains
- Add or connect your domains
- Return to Settings > Markets
- Select a market
- Assign a domain, subdomain, or subfolder
Shopify automatically manages redirects, hreflang tags, and SEO structure.
Step 7: Configure Taxes
Enable Automatic Tax Calculation
- Go to Markets
- Select a market
- Open Taxes
- Enable Collect tax
- Choose Automatically calculate taxes
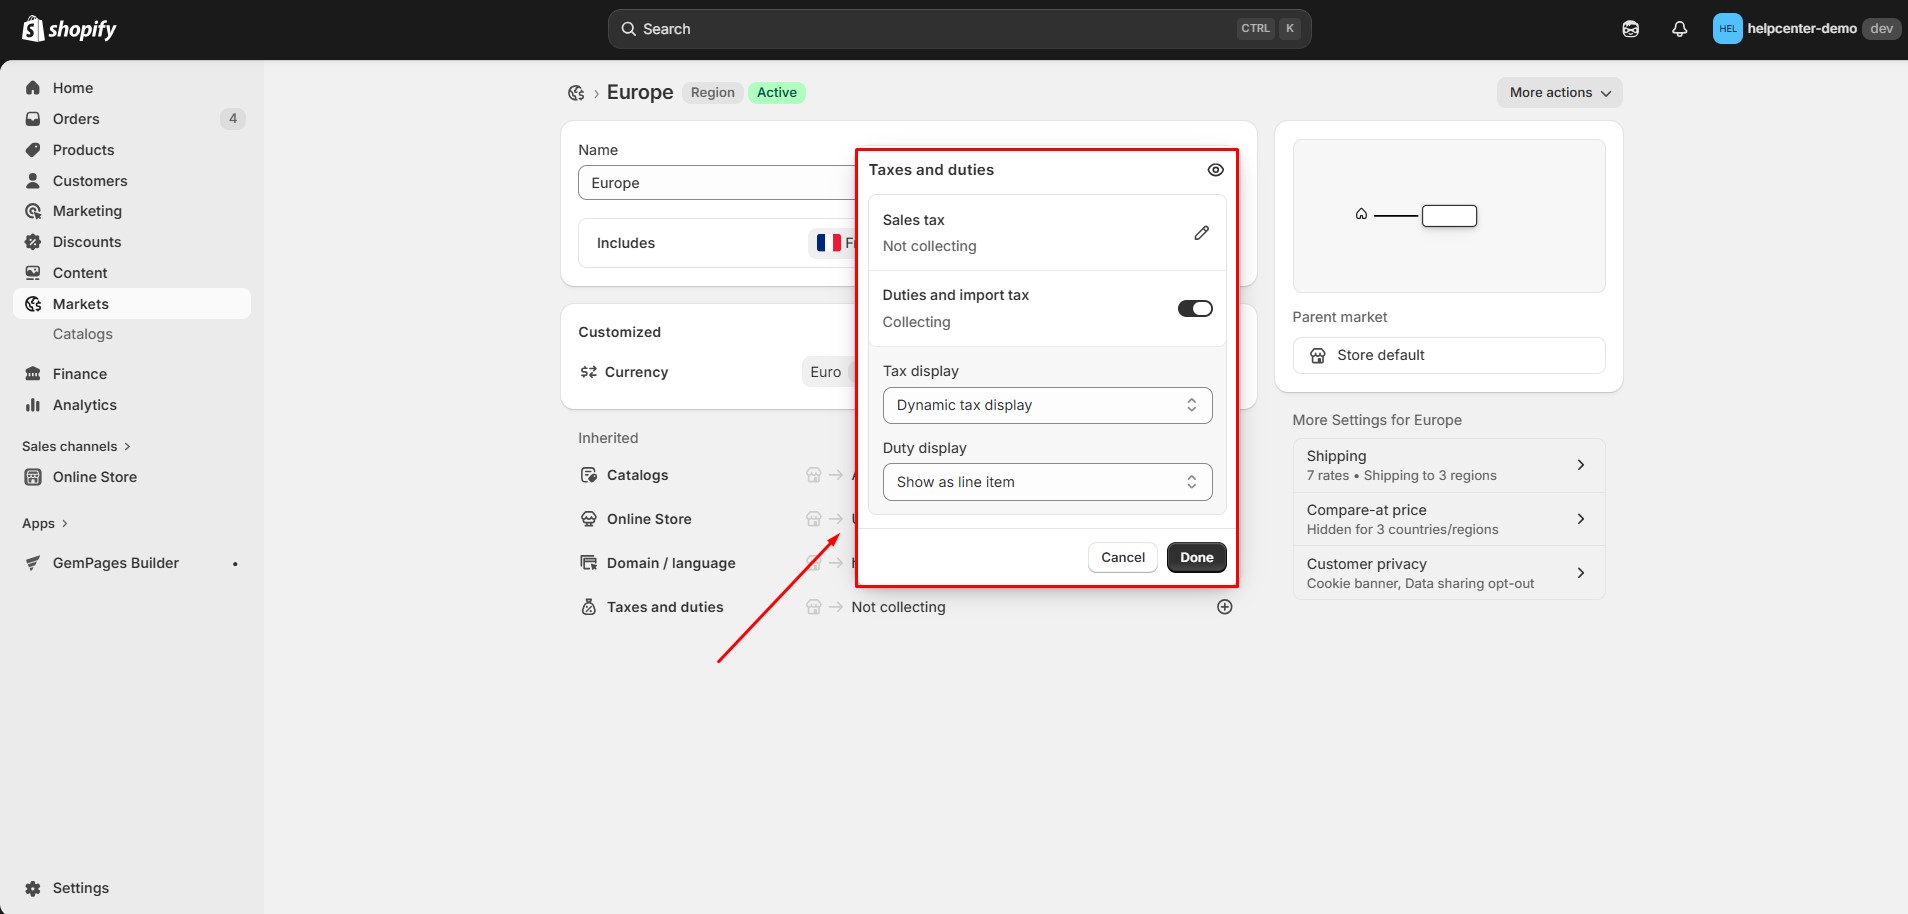
Shopify supports major tax systems, including:
- VAT (EU, UK)
- GST (Australia, New Zealand, Canada)
- Sales tax (United States)
Add Tax Registrations If Required
- Go to Settings > Taxes and duties
- Add VAT or GST registration numbers
- Assign them to the relevant regions
Shopify calculates taxes but does not file or remit them on your behalf.
Step 8: Set Up Duties and Import Fees
- Go to Markets
- Select a market
- Open Duties and import taxes
You can choose whether:
- Duties are paid by the customer upon delivery, or
- Duties are calculated and collected at checkout (carrier support required)
Clear duty handling reduces failed deliveries and customer complaints.
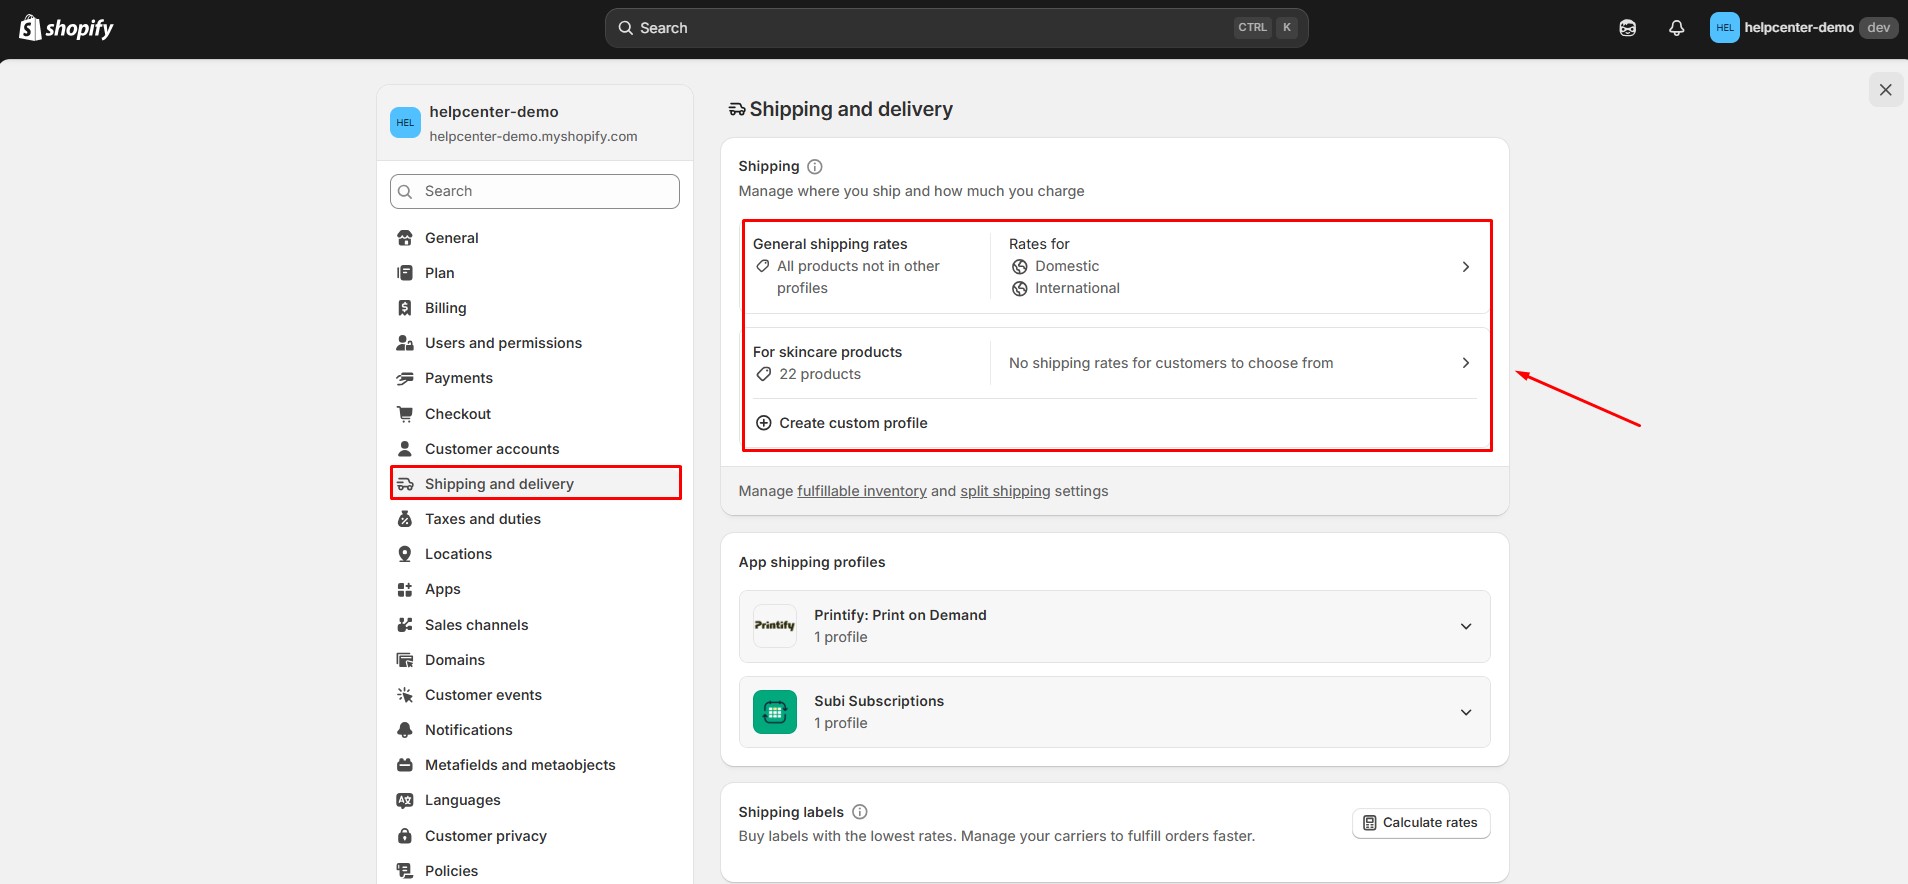
Step 9: Configure International Shipping
- Go to Settings > Shipping and delivery
- Open your shipping profile
- Create shipping zones for international regions
- Assign countries to each zone
- Add shipping rates
Best practices for international shipping:
- Clearly communicate delivery times
- Offer tracked shipping options
- Explain customs and duties upfront
- Avoid surprising customers with additional fees at checkout
Step 10: Test Each Market Before Launch
Before launching international sales, test every market thoroughly.
Checklist:
- Switch markets manually
- Verify currency and language display
- Confirm price adjustments and rounding
- Review tax and duty calculations
- Test shipping rates
- Place test orders
Common Mistakes to Avoid
- Using one global price for all markets
- Ignoring tax obligations
- Relying only on currency conversion without a pricing strategy
- Not translating key content
- Launching without testing each market
For a more detailed checklist, you can refer to these official docs from Shopify:
- Duties and import taxes
- Payments
- International shipping
- Publishing products with international sales tools
- Managed Markets
- Duty and tax inclusive pricing
- Understanding the General Product Safety Regulation (GPSR)
- Add language translations using the Translate & Adapt app
Can I Customize Content for Different Markets?
Yes. Shopify allows you to customize store content based on a visitor’s market. This means customers in different regions can see different promotions, messaging, or product selections while still using the same Shopify store.
Examples of market-specific content:
- Showing “Free US Shipping” for United States customers
- Displaying EU VAT messaging for European visitors
- Promoting region-specific products or collections
- Changing seasonal promotions for different regions
Most modern Shopify themes support market-specific content overrides.
This allows you to customize sections of your store for specific markets without affecting the global version.
Steps:
- Go to Online Store → Themes
- Click Customize
- In the top bar of the theme editor, open the market selector
- Choose the market you want to customize
- Edit sections, images, text, or blocks
- Save your changes
These edits only apply to that selected market. The default store content remains unchanged for other markets. For more information, please refer to this article: Customizing your theme for specific markets or Shopify B2B
FAQs about Shopify International Markets
1. Do I need multiple Shopify stores for international selling?
No. Shopify Markets is designed to manage international sales from one store.
2. Does my theme affect Shopify Markets?
No. Markets logic is handled by Shopify. Your theme or page builder only affects presentation.
3. Can I limit products by market?
Yes. Product availability can be controlled per market.


Thank you for your comments