


Why Exporting Images Matters for Your Store Design
Exporting images from your Shopify gallery can be useful when you want to back up your assets, share them with your team, or edit them further before re-uploading. Having direct access to these files ensures you maintain consistency across different channels (such as ads, email, or social media) while keeping your brand identity aligned.
Even though Shopify only allows one-by-one export, this still gives you more control over your visual assets outside of the Shopify environment.
If you want to export bulk images from the gallery, please consider using a 3rd-party app from the Shopify App Store.
How to Export Shopify Images from the Gallery?
Follow these steps to export your Shopify images from the gallery:
Step 1: Log in to your Shopify account and go to the admin page.
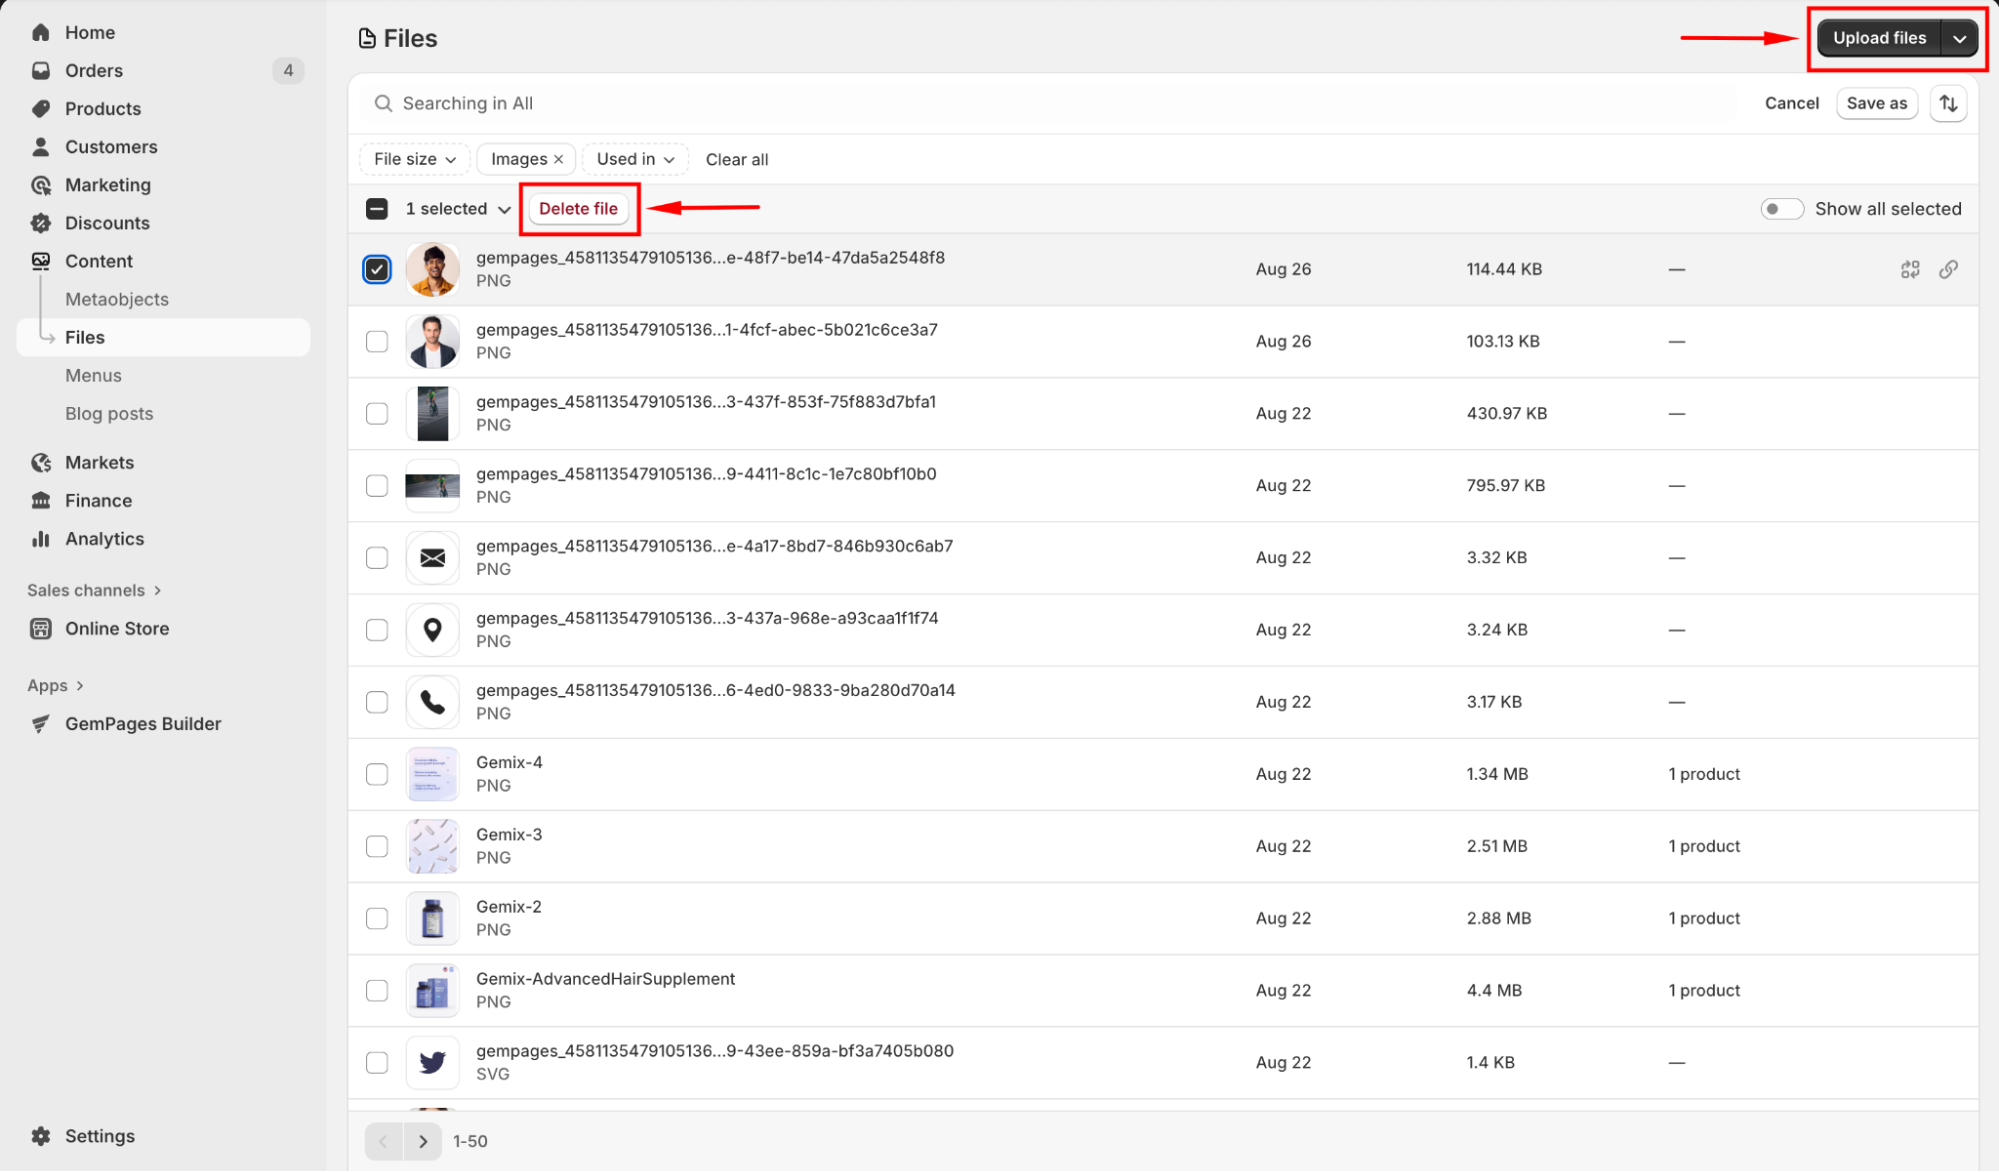
Step 2: On the left sidebar, click Content to show the dropdown. Hit the Files option to open the gallery.
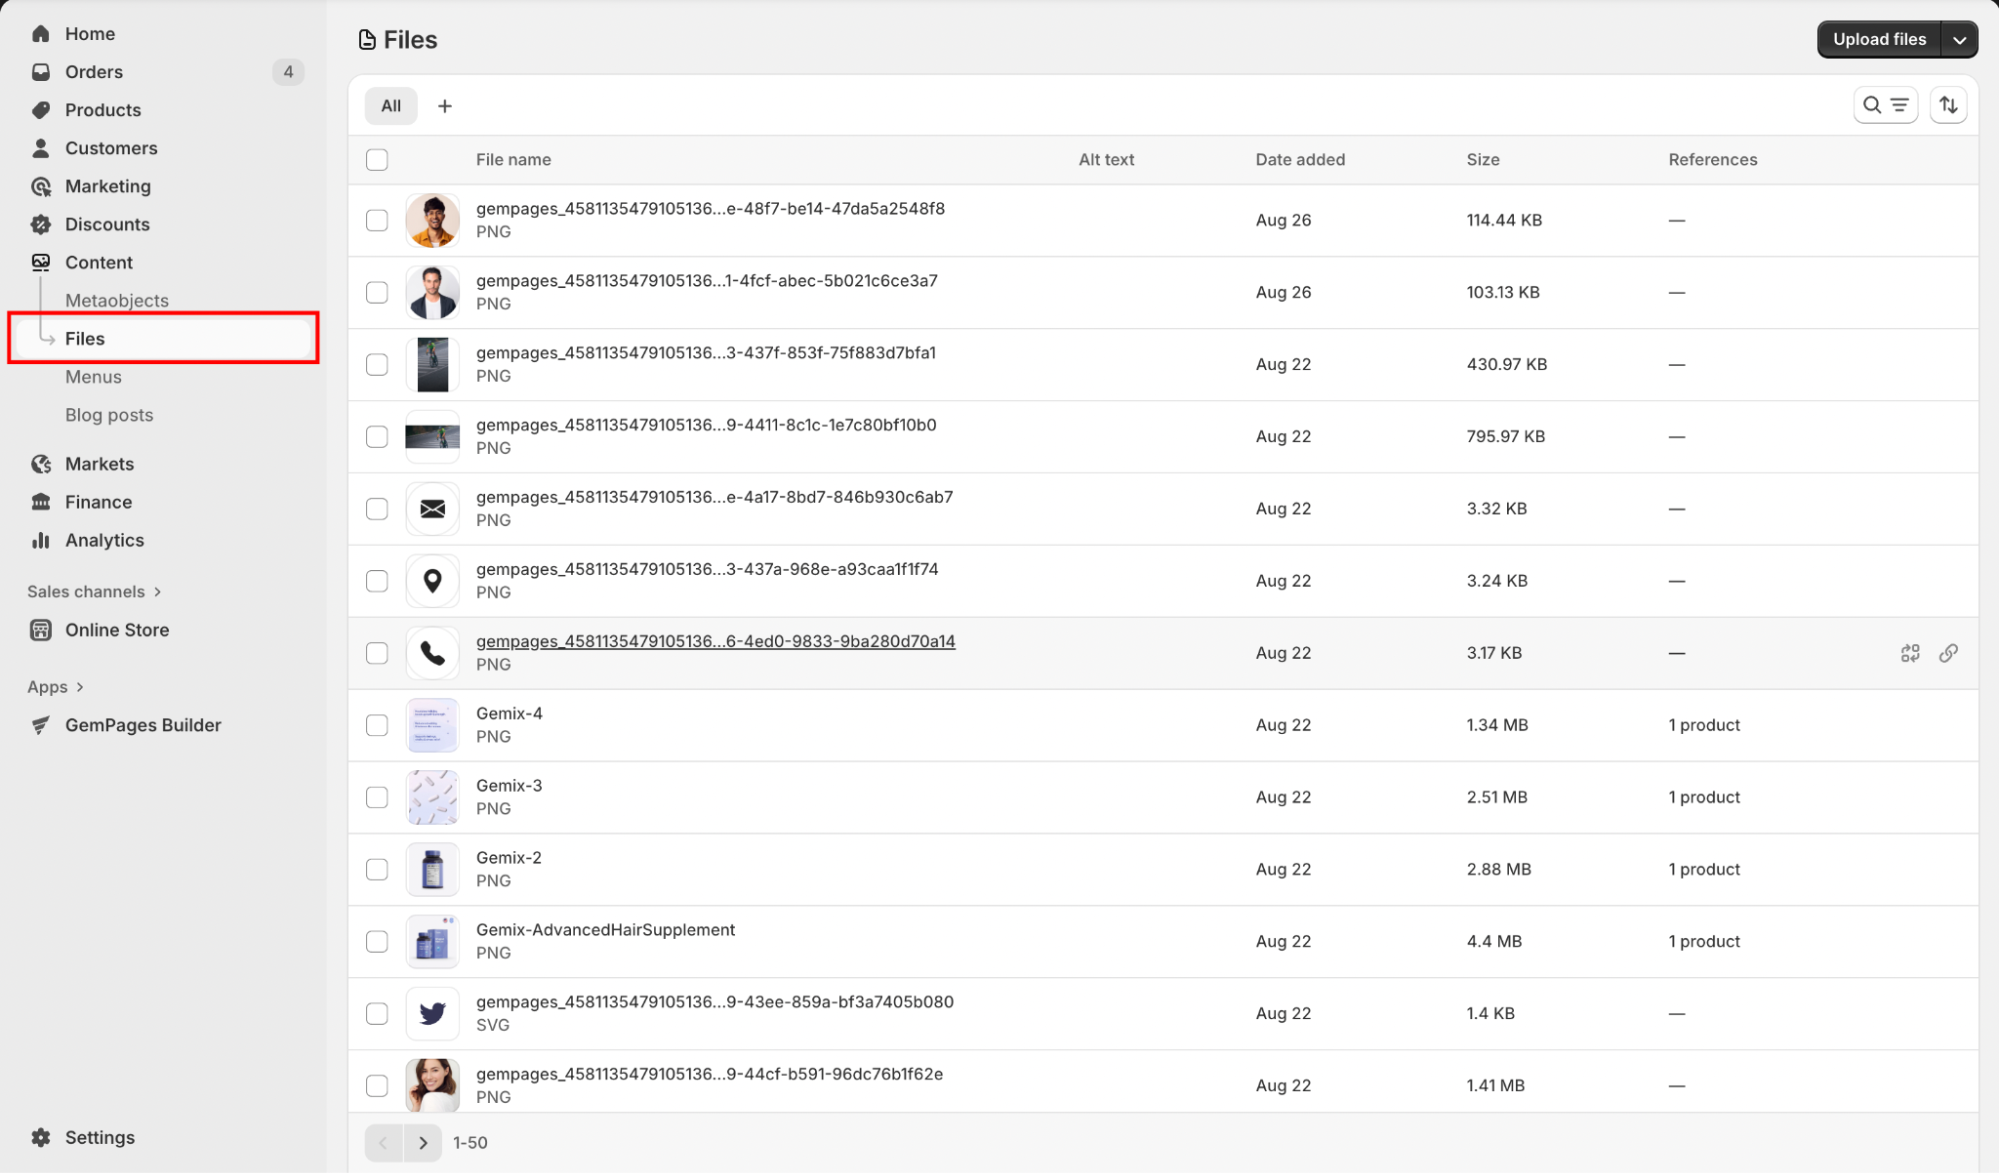
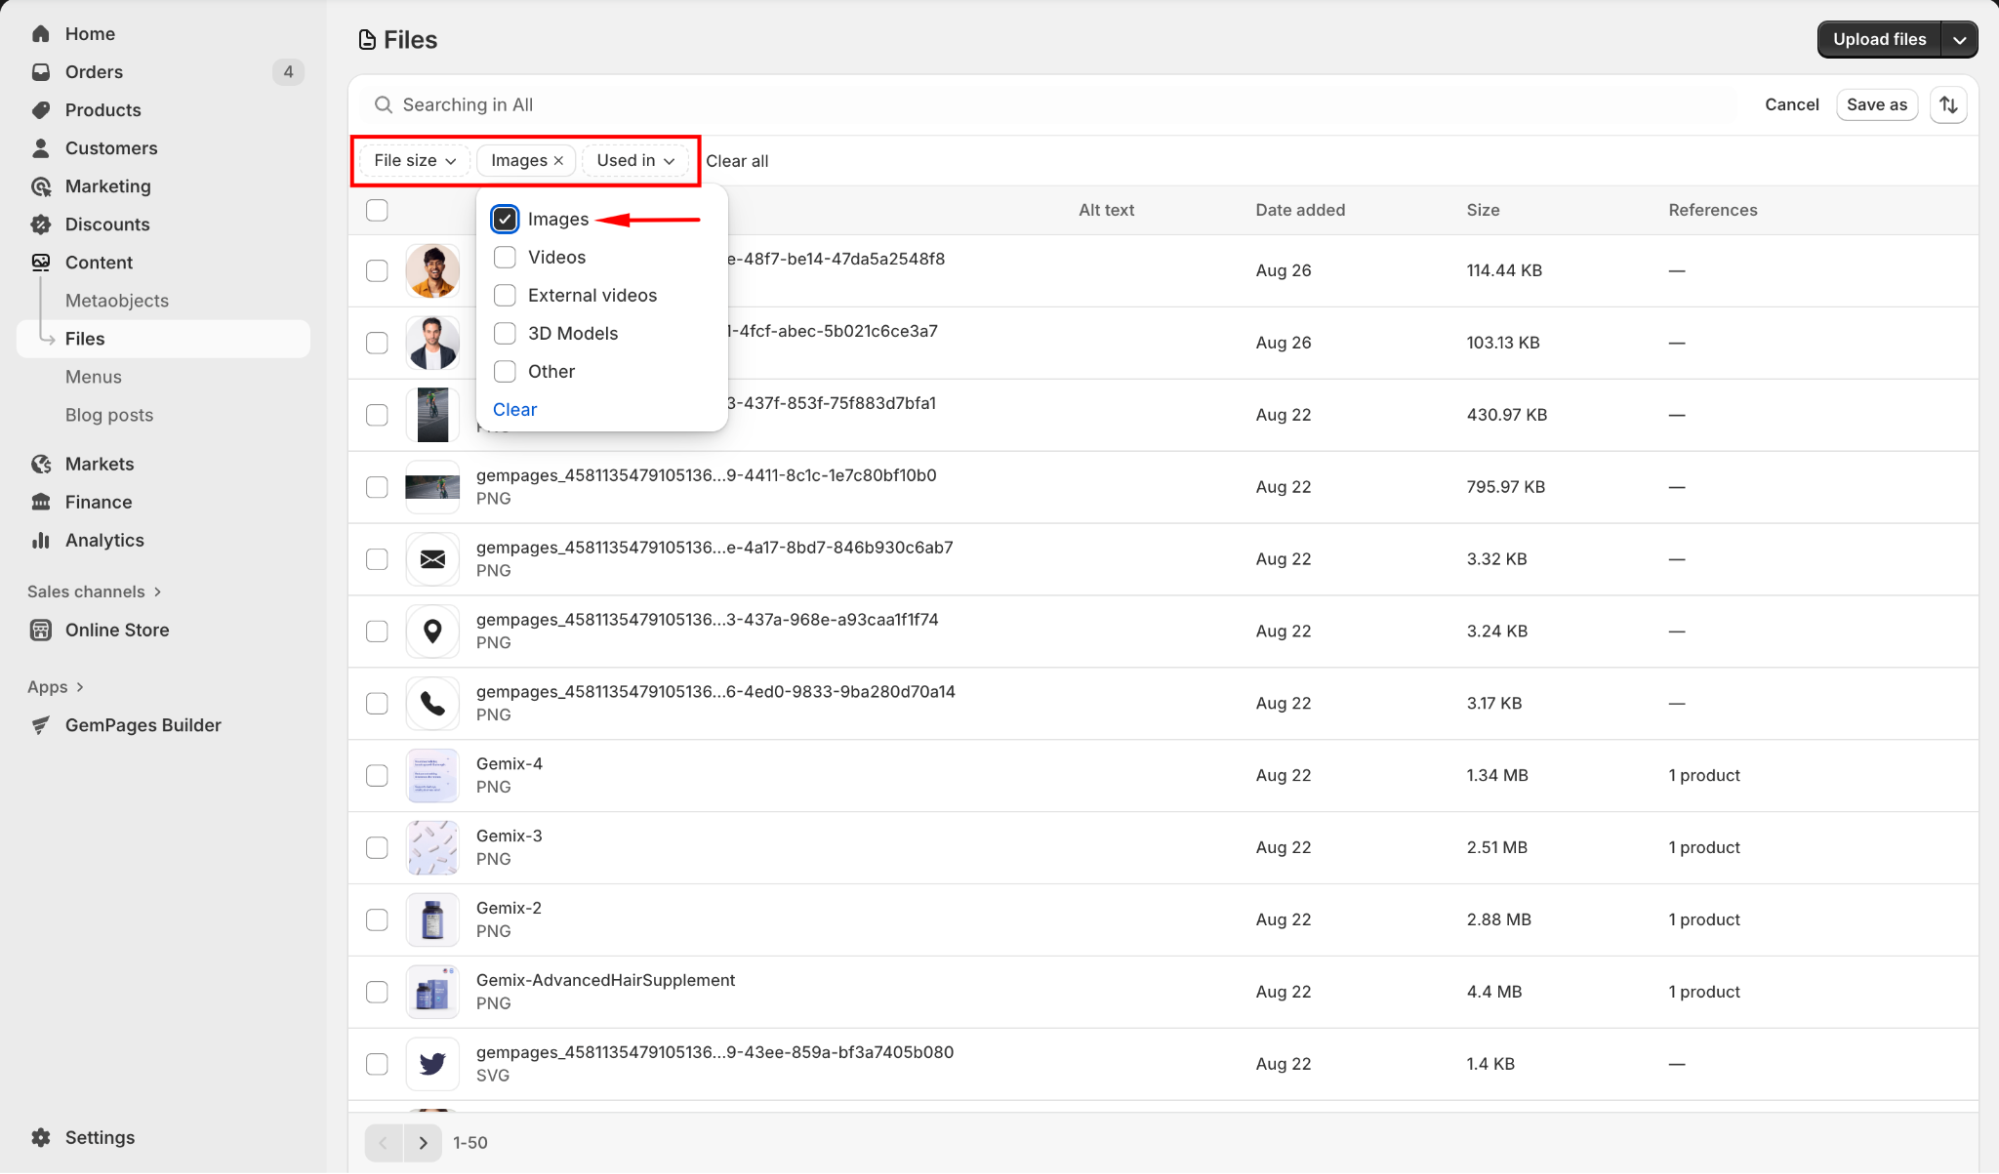
Step 3: From there, you can search the images by “file name”, or filter them by “file size”, “file type”, and “used in” option.
Step 4: Click the image you want to export to open the details view, and then click the Download icon in the upper-right corner.
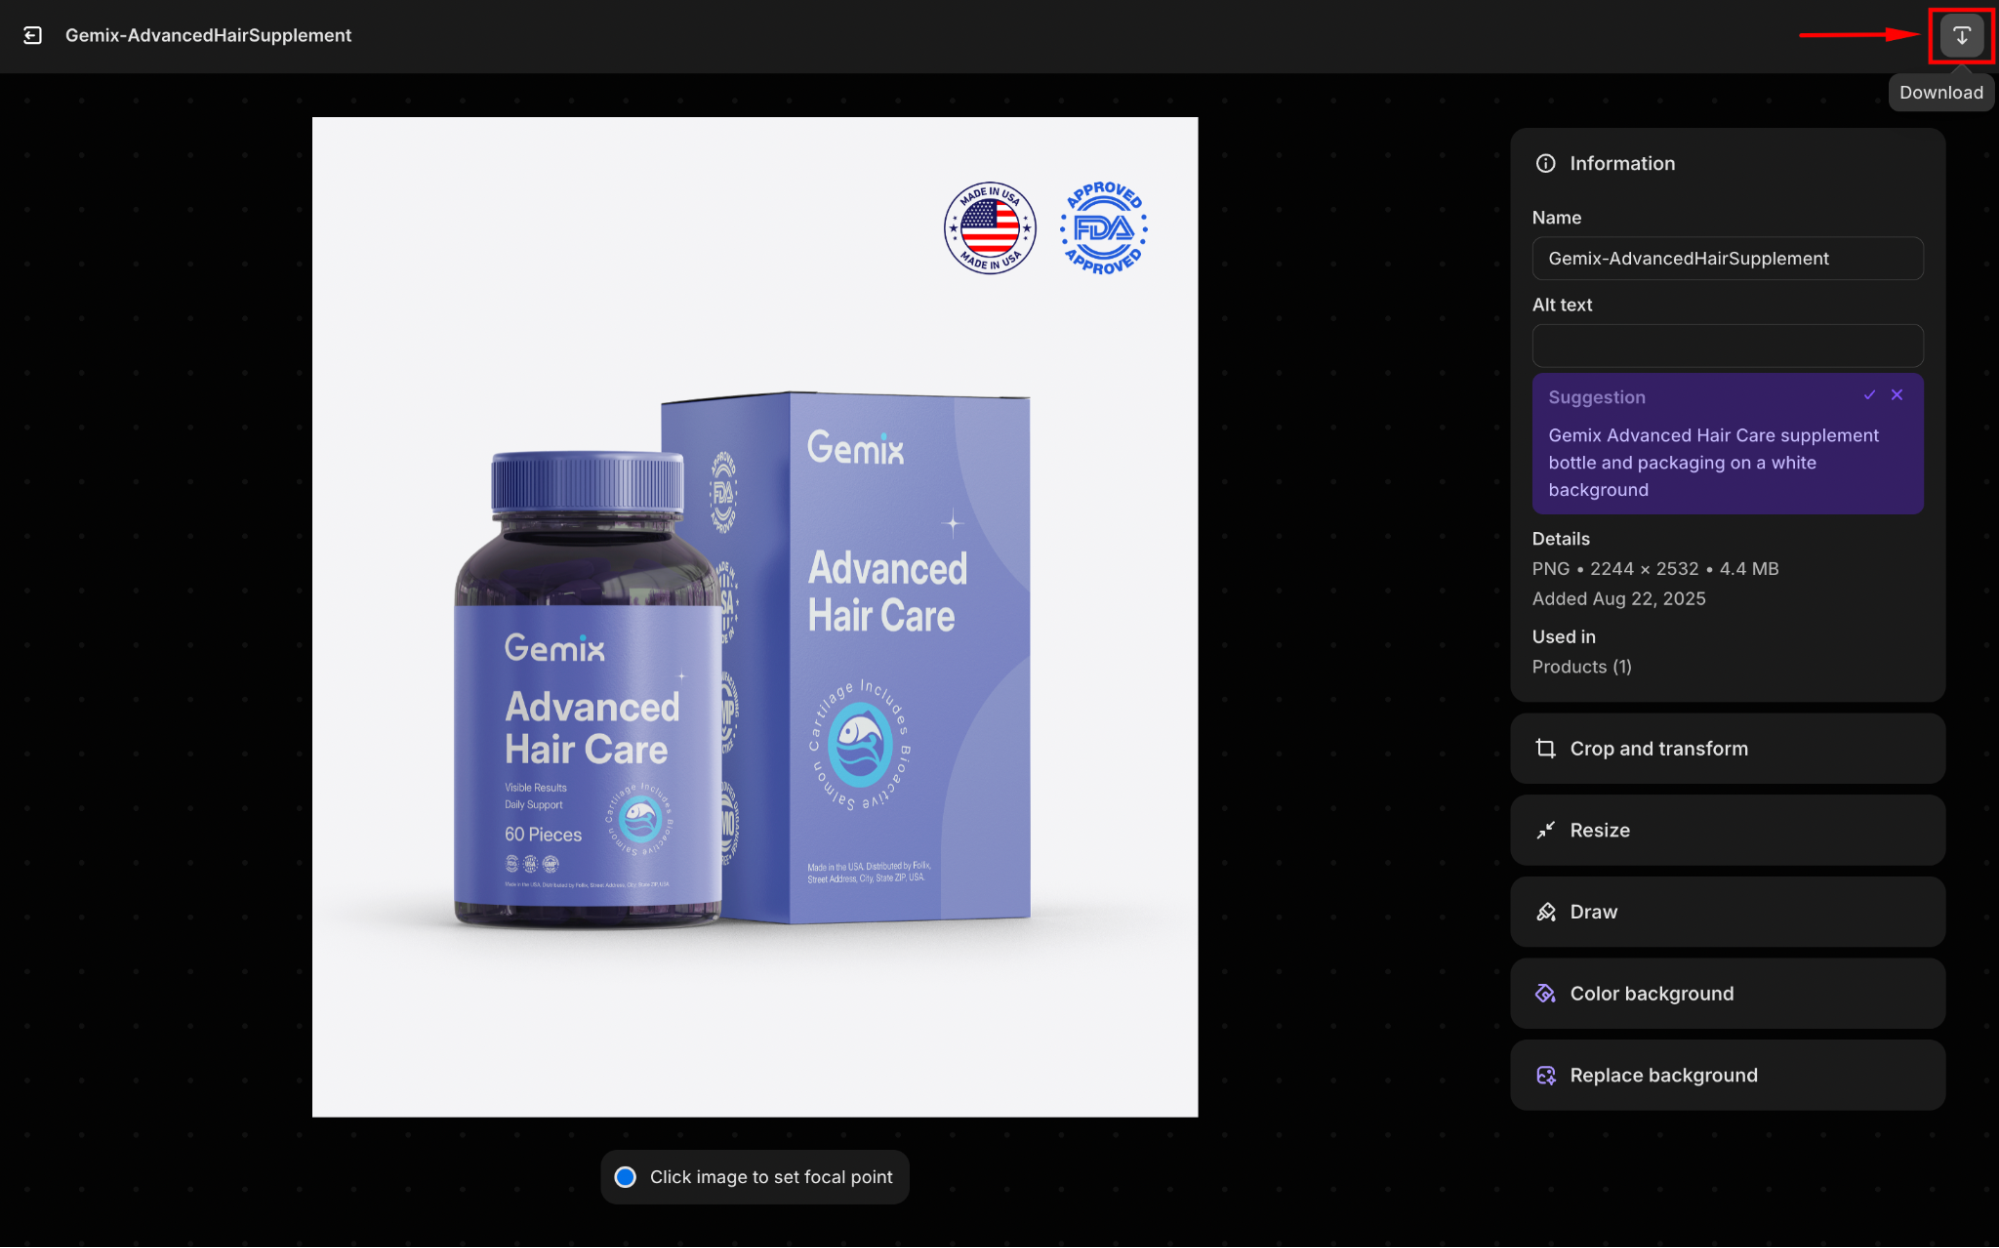
If you prefer, you can change the file name before exporting the image by using the Name option in the right sidebar.

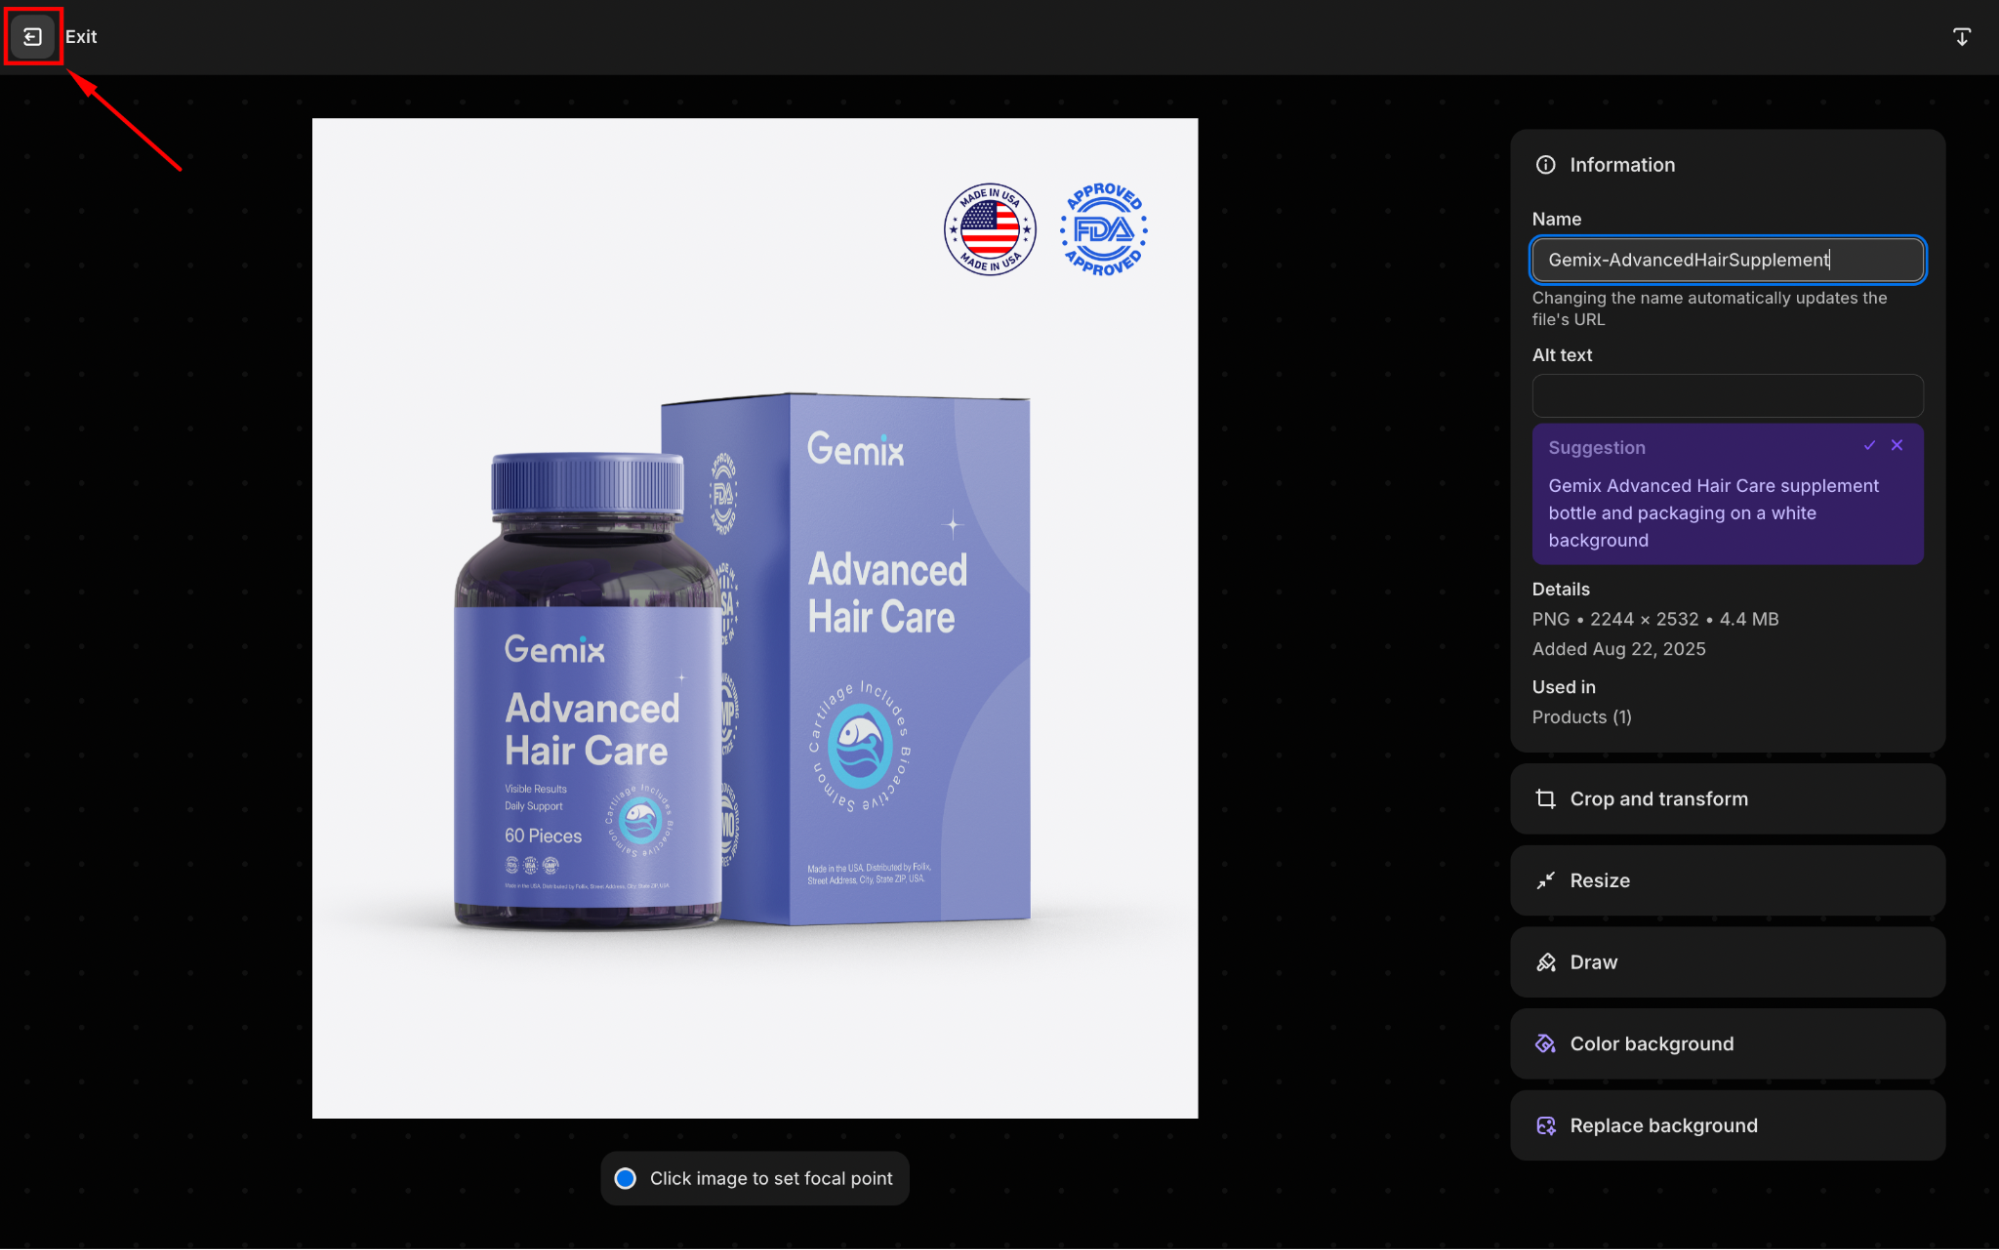
Step 5: In the upper left corner, click the Exit icon to get back to the gallery, and hit another image to download it.
From the Files page, you can also delete bulk images or upload new files.
Using Exported Images in GemPages
When designing with GemPages, you can use images straight from your Shopify Files library without having to export them first.
In detail, GemPages allows you to:
- Select any existing images straight from your Shopify Files library.
- Upload a new image from your device if it hasn’t been imported to the gallery yet.
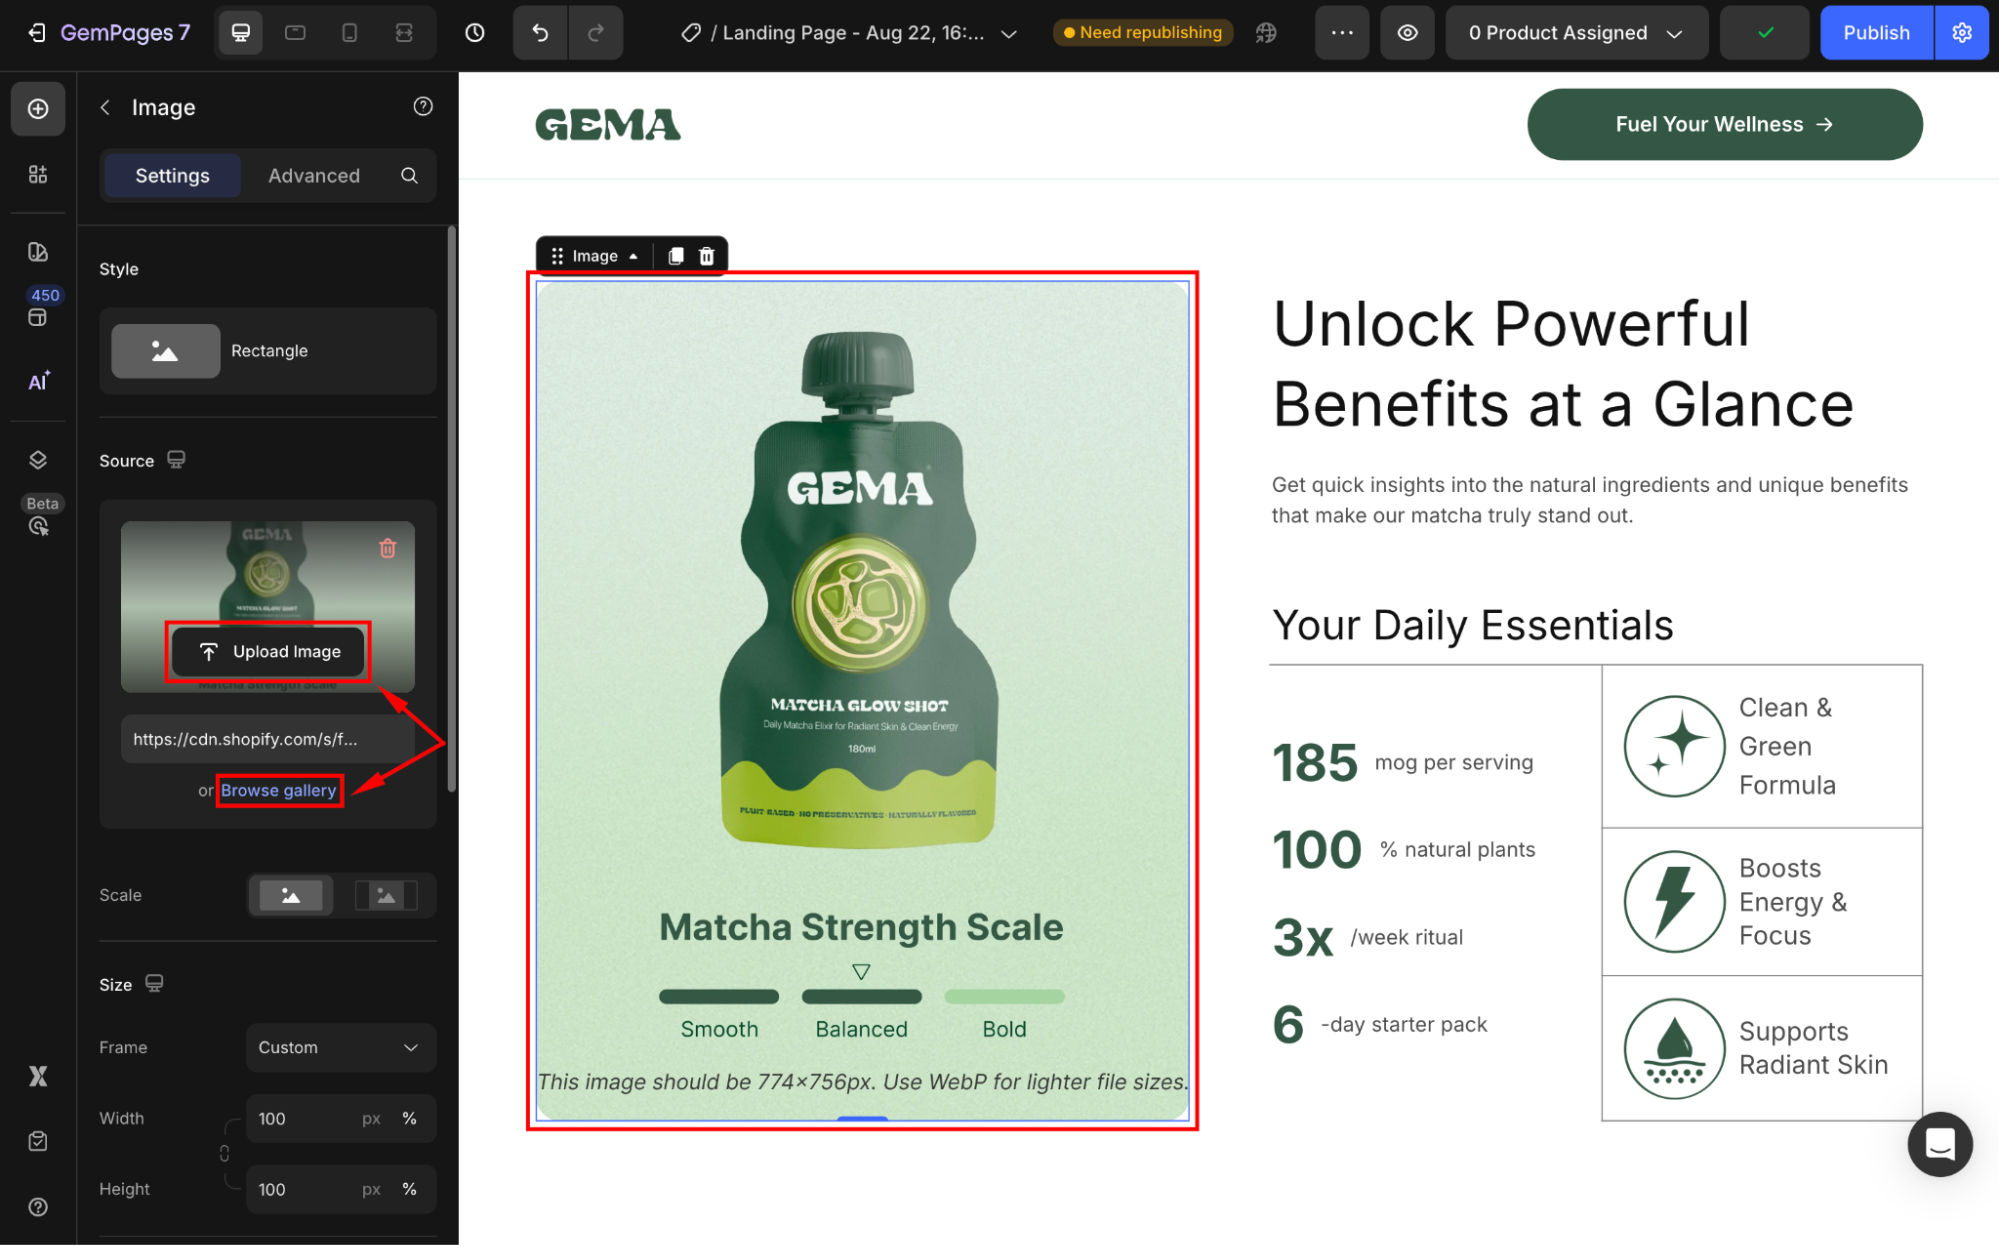
This saves you time and avoids unnecessary downloads and re-uploads. Your entire Shopify image library is always available inside GemPages, ready to be used in elements such as Image Element, Carousel Element, or the Hero Banner Element.


Thank you for your comments