


What Is Shopify Flow?
Shopify Flow is an automation tool that allows Shopify merchants to create workflows that run automatically when certain events happen in their store.
A typical workflow in Shopify Flow includes three components:
Trigger: The event that starts the workflow.
Example: Order created.
Condition: Rules that determine whether the workflow should continue running.
Action: What Shopify should do automatically when the conditions are met.
Example: Add a tag to an order.
Merchants often use Shopify Flow to automate tasks such as:
- Tagging orders automatically
- Detecting potential fraud
- Sending inventory alerts
- Segmenting customers based on behavior
In this tutorial, we will use Shopify Flow to automatically tag orders when a customer accepts a GemPages post-purchase offer.
What This Workflow Does
Once configured, the workflow works as follows:
- A new order is created in your store.
- The order is edited by GemPages when the customer accepts a post-purchase offer.
- Shopify Flow detects this change.
- The system automatically adds a predefined tag to that order.
This tag helps you quickly identify orders that include post-purchase upsells directly in the Shopify order dashboard:
Before You Start
Before creating the workflow, make sure you have installed Shopify Flow from the Shopify App Store.
If you are new to Shopify Flow, refer to the official guide: https://help.shopify.com/en/manual/shopify-flow
Once the app is installed, you can start creating your automation.
How to Automatically Tag Orders for GemPages Post-Purchase Offers
Follow the steps below to create a workflow in Shopify Flow that automatically adds a tag to orders when customers accept a GemPages Sales Funnels post-purchase offer.
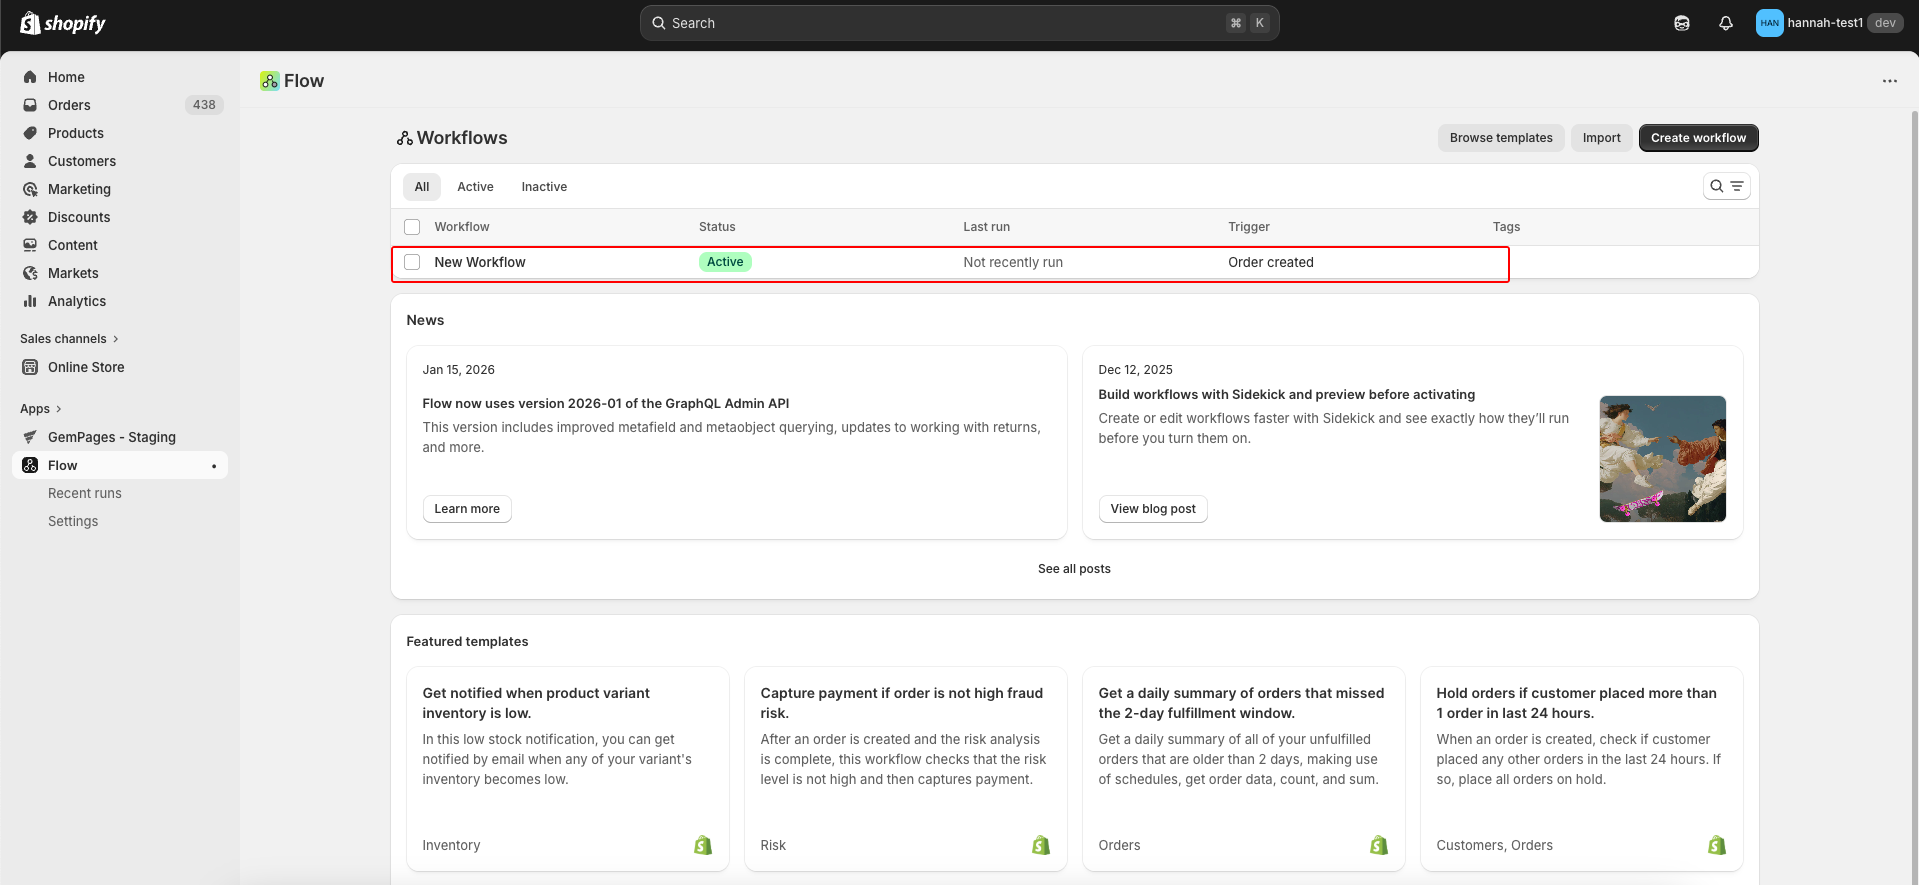
Step 1: Create a New Workflow
- Open Shopify Flow from your Shopify admin => Click Create workflow.
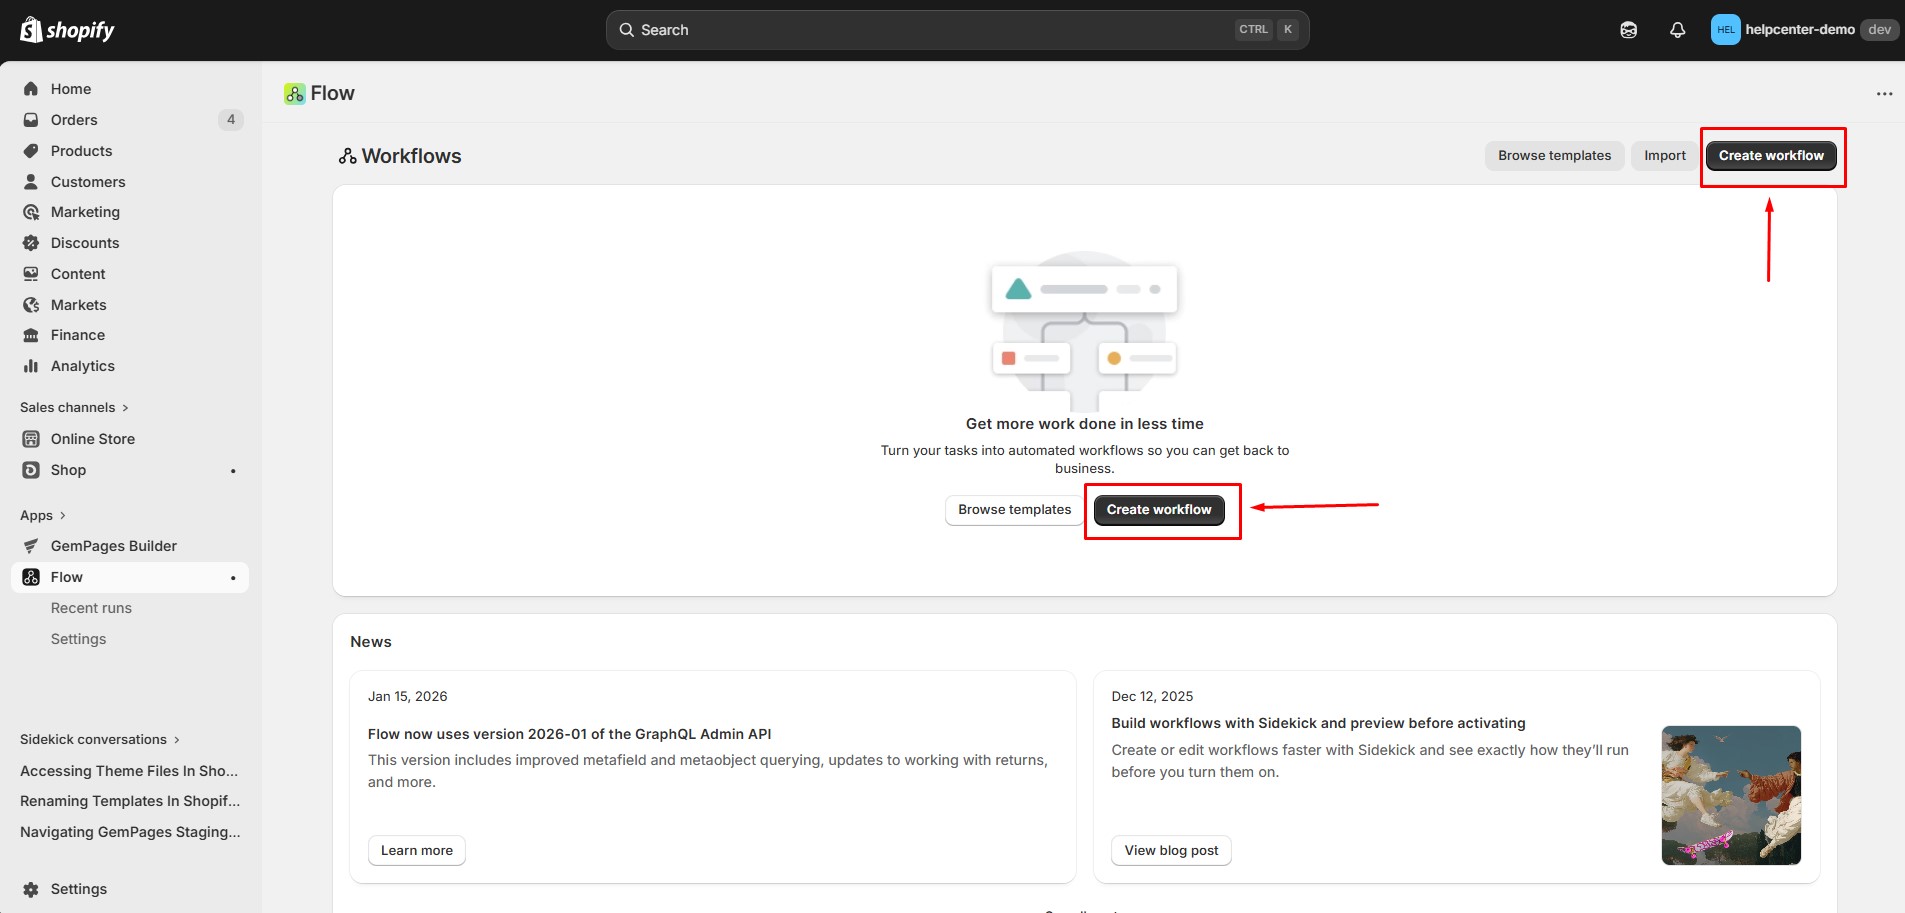
- The Create workflow screen will appear. Click Select a trigger.

Step 2: Set Up the Trigger
The trigger determines when the workflow starts.
- In the trigger search bar, type “Order created”. Select Order created from the list.
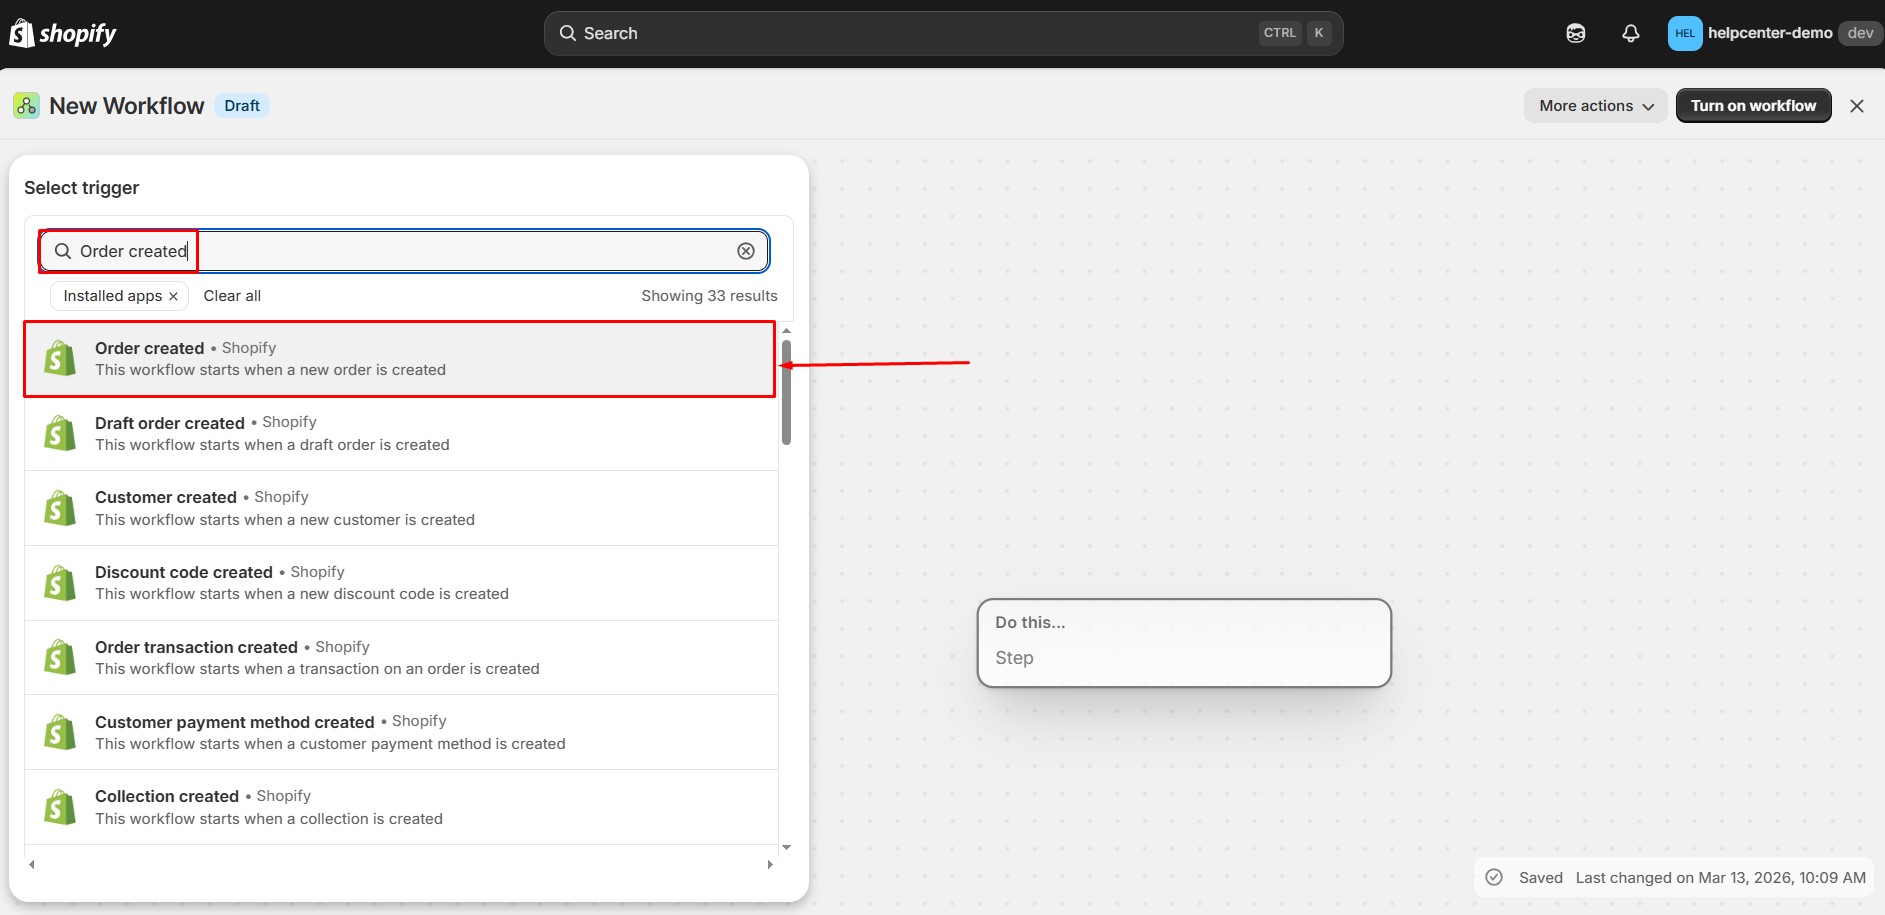
- After selecting the option, the screen displays the result as:

This trigger will start the workflow whenever a new order is created in your store.
Step 3: Add the Conditions
Before adding the conditions, it’s helpful to understand why they are required.
When a customer accepts a GemPages post-purchase offer, Shopify does not create a new order. Instead, the existing order is edited to add the accepted item. Because of this, the workflow needs to detect orders that were edited by the GemPages app.
To accurately identify these orders, we use two conditions:
- Order edited = true: Ensures the workflow only continues for orders that were modified after being created.
- App title = GemPages Builder: Confirms that the edit was made by the GemPages app, not by another app or a manual change.
Add the first condition:
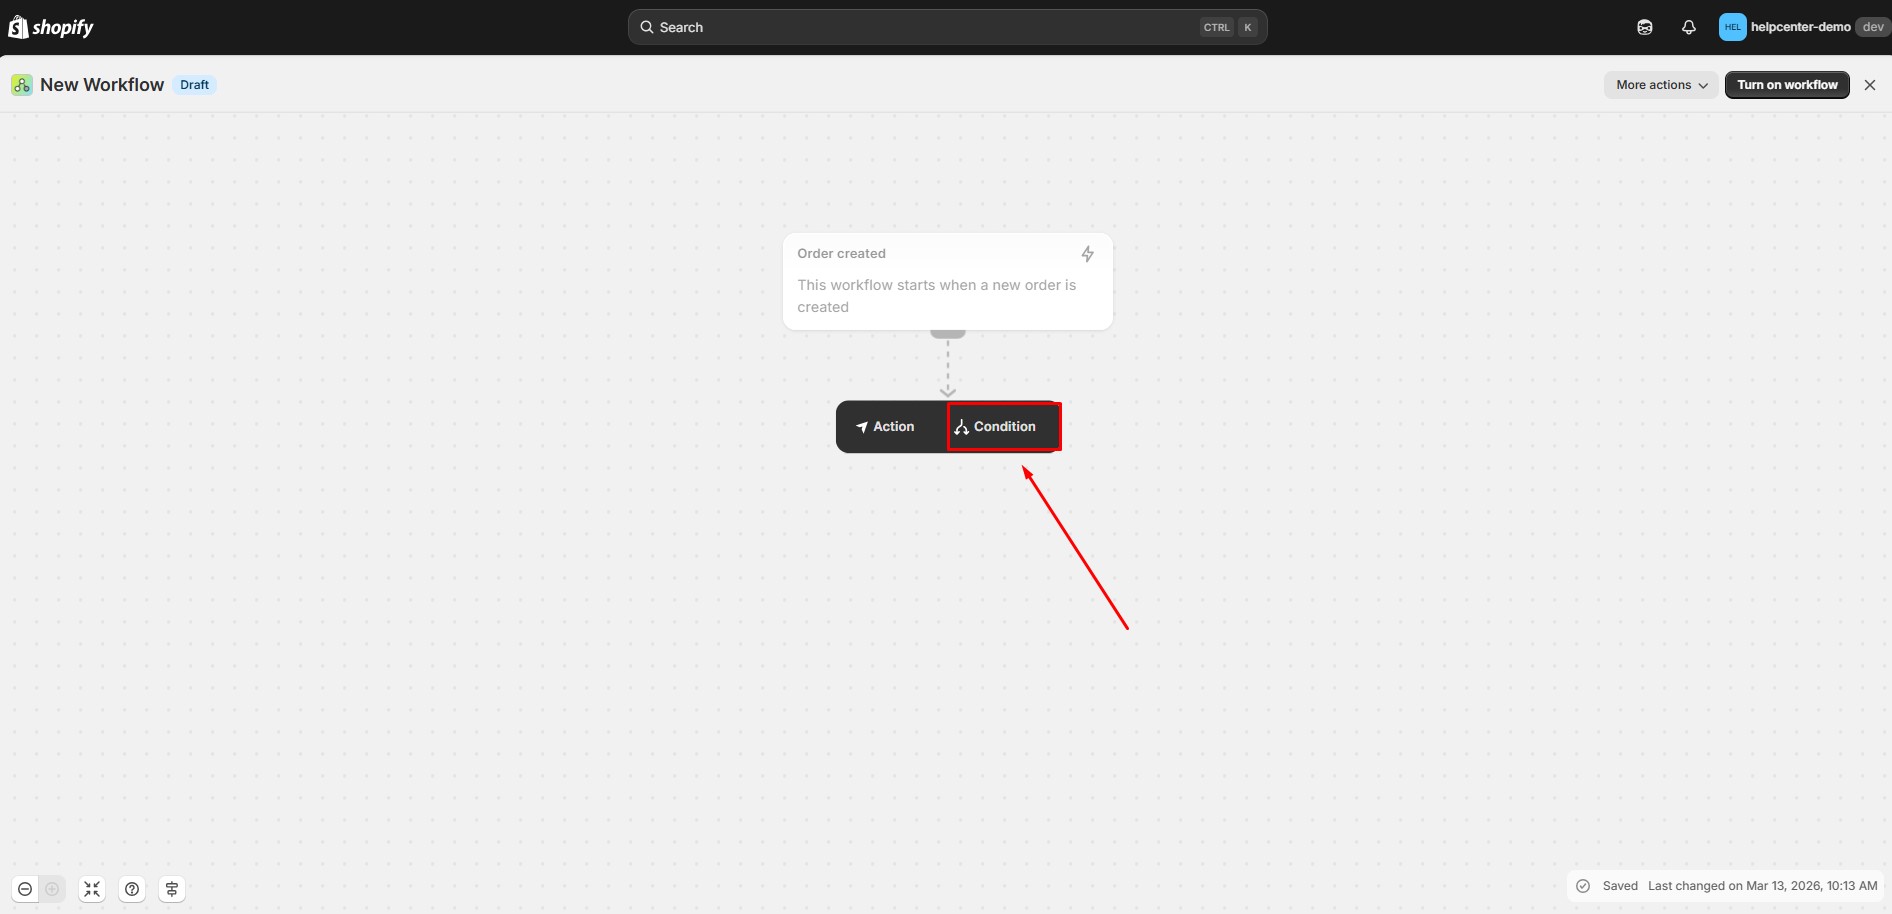
- Add the condition by hovering the block trigger and clicking the button “+”.
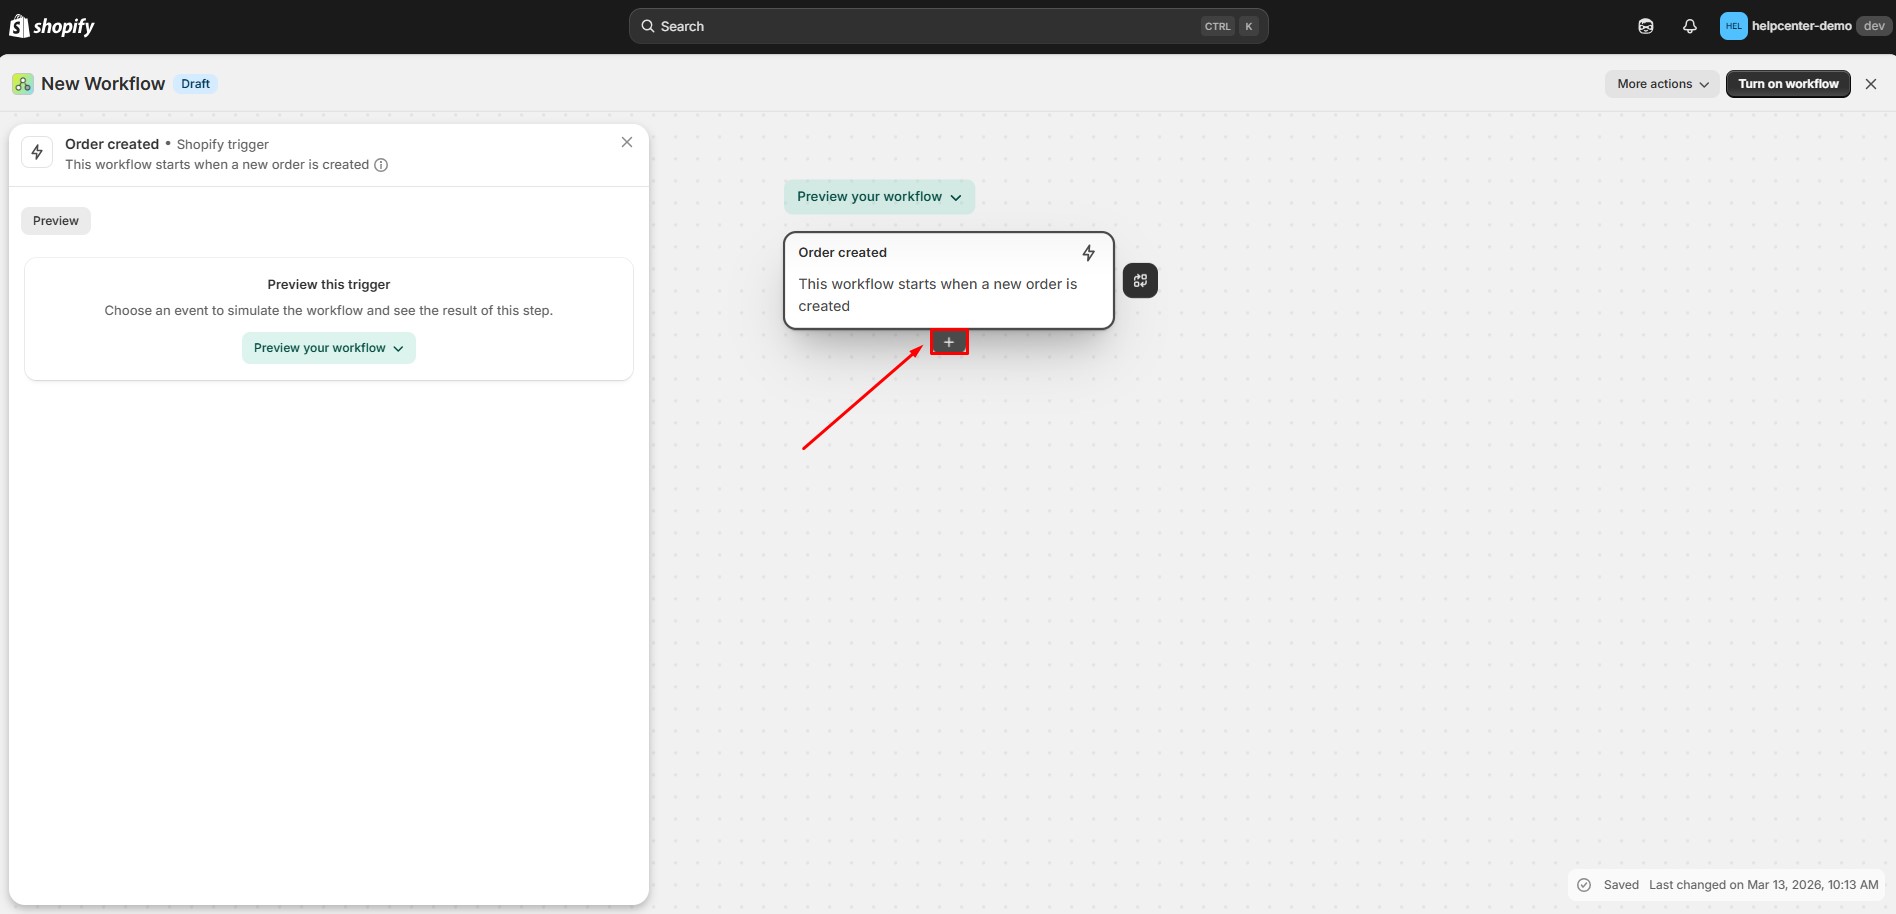
- Select the button Condition.
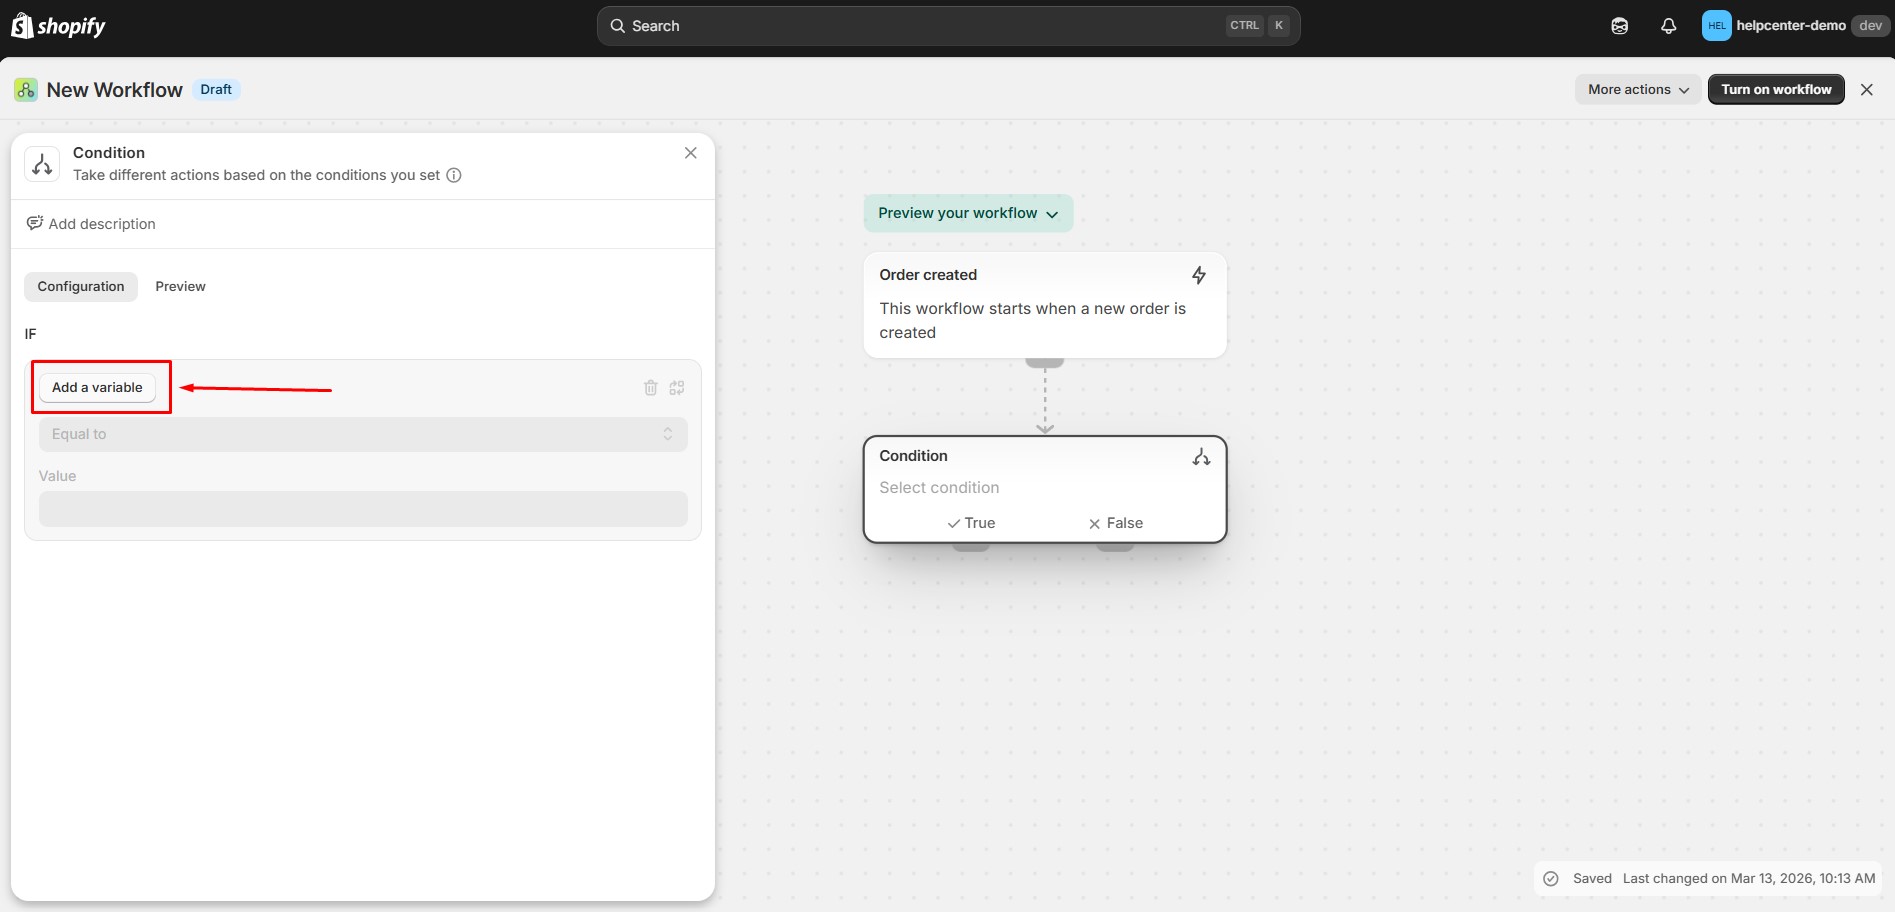
- The block Condition is displayed, in the left sidebar, select the button Add a variable to set the condition.
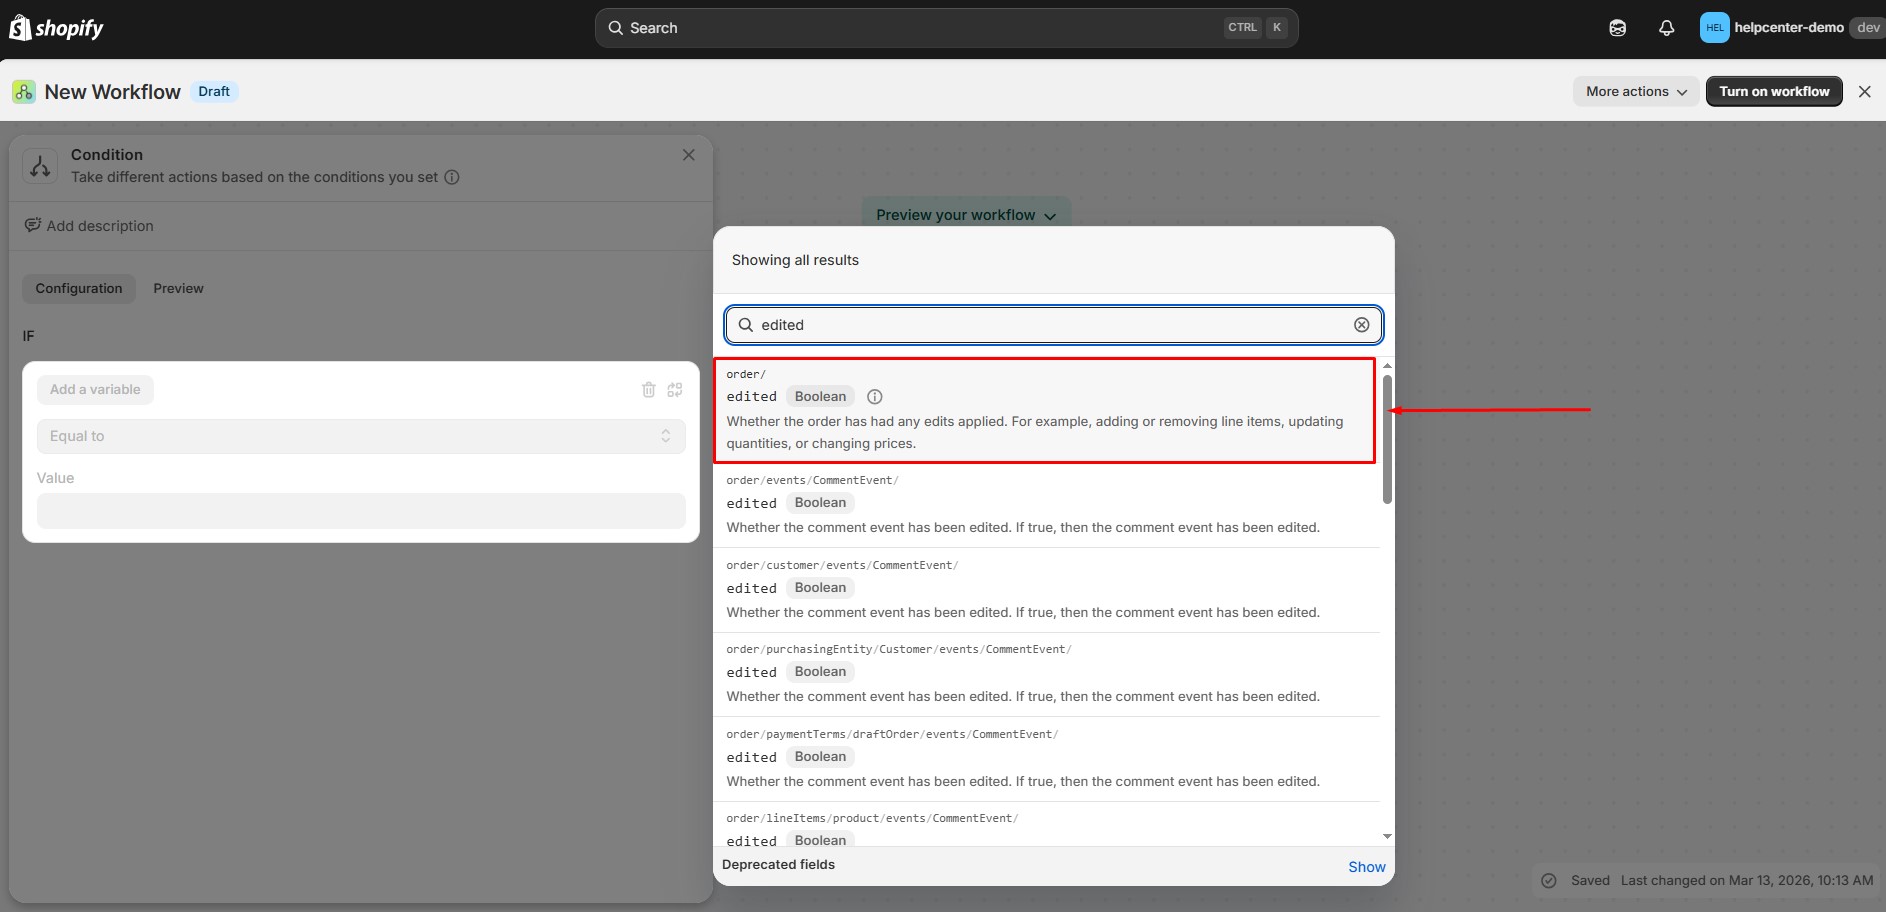
- The modal variable displayed, the user can search for the term “edited” to select the variable “order edited.“
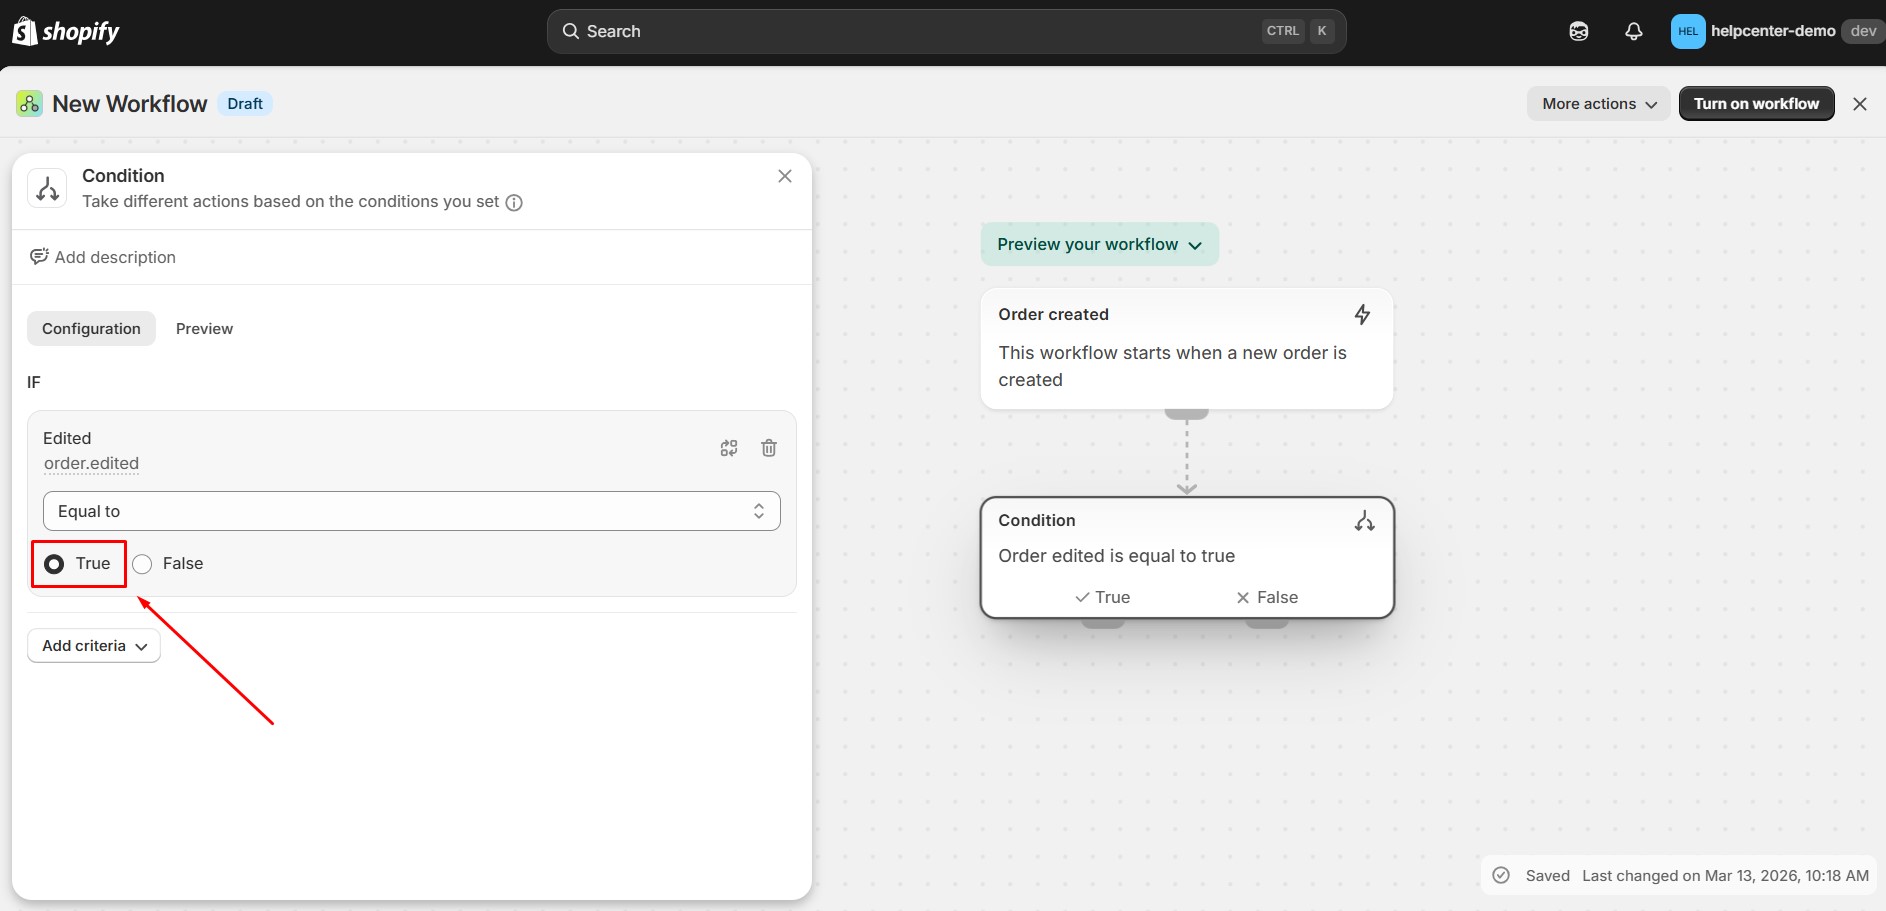
- Then, set the condition Order edited = true:
Add the second condition:
Now add another rule to check whether the order was edited by GemPages.
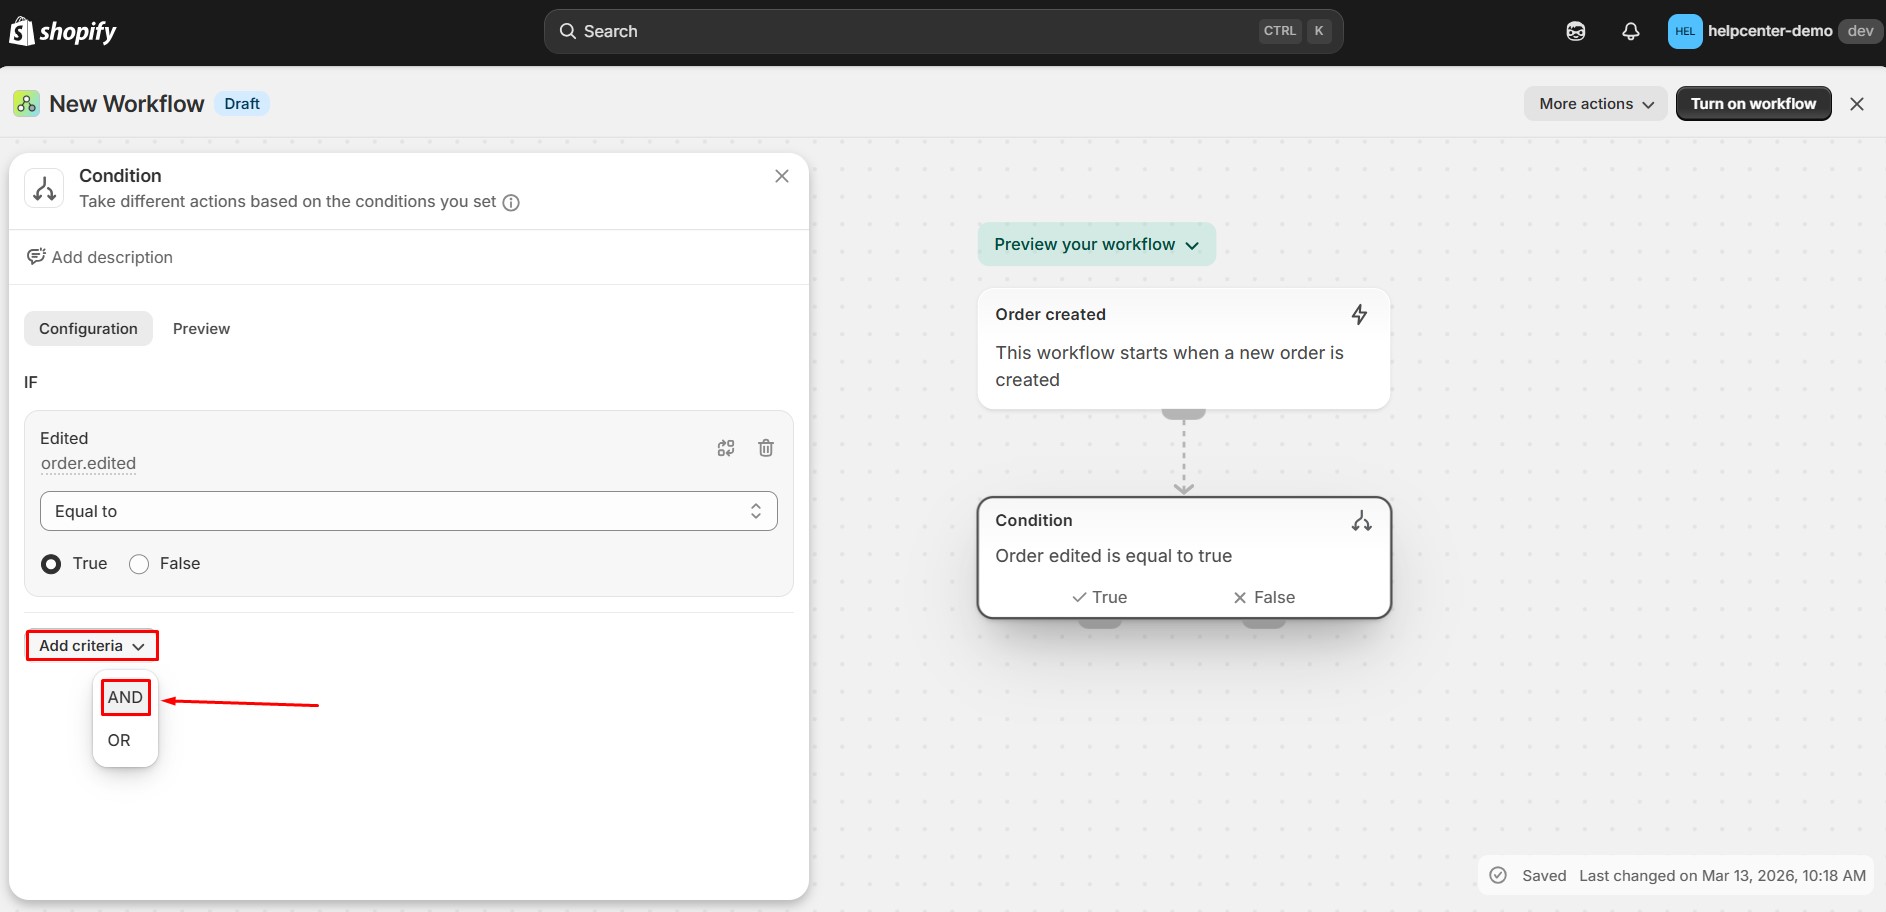
- Click Add criteria. Choose AND to combine the conditions.
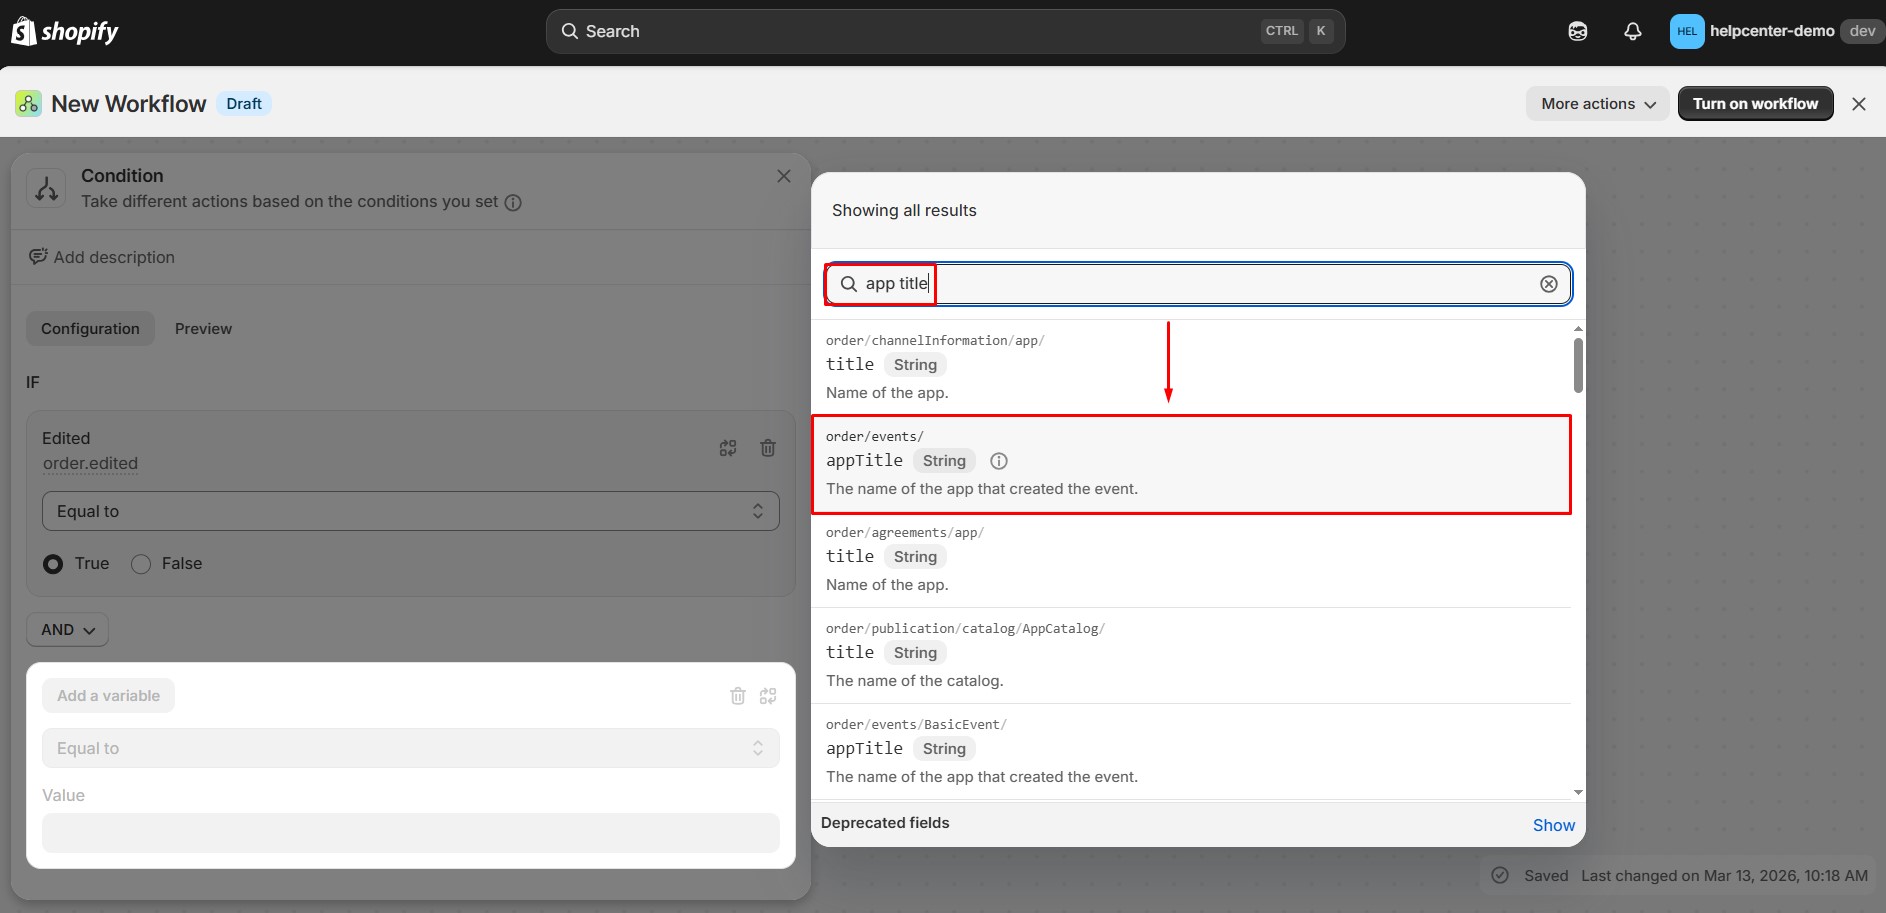
- The modal variable displayed, the user can search for the term “app title” to select the variable “appTitle“.
- Then fill the app title “GemPages Builder” into the field.
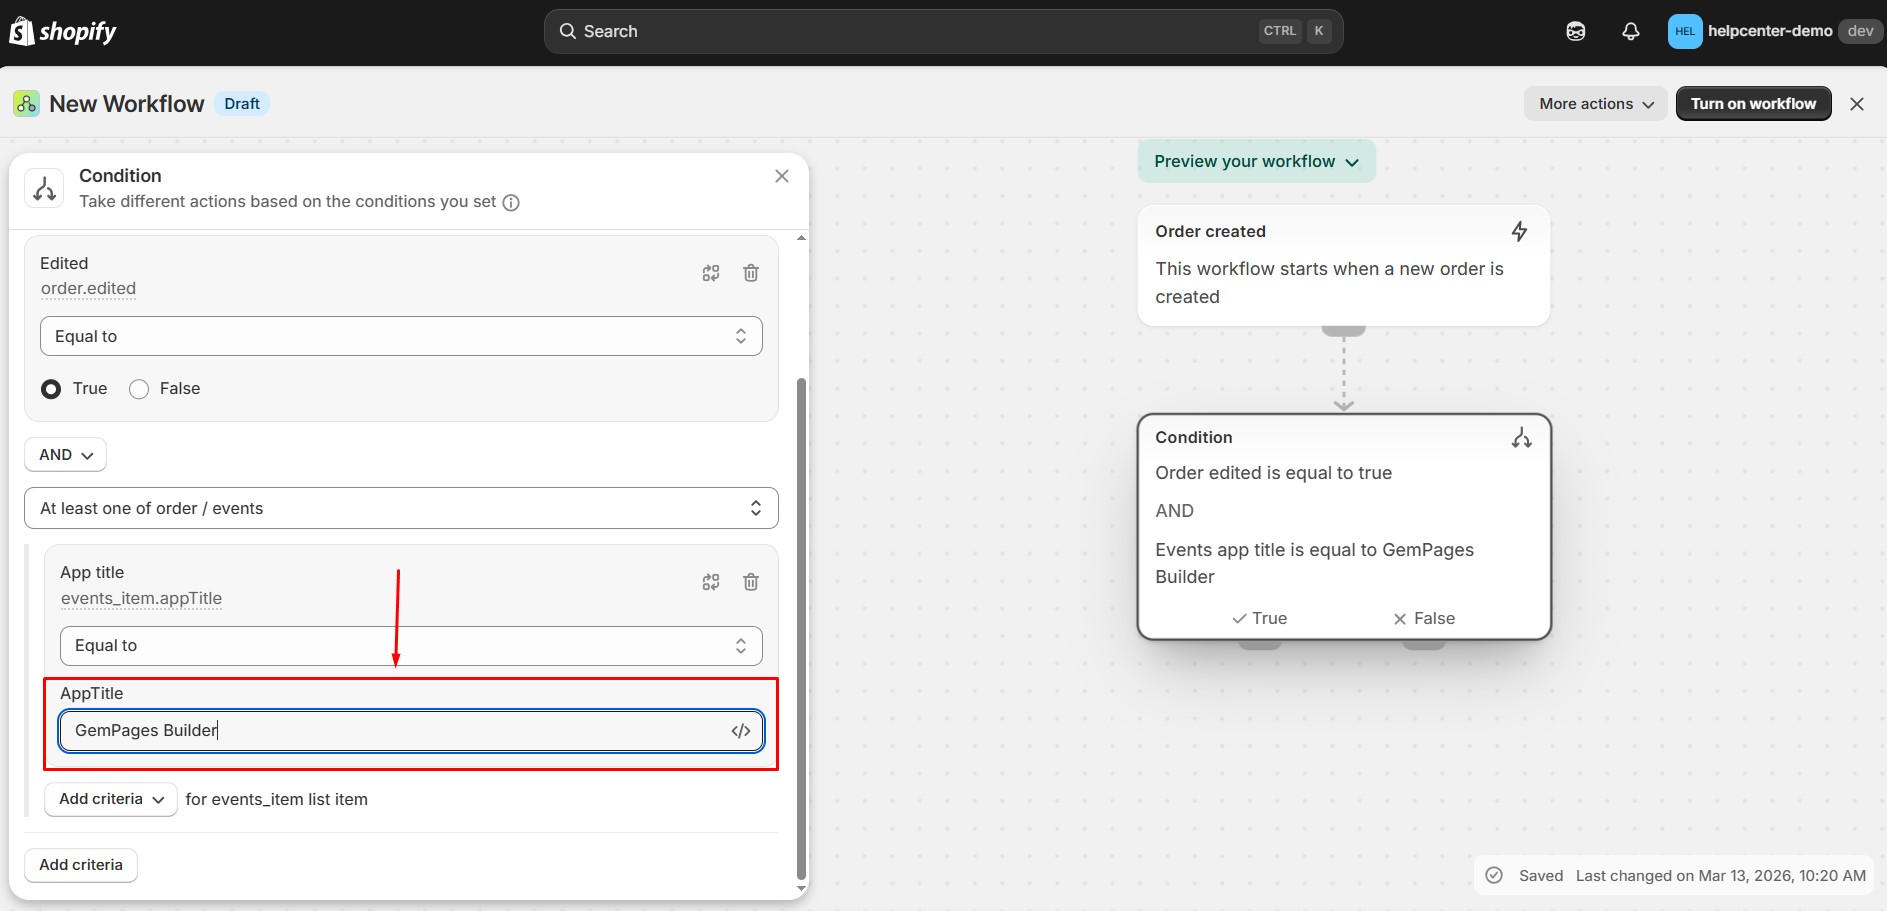
Your conditions should now be:
- Order edited = true
- App title = GemPages Builder
This tells Shopify Flow to continue only if the order was edited by the GemPages app.
Step 4: Add the Action (Tag the Order)
Next, configure the action that adds a tag to the order.
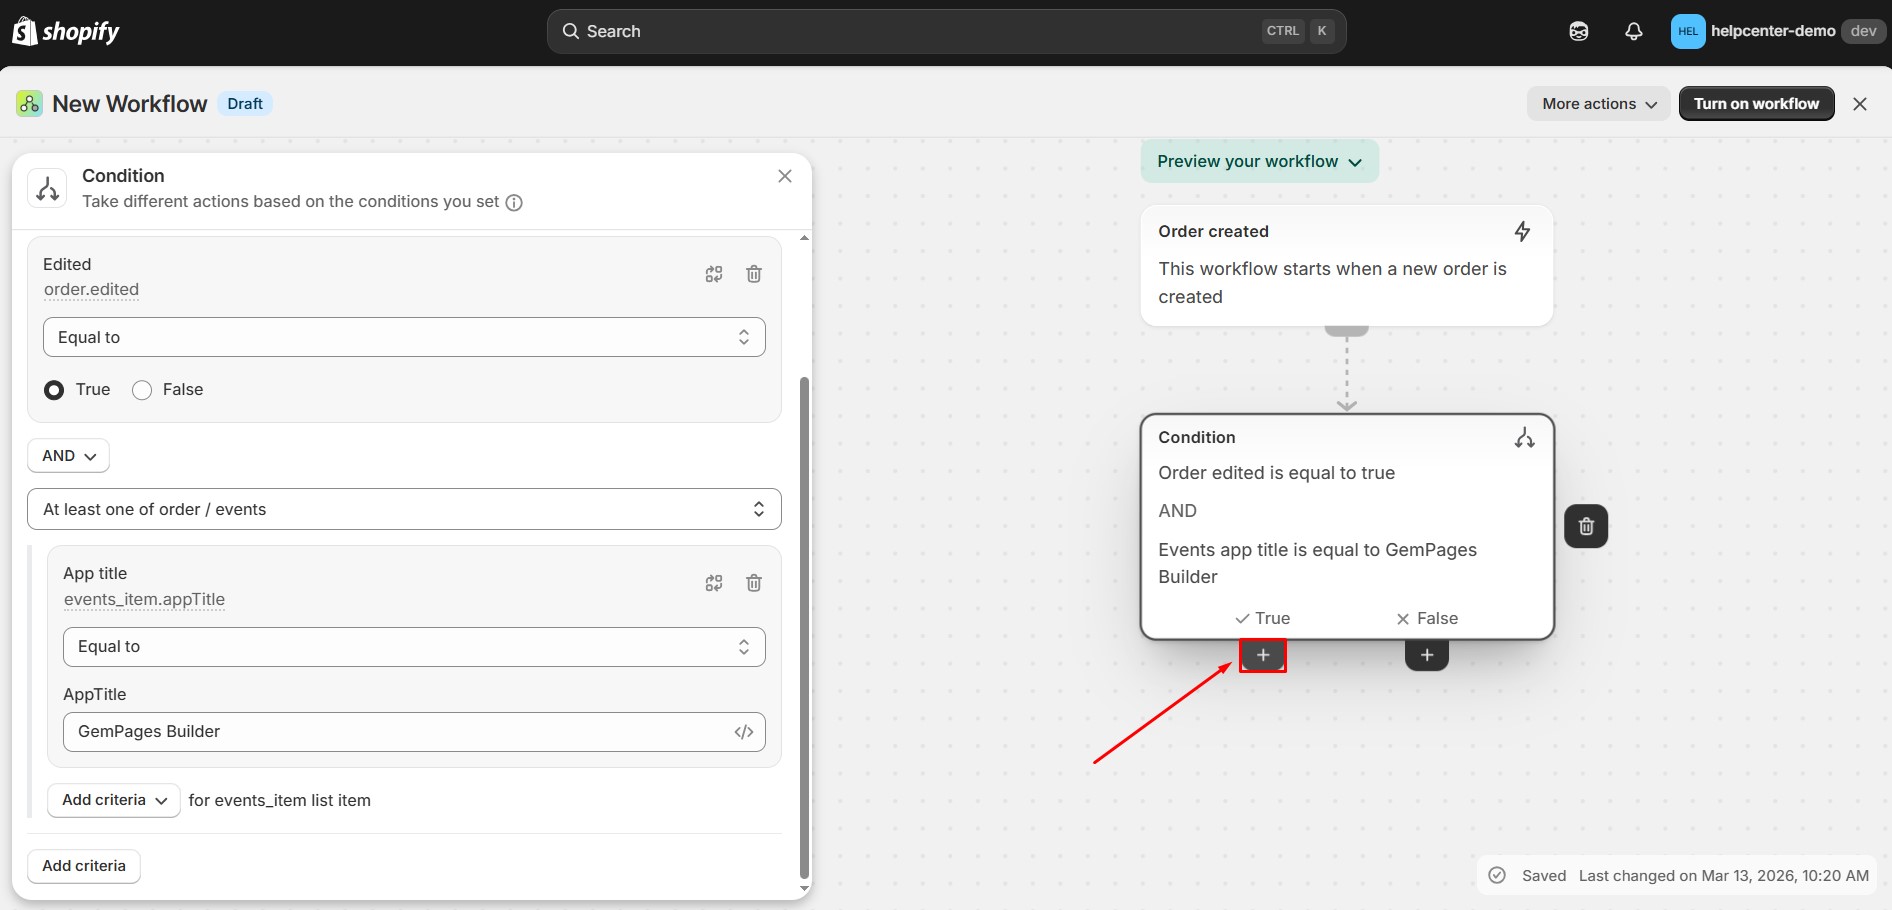
- To set up Action, hover over the Condition block, then click button “+”.
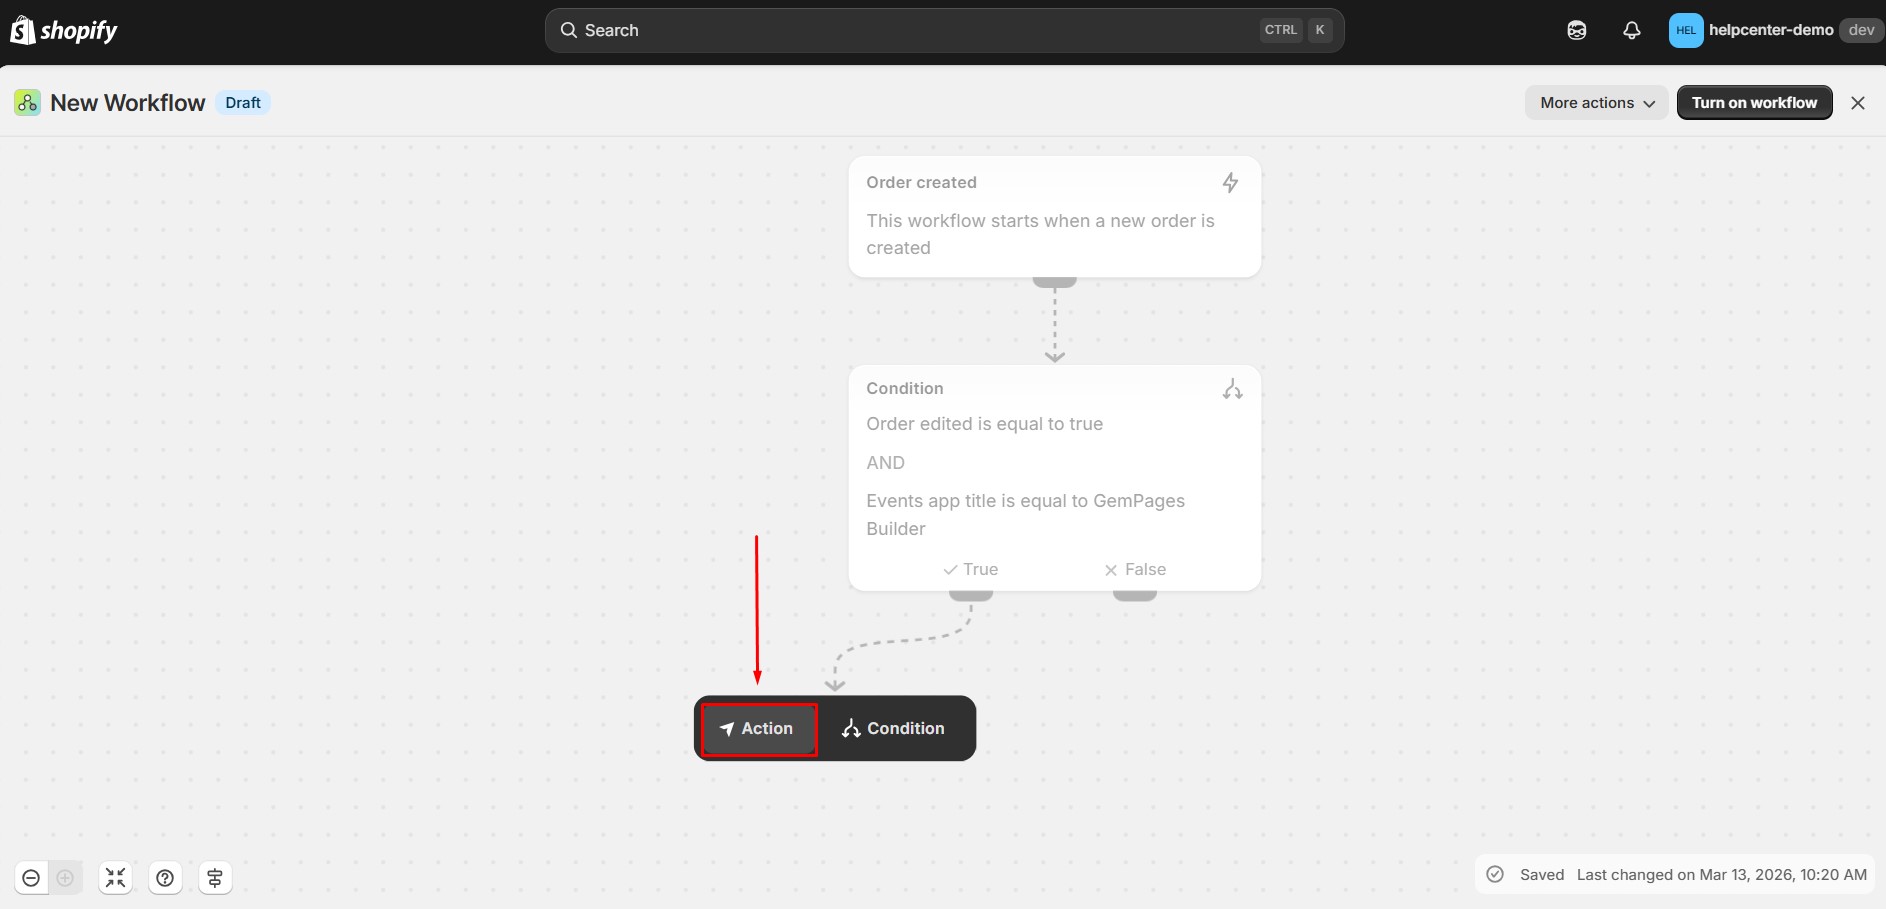
- Then select the button Action to add an action in the flow.
- In the action search bar, type Add order tag them select this option from the list.
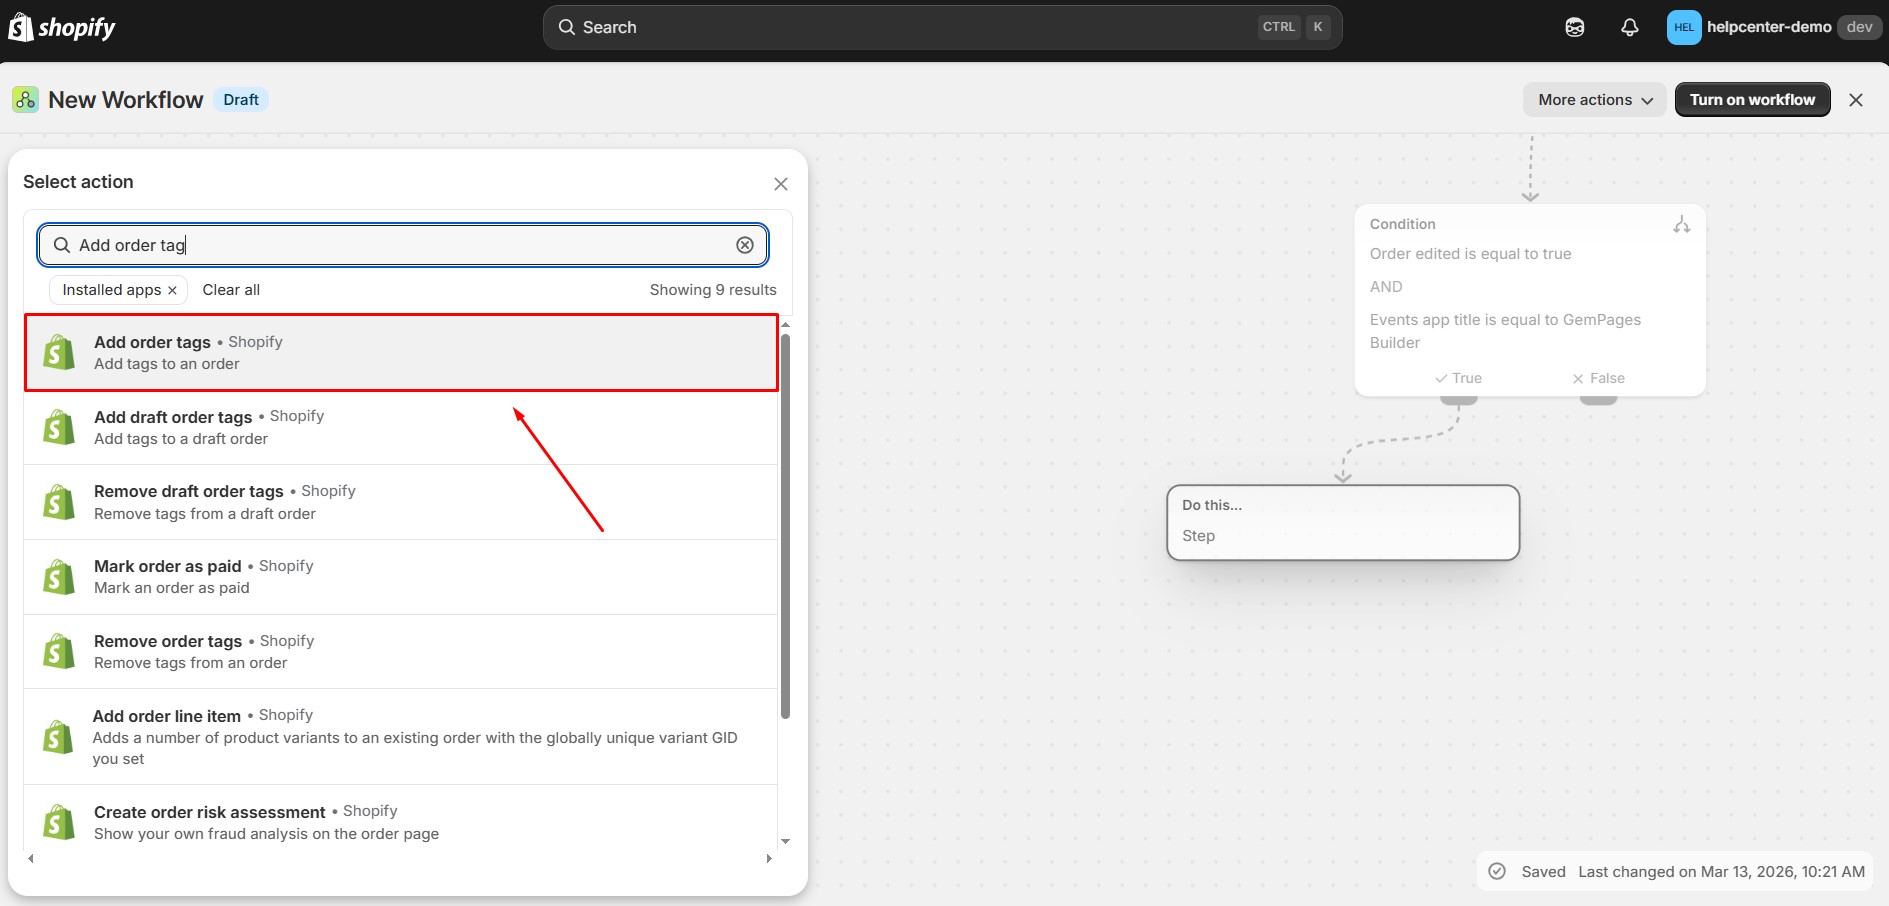
- Then enter the tag you want to apply to the order.
Example: GemPages Sales Funnel
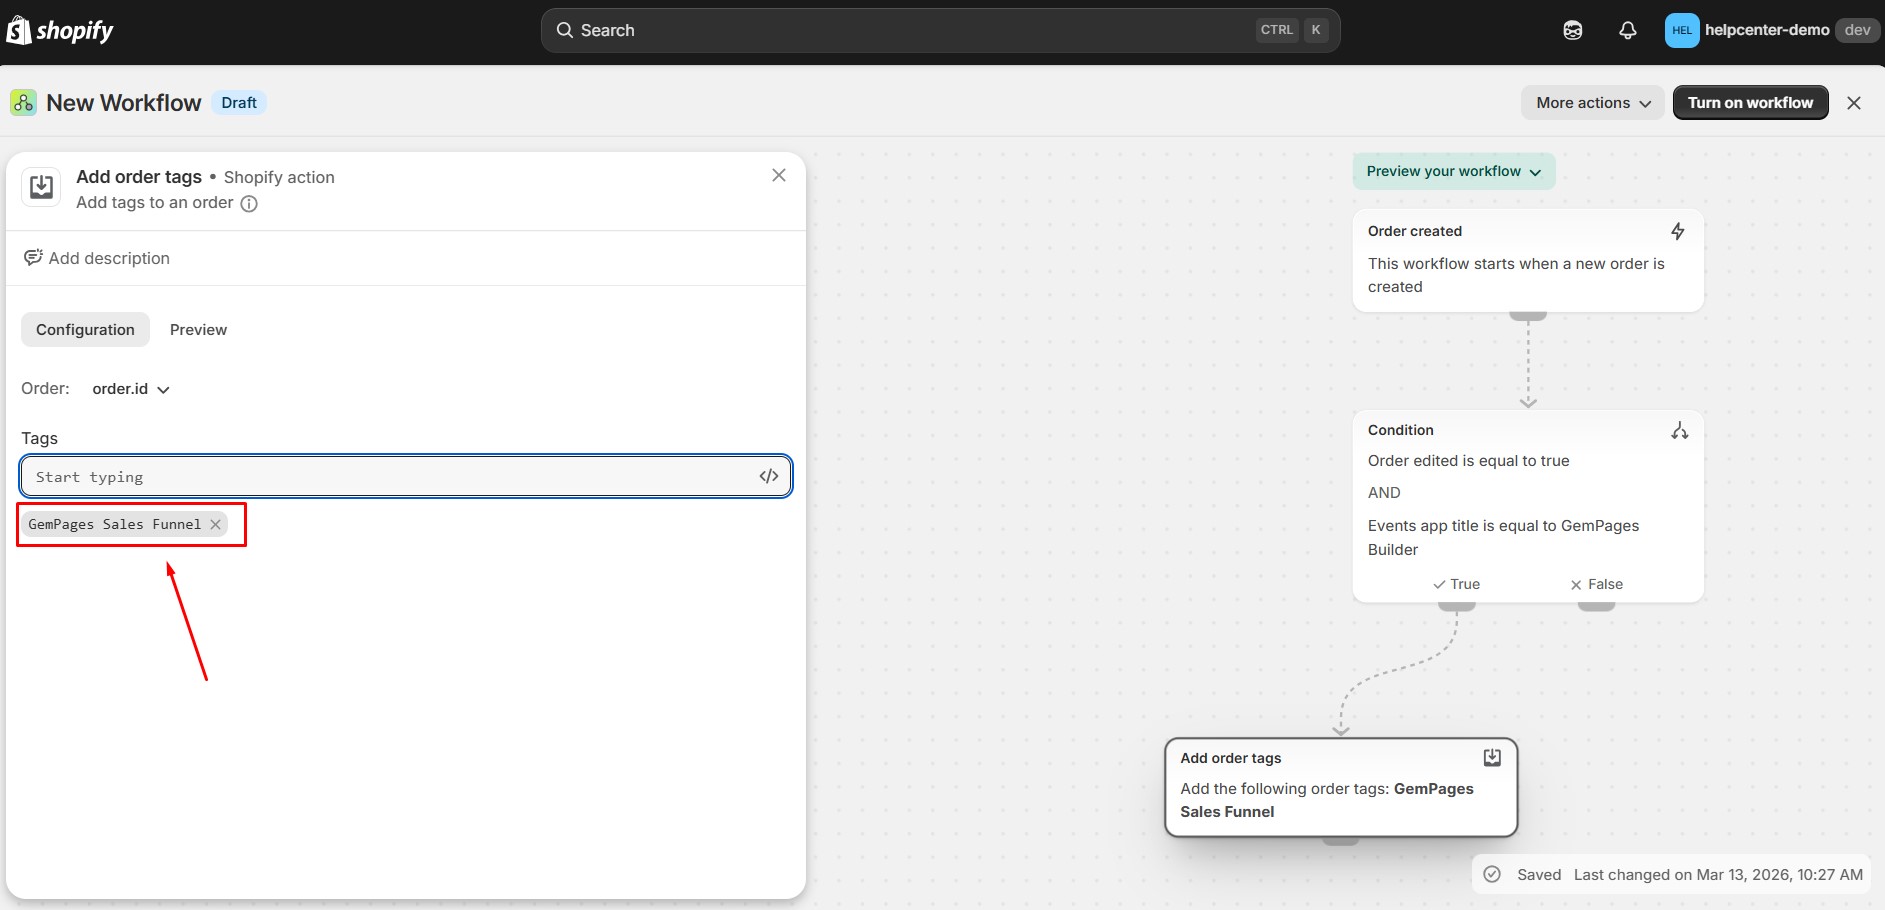
You can use any tag name that fits your workflow. Once added, the action block will appear in the workflow preview.
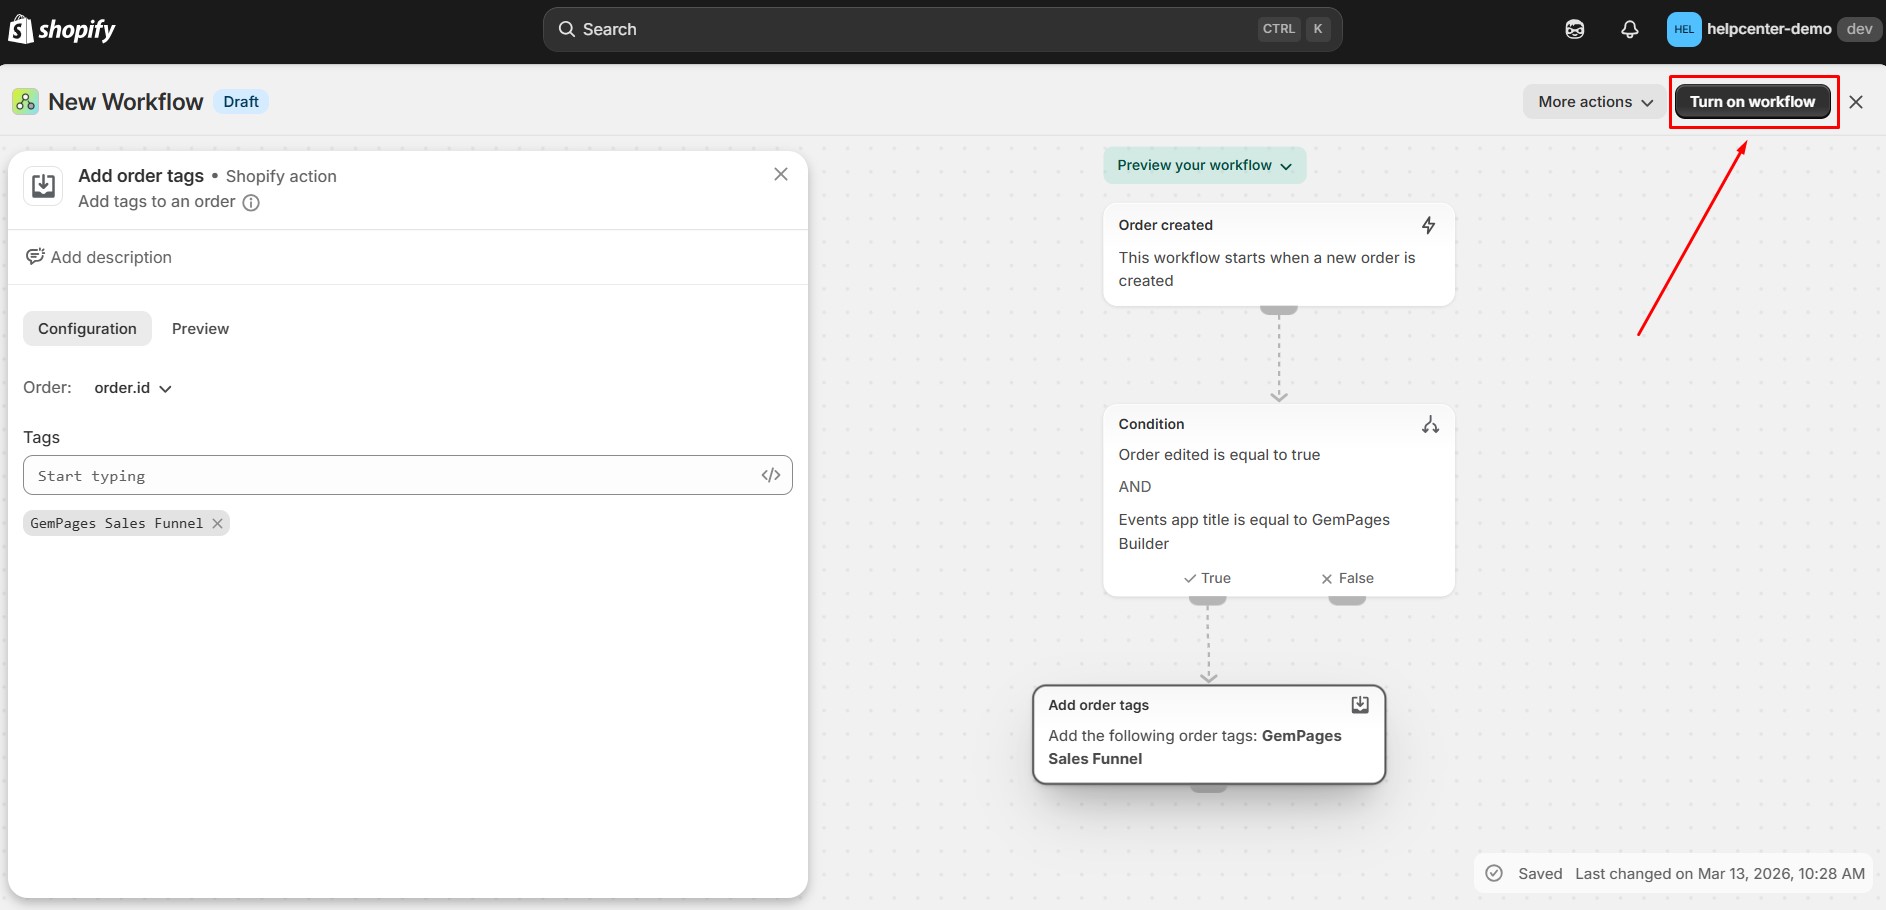
Step 5: Turn On the Workflow
After completing the setup:
- Click Turn on workflow.
- Confirm the action.
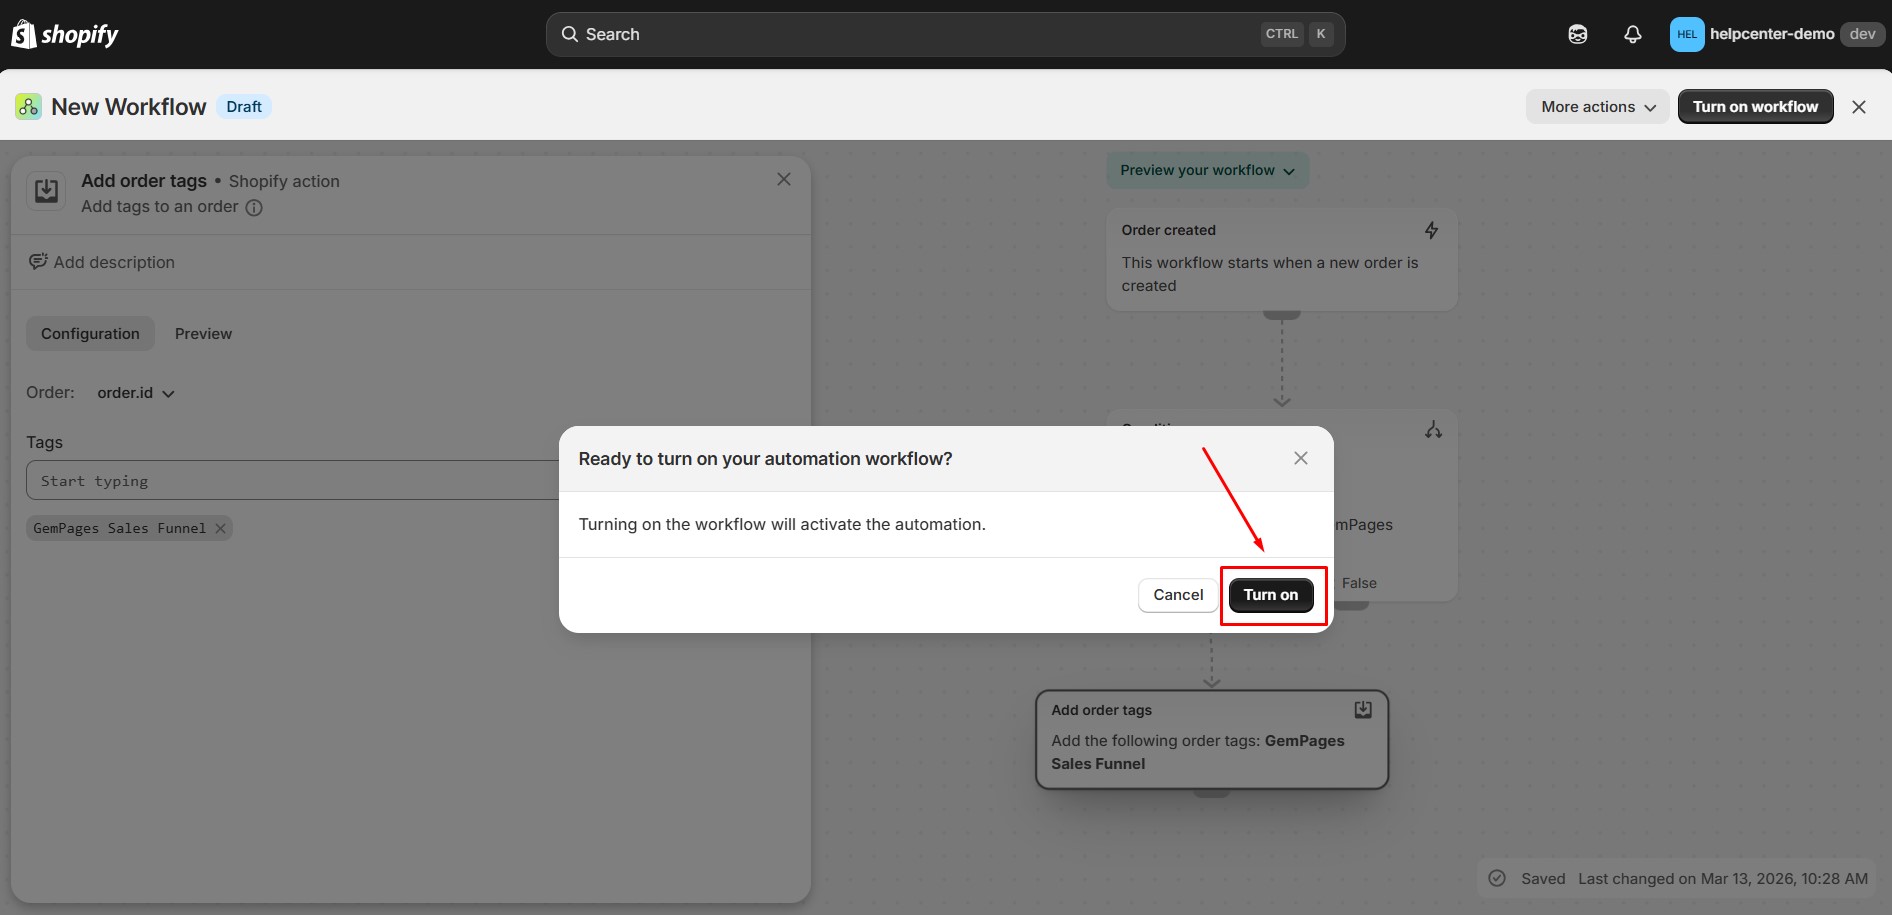
- A new workflow is created.
After setting, if there is an order accepted post-purchase offer from GemPages Sales Funnels, the addition tag will be added to the order.
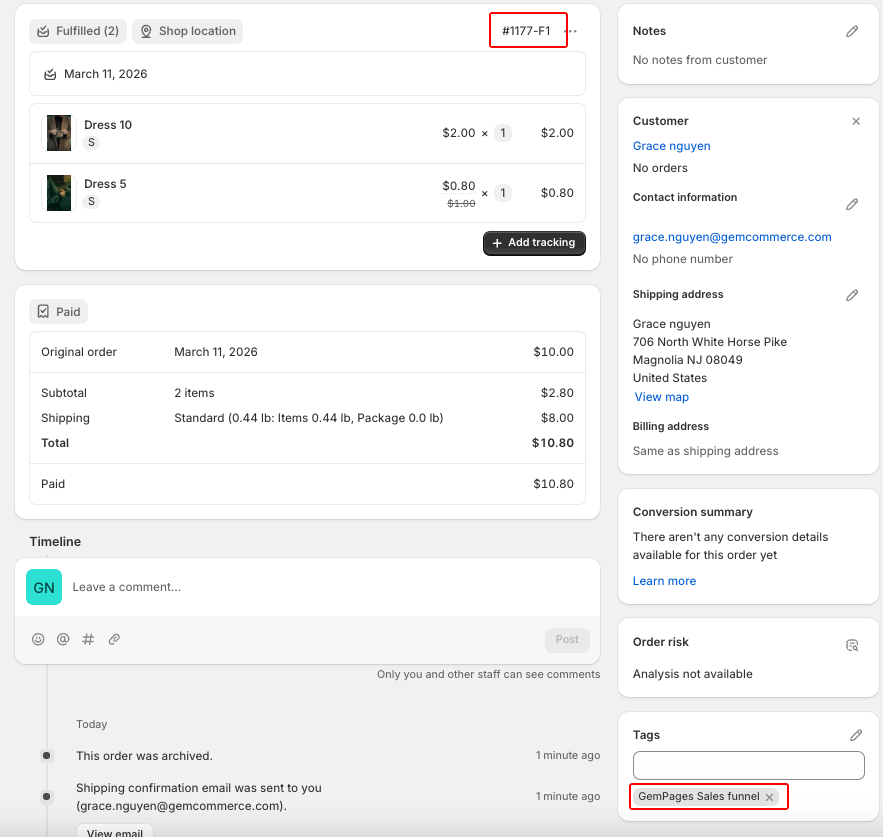
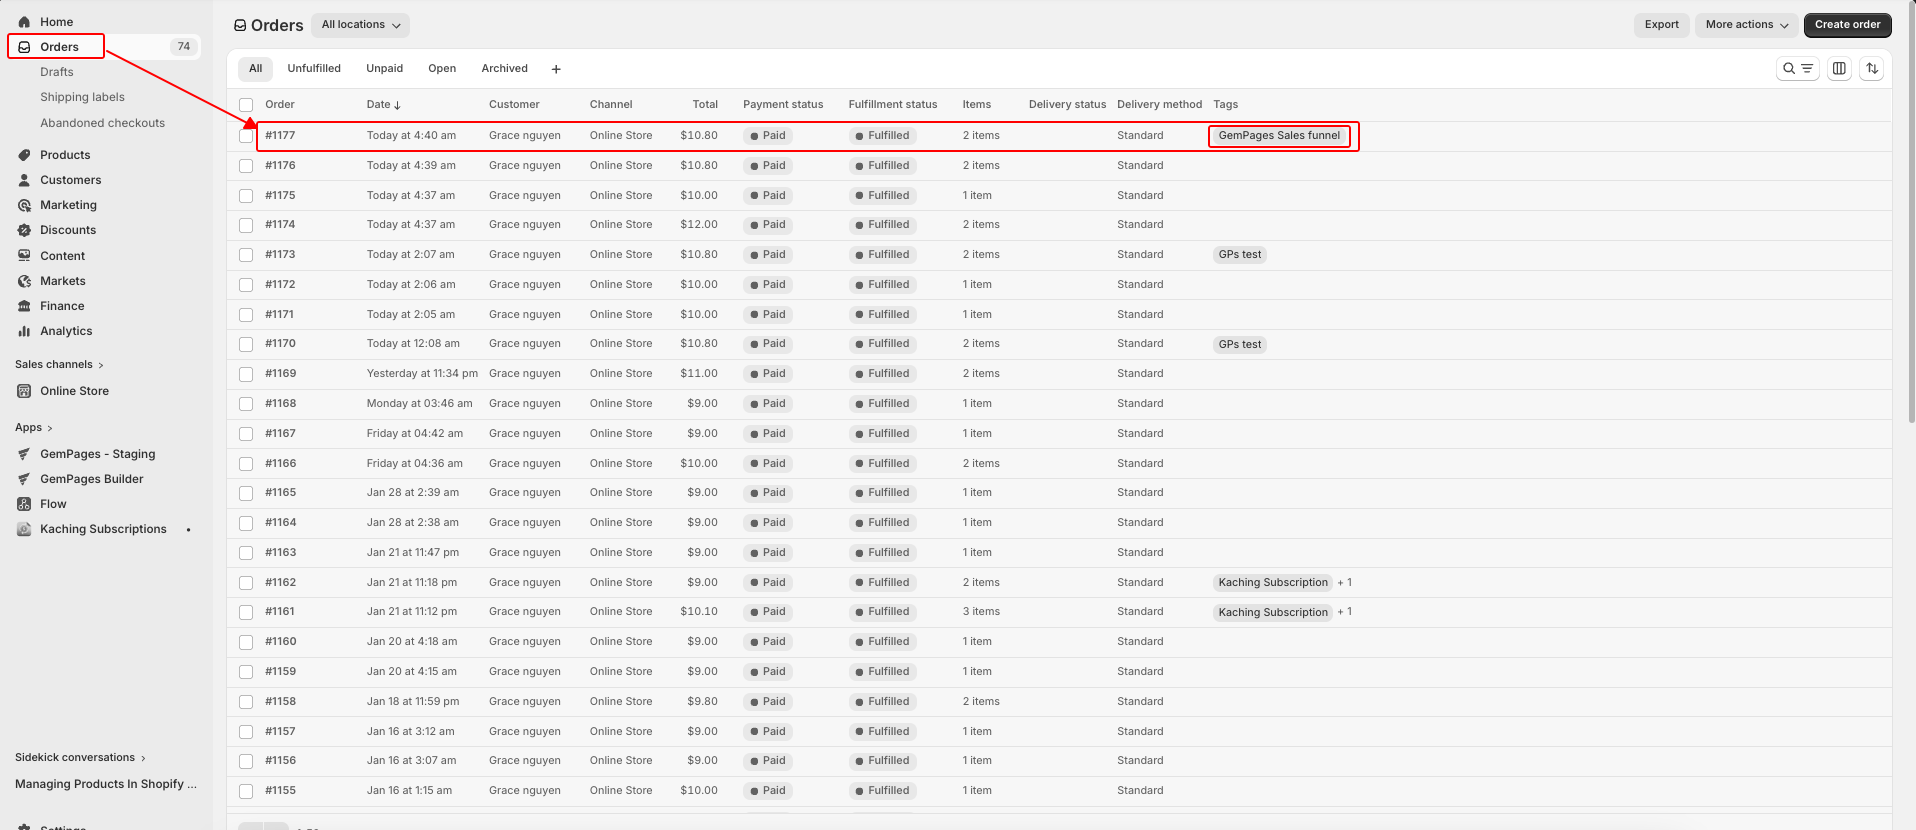 The store’s owner can see the tag in the orders list and the order detail:


Thank you for your comments