


By default, Carousel dots in GemPages are usually centered below the slider. However, depending on your layout and design style, you may want to align the dots to the left side instead.
This article will show you how to left-align Carousel dots in GemPages using simple custom CSS code, no coding experience required.
Why Left Align Carousel Dots?
Left-aligned Carousel dots can help improve both design consistency and user experience in certain layouts.
Here are some common use cases:
1. Match Left-Aligned Content Layouts
If your headings, text, and buttons are aligned to the left, centered dots may look visually inconsistent. Left-aligning the dots creates a cleaner and more balanced layout.
2. Create a Modern Minimal Design
Many modern website designs use left-aligned navigation elements for a more professional and editorial-style appearance.
3. Improve Mobile Layout Spacing
On mobile devices, left-aligned dots may fit better with stacked content and avoid awkward spacing.
How to Left Align Carousel Dots
Step 1: Select the Carousel Element
Inside the GemPages editor, click the Carousel element where you want the dots to be left-aligned.
Step 2: Open the Custom Code Panel
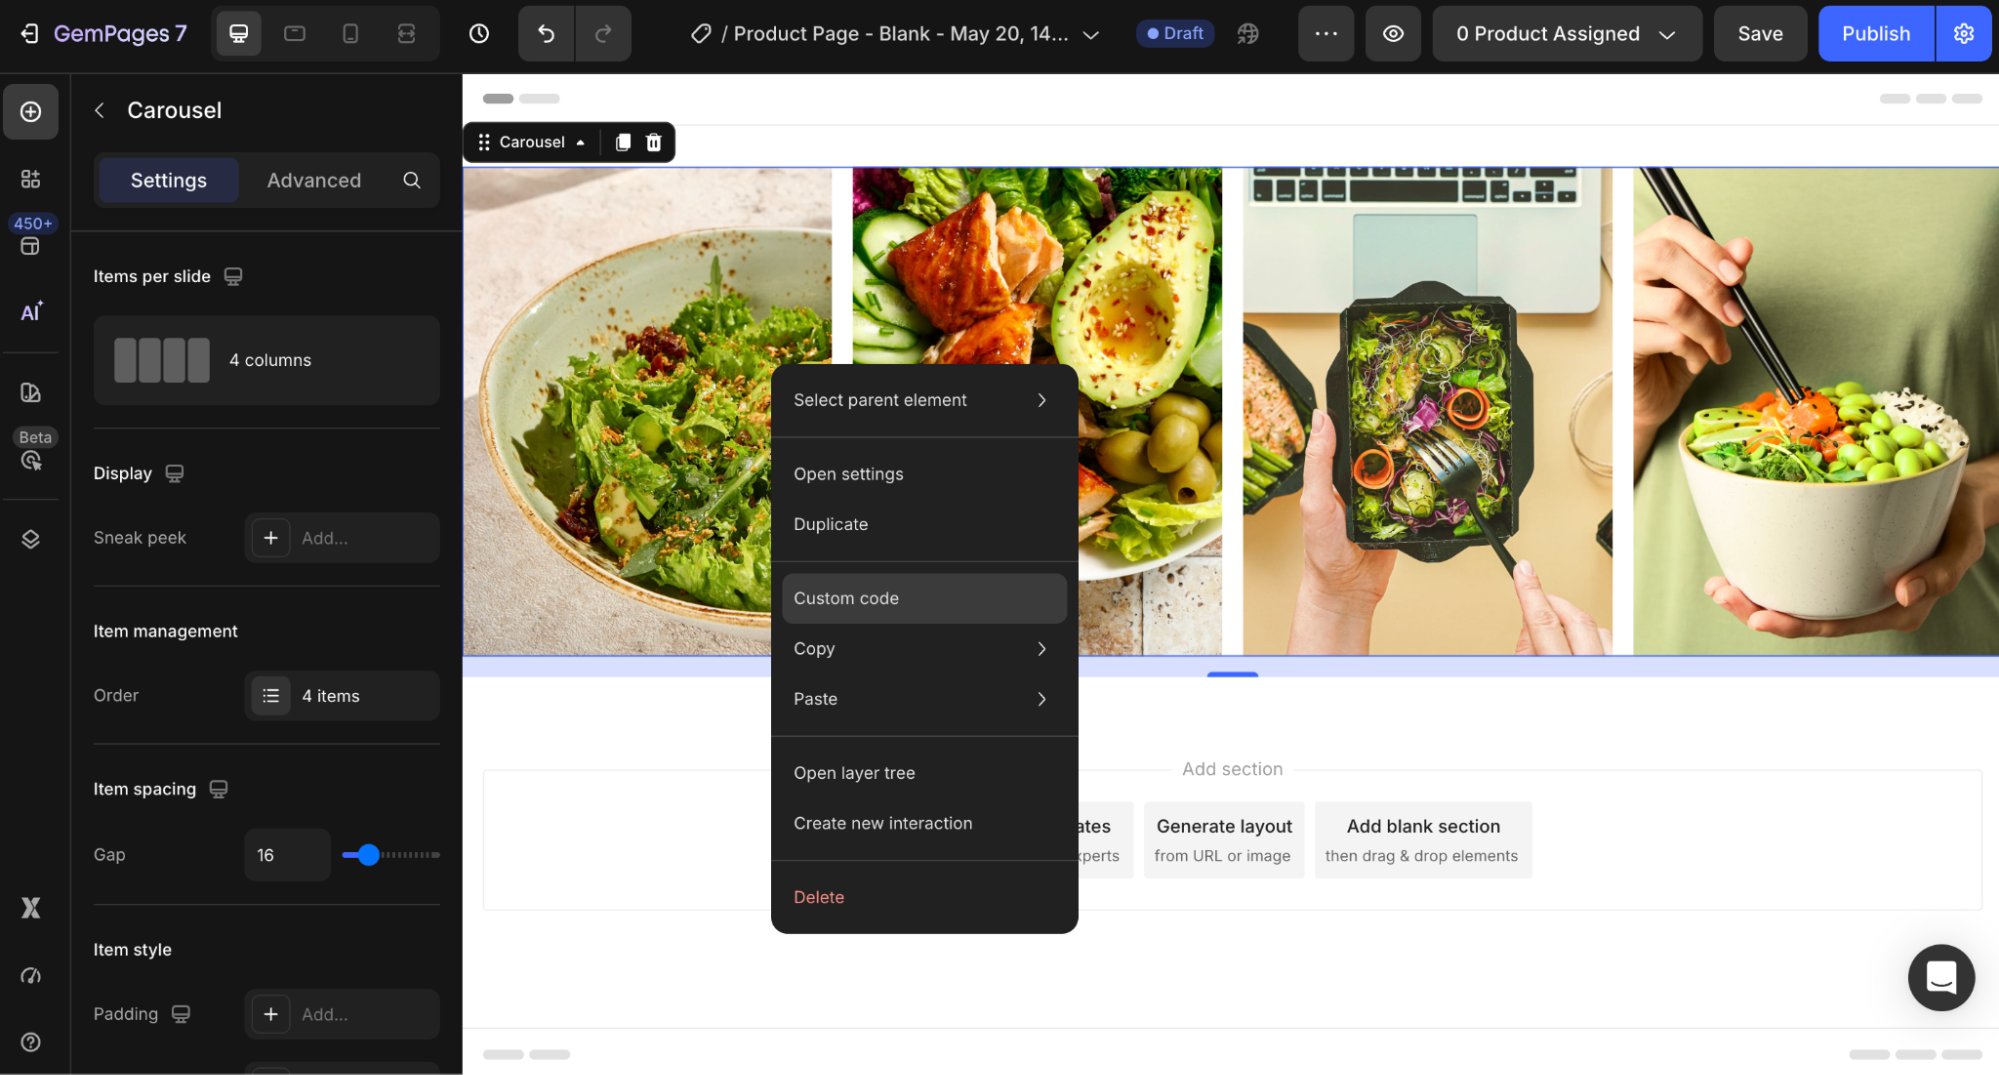
Right-click the Carousel element, then select Custom Code.
The Custom Code panel will appear.
Step 3: Add the CSS Code
Add the following CSS code into the Custom Code field:
.gL5w7OAVEa .gp-carousel-dot-container {

 justify-content: start !important;

}
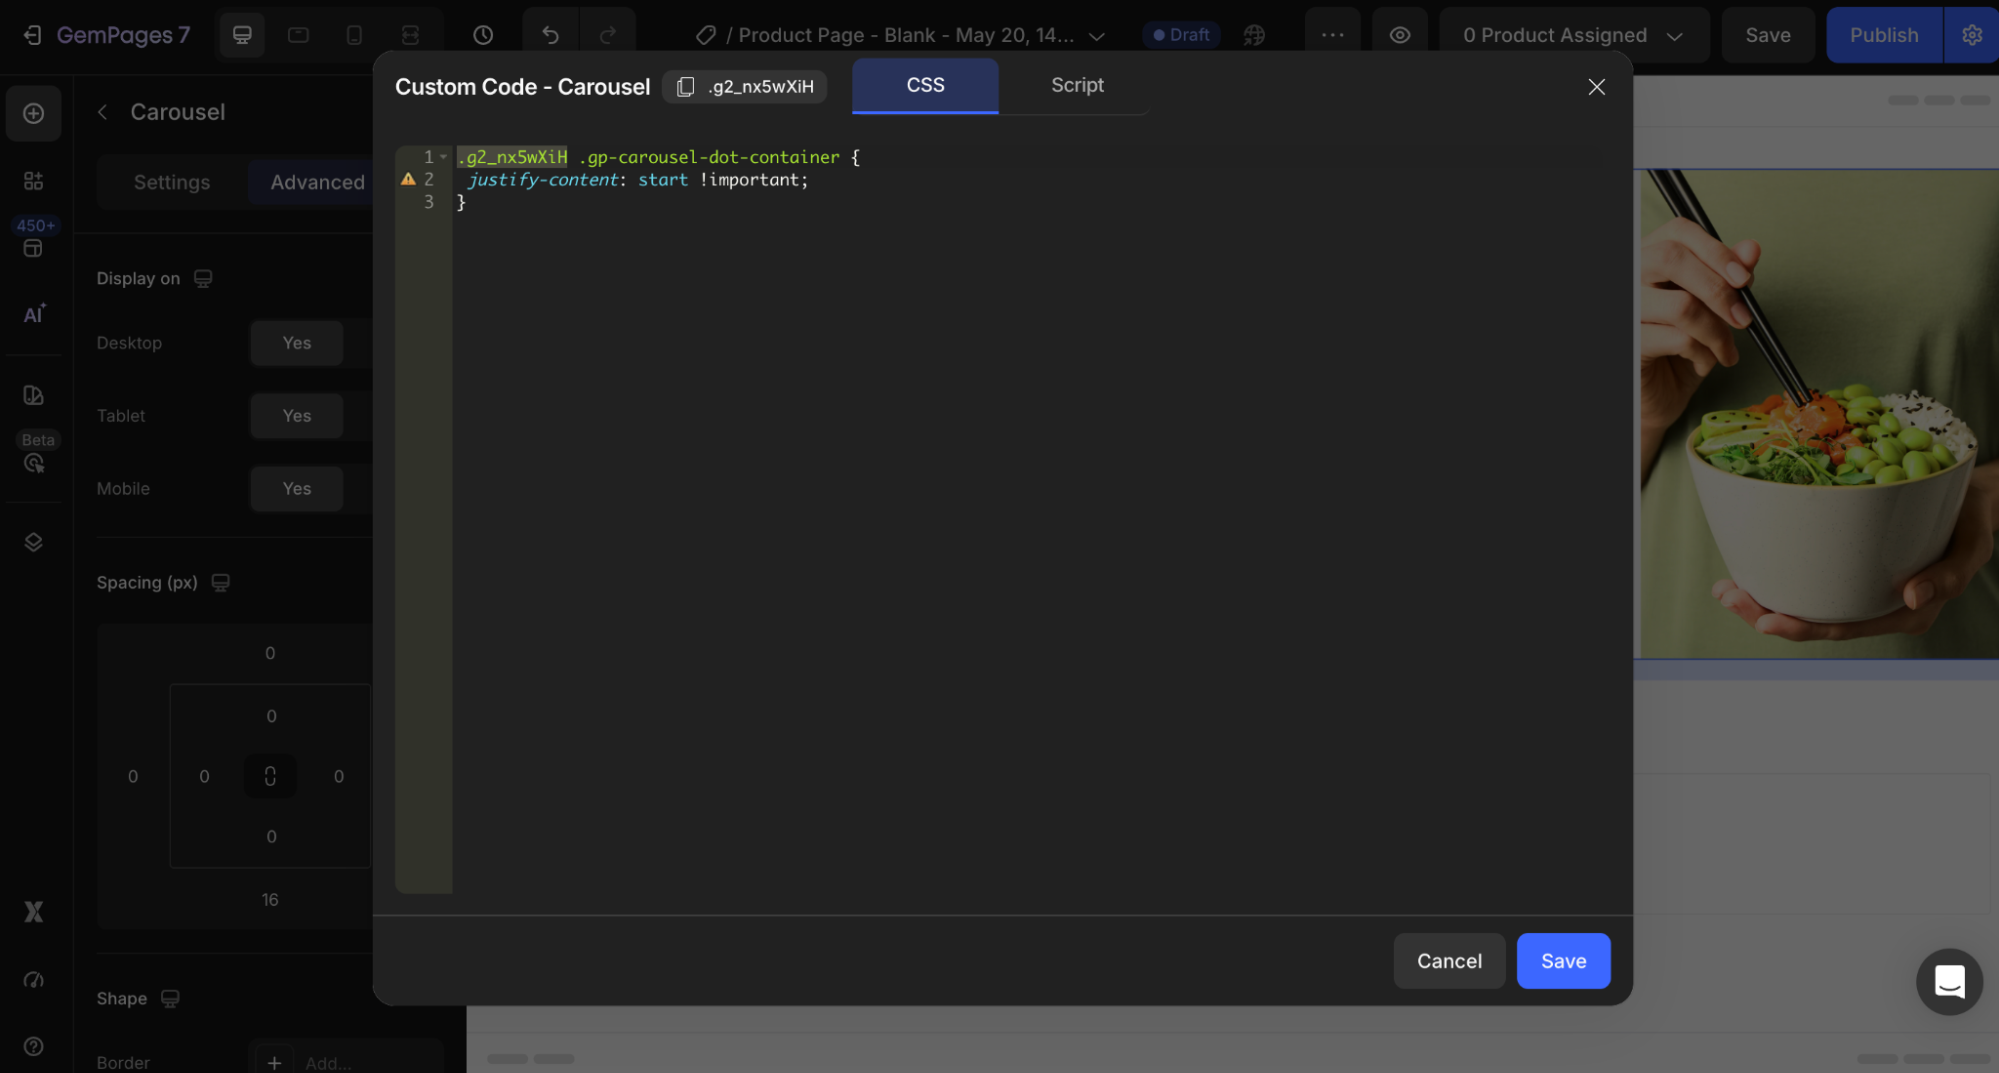
Example:
.YOUR_ELEMENT_ID .gp-carousel-dot-container {

 justify-content: start !important;

}
This ensures the custom styling only applies to the specific Carousel element you selected.


Thank you for your comments