


By default, the Delivery Date element only displays the estimated delivery information without additional custom text beside it.
However, in many cases, merchants want to add extra messages after the delivery date to improve clarity, create urgency, or increase customer trust.
This guide shows you how to add custom text after the Delivery Date element using custom CSS in GemPages.
Common Use Cases
Adding custom text to the Delivery Date element can help improve the shopping experience and communicate important information more clearly.
Some common use cases include:
- Displaying messages like:
- “Estimated Delivery”
- “Ships Fast”
- “Express Shipping Available”
- “Business Days Only”
- “Limited Stock”
- “Free Shipping Included”
- Adding promotional messages beside the delivery estimate
- Highlighting fast shipping for conversion optimization
- Styling delivery information to better match your store branding
- Creating a more premium product page design
Example:
Jun 12 – Jun 15 | Free Express Shipping
Step 1: Open the Custom Code Area
- Open the GemPages editor.
- Click on the Delivery Date element.
- Right-click the element.
- Select Custom Code.

This opens the custom code editor for that specific element.
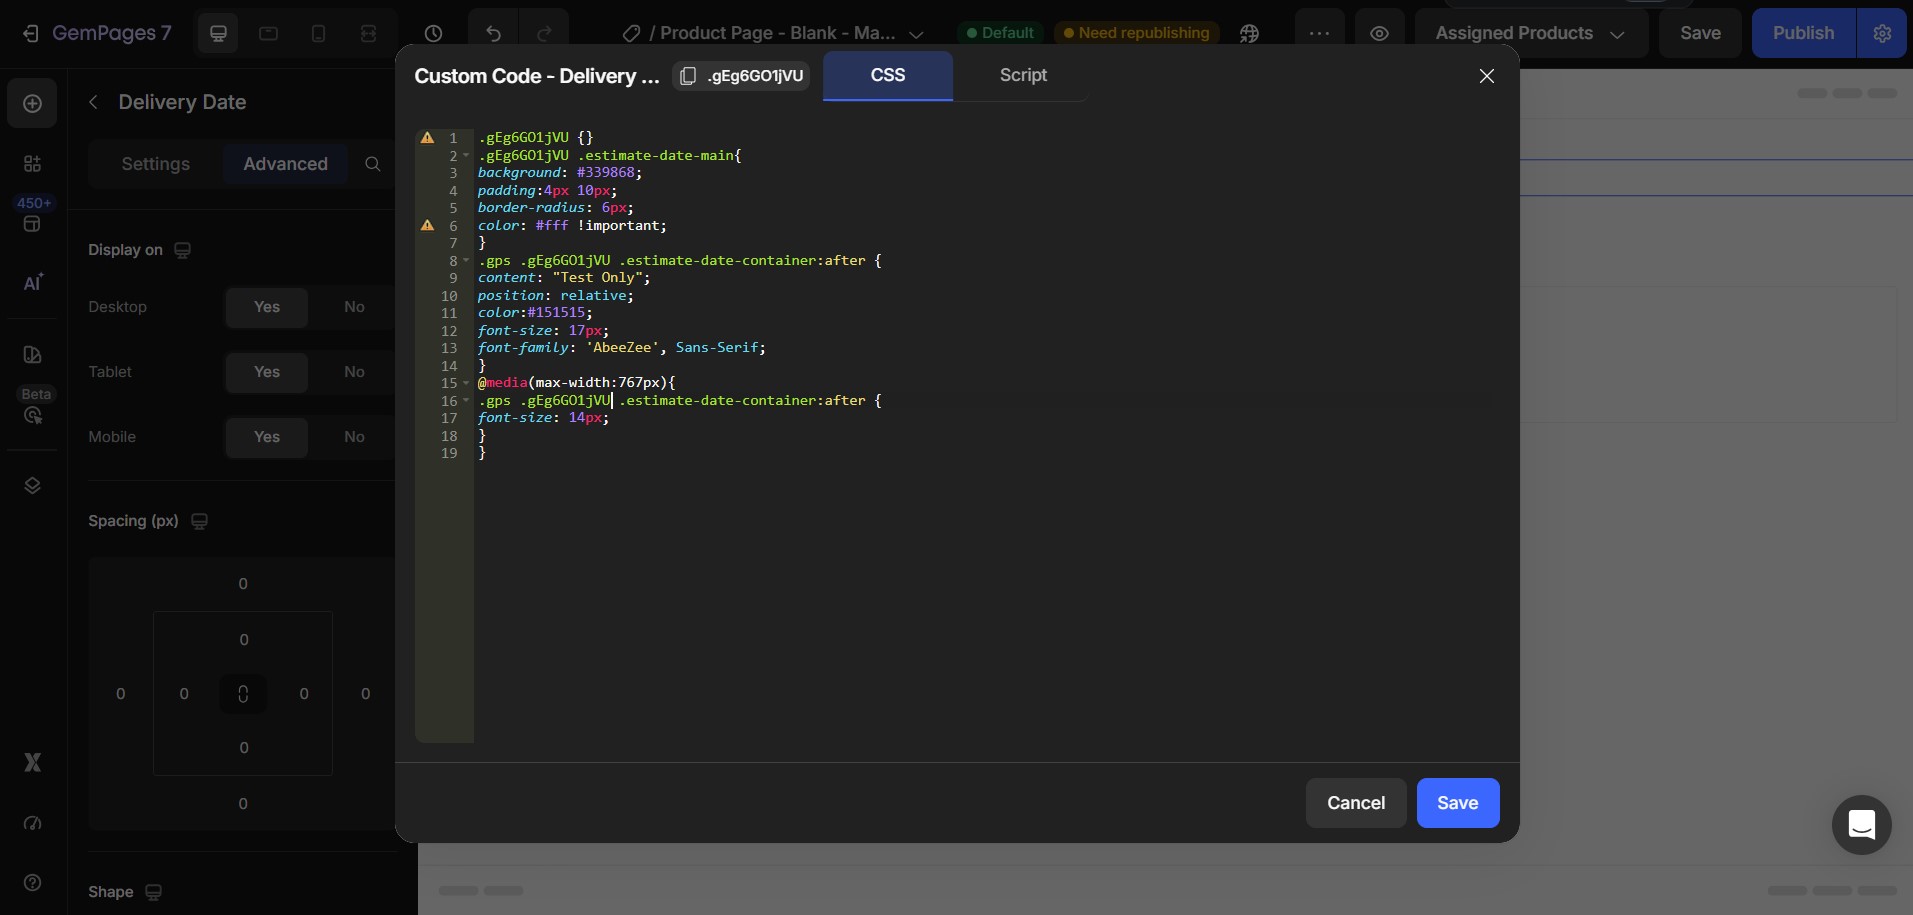
Step 2: Paste the Custom Code
Paste the following code into the Custom Code area:
.gzacmFacXB {}

.gzacmFacXB .estimate-date-main{

background: #339868;

padding:4px 10px;

border-radius: 6px;

color: #fff !important;

}

.gps .gzacmFacXB .estimate-date-container:after {

content: "Test Only";

position: relative;

color:#151515;

font-size: 17px;

font-family: 'AbeeZee', Sans-Serif;

}

@media(max-width:767px){

.gps .gzacmFacXB .estimate-date-container:after {

font-size: 14px;

}

}
Note: Replaceable Parts in the Code
Before using the code, make sure to replace the customizable parts below to match your own setup and design preferences.
| Code Part | What It Controls | What You Should Replace It With |
| .gzacmFacXB | The element class selector | Your actual Delivery Date element class |
| “Test Only” | The custom text displayed after the delivery date | Your preferred message |
| #339868 | Background color of the delivery date badge | Your preferred HEX color code |
| #fff | Text color inside the badge | Your preferred text color |
| #151515 | Color of the custom text after the delivery date | Your preferred text color |
| 17px | Desktop font size of the custom text | Your preferred desktop font size |
| 14px | Mobile font size of the custom text | Your preferred mobile font size |
| ‘AbeeZee’, Sans-Serif | Font family of the custom text | Your preferred font family |
| padding:4px 10px; | Inner spacing of the delivery date badge | Your preferred spacing values |
| border-radius: 6px; | Roundness of the badge corners | Your preferred border radius |
Step 3: Save and Publish
- Click Save.
- Publish or update your page.
- Preview the page on desktop and mobile.
Your Delivery Date element should now display a styled badge with custom text beside it.’


Thank you for your comments