


Update: March 30, 2026
Subscription-based business models are becoming increasingly popular as they help turn one-time buyers into loyal, recurring customers. When integrated into a sales funnel, subscription offers can streamline the entire customer journey, from initial purchase to long-term retention, while also generating more predictable revenue.
With this new update, GemPages now supports upselling subscription products directly within sales funnels.
What’s new in this update?
Previously, GemPages did not support subscription products in sales funnel offers.
Now, with this update, you can:
- Add subscription products as upsell offers
- Design subscription-based upsell pages using drag-and-drop elements
- Seamlessly integrate subscription offers into your funnel without disrupting the customer experience
Benefits for merchants
Flexible support for subscription-based business models
This update allows merchants to sell products through subscriptions (e.g., monthly beauty boxes, supplements, digital services, etc.) directly inside the funnel. It ensures a smooth buying experience without requiring customers to leave the flow.
Fully customizable subscription offer pages
You can now design upsell pages that include subscription options using visual drag-and-drop elements inside the GemPages editor.
Note:
- This feature is available on all GemPages (Version 7) plans
- Subscription upsell is only supported when Offer Type = Specific Offer
- If you select Custom Offers (Dynamic Offers), the subscription option will not be displayed
- If a template contains multiple product offers, data such as variants and corresponding selling plans will NOT be synchronized between product offers
Before you start
1. You must have a subscription product
To create a subscription upsell, your store must already have at least one subscription product.
To learn how to set this up, refer to Shopify’s official documentation: Setting up subscriptions
2. Install a subscription app
Shopify requires a third-party app to create subscription selling plans.
You can use apps such as:
- Shopify Subscriptions
- Appstle
- Recurpay
- PayWhirl
- Loop
- BOLD
- Joy Subscription
- RecurringGO
- East
- Kaching Subscription
3. Supported payment gateways
To use subscription products, your store must use one of the following payment gateways:
- Shopify Payments
- PayPal Express
- Authorize.net
- Adyen
- Stripe
Payment gateway availability may vary depending on your region and provider terms.
Step-by-step: How to Create a Sales Funnel with Subscription Upsell
A complete funnel with a subscription upsell typically includes:
- Presale page: Introduces the product and builds interest
- Sales page: Encourages customers to make the initial purchase
- Upsell page (Subscription product): Offers a subscription upgrade after purchase
By following the steps below, you will create this full funnel.
Step 1: Create a New Funnel
From your Shopify admin, go to: GemPages Builder → Sales Funnels → Create New Funnel
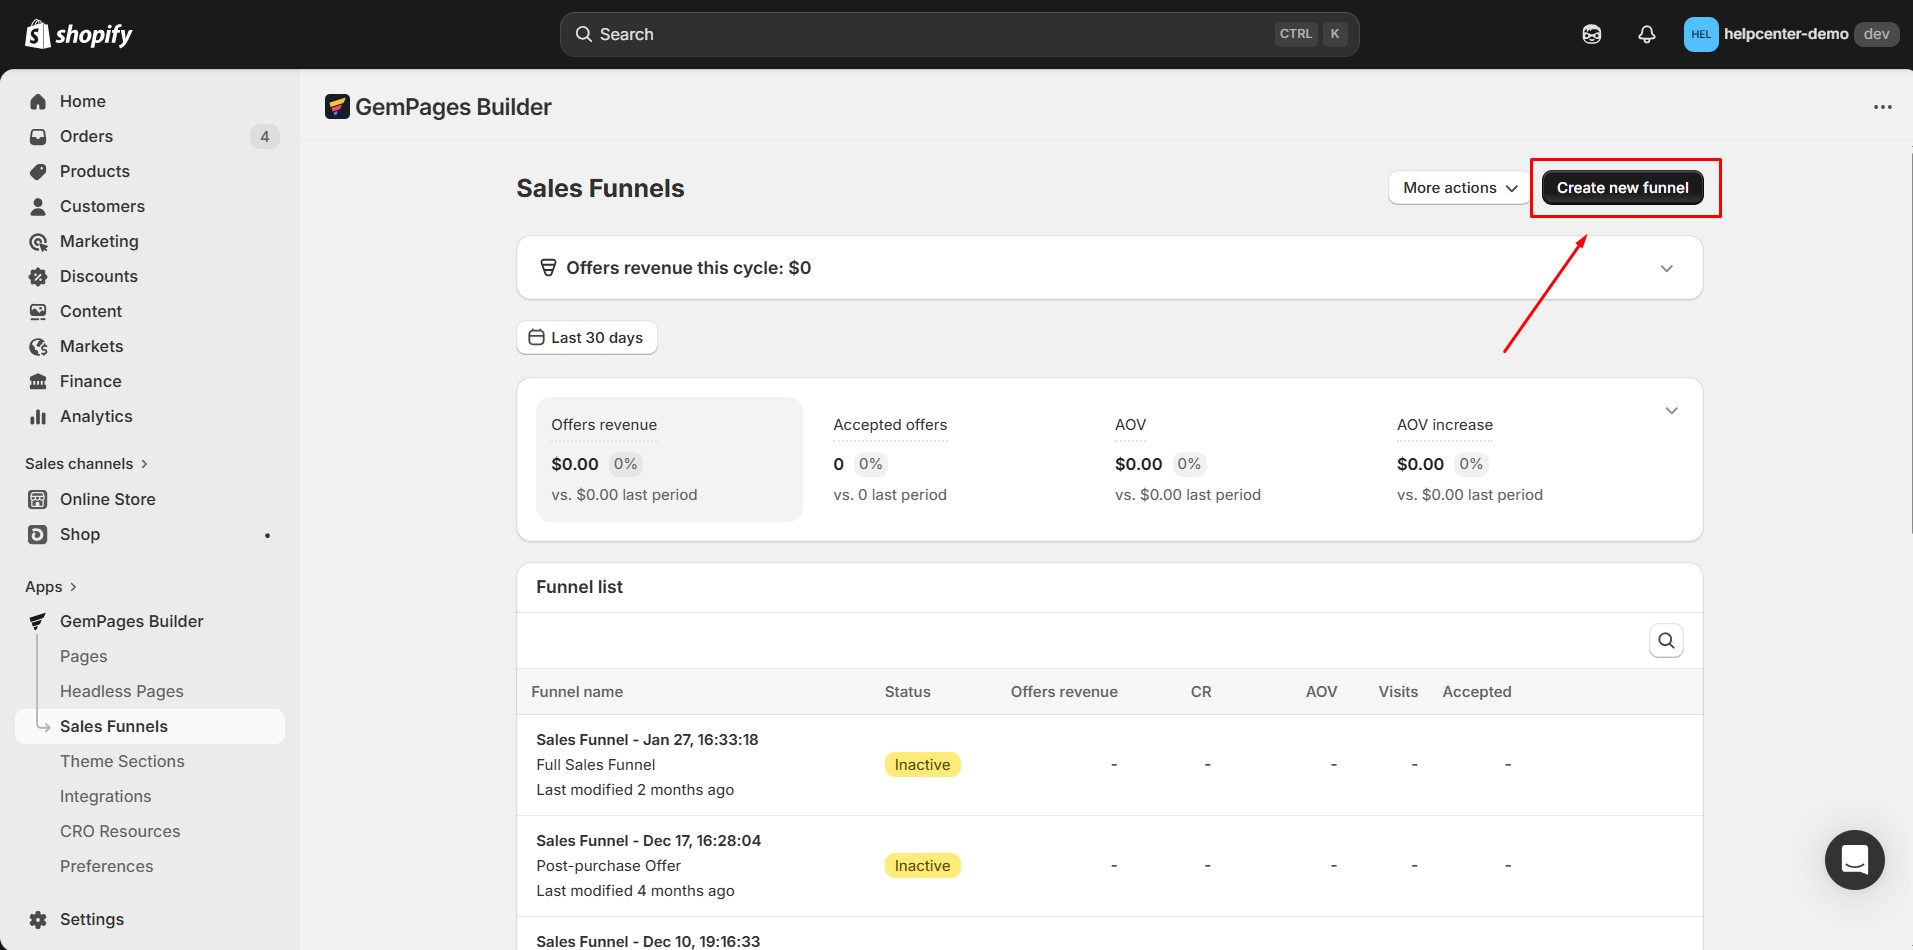
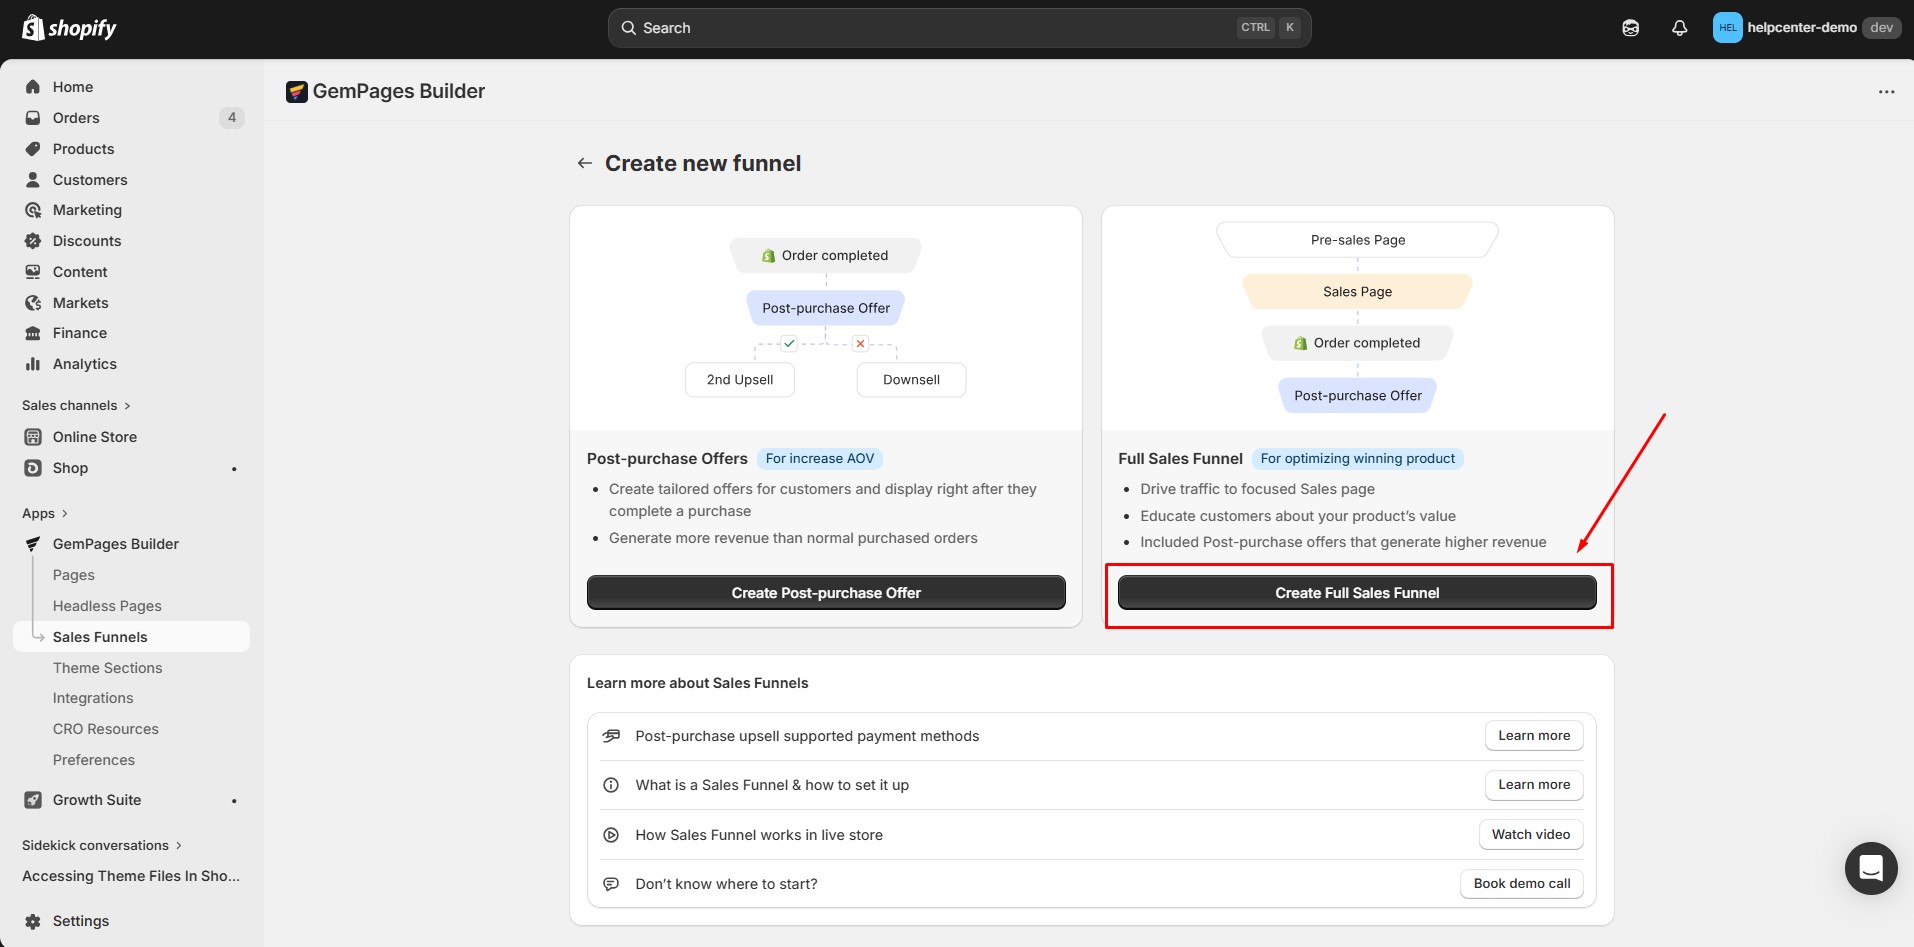
Step 2: Choose your funnel type
You will see two options:
- For post-purchase only → select Create Post-Purchase Offers
- For a full funnel experience → select Create Full Sales Funnel
In this guide, we’ll use Create Full Sales Funnel for example.
Step 3: Create Your Pre-sale Page
- Click on Add Pre-sales Page to add a pre-sales page to your funnel. A pre-sales page is used to introduce your product and guide customers to the next step, so it must be linked to the sales page in order to function properly (you’ll learn how to link them in the steps below).
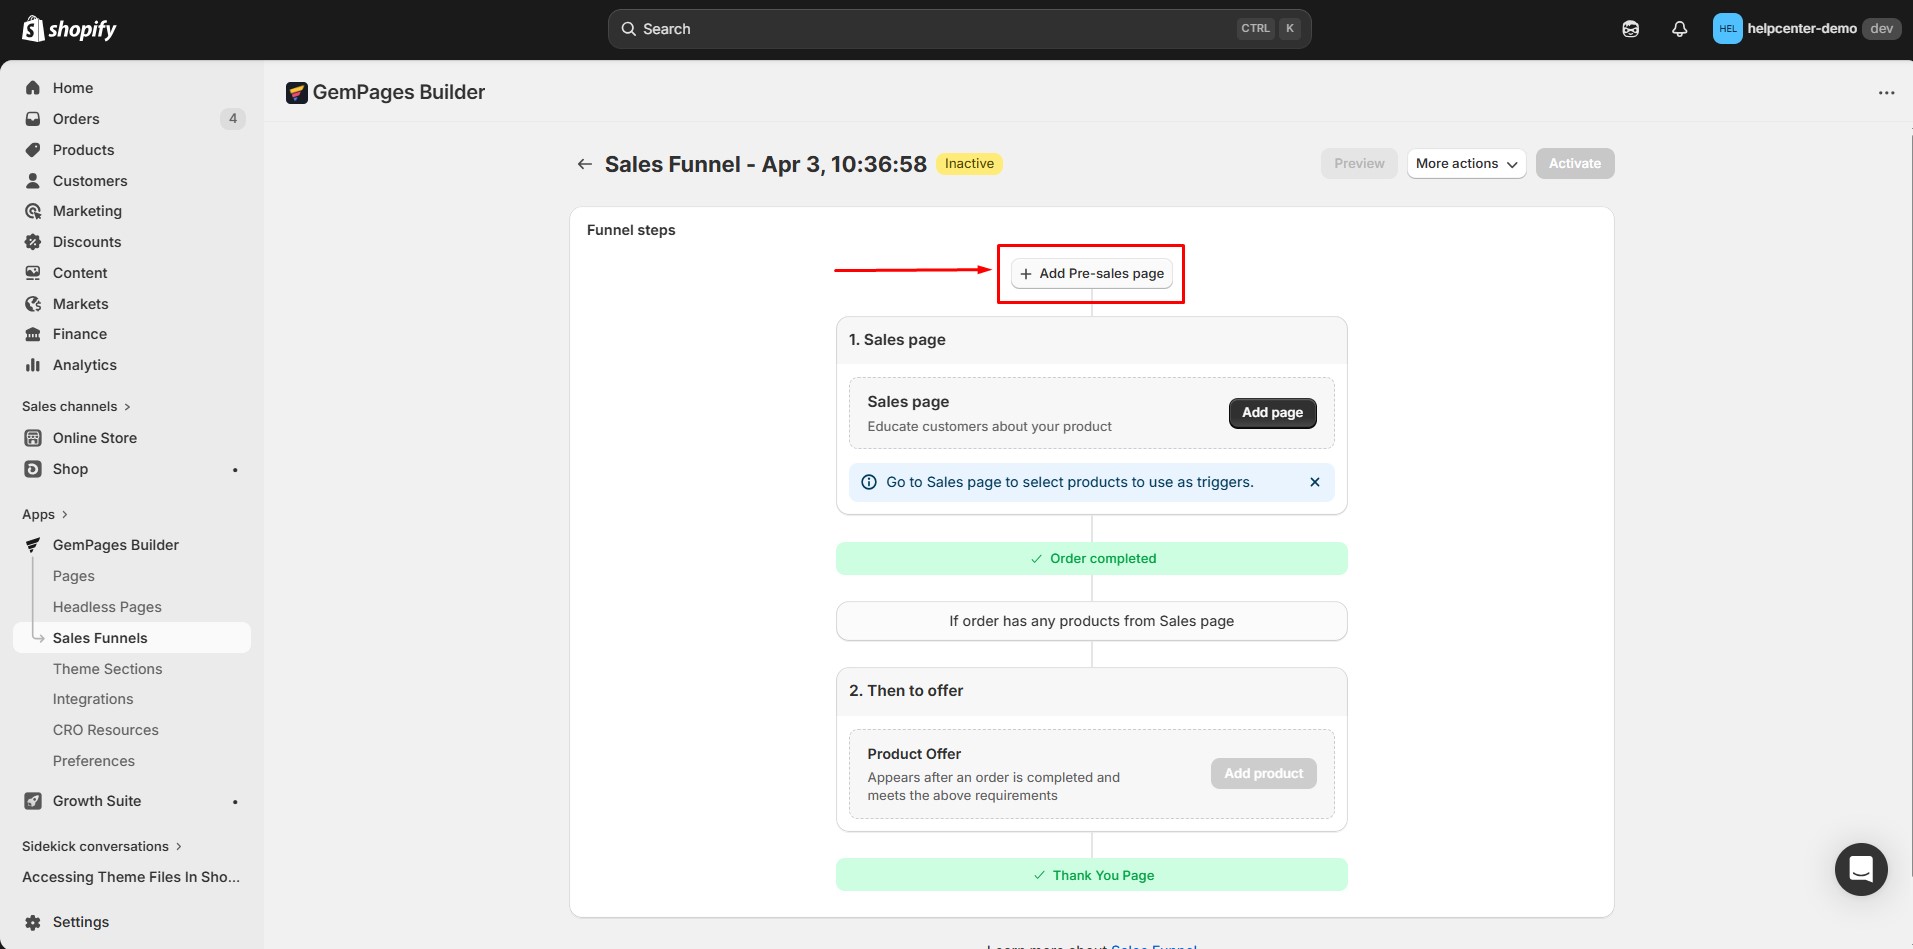
- Click on the Edit Page option to start designing it.
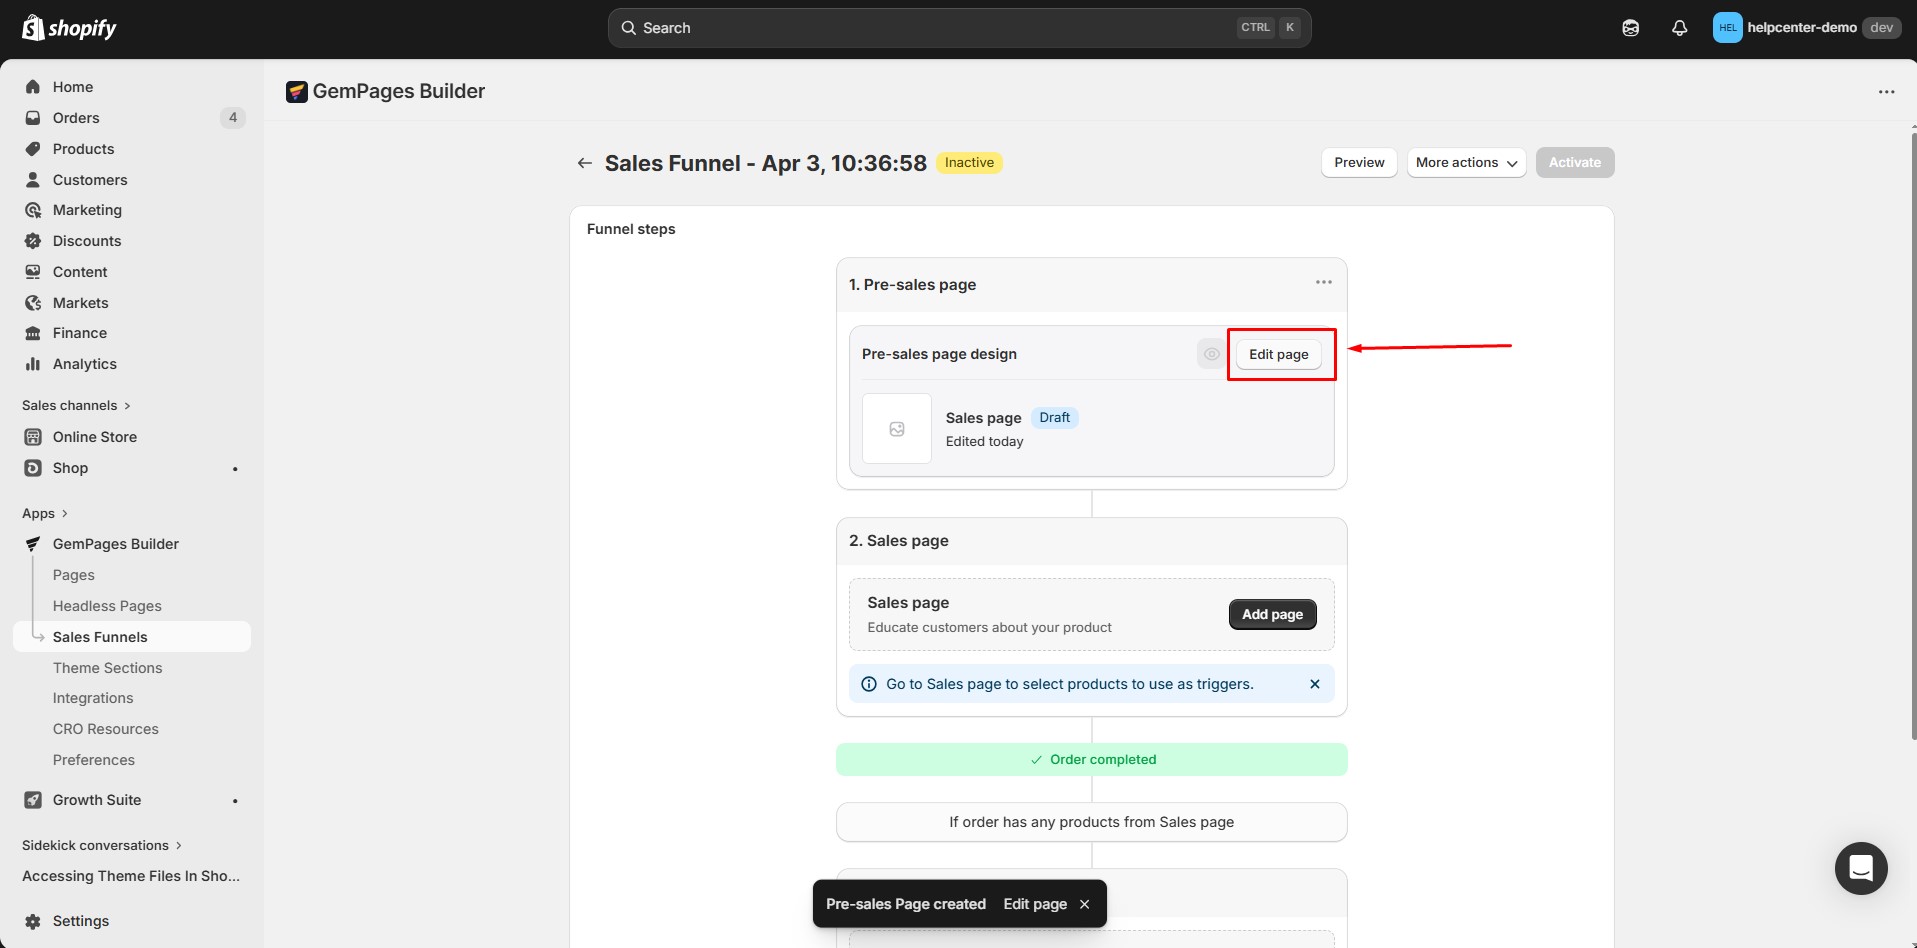
- Design your pre-sales page. You can either use an existing page design or create a new design for your pre-sales page by choosing a new template.
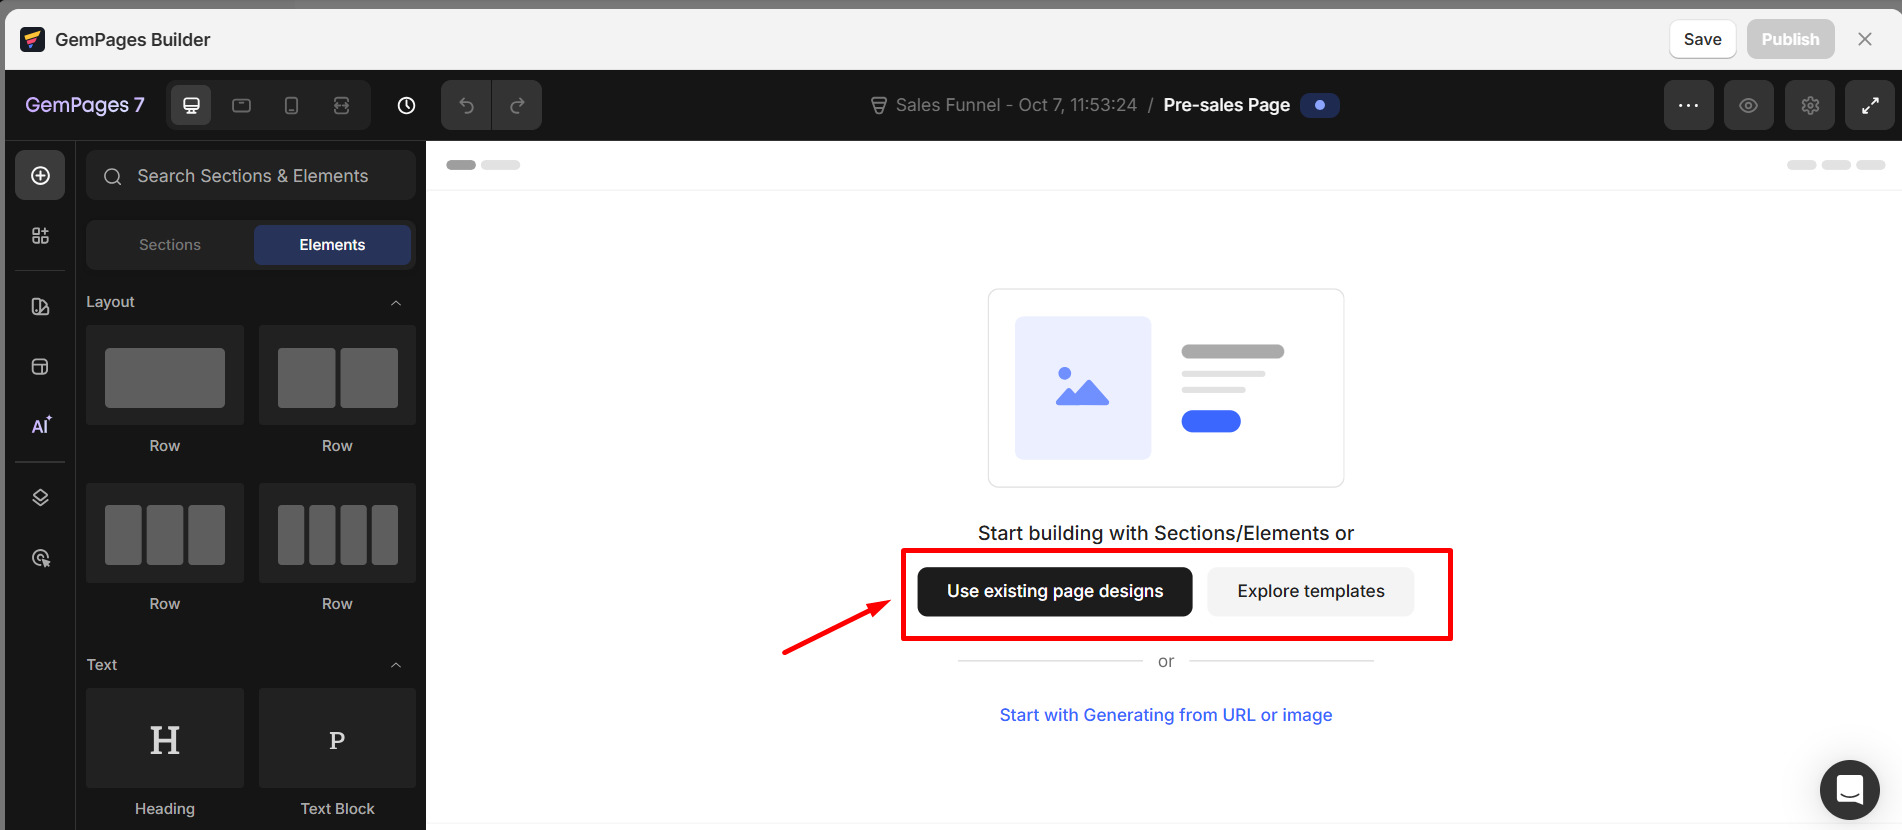
- Identify elements on your pre-sales page to be linked to your sales page or add elements that can contain links, such as buttons, hero banners, or images. For example, you might want to link to your sales page through a button like this:
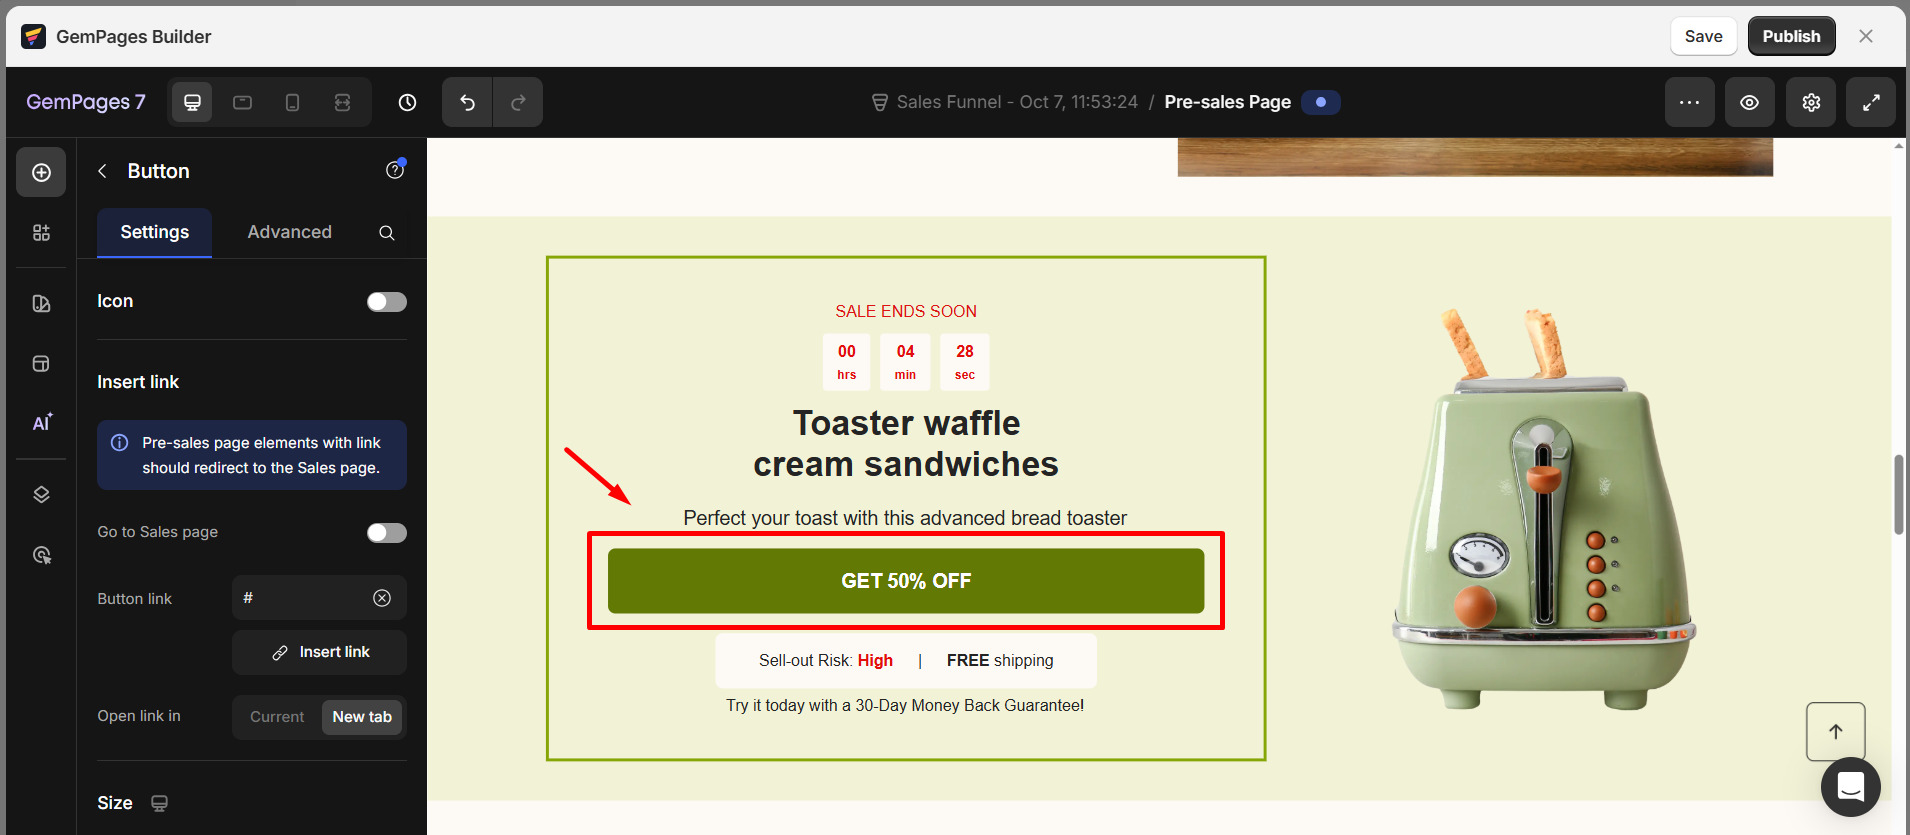
- Select the element you want to link (in this case, the button). On the left sidebar, you’ll find the option to insert a link.
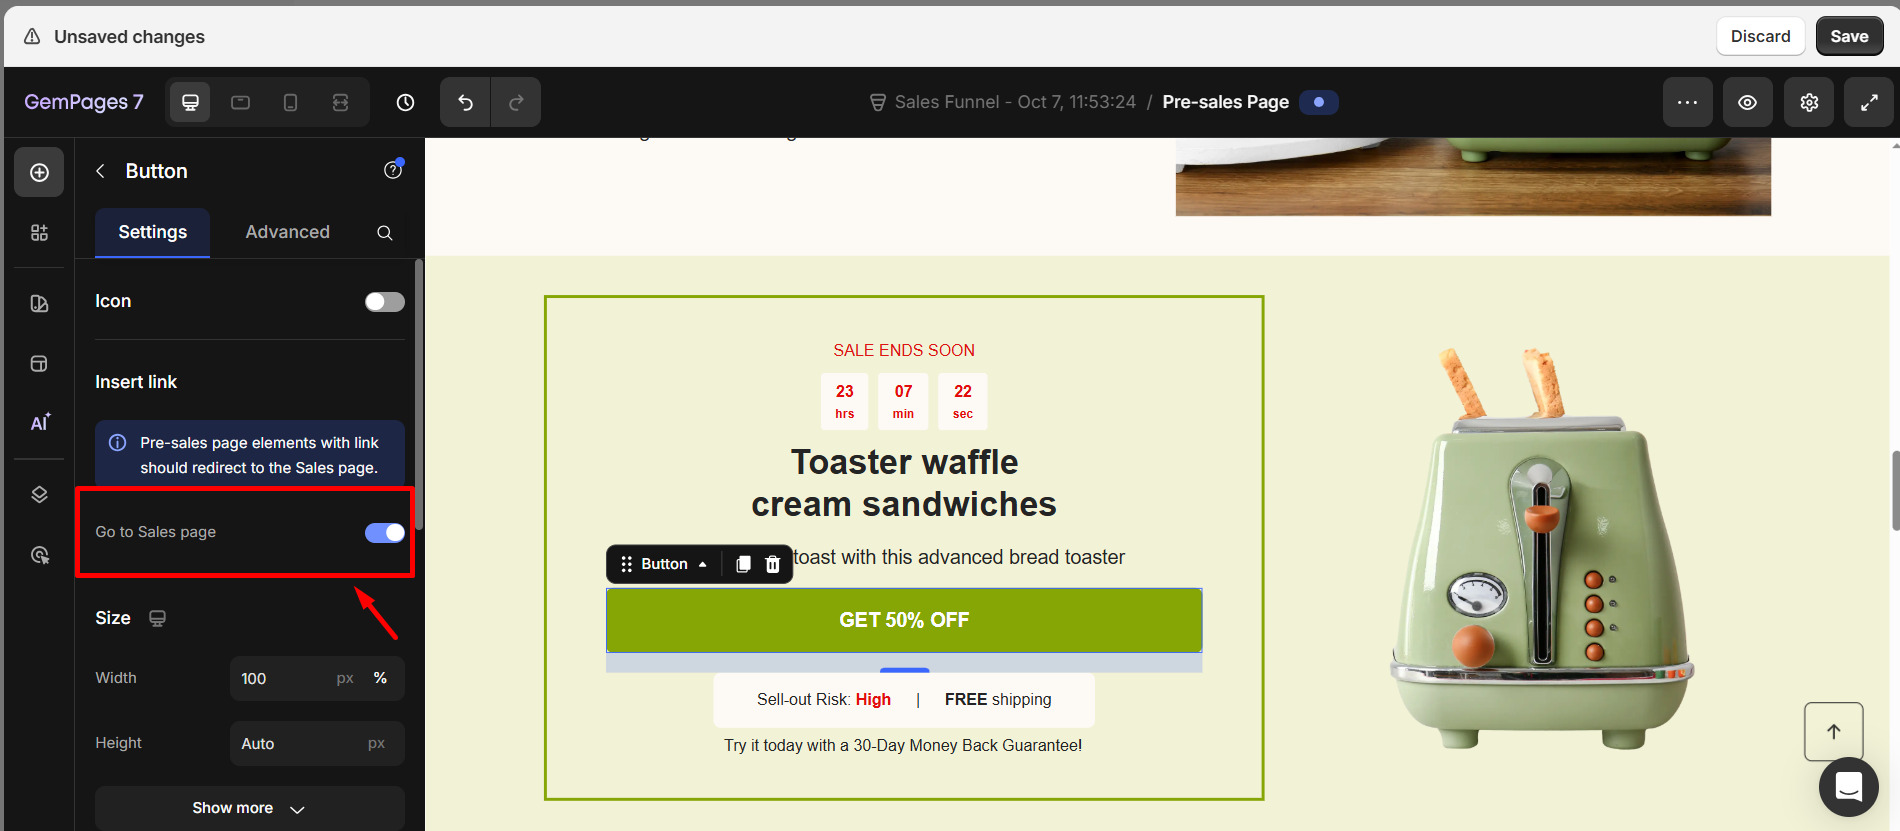
- Toggle on the “Go to sales page” option — this will link the button to the sales page that’s in the same funnel as your pre-sales page.
Save and publish the page.
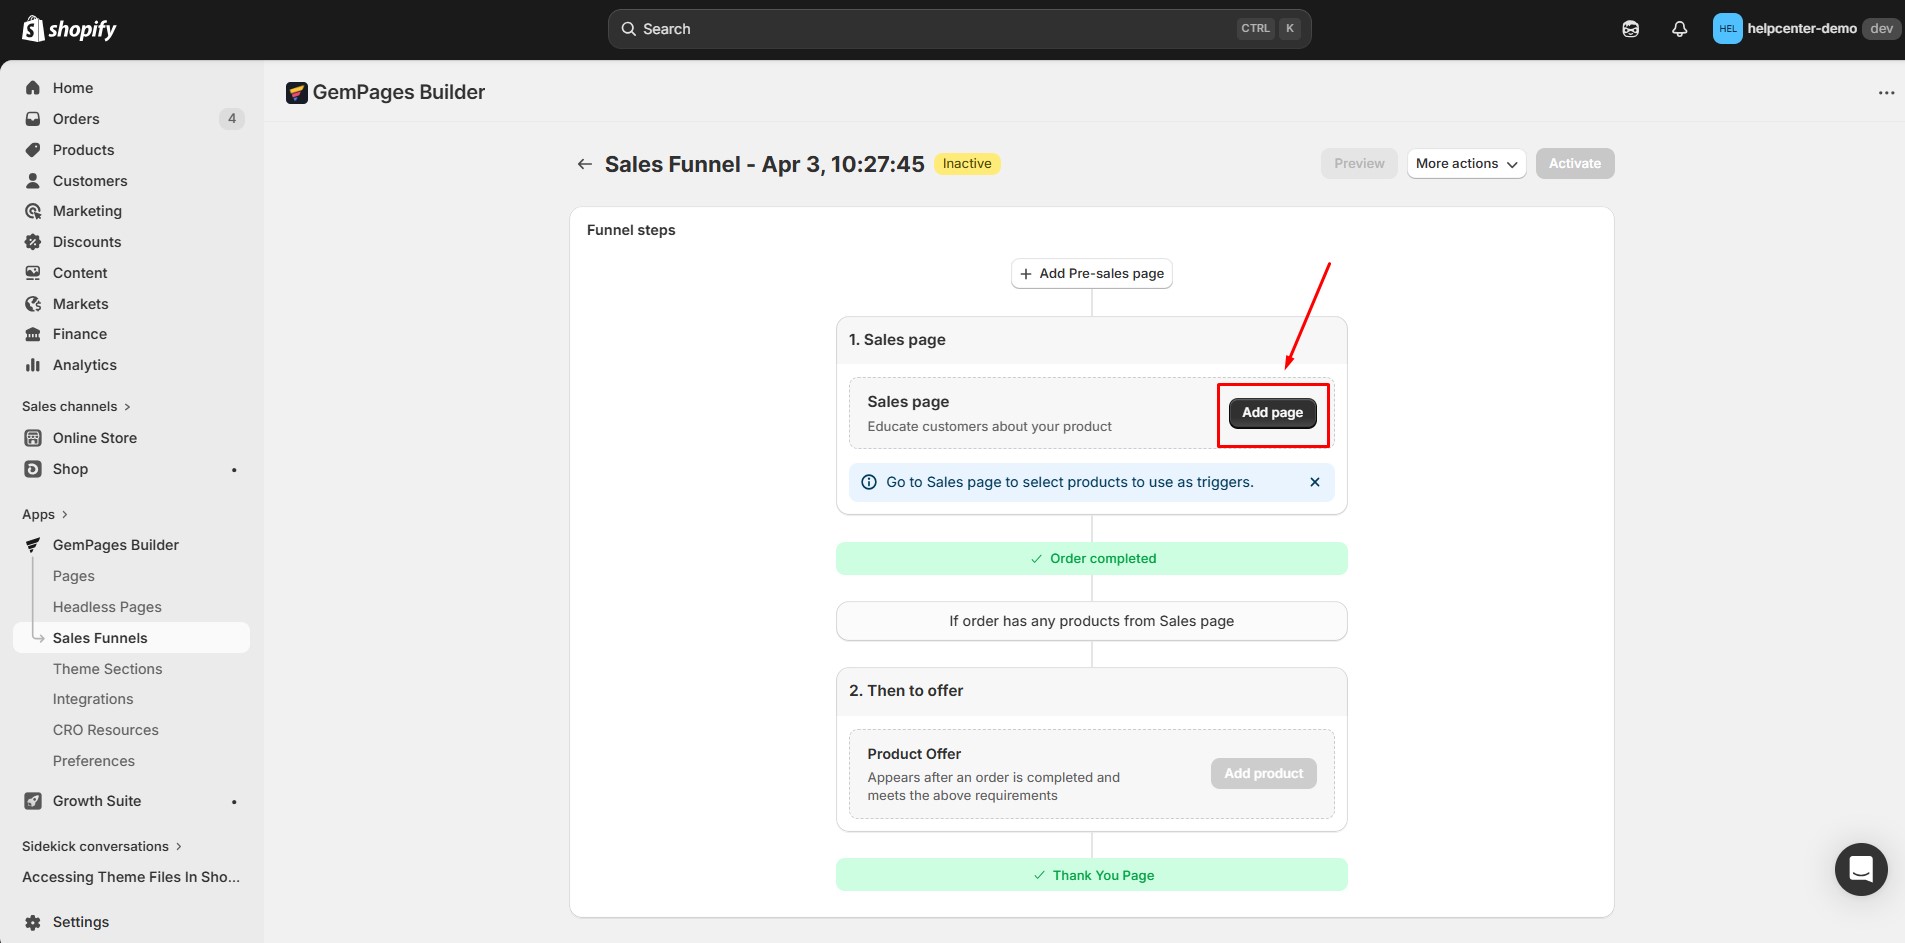
Step 4: Create Your Sales Page
Click Add Page to start building your sales page.
You will be redirected to the GemPages editor, where you can choose one of the following options:
Option 1: Use an existing page design
If you already have a high-performing page, you can reuse it. Templates with product sections will automatically add those products as product triggers. If you don’t want to include these products, uncheck: “Add product from selected template to sales page”
*A product trigger is the product that customers must purchase to activate the next step in the funnel (e.g., showing an upsell offer).

Option 2: Create a blank page
Start from scratch with a blank canvas.
- Use drag-and-drop elements or templates to build your page
- Make sure to assign products to the page — these will act as your funnel triggers
Option 3: Use a pre-built template
- Browse the template library and choose a ready-made design.
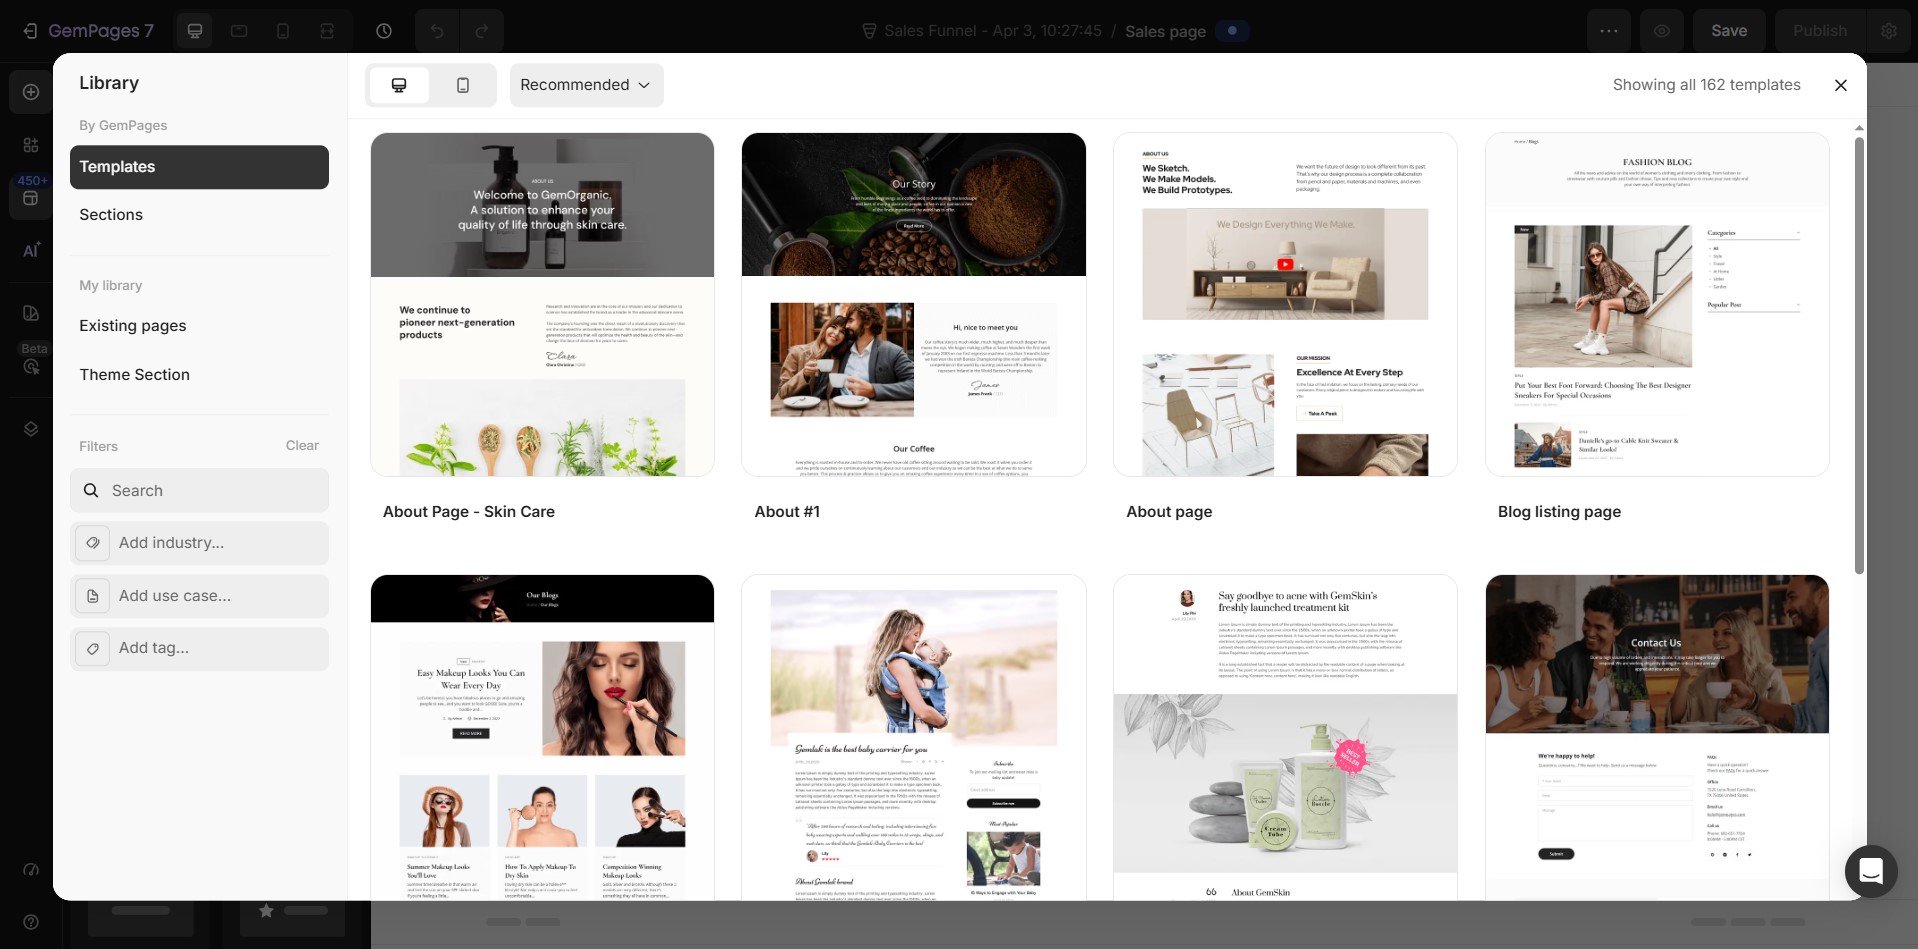
- Assign a product and click Publish to make it live as your sales page.
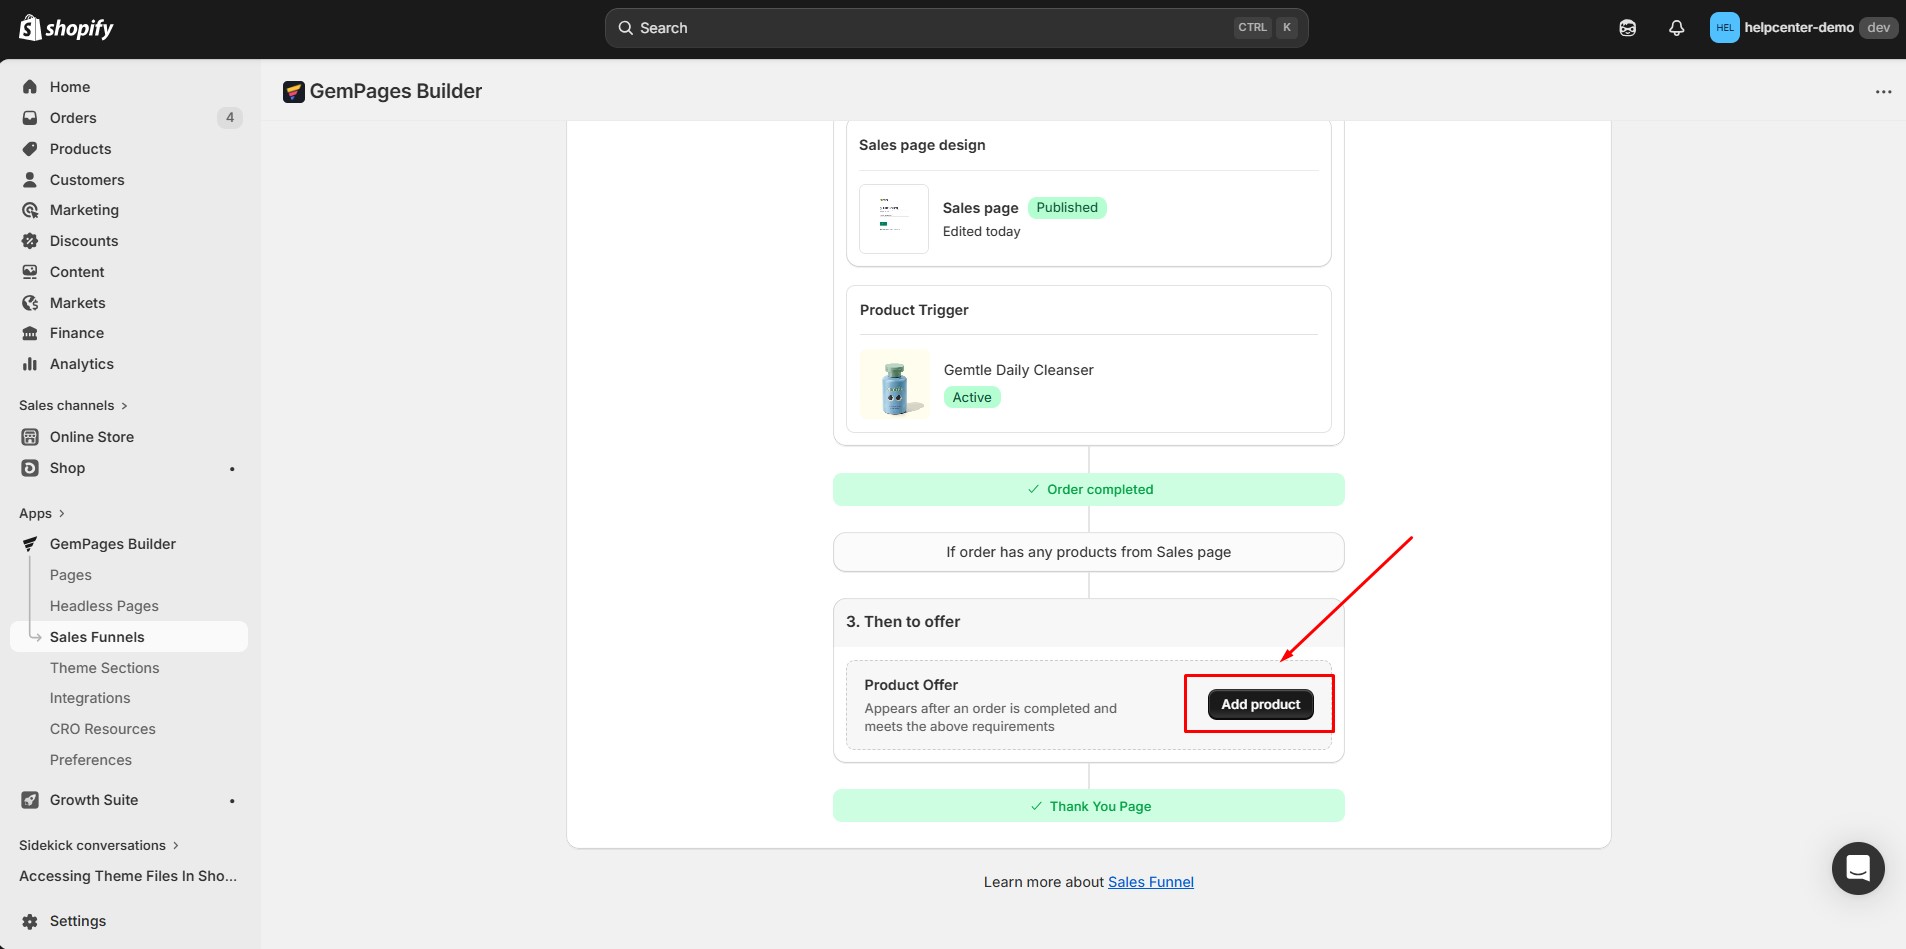
Step 5: Add Product Offer (Subscription Offer)
- After publishing your sales page, you’ll see a confirmation message. Click Continue to edit the funnel to add offers.
- Under the “3. Then to offer“ section, click on Add product to choose a product offer for your sales funnel => Select Specific offers.
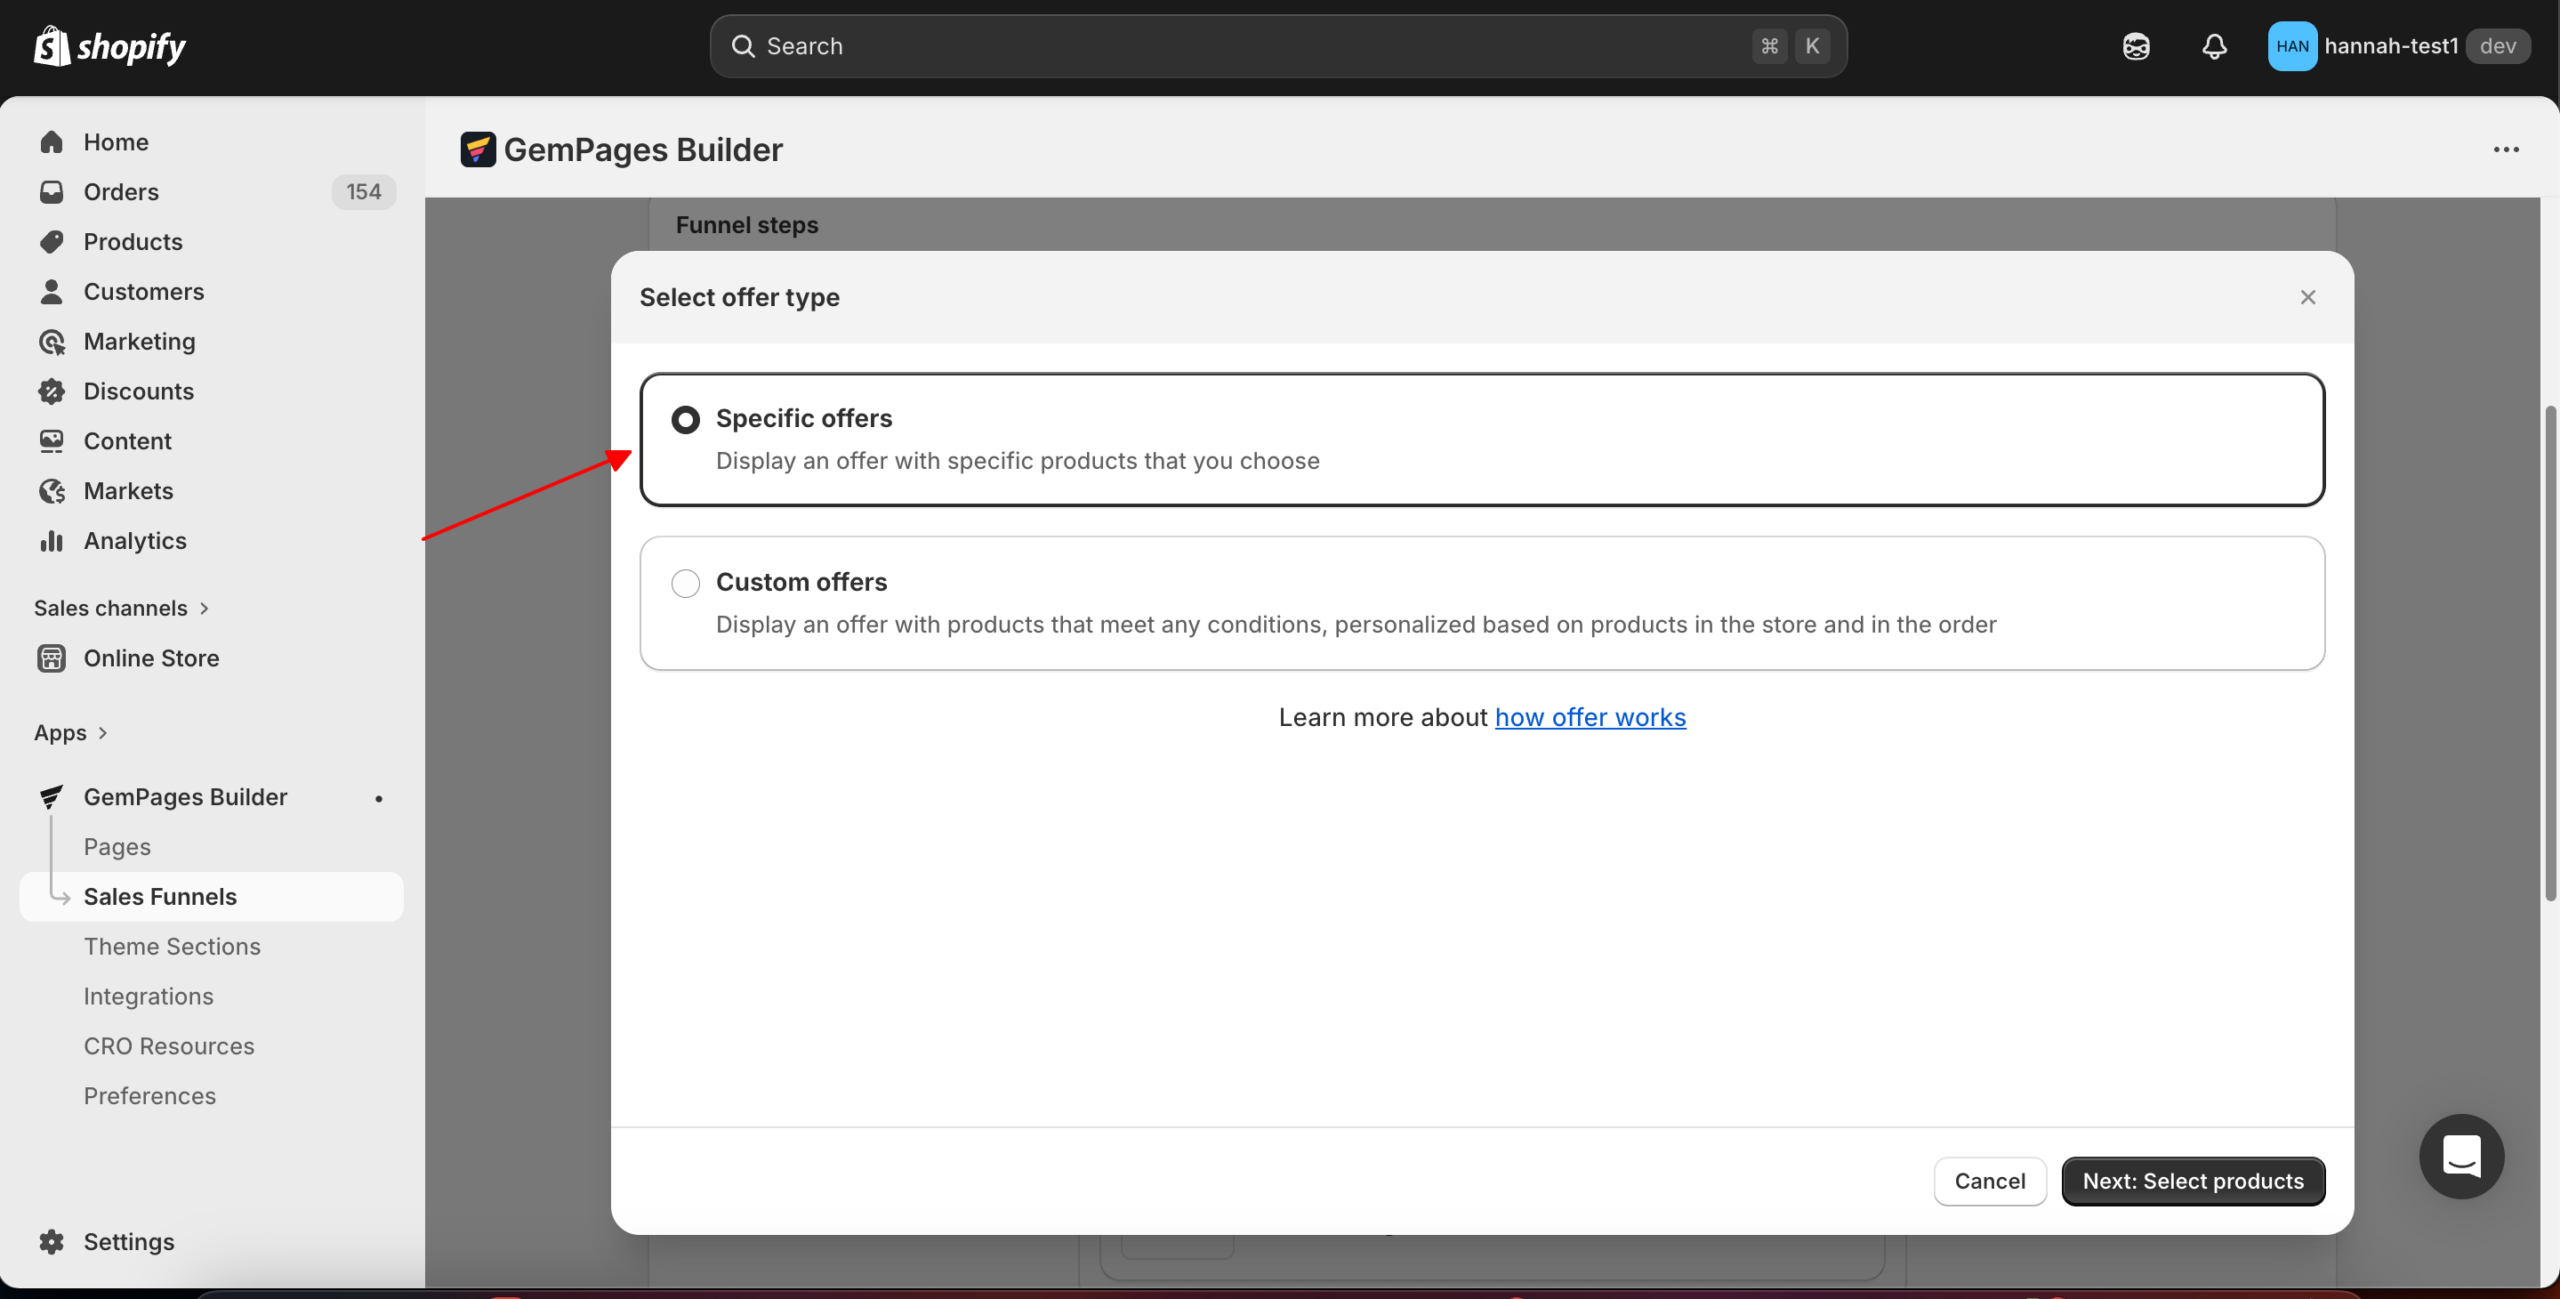
For more details about dynamic offers, refer to this article: Sales Funnel – Dynamic Offer.
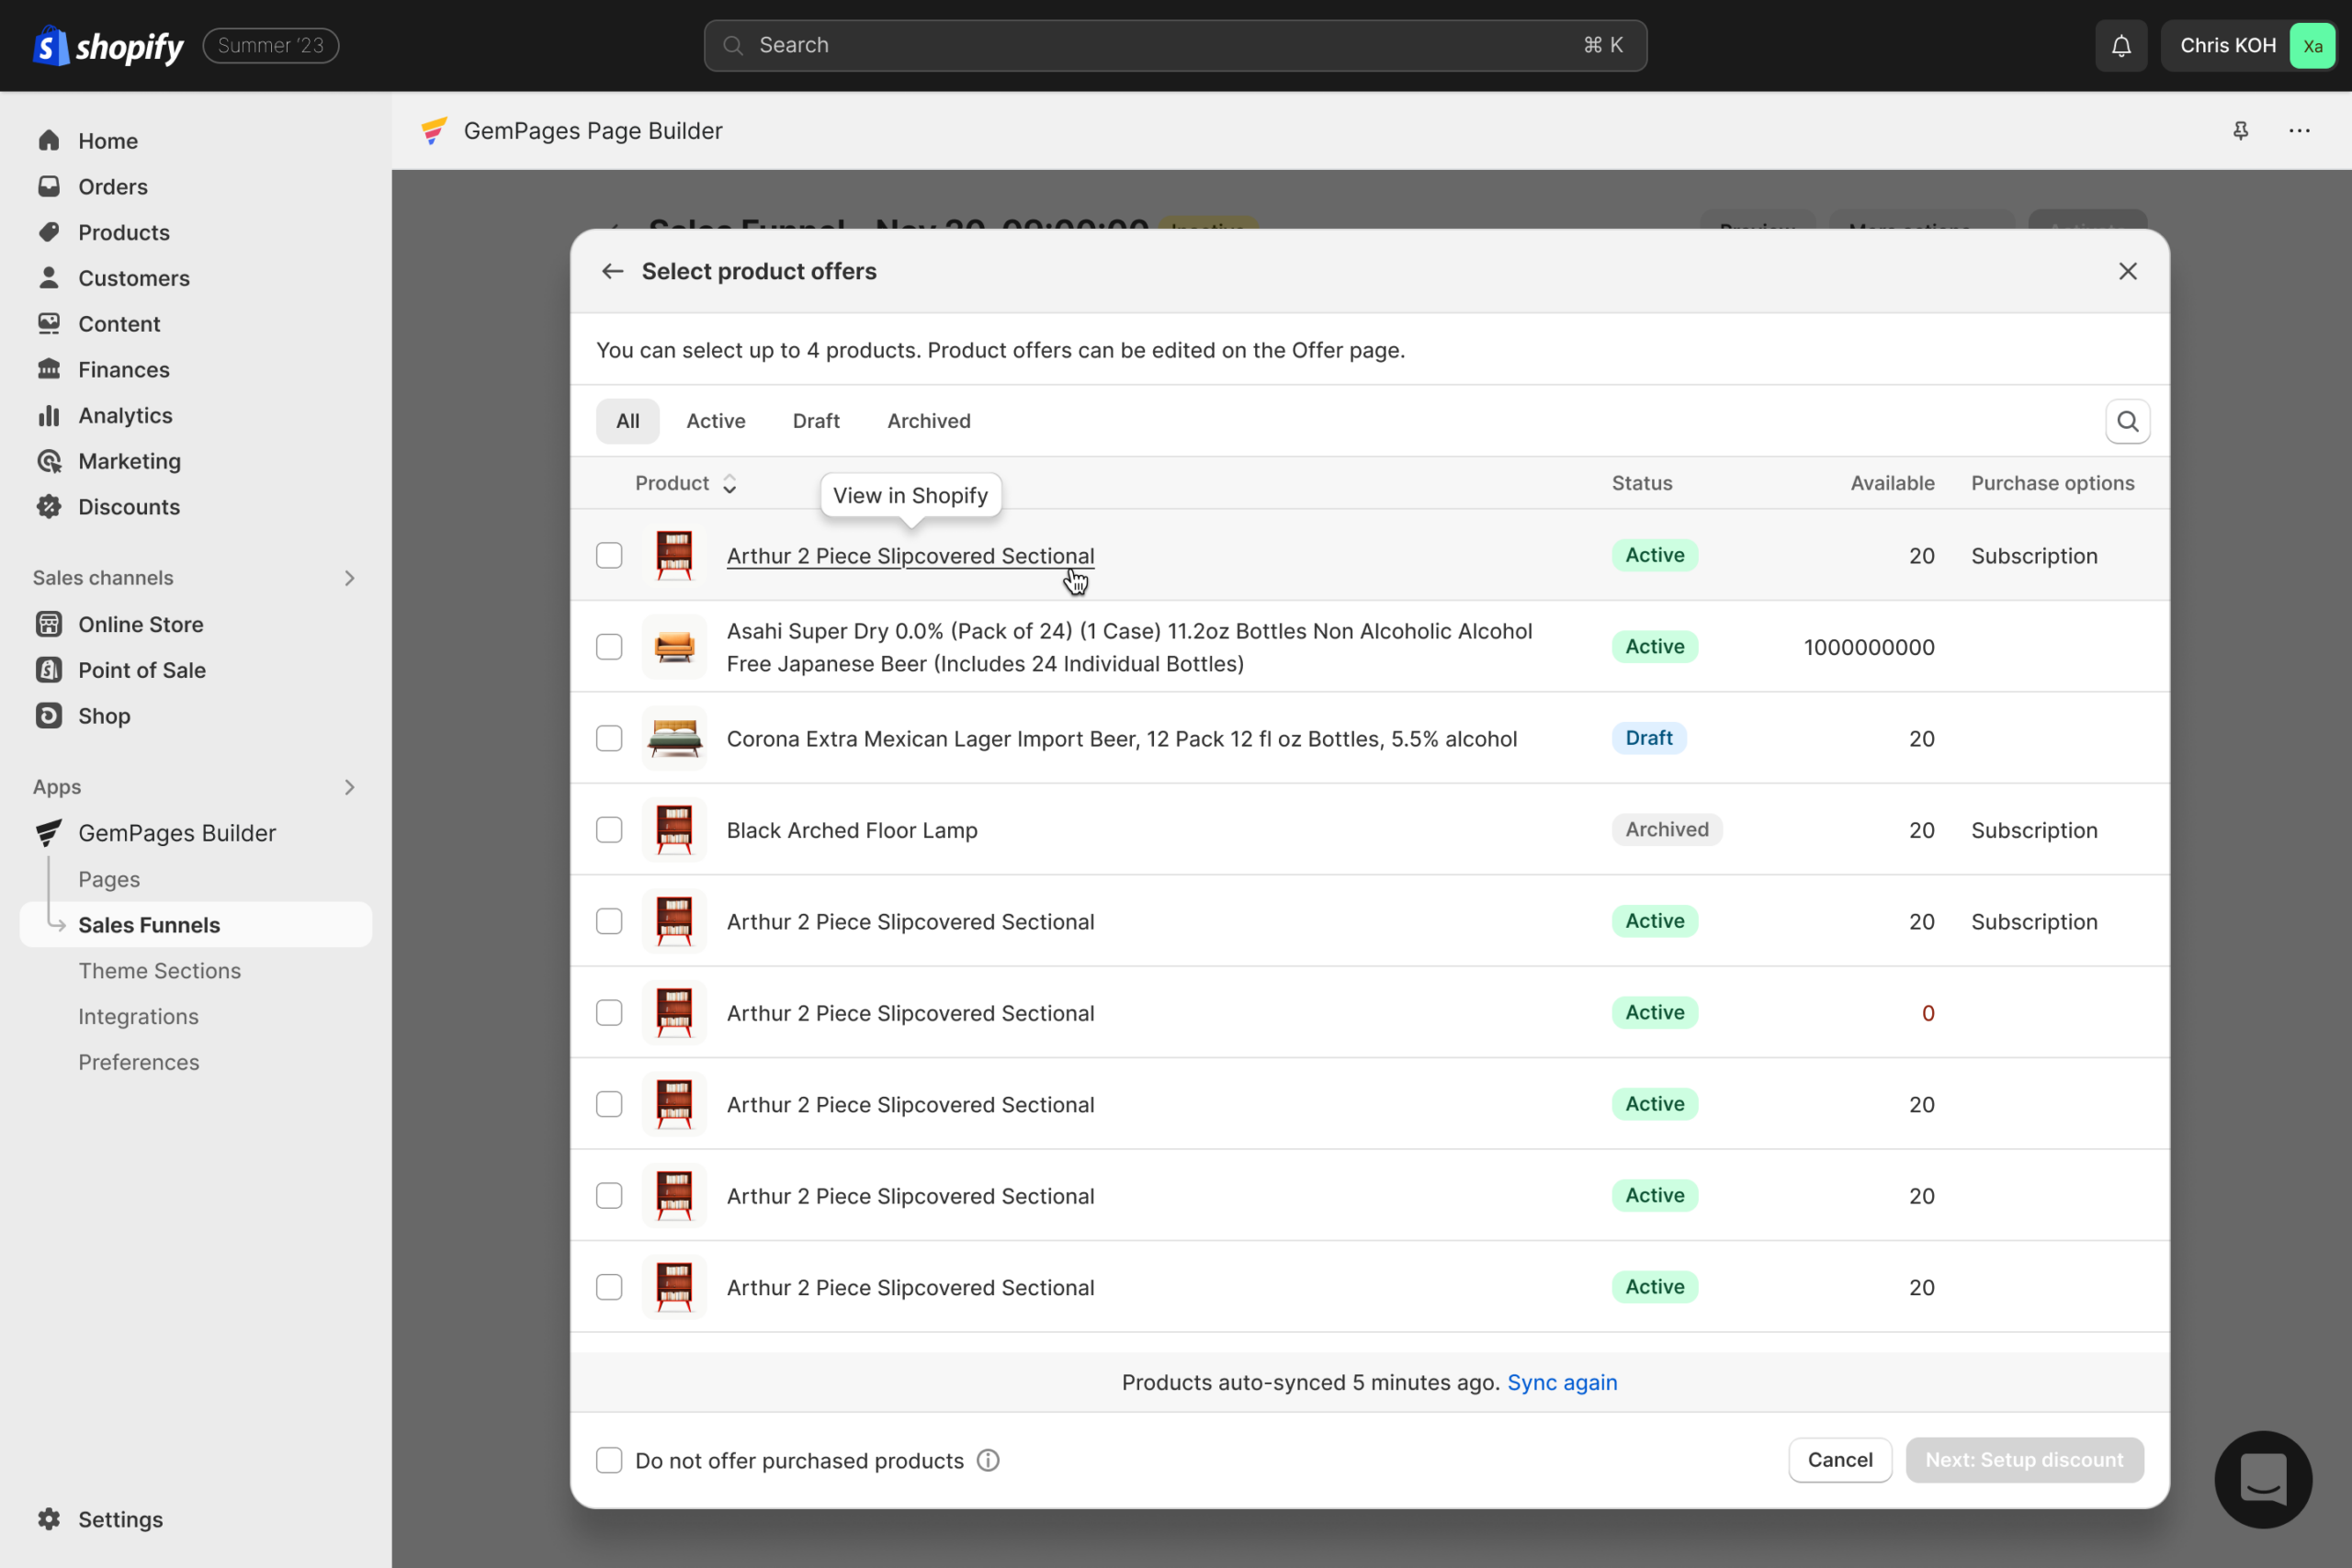
- Choose your subscription product(s) (up to 4 products)
- Subscription products will be labeled as “Subscription” in the Purchase Options column
- Includes both:
- One-time + subscription products
- Subscription-only products
- Includes both:
Step 6: Setup discount
- Configure discounts for each product offer.
- Click Save offer.
At this point, your subscription upsell is successfully created.
How to Customize the Upsell Page?
For subscription products, you must use the Subscription element and Buyer Consent element.
Step 1: In the editor, search for:
- “Subscription”
- “Subscribe”
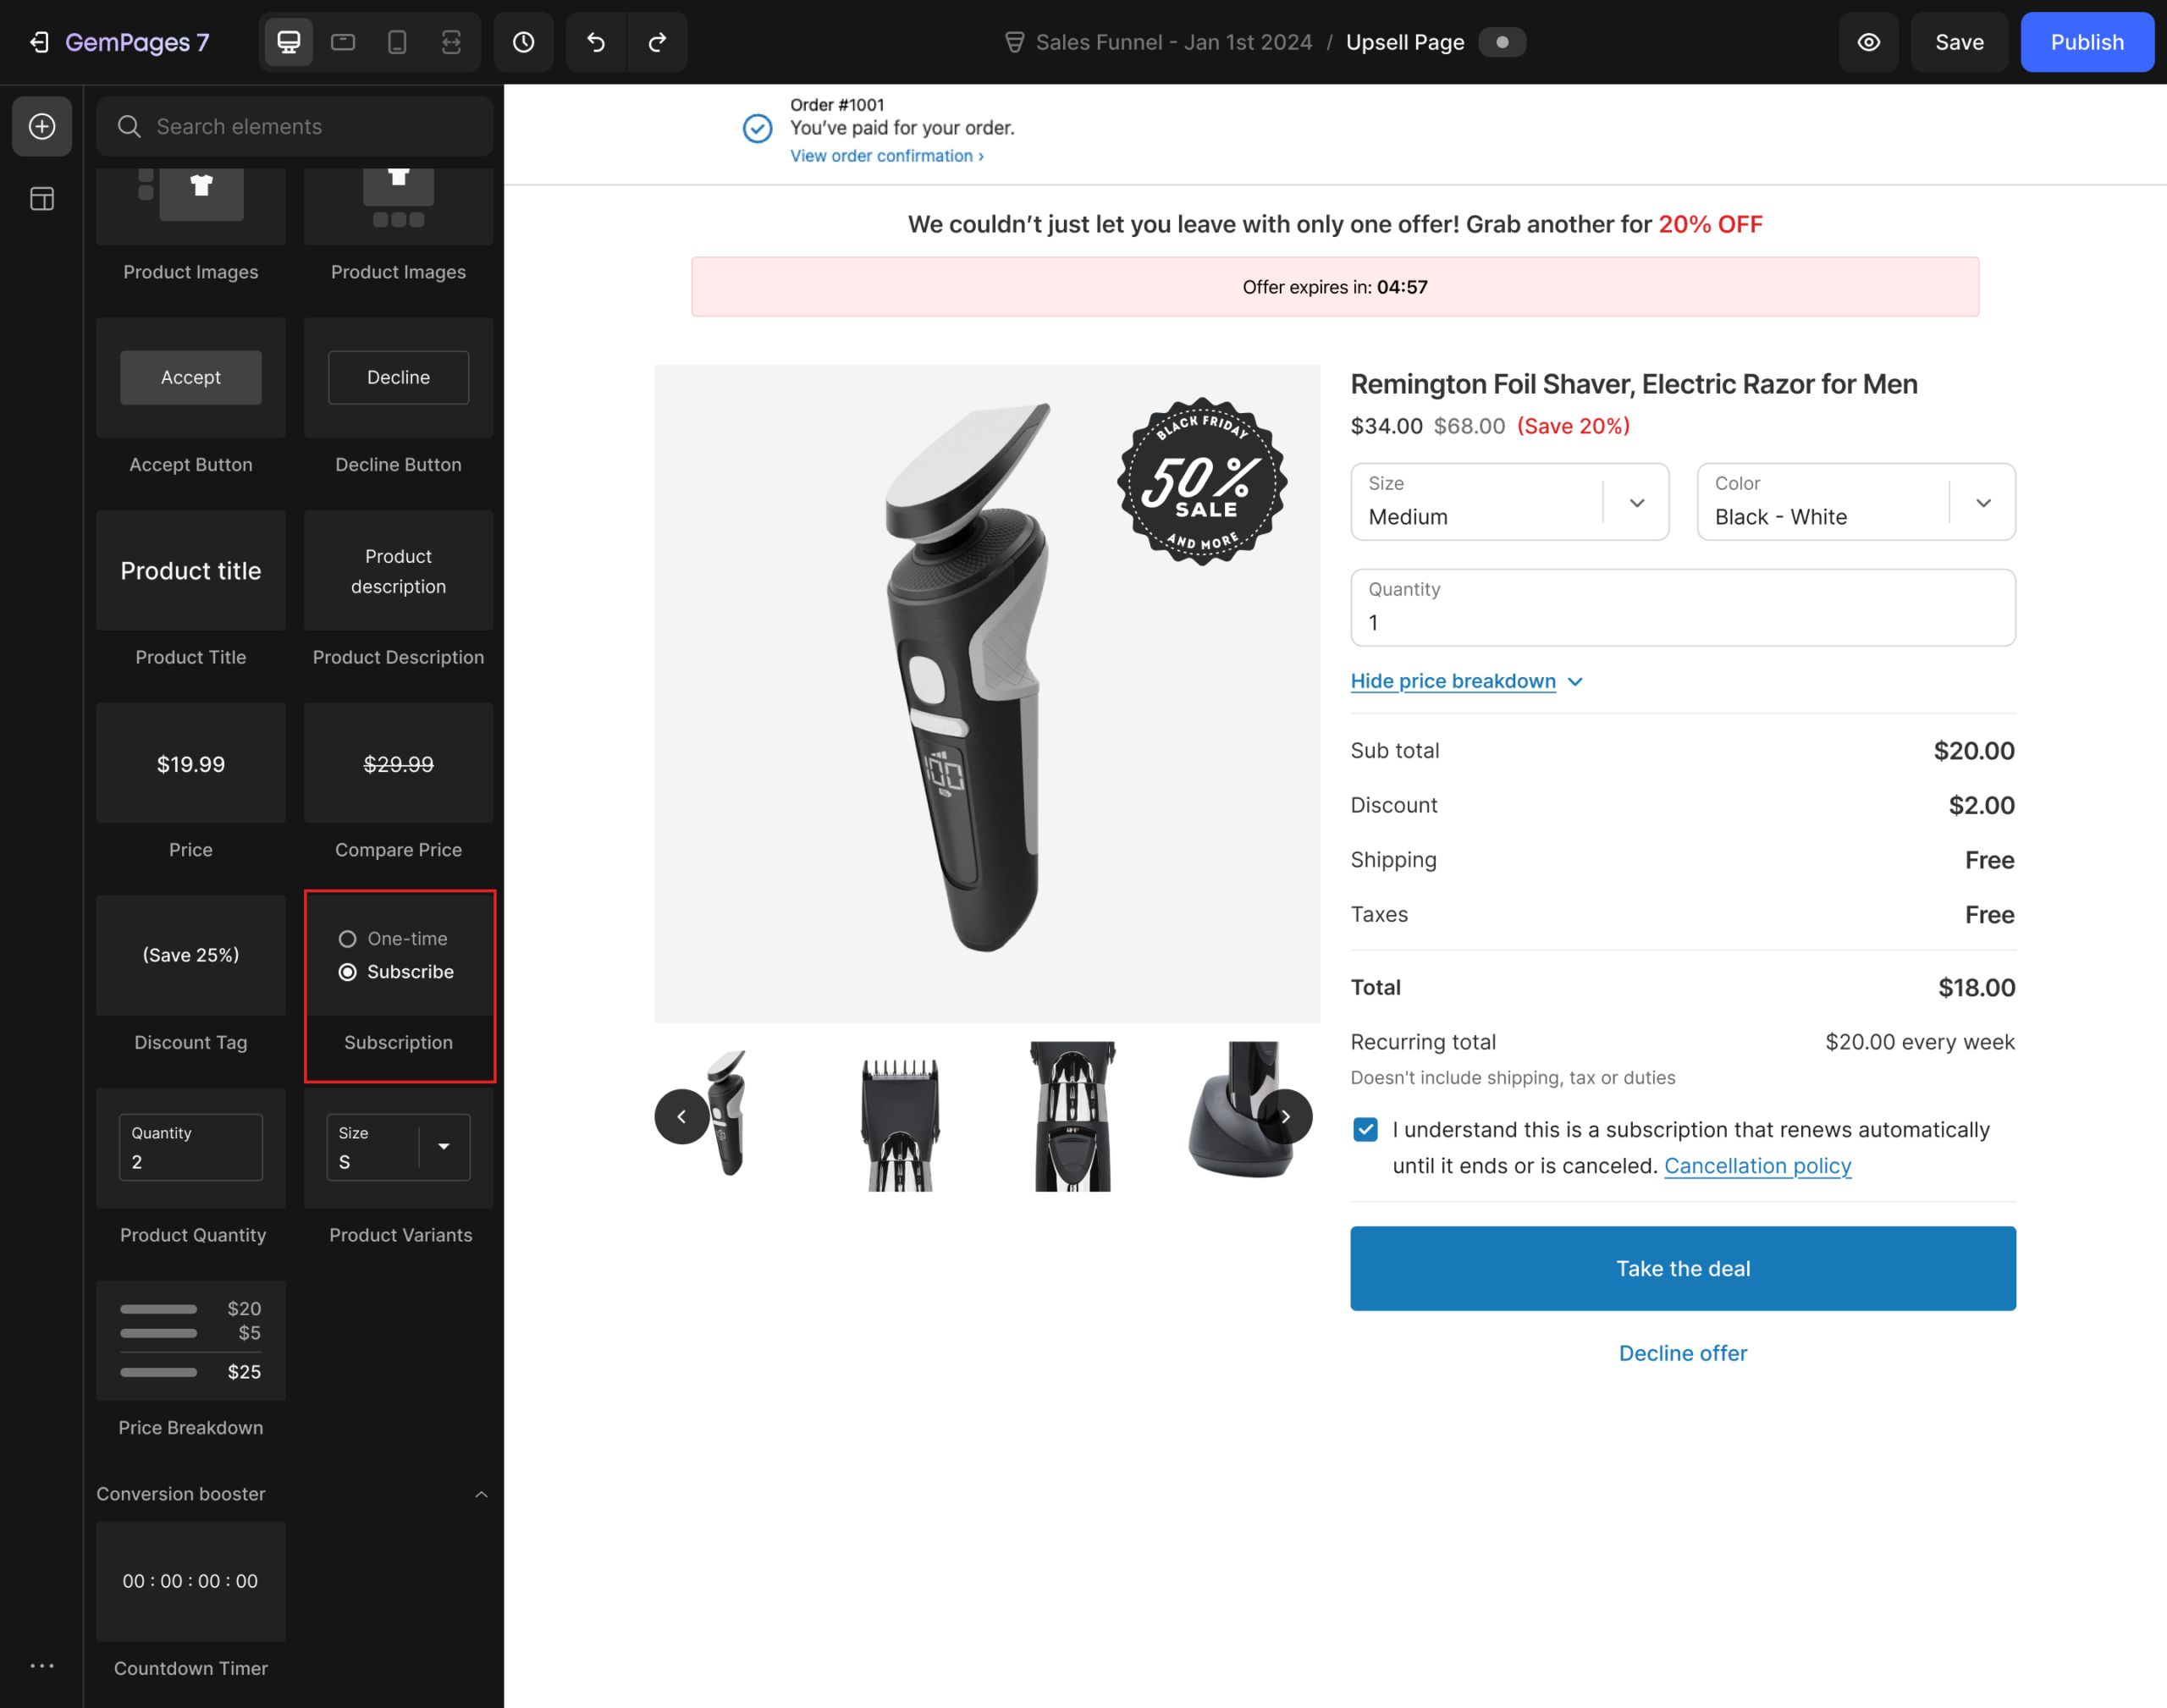
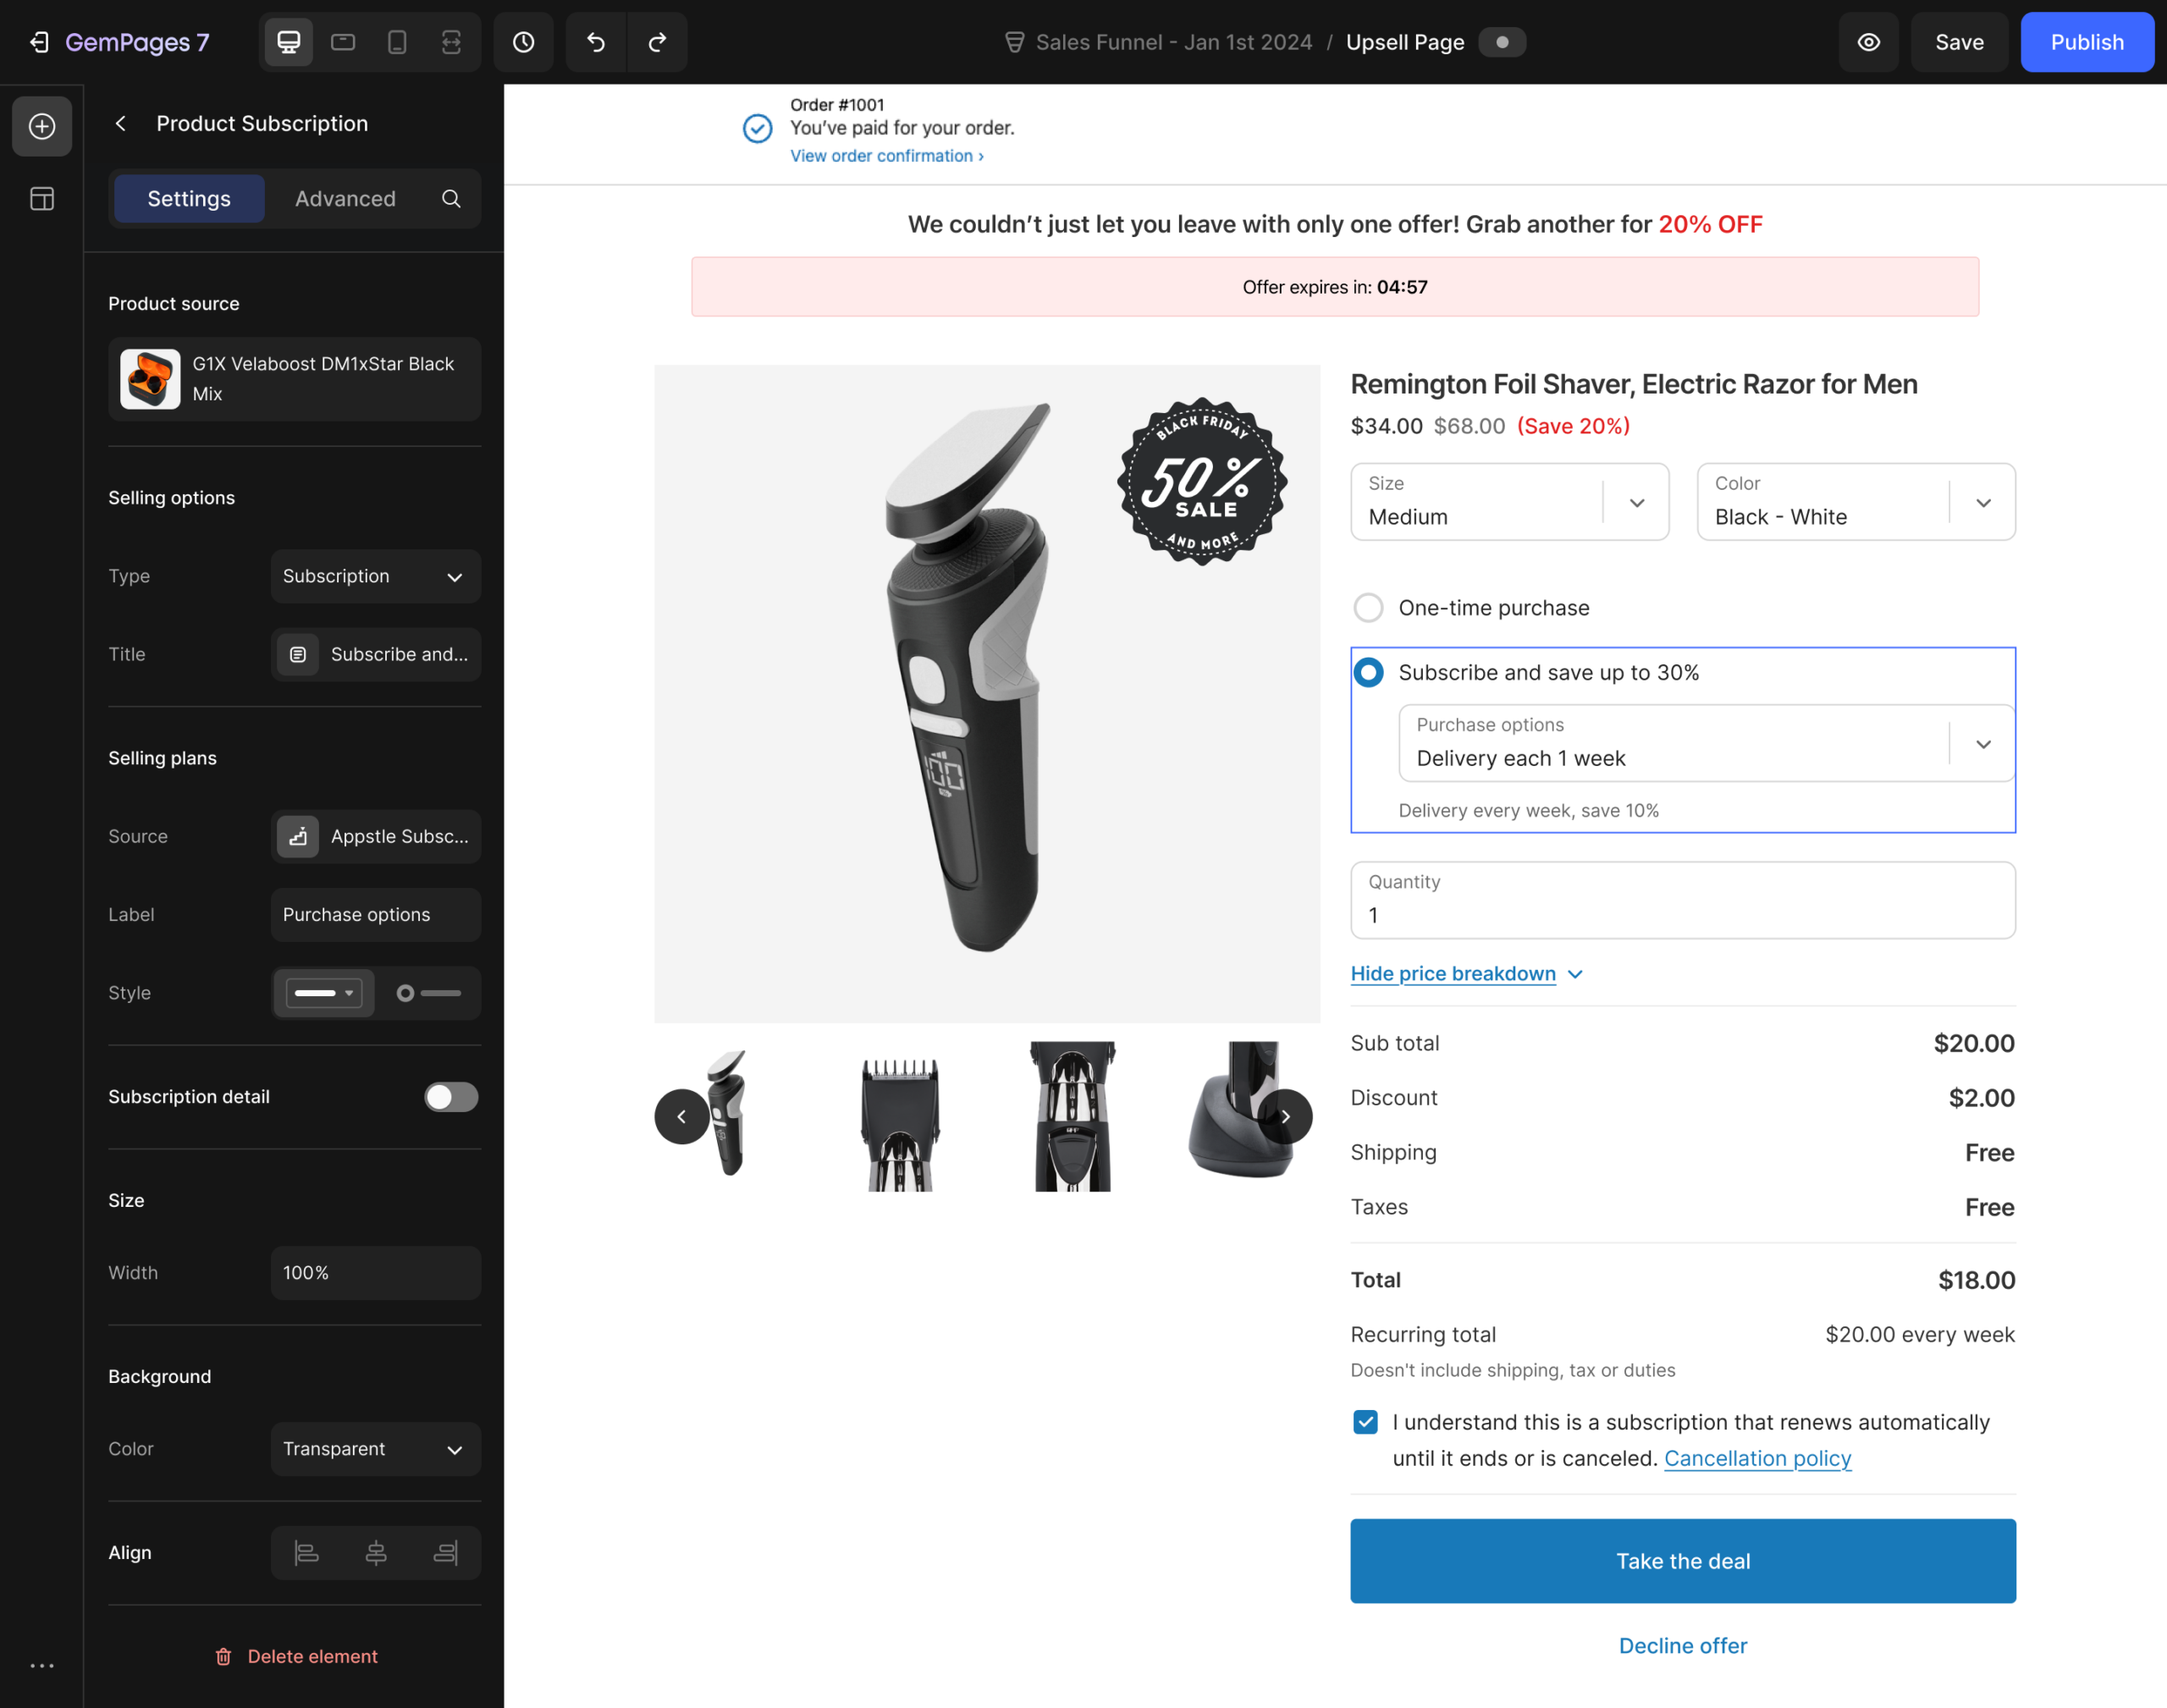
Step 2: Dragging the “Subscription” element into the design area.
Depending on your product type:
Case 1: Product supports both one-time & subscription
The system will automatically generate:
- One element for one-time purchase
- One element for subscription purchase
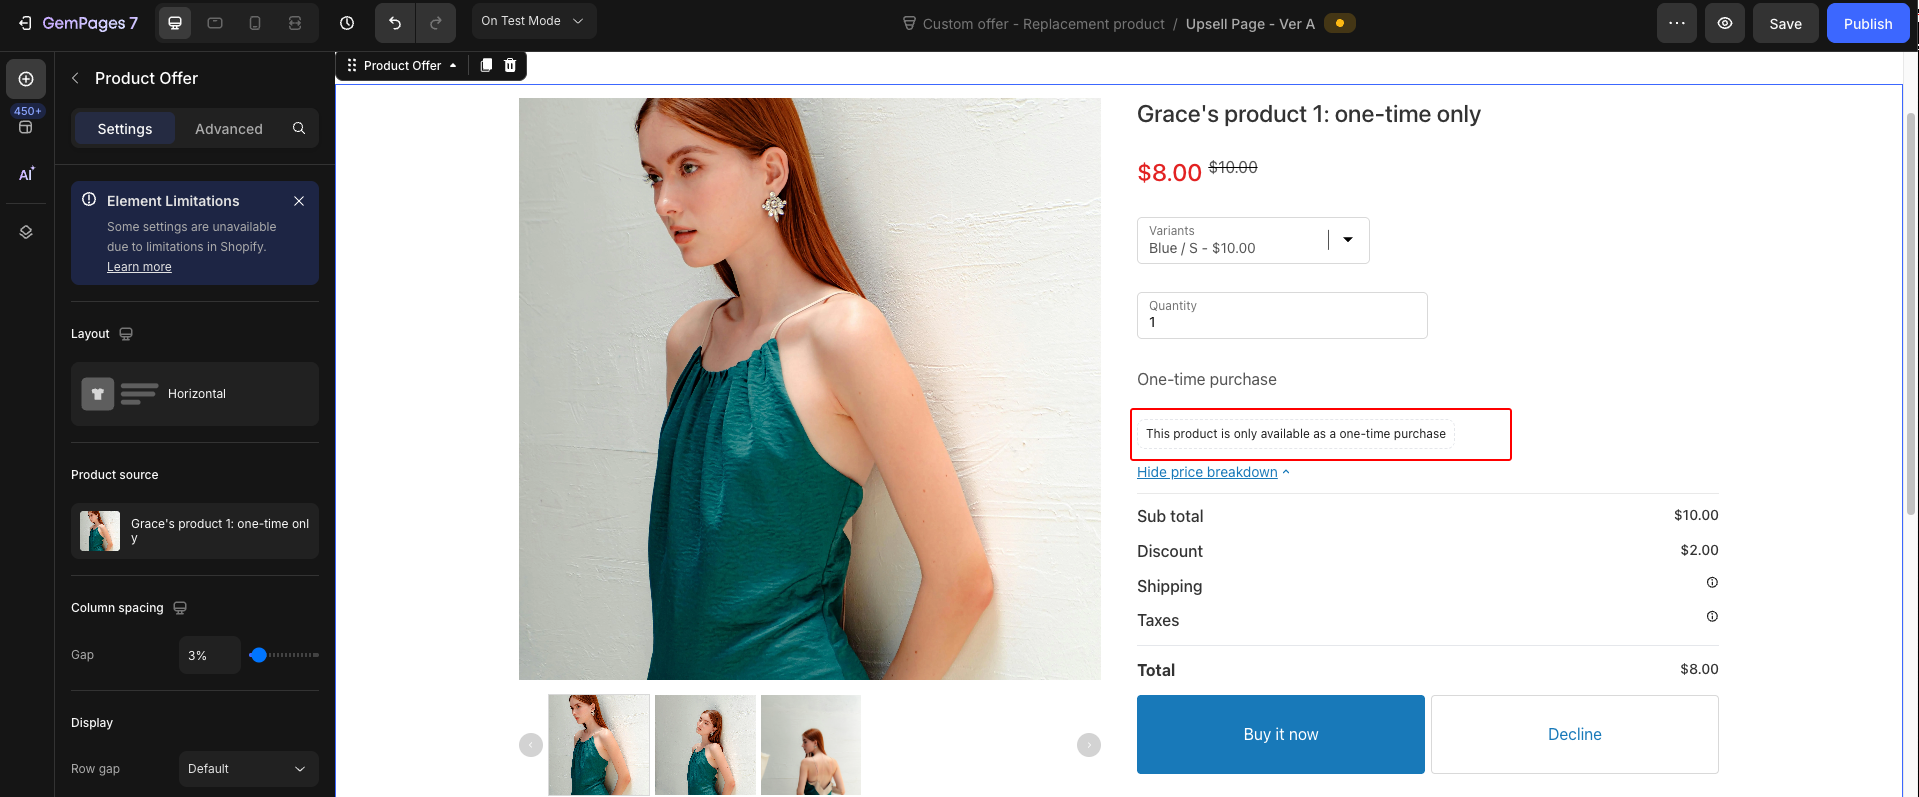
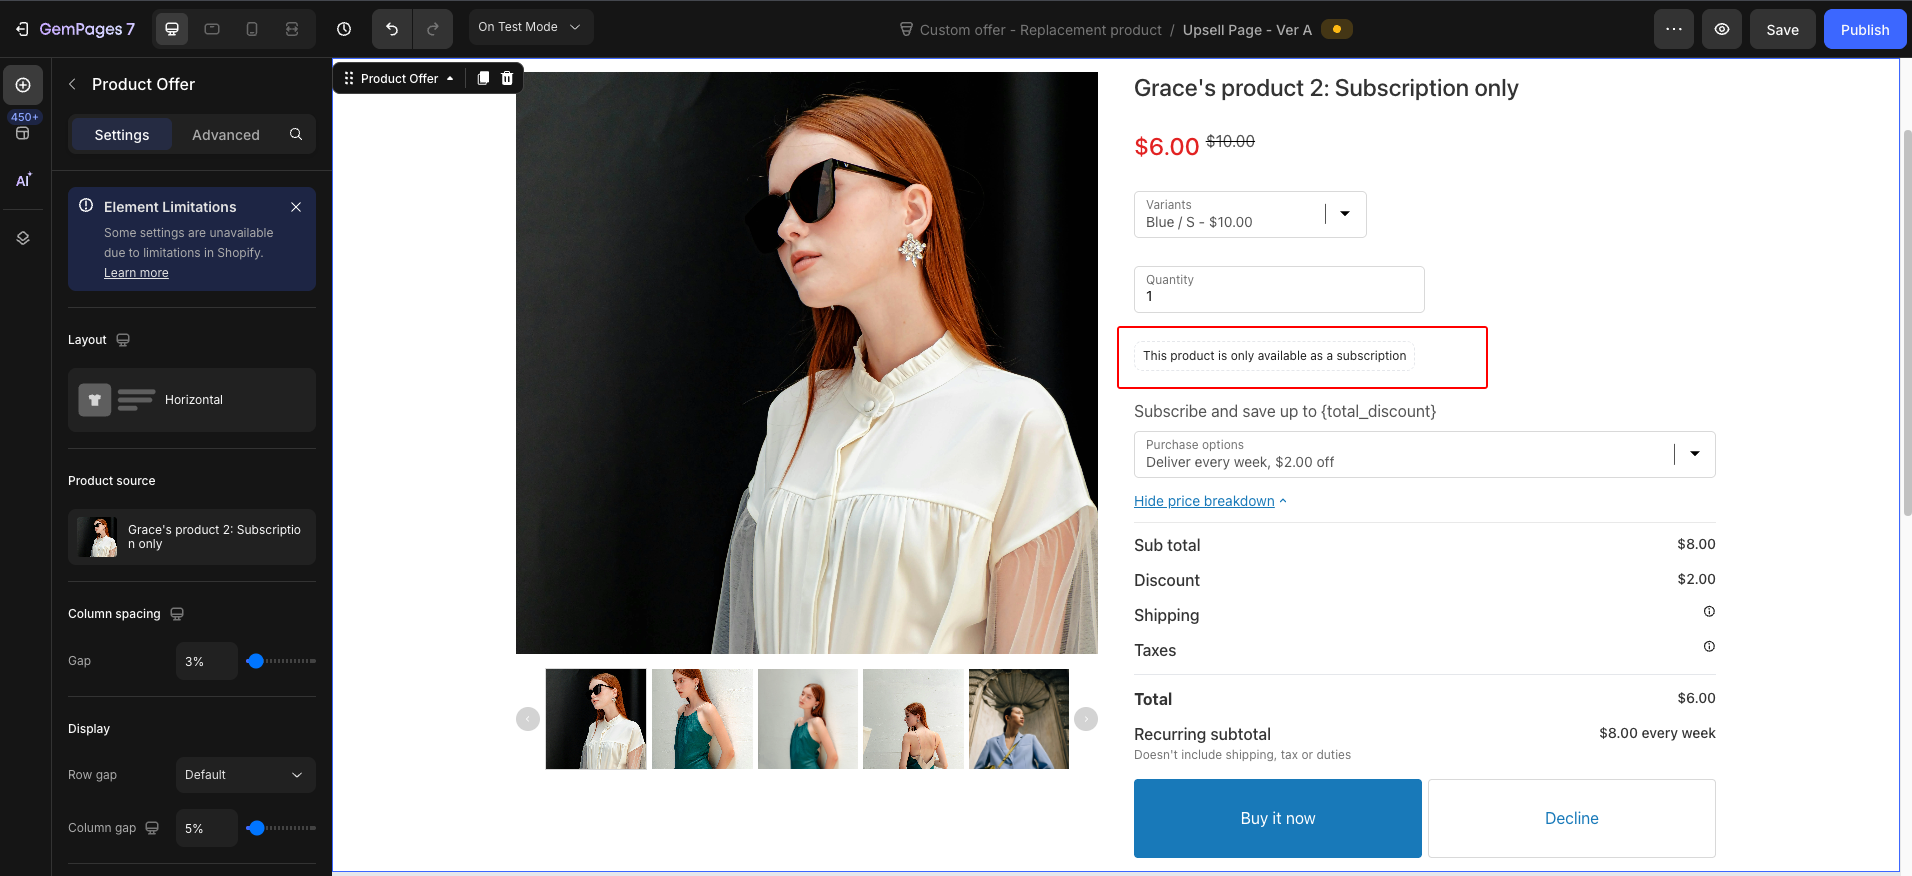
Case 2: Product is one-time only
The element will display: “This product is only available as a one-time purchase.”
Case 3: Product is subscription-only
The system will generate a Subscription element for subscription purchase only.
Step 3: In the element list, search “Buyer Consent” element by keywords: policy, terms, agrees, checkboxes, ticks, subscription, consent, confirm, approve.
Step 4: Drag and drop Buyer consent into the design area.
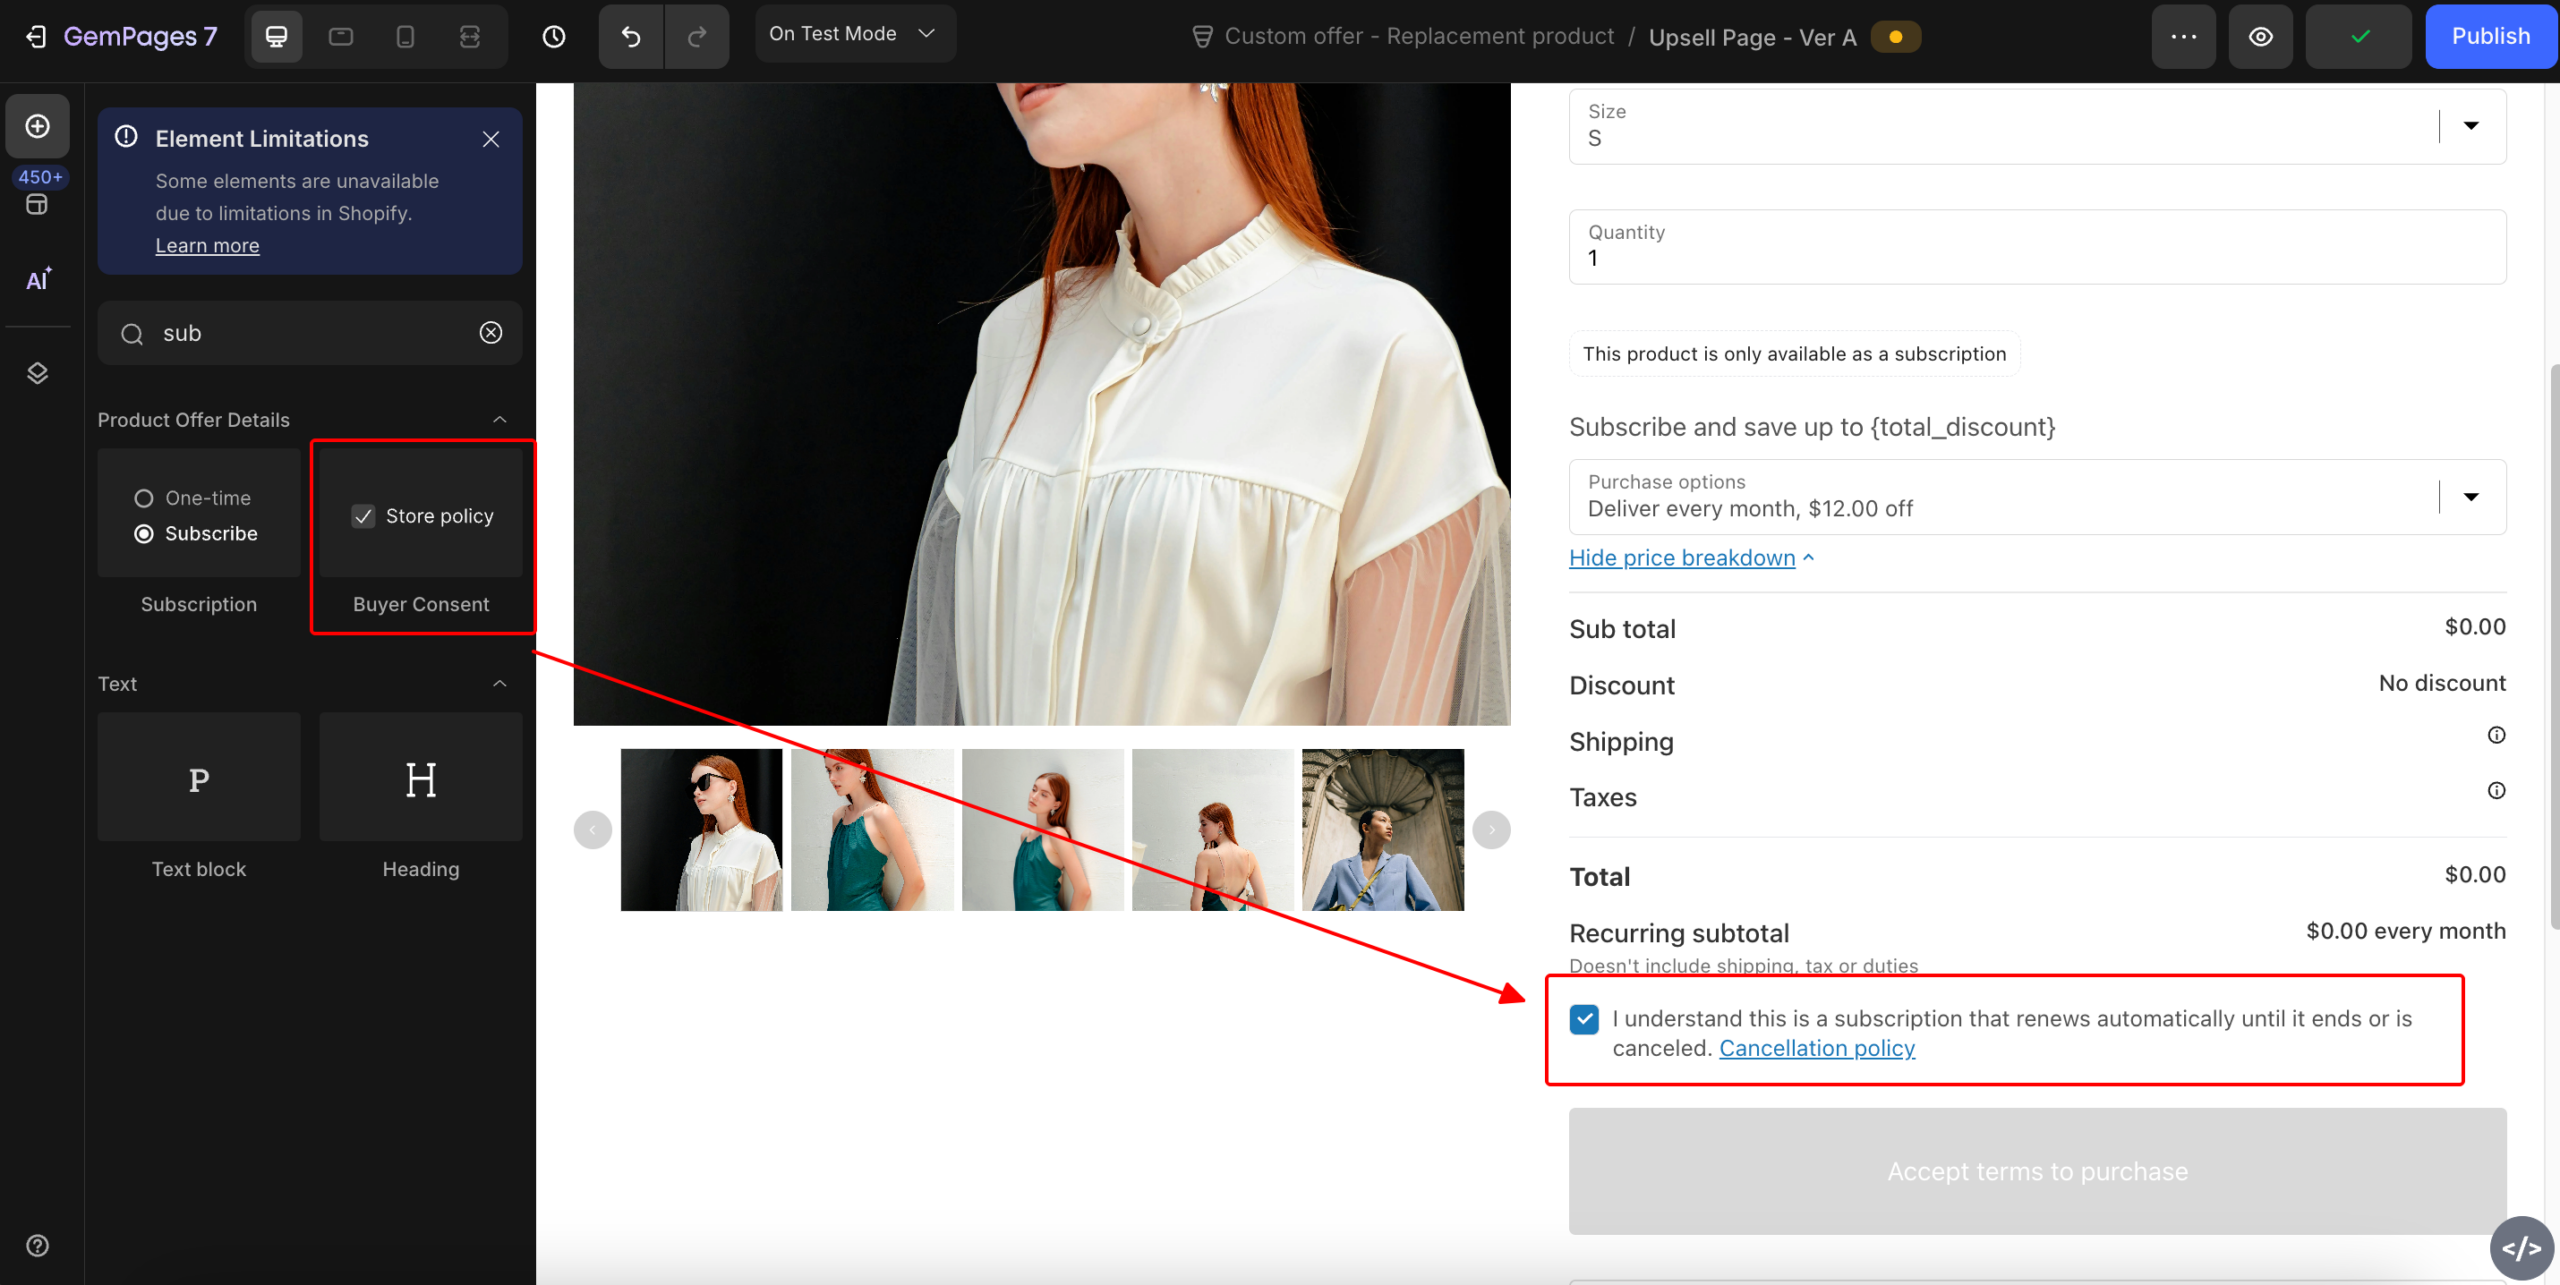
Note:
- The Subscription Element and Buyer Consent can only be placed inside the Product Offer element.
- If the user doesn’t drag and drop the Subscription Element and Buyer Consent into the design area, the Publish button will be disabled.


Thank you for your comments