


Keeping your page elements updated is important for maintaining the best editing experience, compatibility, and performance inside GemPages.
Previously, older versions of elements such as Product Image, Product List, and Carousel could continue existing on pages even after newer versions were released. While older elements still worked, users could miss important improvements, bug fixes, UI enhancements, and performance optimizations available in the latest versions.
With the new Element Upgrade feature, merchants can now quickly update outdated elements directly inside the GemPages editor without needing technical assistance.
Supported Elements and Scope
The Element Upgrade feature currently supports the following elements:
- Product Image
- Product List
- Carousel
This feature is available for:
- All GemPages Version 7 page types
- All user roles
- All pricing plans
How to Update Element Versions
There are two options to upgrade outdated elements inside GemPages.
Option 1: Update a Single Element Manually
Use this option if you want to update it individually.
Step 1: Open the page that contains the outdated element.
Step 2: Click the element on the page.
If the selected element is using an outdated version, an Update button will appear in the element toolbar.
Step 3: Click the Update button.
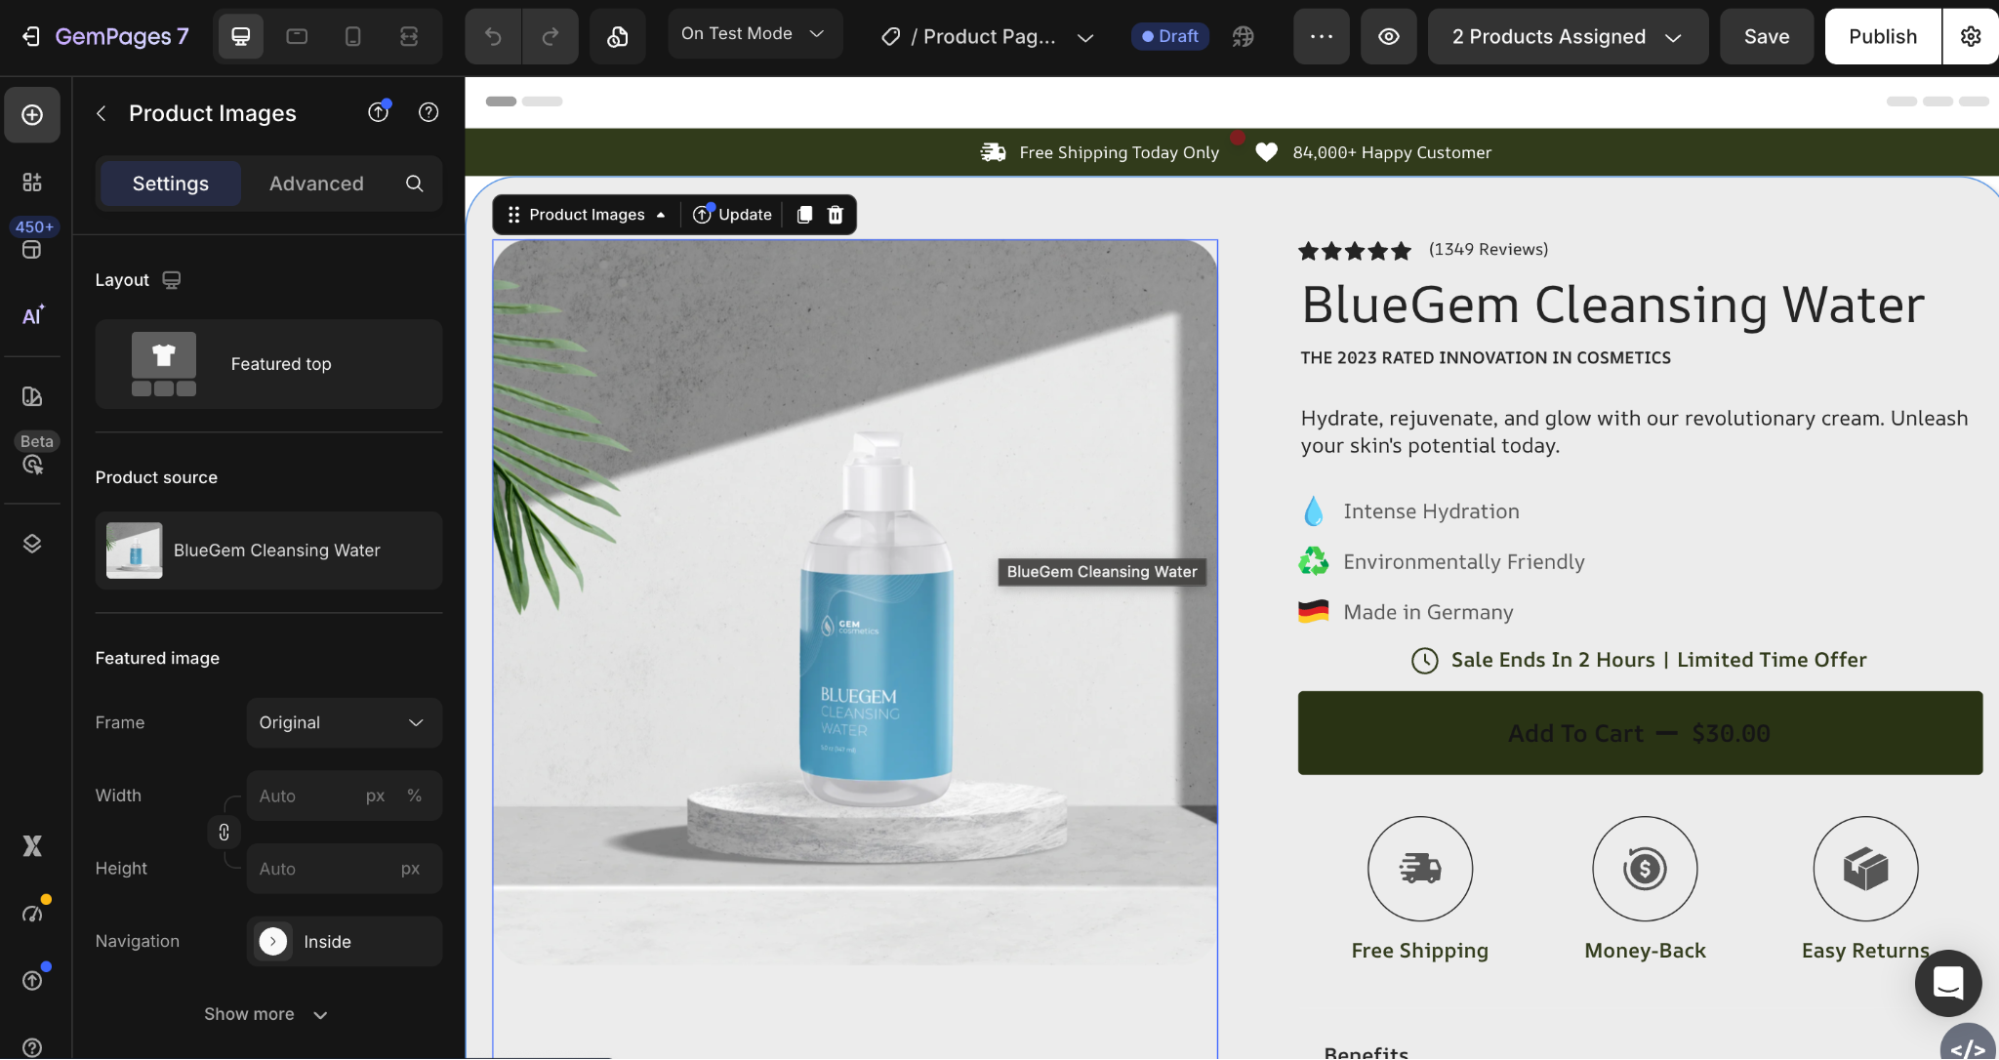
GemPages will automatically upgrade the selected element to the latest version.
Step 4: Wait for the Update to complete
After the update is completed successfully:
- The button changes from Update to Updated
- A success toast message appears
Step 5: Refresh or Reopen the Page
Once the page reloads, the Upgrade button will disappear because the element is already updated.
Option 2: Update Multiple Outdated Elements at Once
This workflow is especially useful for pages containing multiple outdated Product Image, Product List, or Carousel elements.
When GemPages detects outdated elements on a page, the system can automatically help you identify and update them from a centralized panel.
Step 1: Open a page containing outdated elements. If outdated elements are detected, GemPages automatically displays an onboarding popup.
Note: The onboarding popup only appears once.
Step 2: Click Update now
Click Update now to open the upgrade panel.
The panel displays all outdated elements found on the page.
Step 3: Review the outdated element list
Inside the panel, you can:
- Locate each outdated element
- Jump directly to the element position on the page
- Select the element
- View its responsive breakpoint
This helps merchants quickly identify which areas of the page require updates.
Step 4: Update Elements
You can either:
- Update elements individually one by one
- Or click Update All to upgrade all outdated elements simultaneously
Step 5: Verify Completion
After updating:
- Element statuses change to Updated
- Remaining upgrade counts are recalculated
- Updated items disappear after page reload or future sessions
Upgrade Reminder Before Publishing
To help merchants avoid publishing pages with outdated elements, GemPages also provides upgrade reminders during the publishing process.
Step 1: Click Publish. When outdated elements still exist on the page, a reminder popover appears before publishing.
Step 2: You can review all outdated items and decide whether to upgrade them before continuing.
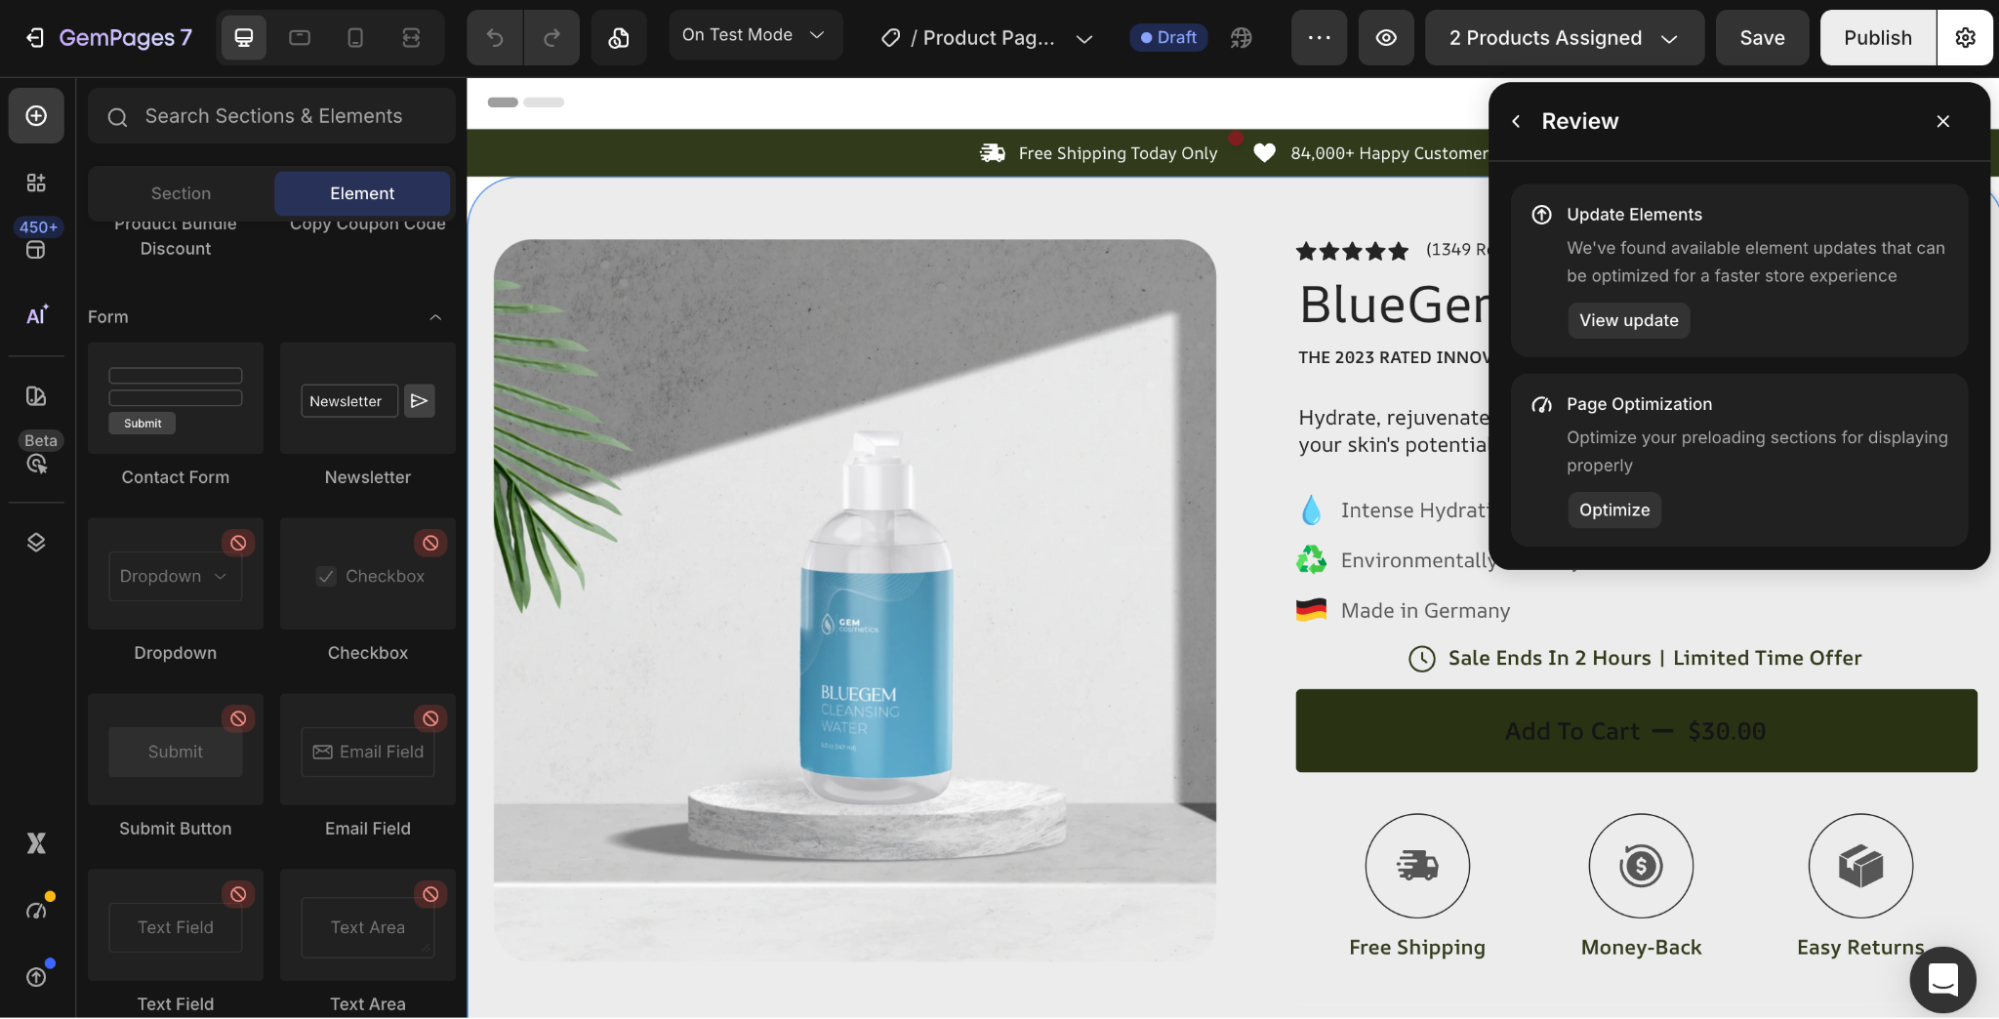
Step 3: After all outdated elements are upgraded:
- Upgrade menu items disappear
- Sidebar upgrade entries are removed
- Upgrade reminders no longer appear
Upgrade Pages Containing Custom Code
If your page contains custom CSS or JavaScript attached to elements, GemPages recommends reviewing compatibility before upgrading.
This helps prevent unexpected styling or functionality changes after the new element version is applied.
Step 1: Begin updating outdated elements as usual.
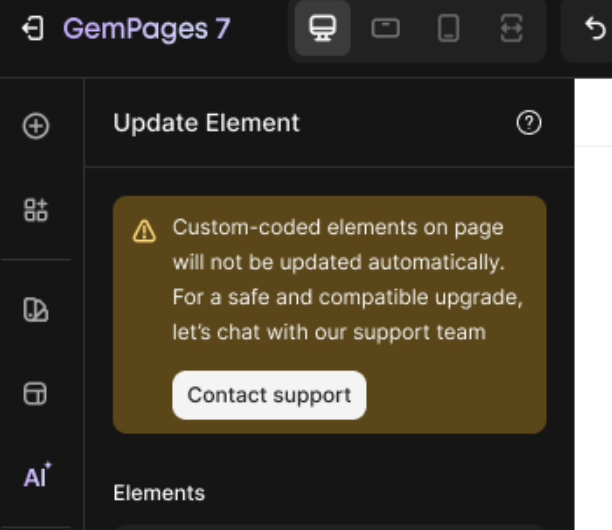
Step 2: If custom code is detected, a warning notification appears.
The banner informs you that custom CSS or JavaScript behavior may be affected after upgrading.
Step 3: Click Contact Support to open Intercom automatically.
GemPages will prefill important information, including:
- Store URL
- Editor URL
- Upgrade request details
This allows the support team to review compatibility and assist with the safest upgrade approach.


Thank you for your comments